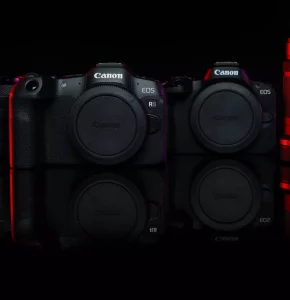
So, now I was able to spend some days with the new Canon EOS R5. Unfortunately, I only had the opportunity to take some “wildlife” pictures of the bird life in my garden at home. You can find some pictures in this article.
But first I started to configure the camera, which was very complex due to the very extensive range of settings.
Configuration - What did I change?
I have been using Canon DSLR cameras for many years and have gradually optimized the menu settings for my purposes. Fortunately, the new EOS R5 has also inherited many of the options of its older mirrored predecessors, so I was able to restore my familiar configuration as far as possible. This is especially important to me because I want to keep using my EOS 5DS R without having to constantly rethink the handling. In the main, I have configured the following settings in the menu of the EOS 5R:
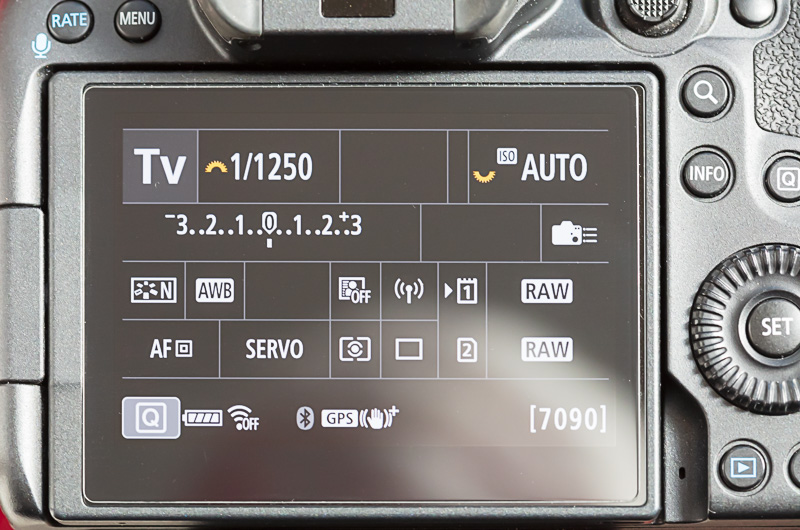
Image quality (SHOOT1)
I only shoot in RAW format, so I selected RAW as image quality in the menu. In the RAW-format, all information of the chip is saved, what allows an extensive post processing of the pictures in the maximum possible quality on the computer at home. My standard application for editing and managing my images is Adobe Lightroom Classic*, that I already use for many years (since version 1.0).
I do not yet have any great experience with the compressed and much more space-saving cRAW format offered by the EOS R5, my previous EOS DSLR cameras did not support it. The Canon RAW format was already compressed before, but without a loss of image information. The new cRAW format now allows a small loss of information. At first glance, however, the image quality hardly seems to suffer but the files become about 40% smaller, which also increases the number of possible shots until the buffer is filled.
By the way, Sony Alpha 7R cameras compress their RAW files lossy by default, but this doesn’t bring any visible disadvantages. JPEG files are also always lossy compressed.
In RAW format, the camera can take at least 45 frames at 20 frames/second according to the display in the viewfinder and at least 84 frames at 20 frames/second in cRAW format before they are written to the card. The recording speed afterwards depends on the writing speed of the memory card. With my Wise 512GB CFexpress Card, the speed after the internal buffer ist filled, remains at 5-7 fps in RAW and 13-14 fps in cRAW.
A detailed comparison between Canon RAW and cRAW can be found at The-Digital-Picture.com
ISO speed settings (SHOOT2)
I usually work with Auto ISO. Here I left the default Auto range of 100-12800, as the EOS R5 gives good results even at high ISO values:
Shutter mode(SHOOT6)
I have included this menu item in the quick menu, since it has to be changed frequently.
The EOS R5 achieves the fastest possible continuous shooting speed of 20 frames per second and is completely silent only in fully electronic mode. Unfortunately, it is not possible to set a slower speed, you can either choose 20 frames/second or single frame mode. The downside of the electronic shutter is that a distortion of fast moving objects, the so called rolling shutter, can occur. In artificial light there can be stripes in the image and the dynamic range might be slightly reduced because the sensor is only read with 12bit. So I use the fully electronic mode only for action sequences / wildlife without artificial light or if the camera should remain as inconspicuous as possible.
Für alle langsameren statischen Aufnahmen ist hingegen der mechanische Verschluss zu bevorzugen, Blitzen geht nur mit ihm. Ich verwende ihn meist. Er erreicht bei Bedarf aber auch eine Serienbildgeschwindigkeit von bis zu 12 Bildern/ Sekunde.
Disp. performance (SHOOT8)
I always set it to “smooth”, i.e. 120Hz, as the picture in the viewfinder is much more stable, especially when panning, and subjects can be followed more easily. It uses a bit more power for this. Anyway, the viewfinder: The resolution is now so high, that for the first time I no longer miss the optical viewfinder of a classic DSLR. In the dark, the view through the viewfinder is even better (because it is much brighter) than with a DSLR.
Update:
Since firmware version 1.5.0, there has been an additional menu item “Suppress lower frame rate”, which displays a much smoother viewfinder image in dark environments. Be sure to activate it by pressing the “Info” button!
AF operation (AF1)
As usual, I set the AF mode to “SERVO-AF” because I always separate the focus from the shutter release. So, if I don’t want to change a focus anymore, I just take my thumb off the AF-ON button and have the same effect as in “ONE SHOT” mode. With the EOS R5, I’ m now using the AF method for face detection and tracking by default. I match the priority of the Scene Recognition to the shooting situation (Animals in the zoo and on safari, People at family events). I have the eye recognition always activated, which is one of the great strengths of the EOS R5. The continuous AF remains switched off.
Servo AF (AF3)
Here it is worth experimenting a little for your own shooting situations. I have currently set “Case 2”, and in doing so have further reduced the AI servo response to -2, so that the focus sticks to the subject once captured.
Switching tracked subjects (AF4)
To increase the “sticking” to the subject even more, I have entered “0” (Disable) here.
Initial Servo AF pt for face & tracking (AF5)
Here I selected the middle option, which starts the AF search at the last used spot field. This makes it easier to select the person to focus on, when there are several people in the picture.
Customize buttons (C.Fn3)
As I am used to for years, I changed the button assignment to backbutton focusing. Now the shutter release only serves for metering and taking pictures. Focusing is started separately by the corresponding thumb button “AF-ON”. I have been using this method on all my cameras for many years.
A special feature of the Canon EOS R5 is its intelligent focus algorithm, which recognizes people, animals, heads, faces and eyes. To be able to react quickly, I therefore selected even three seperate thumb-buttons for focusing this time. My standard mode is now the intelligent subject recognition with -tracking, I have put this function on the “AE Lock button” (*) button in the middle.
Additionally, I configured the focusing on a freely selectable spot focus field on the left side “AF-ON” button. This mode is very helpful to focus exactly through a tree gap or fence, for example. So I can select both modes very quickly depending on the shooting situation. Often I use the “AF-ON” button to focus on a subject at first and then switch to the “AE Lock button” (*) button to follow it up.
I have now assigned the third button, “AF Point button” (right side), to the Eye Detection AF function, which searches the entire viewfinder image for people, faces and eyes. This is sometimes helpful for a quick snapshot.
So now I have three separate buttons to select the focus mode, which cover more and more areas of the viewfinder from left to right.
To achieve this functionality, I have configured the following settings in the “Customize buttons” menu:
Shutter button half-pressed
As mentioned above, I do not use the shutter release to focus, I do this separately with my thumb on the “AF-ON” button. Therefore I have selected Measurement Start here. Alternatively, the “*” (AE lock while button pressed) can be selected. In this case, the exposure control is saved and used for all following shots until the shutter button is released completely. However, this has sometimes cost me a few shots in continuous shooting series, e.g. when animals moved from shadow to sunny areas and the shots were suddenly completely overexposed. Since then, I leave it at ” Metering start”.
AF-ON
This button allows me to focus on small subjects through gaps, for example a small bird in a tree. The following settings in the detailed settings via the “Info” button allow this:
- AF mode: Servo
- AF methode: Spot AF
- Servo AF characteristics:maintain current setting
AE Lock button (*)
For this button I have selected the first menu item ” Metering and AF Start”. In the detailed setting, which is opened by pressing the “INFO” button, I have set:
- AF mode: Servo
- AF method: face detect and tracking
- Servo AF characteristics: - maintain current setting
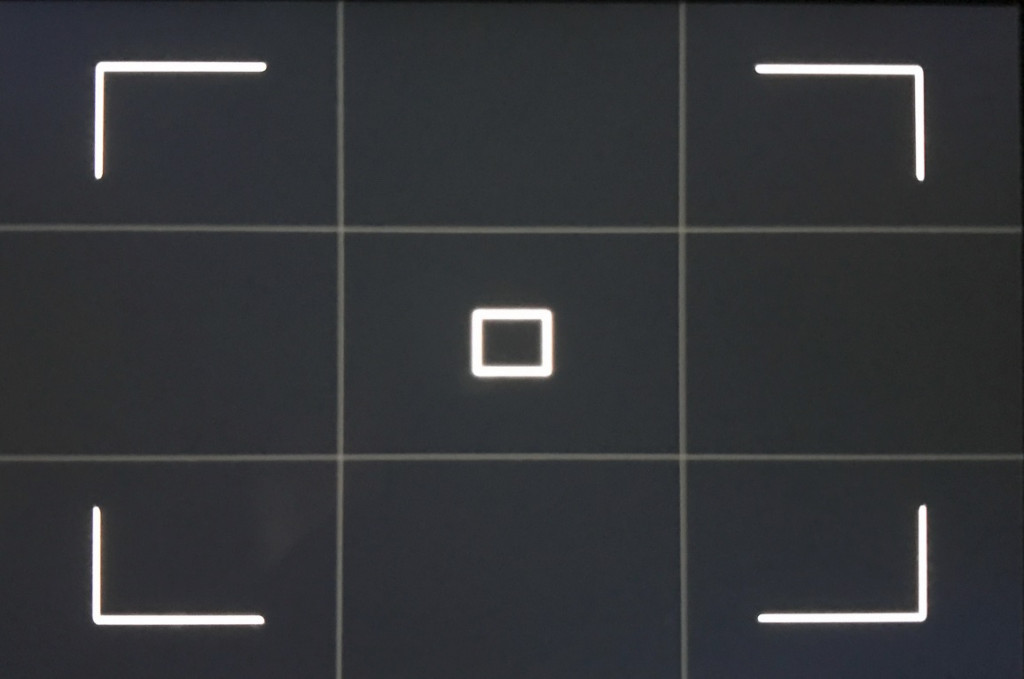
In this mode, you can first position the small visible AF area in the viewfinder where you want to focus. If a face is there, the camera tries to locate the eyes and focus on them. This is also very helpful with birds:
The initial focus field also allows you to select the person or animal to be focused on from several people or animals. As long as the AE Lock button (*) is pressed, the focus remains locked on the selected subject.
AF point button
In the meantime I have also assigned a third button for the AF, the “AF point button”. Since I can reach the AF field selection comfortably via the Q-Menu and use this function only extremely rarely, I don’t need the button for this anymore. Instead, I have now assigned the Eye Detection AF to this button. In contrast to the function of the “AE-Lock” button, which I described above, the Eye Detection AF takes the entire viewfinder image into account and does not start from the preset focus field. This function is helpful for snapshots when things have to be done very quickly.
SET button
I have assigned the loupe function to the “Set” button in the middle of the back dial.
Multi-Controller
The small joystick called “multi-controller” to the right of the viewfinder is used, among other things, to move the focus point. For reasons that I have not been able to understand for years, this useful function is deactivated by default in Canon cameras. To use the joystick to select the focus point, the AF field button on the right camera shoulder must always be pressed first in the basic setting. Therefore I have always activated the option “Direct selection AF field”.
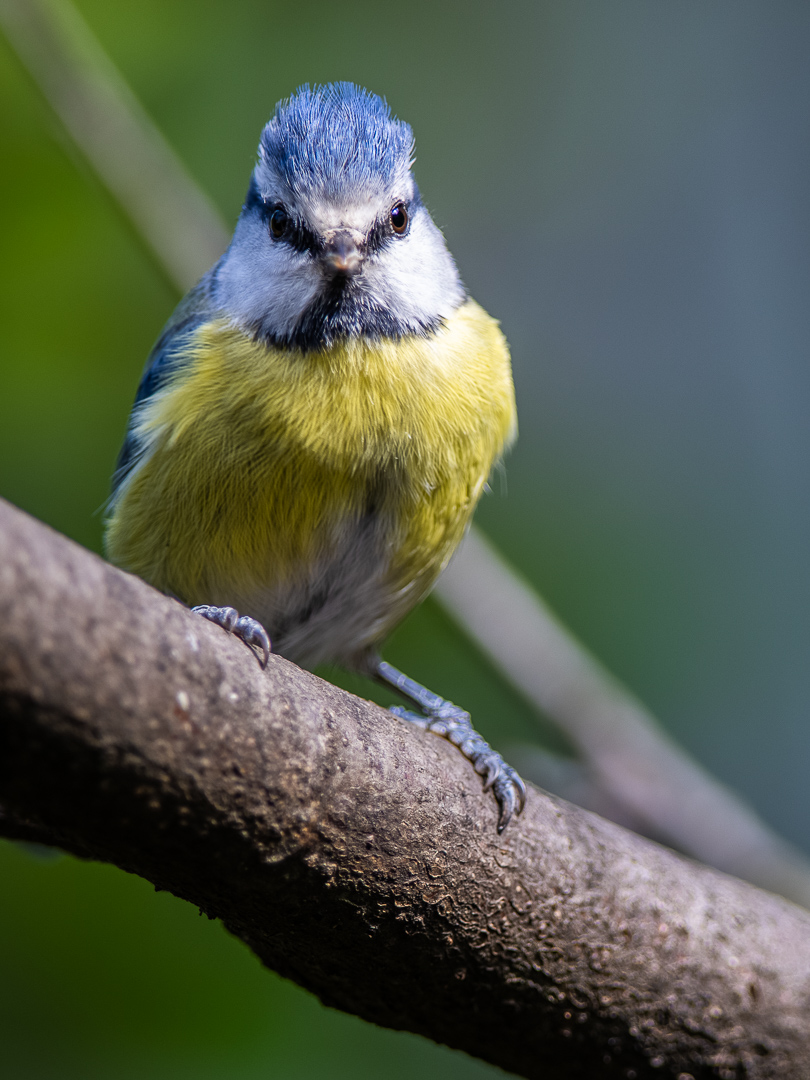
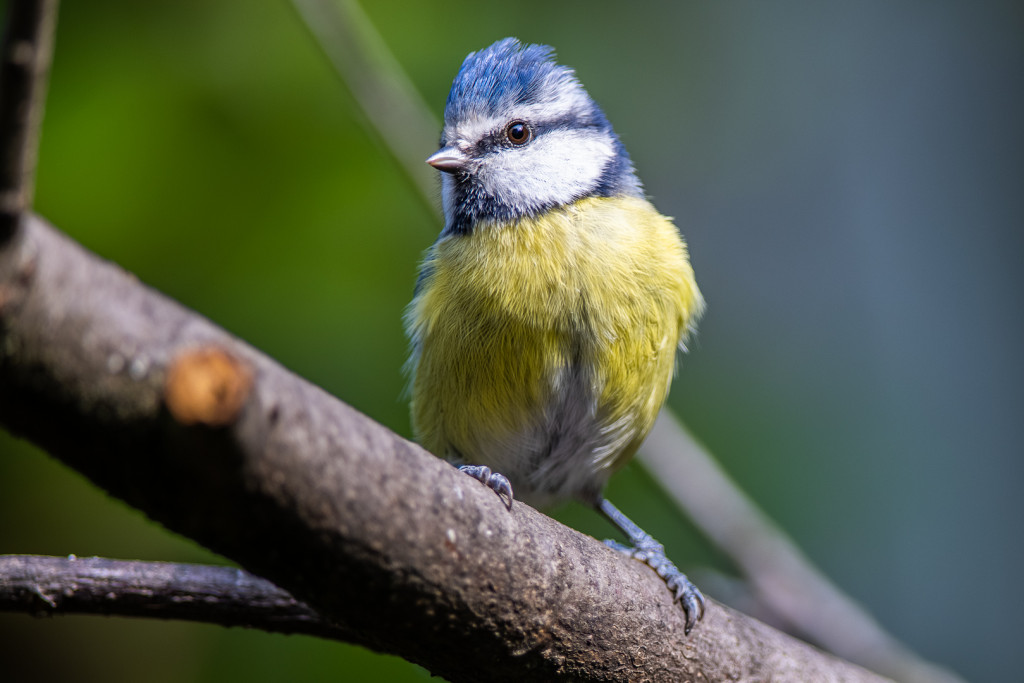
Initial findings
After the configuration, it went into the garden for the first tests, for which some garden birds had to serve. Some results are shown above. All in all I am very impressed by the handling and the image quality of the camera.
Viewfinder
As written above, the EOS R5’s electronic viewfinder is excellent. The resolution is so high, that I can’t see any pixels. I think that anyone who looks through it without any bias will not see much difference to the viewfinder of a DSLR. Last evening, I took my 5DS R again and was shocked by how dark the optical viewfinder is in the twilight - this is where the electronic viewfinder of the R5 clearly scores. In comparison with my SONY Alpha 7R III, which I have been using up to now, the very low switch-on delay of the Canon EOS R5 of less than one second is also very welcome. With the Sony, I sometimes had the feeling of missing a shot until it was ready for use.
Autofocus
Autofocus is certainly one of the EOS R5’s killer features. During my experiments with those small garden birds, it almost was glued to them. After a few moments, the camera recognized the eyes and moved the focus with incredible speed, even when taking a series of shots at 20 frames per second! The number of misfocuses pictures was almost non-existent - this is a huge progress.
Compatibility
Since I already own a lot of EF lenses and want to still use my Canon EOS 5DS R at least as a second body, I ordered nothing more than the EF-R mount adapter for the camera. At first, I plan to continue using my existing lenses with this adapter.
Well, the good news: all the lenses I’ve tried so far work at least as well as on the EOS 5DS R.
And the best is yet to come: on all EF lenses, the R5’s sensor-based stabilizer (IBIS) is available in addition. For the lenses without built-in stabilizer (like my 85mm f/1.2 or even the TS-E 17mm), the sensor stabilizes all axes. But even the EF lenses with built-in optical stabilizer gain additional benefit from the IBIS. In addition to the axes, which the optical stabilizer stabilizes, the sensor takes care of X/Y and roll movements.
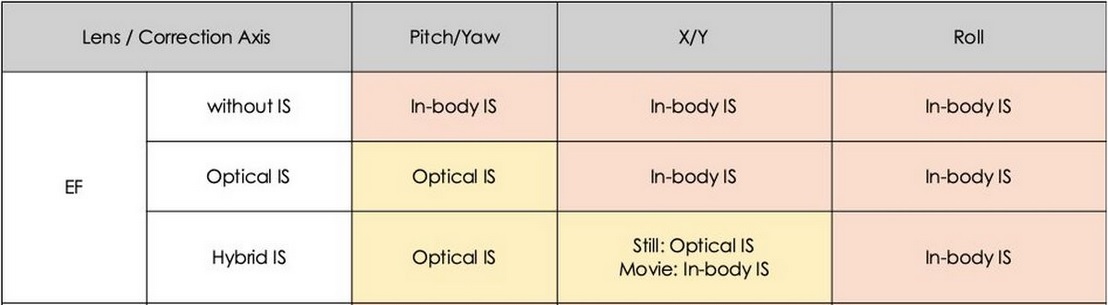
For lenses without IS, you can turn the IBIS on or off in the menu, for lenses with IS, the corresponding switch on the lens is used for this purpose.
The 85 f1.2L II USM is now even more fun to use. In addition to the in-body-stabilization, the focus is now exactly on the eyes in all portraits. With the DSLRs, I always had more than 50% waste at open aperture, because the phase contrast AF was not accurate enough.
The 17mm TS-E is much more fun to use with mirrorless cameras anyway, because the result of the tilt/shift adjustment can now be viewed through the electronic viewfinder. With DSLR bodies, the optical viewfinder shows strong vignetting when the lens axes are adjusted, only the monitor in live view is usable. When the sun is shining, it is difficult to see anything on the monitor. In addition, it cannot be moved on the 5D and 7D bodies. By the way, the TS-E was an major reason for my intermezzo with the adapted Sony Alpha 7R I-III bodies - but now I can do all this)with a Canon camera again 😉 . Very useful with the TS-E (and all other manual lenses) is also the great focus assist tool of the R5, which can be displayed in the viewfinder. It reminds me of the split image indicators from old analog times.
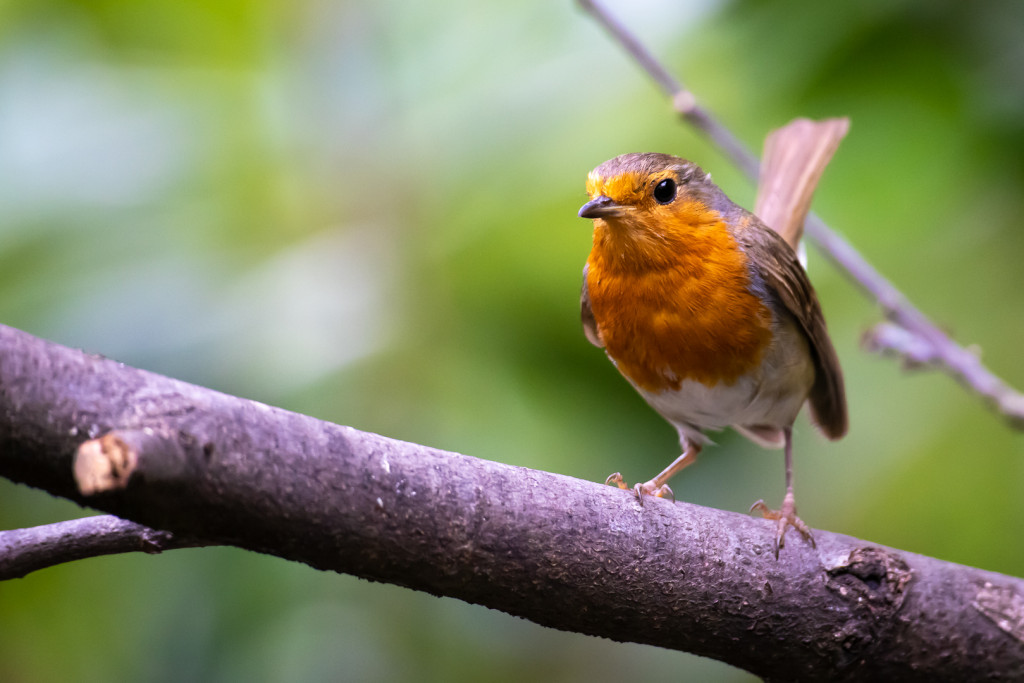
My Sigma 60-600 f/4.5-6.3 DG OS HSM Sports* - Zoom also works great on the adapter, I took the picture of the robin above with it - handheld at 600mm. The eye AF also works very well with this lens. The focus area is slightly limited, however, it still covers about 80% of the frame vertically and horizontally. But this is still far more than with Canon DSLR cameras:
The EF 400mm f2.8L II IS USM - fantastic with or without extender!
After my good experiences with the lens on the Sony a7R III, I have now bought the Samyang AF 14/2.8 again. Because I want to use it on my EOS 5DS R as well, I decided to choose the EF version. I have published further information about the lens in a separate report.
Accessories
Every new camera requires new accessories, which should be considered when buying.
Energy…
It’ s nice that the EOS R5 can use any existing batteries of the EOS 5D/ 7D series. The somewhat newer LP-E6N batteries, of which I fortunately already own three, can even be charged in the camera via USB-C, the current LP-E6NH, which comes with the camera and has a slightly higher capacity, anyway. With the even older LP-E6 batteries, this is probably not possible.
Due to the exorbitantly high price of the original Canon batteries, I bought additional cloned batteries. After extensive research on the Internet, I ordered two Blumax batteries*, because these should be highly compatible with the originals. The batteries have arrived in the meantime and work perfectly in my camera. In the EOS R5’s ” Battery info” menu they are recognized as LP-E6NH batteries and can also be registered in the camera with their own identification number.
Charging works both in camera by USB-C, as well as in the original Canon charger up to 100%. Both batteries show three green bars in the battery status menu of my camera. According to the label, the capacity of the Blumax batteries with 2040 mAh is close to the capacity of the new LP-E6NH batteries (2130 mAh). I cannot check if this is really true, but so far my initial impression is positive. But they also deliver (unlike other replicas, which are only recognized as old LP-E6 batteries) enough power for the fast continuous shooting modes of the R5 / R6. When using the “H+” mode, the symbol in the viewfinder appears green accordingly, which means, that 12 fps with mechanical shutter can be reached.
Since the mirrorless cameras always need more power than DSLR cameras, I also ordered the Battery grip BG-R10*, which can be used with two batteries.
As I wrote above, the camera can also be charged or operated via USB-C. But for this it needs a power supply unit with PD - (Power-Delivery) - function. I therefore ordered the Anker PowerPort 5-Port USB C Charger 60W*, which allows simultaneous charging of multiple devices like mobile phones or tablets via 4 additional integrated USB-A sockets.
As an alternative for people on the road, it is also possible to charge or operate the camera via a power bank. It is important that it also has a PD (Power Delivery) function. For this purpose, I have purchased the POWERADD Powerbank Energycell II 26800mAh Power Bank PD 30W*, which allows the camera to be charged several times without any problems. It also contains two more USB-A ports, which can be used to charge a cell phone or tablet at the same time.
PS: If the POWERADD Energycell II is currently not available, there are also many other PD-capable power banks* with different capacities avaolable on amazon.
In addition, the USB-C cable used must have a USB-C plug on both sides and must also be PD-compatible. Suitable USB-C cables are available in different lengths e.g. from amazon* or eBay*.
Memory cards
The EOS R5 features two memory card slots. In the SD card slot, I use my existing 128GB SD cards. But if speed is important or if you want to film in 8K-RAW, even the fastest SD UHS-II cards are not fast enough and a new CFexpress Card is needed.
Even if I only film very little - but I would like to try it. Furthermore, it is possible to take out single frames from an 8k movie with up to 30 frames per second, which then still have a resolution of 35 megapixels. Thus, the EOS R5 even allows continuous shooting at 30 frames per second with full auto focus!
But not all CFexpress cards are capable of providing the necessary speed. Although the label always promises sufficient speeds of more than 1000MB/s, only the larger cards (> 512GB) can maintain this speed over a longer period of time, which is necessary for video recording. Since the usual flash chips currently store about 128GB, cards with a size of 512GB and above usually have at least 4 chips to which they can write simultaneously, they are therefore much faster than the small cards with only one or two flash chips. The smaller cards therefore become slower once their internal buffer is filled, and the 8K RAW recording will stop. As the CFexpress cards are thanks to the new release of the Canon EOS R5 suddenly very much in demand, the prices change quickly, a comparison e.g. at eBay* is therefore very worthwhile.
After a long time of research I decided to buy a CFexpress card from Wise with 512GB*, which offered by far the best price/performance ratio with a price of about 400,-€ (I have found a special offer). In a short test, I was able to record 16 minutes of 8K-RAW on it, until the camera stopped due to overheating. The recorded file had a size of 300GB! I can highly recommend the card. More 512GB CFexpress cards are available here at amazon*.
As a card reader I bought a SanDisk Extreme PRO CFexpress Card Reader*. Contrary to some reviews at amazon, it works without any problems for me. The reviews seem to refer to a mechanical problem with the first version of the reader, which has now been fixed.
I later bought another reader in addition to the Sandisk CFexpress Reader for use on the road. The Sandisk reader works very well, but is very bulky, comparable in size to a computer mouse. I then discovered a new reader from Rocketek at an unbeatable price on amazon and ordered it in addition. I have written another short report about it here.
Screen protector
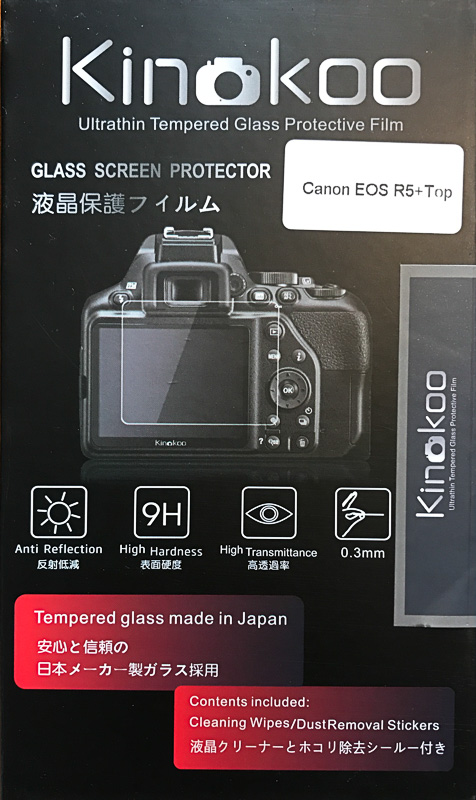
As with the Touch-Displays of my Sonys, I attached a screen protector to the R5, because the display is also more stressed by the swivel movement than the fixed mounted display of the Canon 5DS R. I decided then to use the safety glass from Kinokoo*, because this was the first one available. The set contains two display glasses for the main and shoulder display, as well as microfiber and cleaning cloths.
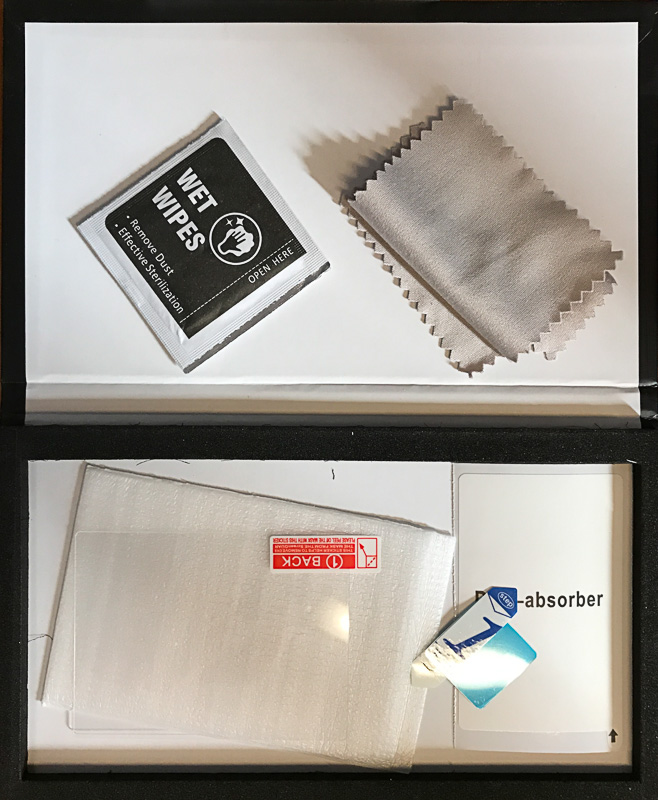
The protective glasses can be easily applied and adhere adhaesively to the diplays without any problems. Below are a few pictures of the set and the mounted protective glasses:


The glass is only 0.3mm thick and does not hinder the complete folding of the display towards the camera. It makes a very valuable impression, and according to Kinokoo, it has a hardness of 9H, corresponding to the GGS glass, that I used on my Sonys before. The touch operation of the display is not affected by the protective glass either.
Résumé
I am completely happy with the camera. The handling is, as expected from Canon, first-class intuitive, the build quality is flawless and it integrates seamlessly into my existing system. The Sony bodies, which I had used in the meantime, were always a compromise solution, despite increasingly better adapters - but to be fair, I have to say that I also took some wonderful pictures with them. With the release of the Sony Alpha 7R IV, I had even briefly considered a complete system change.
But now I am back at Canon at 100%. I hope this report helps one or the other to make a purchase decision or to configure this great camera. I would be glad about comments or further questions.
Further informative articles
You can find many more interesting field reports about the Canon EOS R5 here on my website:
Canon EOS R5 - Autofocus in Action
The autofocus of the Canon EOS R5 is a significant improvement compared to the systems of the SLR predecessors. How does it behave with animals in motion?
With my Canon EOS R5 at the zoo
Here I tested the autofocus with various species in the zoo. I was particularly interested in the animal eye autofocus - it really works impressively well!
Focus Stacking with Canon EOS R5 and R6
Both the Canon Eos R5 and R6 now offer a focus bracketing function. With this function, the camera takes several images in quick succession and shifts the focal plane between them in defined small steps. In post-processing, these can then be combined into one image with an extended focus area. This process is called focus stacking. In my report I explain the advantages of this method and which software is needed for post-processing.
Focus Stacking with the Canon EOS R5 - Settings
In this article, I took a closer look at the focus bracketing options of the EOS R5 and R6.
Denoising with DxO PhotoLab 4
The new sensor of the EOS R5 is a major advancement compared to Canon’s predecessor sensors in terms of dynamic range and also noise reduction. Nevertheless, it is of course not noise-free, especially at higher ISO values, so that noise reduction still remains necessary in post-processing at higher ISO values. In this article, I tested the conversion of EOS R5 RAW files using the DxO PhotoLab RAW converter and its built-in DeepPRIME algorithm, and compared it to the noise reduction in Adobe Lightroom. DxO’s DeepPRIME uses an extensively trained artificial intelligence algorithm to remove image noise and produces truly amazing results.
EF Lenses and EF-RF Mount Adapters
Comparison of the EF and RF version of the 24-105 f/4L IS on the Canon EOS R5
Comparison of the Canon RF 24-105 f/4L with the EF 24-70 f/2.8L II on the EOS R5
The Canon EF mount is alive - the EF 100-400 f/4.5-5.6L IS II USM on the EOS R5
Drop-In Filter Mount Adapter EF-EOS R with C-PL Polfilter
These four reports deal with the lenses for the EOS R5. Does it always have to be new RF mount lenses, or can you also easily use the EF lenses that you may already have or that are available second-hand at a reasonable price? What possibilities do the Canon Mount Adapers EF-EOS R offer?
More Canon EOS R5 related articles
*=Affiliate Link