3-D photography is outdated, the hype is long gone…
But that is not the point here. In my photography so far, I could usually only influence the images in two dimensions by the chosen camera position. When I found a possible motif, I could move closer, further away, or to the left and right - as far as allowed by the terrain and the situation. In the horizontal dimension, on the other hand, most pictures are taken from the familiar perspective of the eye. But unfortunately, familiar also often means boring.
Even positioning the camera close to the ground or photographing with the camera held above the head often yields more interesting results (see e.g. here). As a flight-incapable individual, however, my horizontal degrees of freedom are limited by my physical size and the terrain. Therefore, when looking for new photographic perspectives, I often wish I could “fly in the air”.
Only flying is nicer
This year I have now made the step into the third dimension and bought a photo / video capable drone. In the meantime I even already have two of them 😉 . I have previously dealt extensively with the technical and legal factors of drone flying and would like to report here about my first experiences so far.
For years, I’ve been gazing at the newest photo and video drone models. On the one hand, I’m interested in the technical complexity of these small flying objects, and on the other hand, of course, they open up completely new photographic possibilities.
Until now, the available drones for my photographic needs were either too complicated, large or expensive, or did not offer sufficient image quality. With the release of the DJI Mini 2, I now had a drone for the first time that seemed very compact and light (249 g), inexpensive (under 500€) and at least reasonably usable in the video range (up to 4k/30P). All in all, ideal to get a taste of the new possibilities.
DJI Mini 2
In a deal at amazon in April 2021, I have therefore snapped up a “hassle free” DJI Mini 2 Fly More Combo* complete set with a total of 3 batteries, a 3-fold charger, spare propellers and a practical carrying bag in which everything fits ready for use.
Better safe than sorry…
By the way, I opted for the package including the “Care-Refresh” insurance, which is, so to speak, a all-risk insurance for the drone. The insurance is valid for 12 months and provides a full replacement twice for a small fee if damage occurs to the drone during normal use. For a newbie drone owner, I think this is a reasonable and very affordable offer (current surcharge only 45€).
But before the first flight in the wild, there were still two hurdles to overcome. Due to its low weight, the DJI Mini 2 is free of registration according to current EU legislation, but you must
- register (in Germany with the Luftfahrtbundesamt) as a drone pilot. This is currently possible free of charge. For this you still need
- a drone insurance policy (I signed up online via the mobile app GETSAVE for 3,38€ per month) and a scan of the ID card. After a short time of waiting, you get an electronic E-ID (UAS operator ID), which you have to attach to the drone and you are ready to fly.
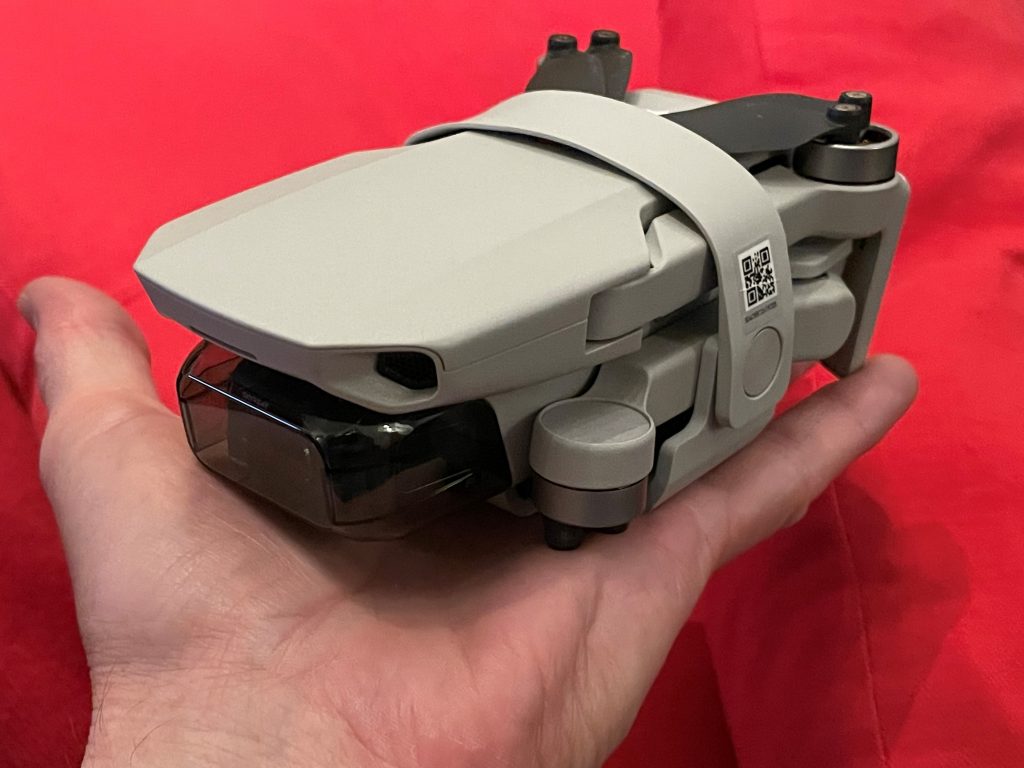
When I held it in my hand for the first time, I just thought: such a small toy - and it should be able to fly? And yes, it can, and amazingly well.
Up in the air
The first test flights with the small drone then thrilled me. The handling is intuitive, the flight time with about 30 minutes per battery very good. I was amazed at the speed of the small drone and how reliably it could hold its position even in windy conditions. The operation is foolproof. If the battery runs low or radio contact is lost, the DJI Mini automatically finds its way back to the takeoff position and lands there. The results of the first test videos and pictures surprised me very positively - although I am still an absolute beginner when it comes to video.
Of course, there were no miracles to be expected in terms of photography. With a 1/2.3″ sensor and 12 megapixels of resolution, the DJI Mini 2 offers roughly the image quality of a cell phone, but it can at least already record RAW files in DNG format. Overall, however, the results were much better than I had initially expected:
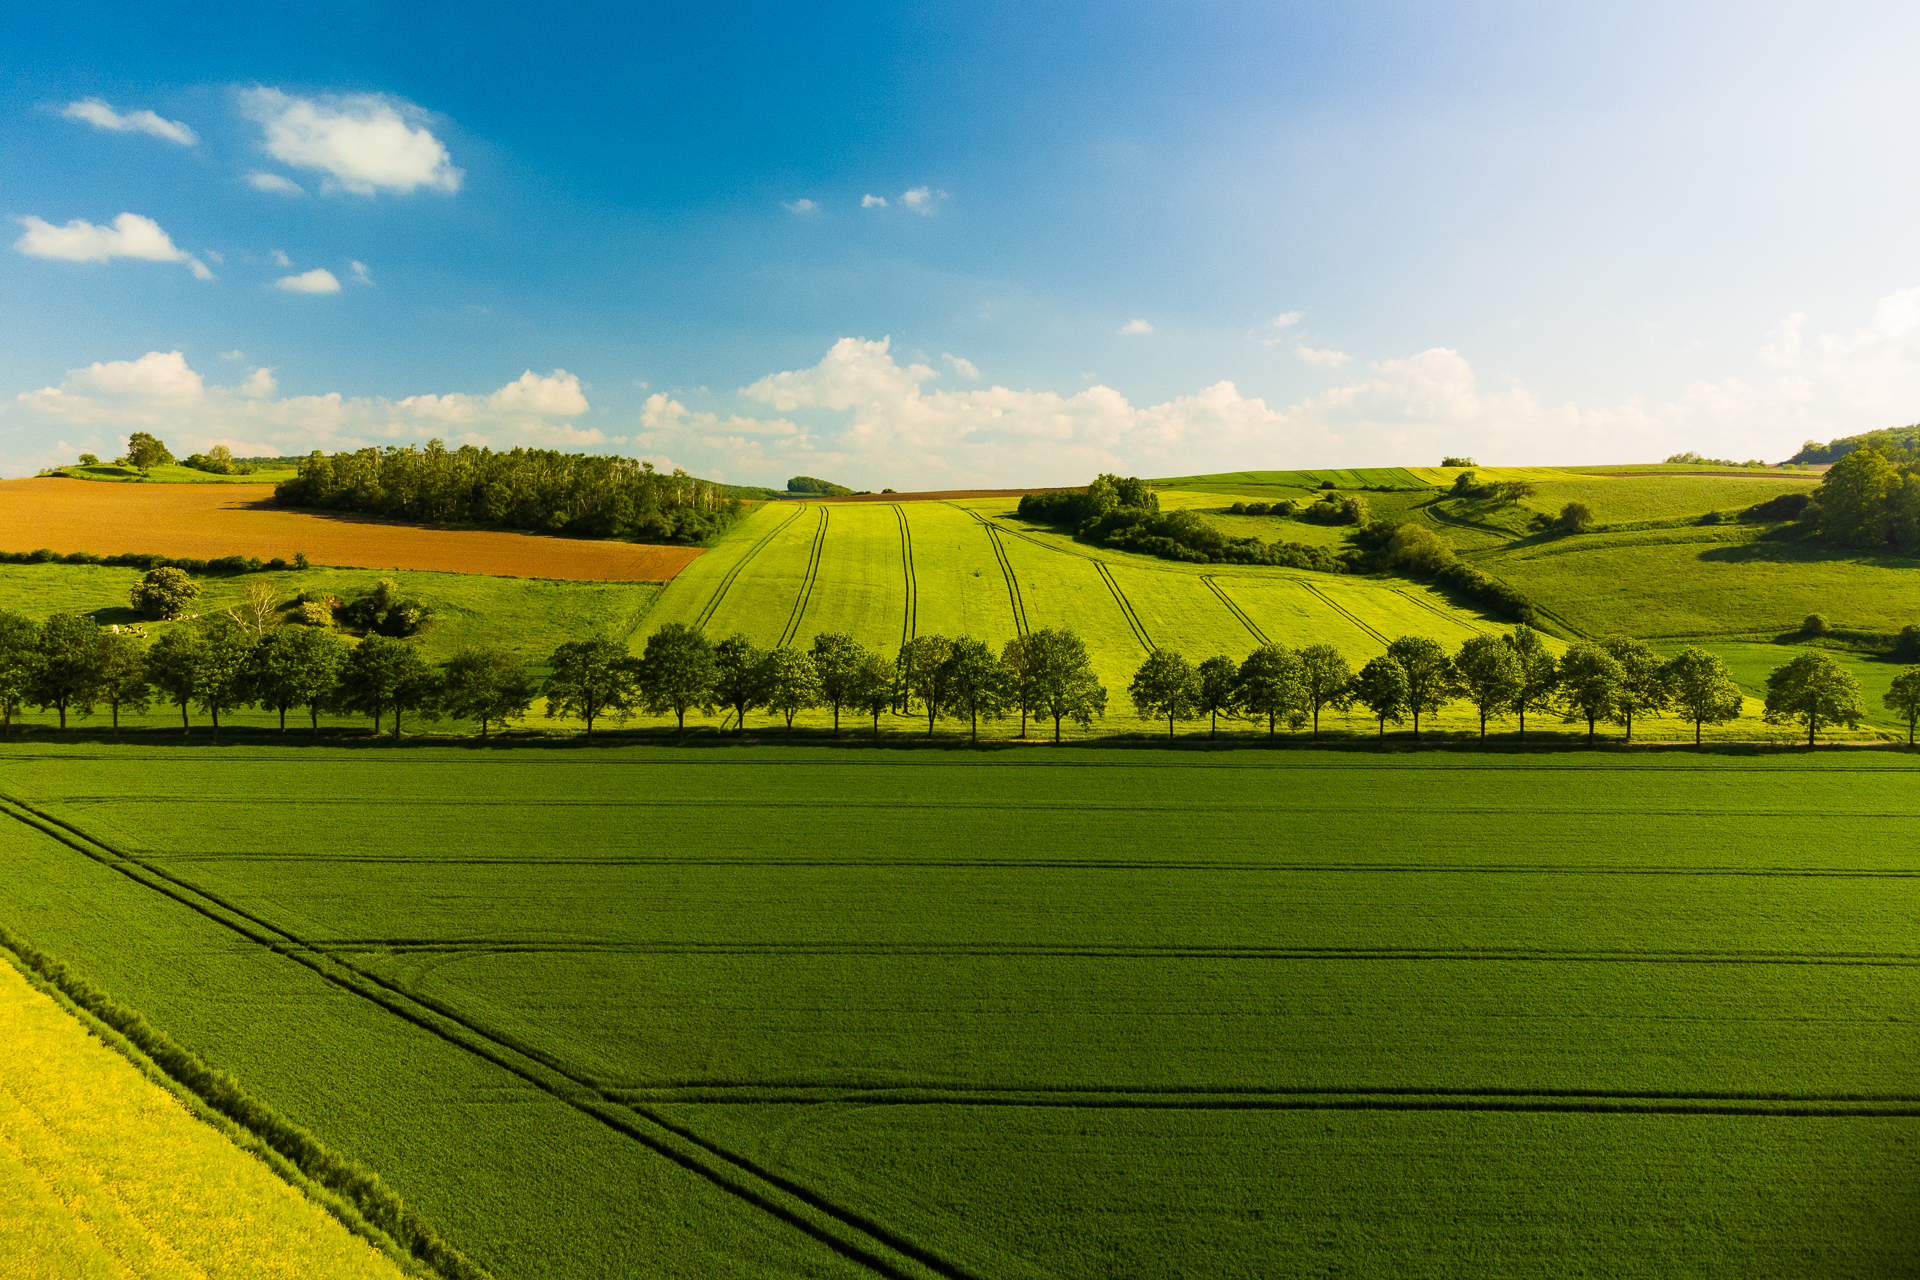
Thanks to the integrated panorama mode of the DJI Mini 2, however, it is also easy to create higher-resolution panoramas that are quite usable, at least in good light and with some post-processing. As an example, here’s a panorama of 9 images from the DJI Mini 2 created using the 3x3 panorama mode. Using Adobe Lightroom, I then combined the DNG files to create a wide-angle panorama. In the end, the image has a total resolution of 36 megapixels:
As a Switzerland vacation was planned this year, I looked around for the current guidelines in Switzerland and found that in our planned vacation area (Engadin) it is largely free to fly with drones. A map of the allowed flight zones in Switzerland is available here. Especially the small drones with a weight below 500g are currently still subject to very few restrictions in Switzerland. More detailed information can be found on the pages of the Federal Office of Civil Aviation (FOCA).
Addendum:
From January 1st, 2023, Switzerland has adopted the EU drone regulation, so that the same restrictions apply there as in Germany.
I want more!
After some practice with the small drone and editing the first pictures, panoramas and videos, I wanted more. Accustomed to the high photo resolution of my Canon EOS cameras, the resolution in the photo area in particular was no longer sufficient for me.
In addition, I also wanted to be able to post-process the videos more extensively, as I am used to doing with the RAW files from my still cameras. The DJI Mini 2 only supports video recordings in 8bit color depth, which, similar to JPEG photos, only have a low dynamic range and allow only minor post-processing.
After first experiments with the video formats of my Canon EOS R5, I wanted to be able to at least record videos in a log format that allows a significantly higher dynamic range. Post-processing for me is then planned with DaVinci Resolve.
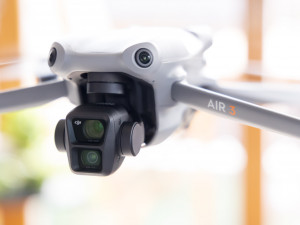
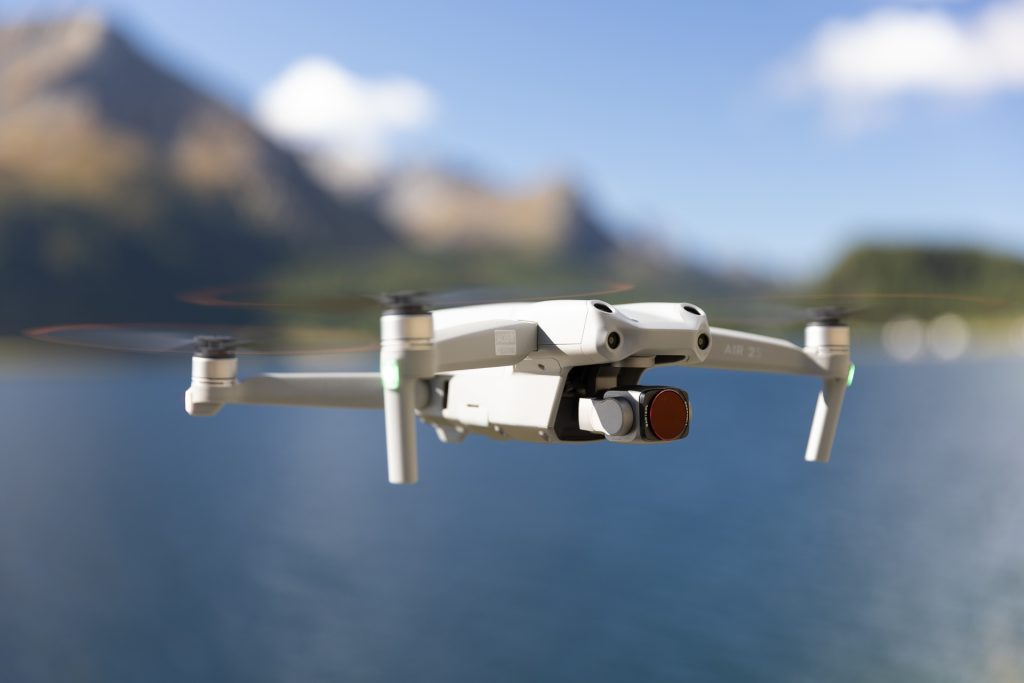
DJI Air 2S
Both points are met by the new DJI Air 2S, which was introduced in April 2021 as the successor to the Mavic Air 2. It has a camera that offers a resolution of 20 megapixels with RAW/DNG files using a 1″ sensor. This is on par with the quite usable resolution of higher-end compact cameras such as the Sony RX100 series. Even the current EOS R6, for example, does not offer a higher resolution.
In terms of video, the Air 2S can even record up to 5.4k/30P or 4k 60P in 10-bit with its proprietary D-Log format. In addition, the exposure (ISO, shutter speed, white balance) can be set manually much more extensively than with the Mini 2, which expands the possibilities once again.
In order to use this larger drone model, however, the so-called “small drone license” is currently required in the EU, which can currently still be completed free of charge online at the Federal Aviation Office in Germany.
So, done, finished and passed the test!
After a short time, I received a confirmation via email in the form of a PDF file, which must be kept with you and shown at all times if required. I always have the scan with me on my cell phone. Then I ordered again at amazon the DJI Air 2S Fly More Combo* and the delivery was already on the next day.
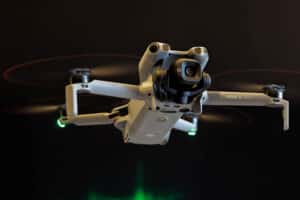
The design of the drone with the folding mechanism of the arms is essentially identical to the Mini 2. Everything is just a bit bigger. Unlike the small drone, however, the Air 2S also has front, rear and top-facing proximity sensors. These allow the drone to automatically follow people or objects or fly routes while avoiding obstacles. Of course, this feature is especially useful in video, but it also significantly reduces the risk of colliding with an obstacle in photography.
However, the larger batteries are now charged via an included proprietary charger with a wider special plug. Nevertheless, I liked the charging via a USB-C power adapter with the Mini much more, since I could also use an existing power adapter of my laptop for this purpose. In addition, the battery in the Air 2S can no longer be charged directly in the drone, it must always be removed.
For the DJI Mini 2, I had already ordered the mandatory E-ID badges in three copies with foresight, so I could attach one of them directly to the Air 2S. The operation of the Air 2s is identical to the mini 2, the controller is the same, so that I could start immediately after the first charging of the batteries.
Some sample photos with the DJI Air 2S
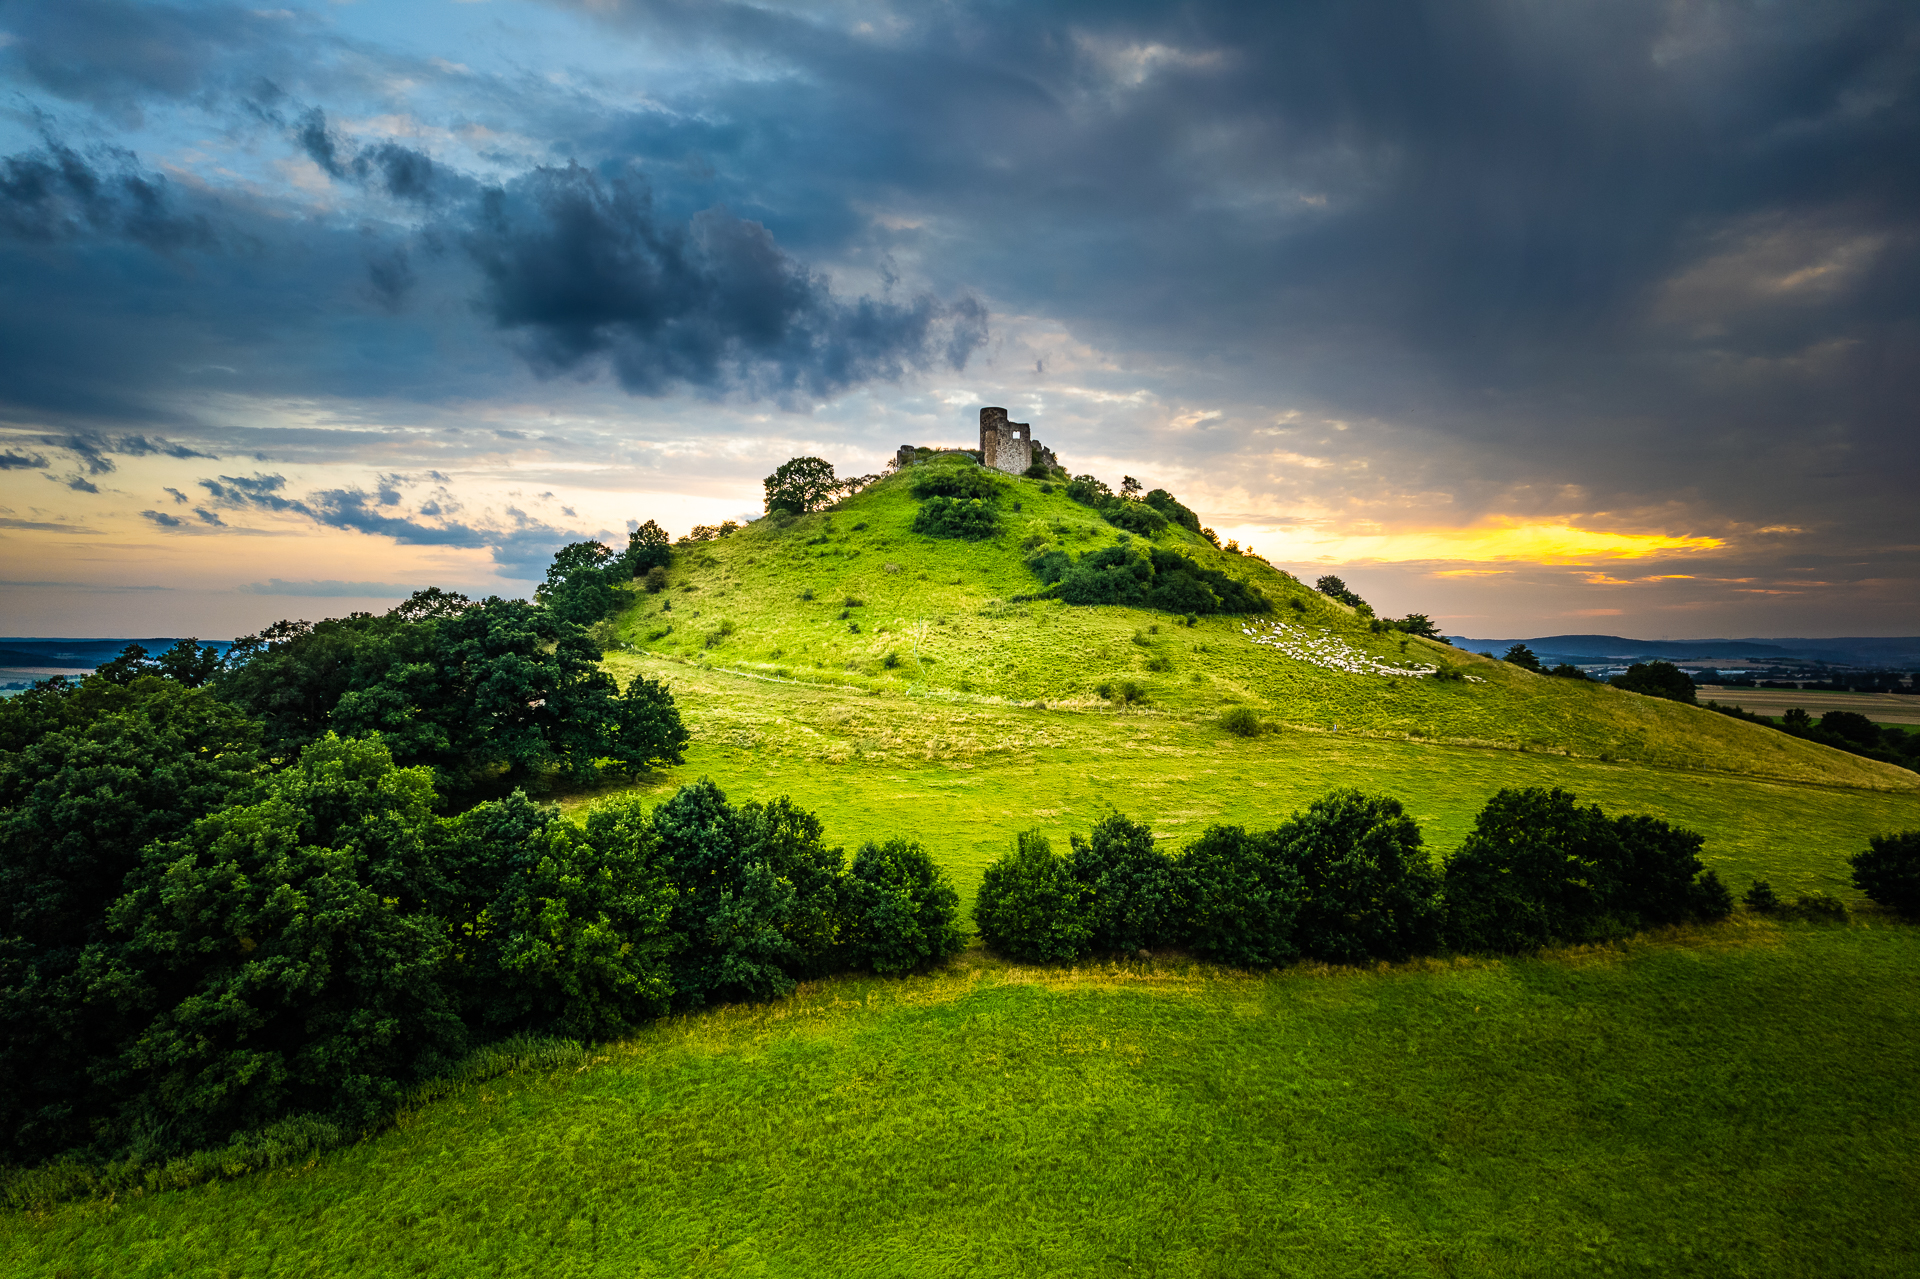
Pictures are worth a thousand words. To test the photographic capabilities of the new drone, it had to get into the air For the first test flight, I visited the Desenberg with the castle ruins of the same name near Warburg at sunset:
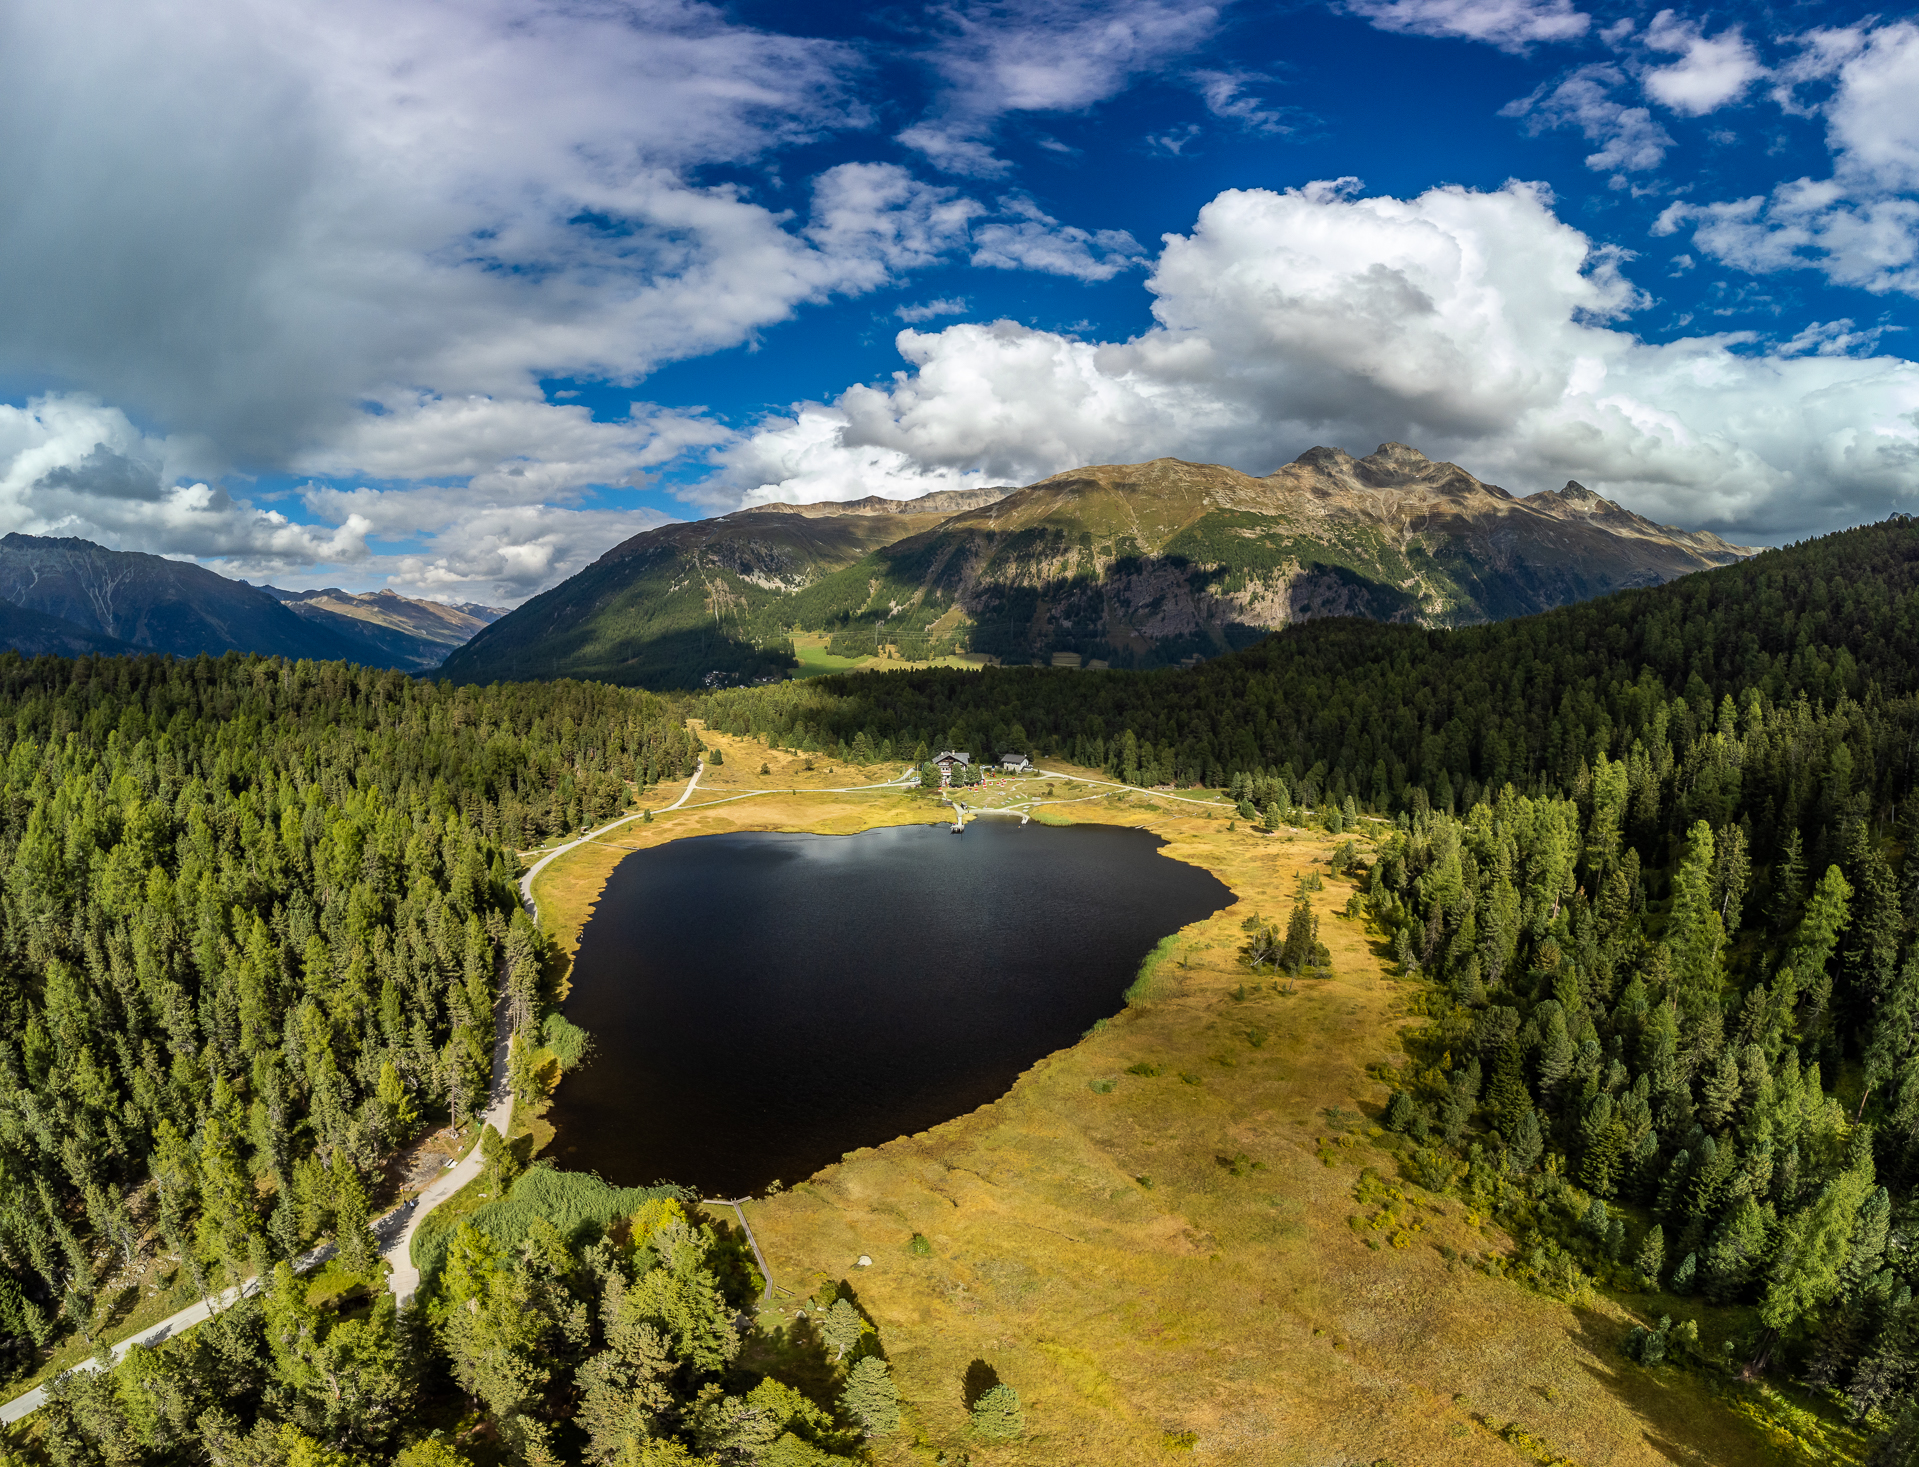
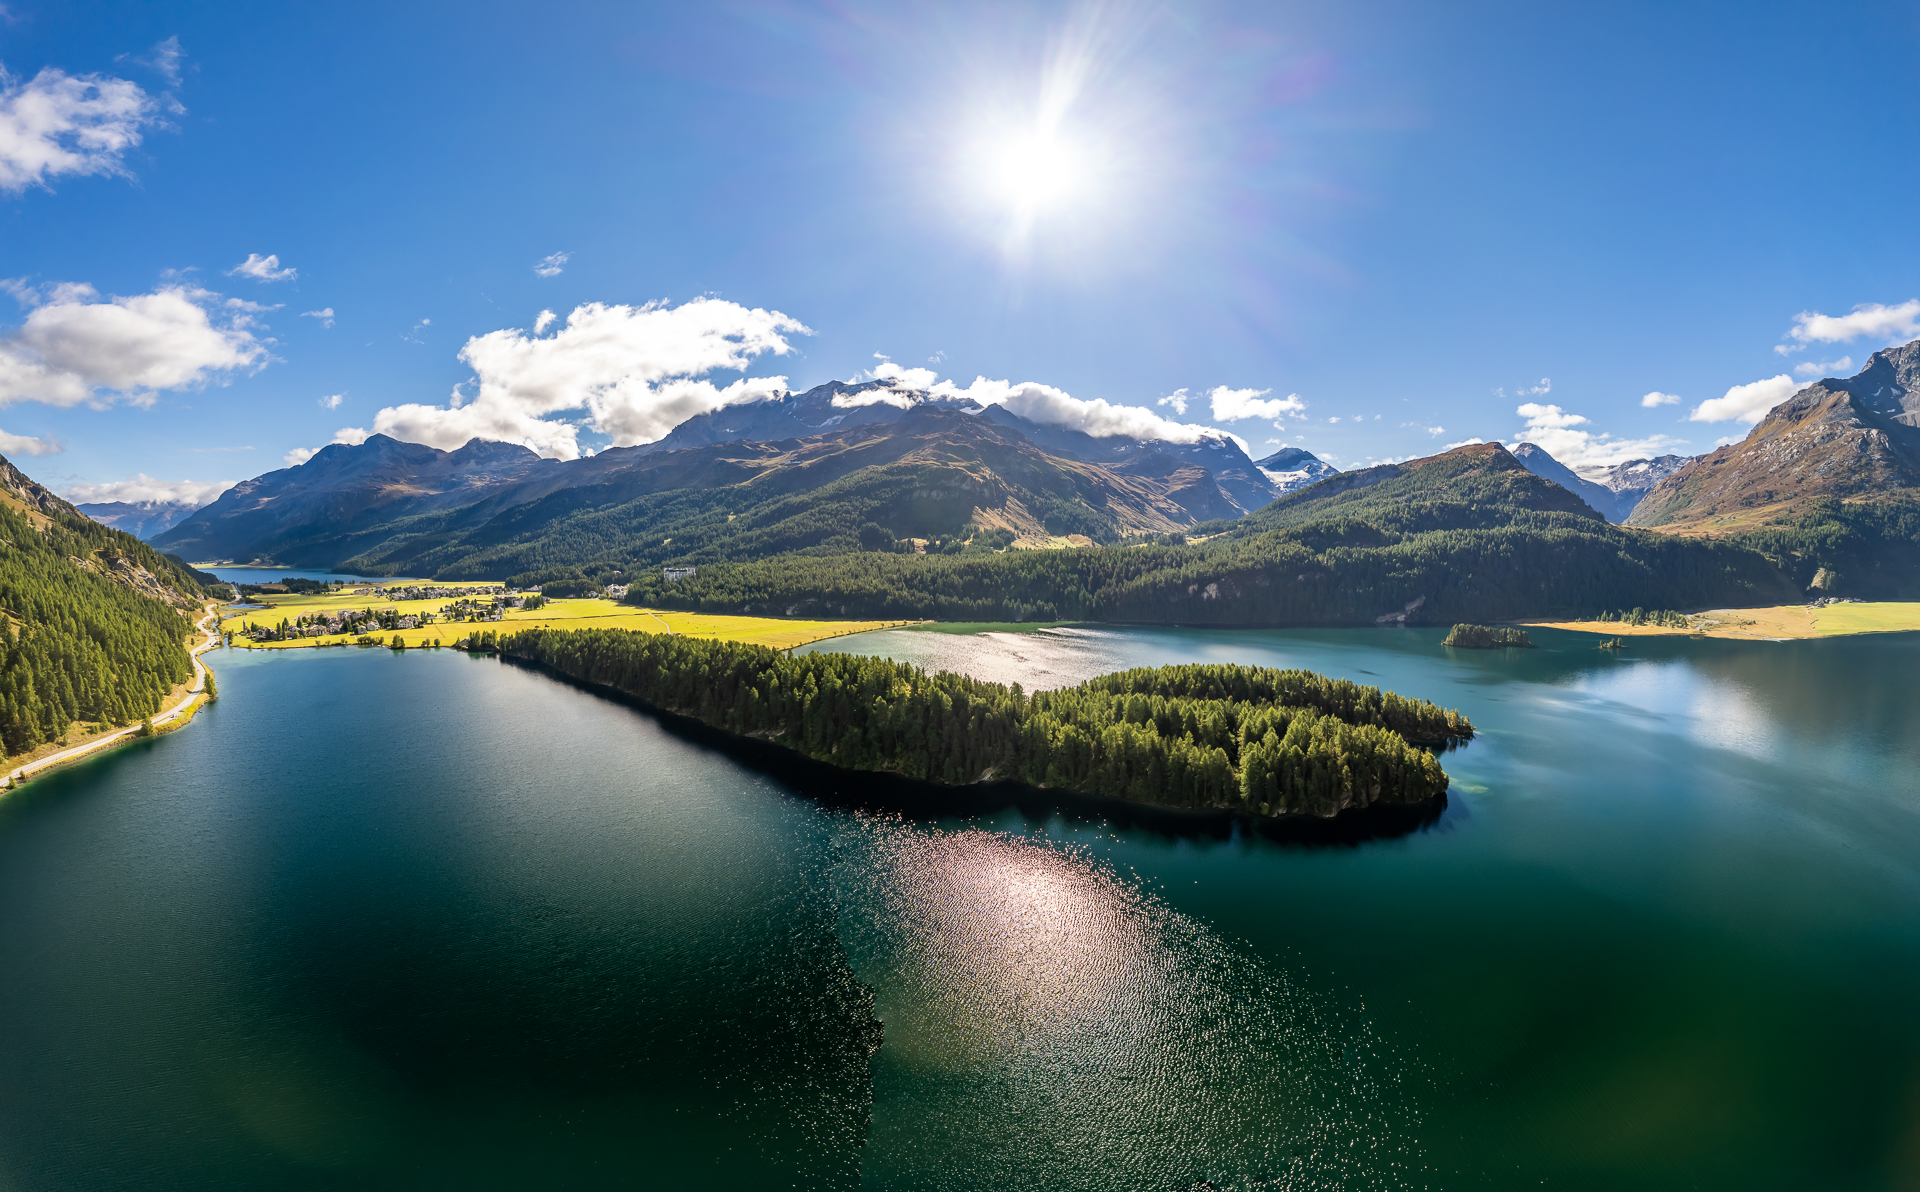
Like the Mini 2, the Air 2S also offers several different panorama modes. Here is a panorama from 9 individual shots, again combined using Adobe Lightroom. The result has a resolution of 59 megapixels:
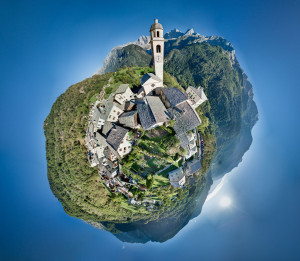
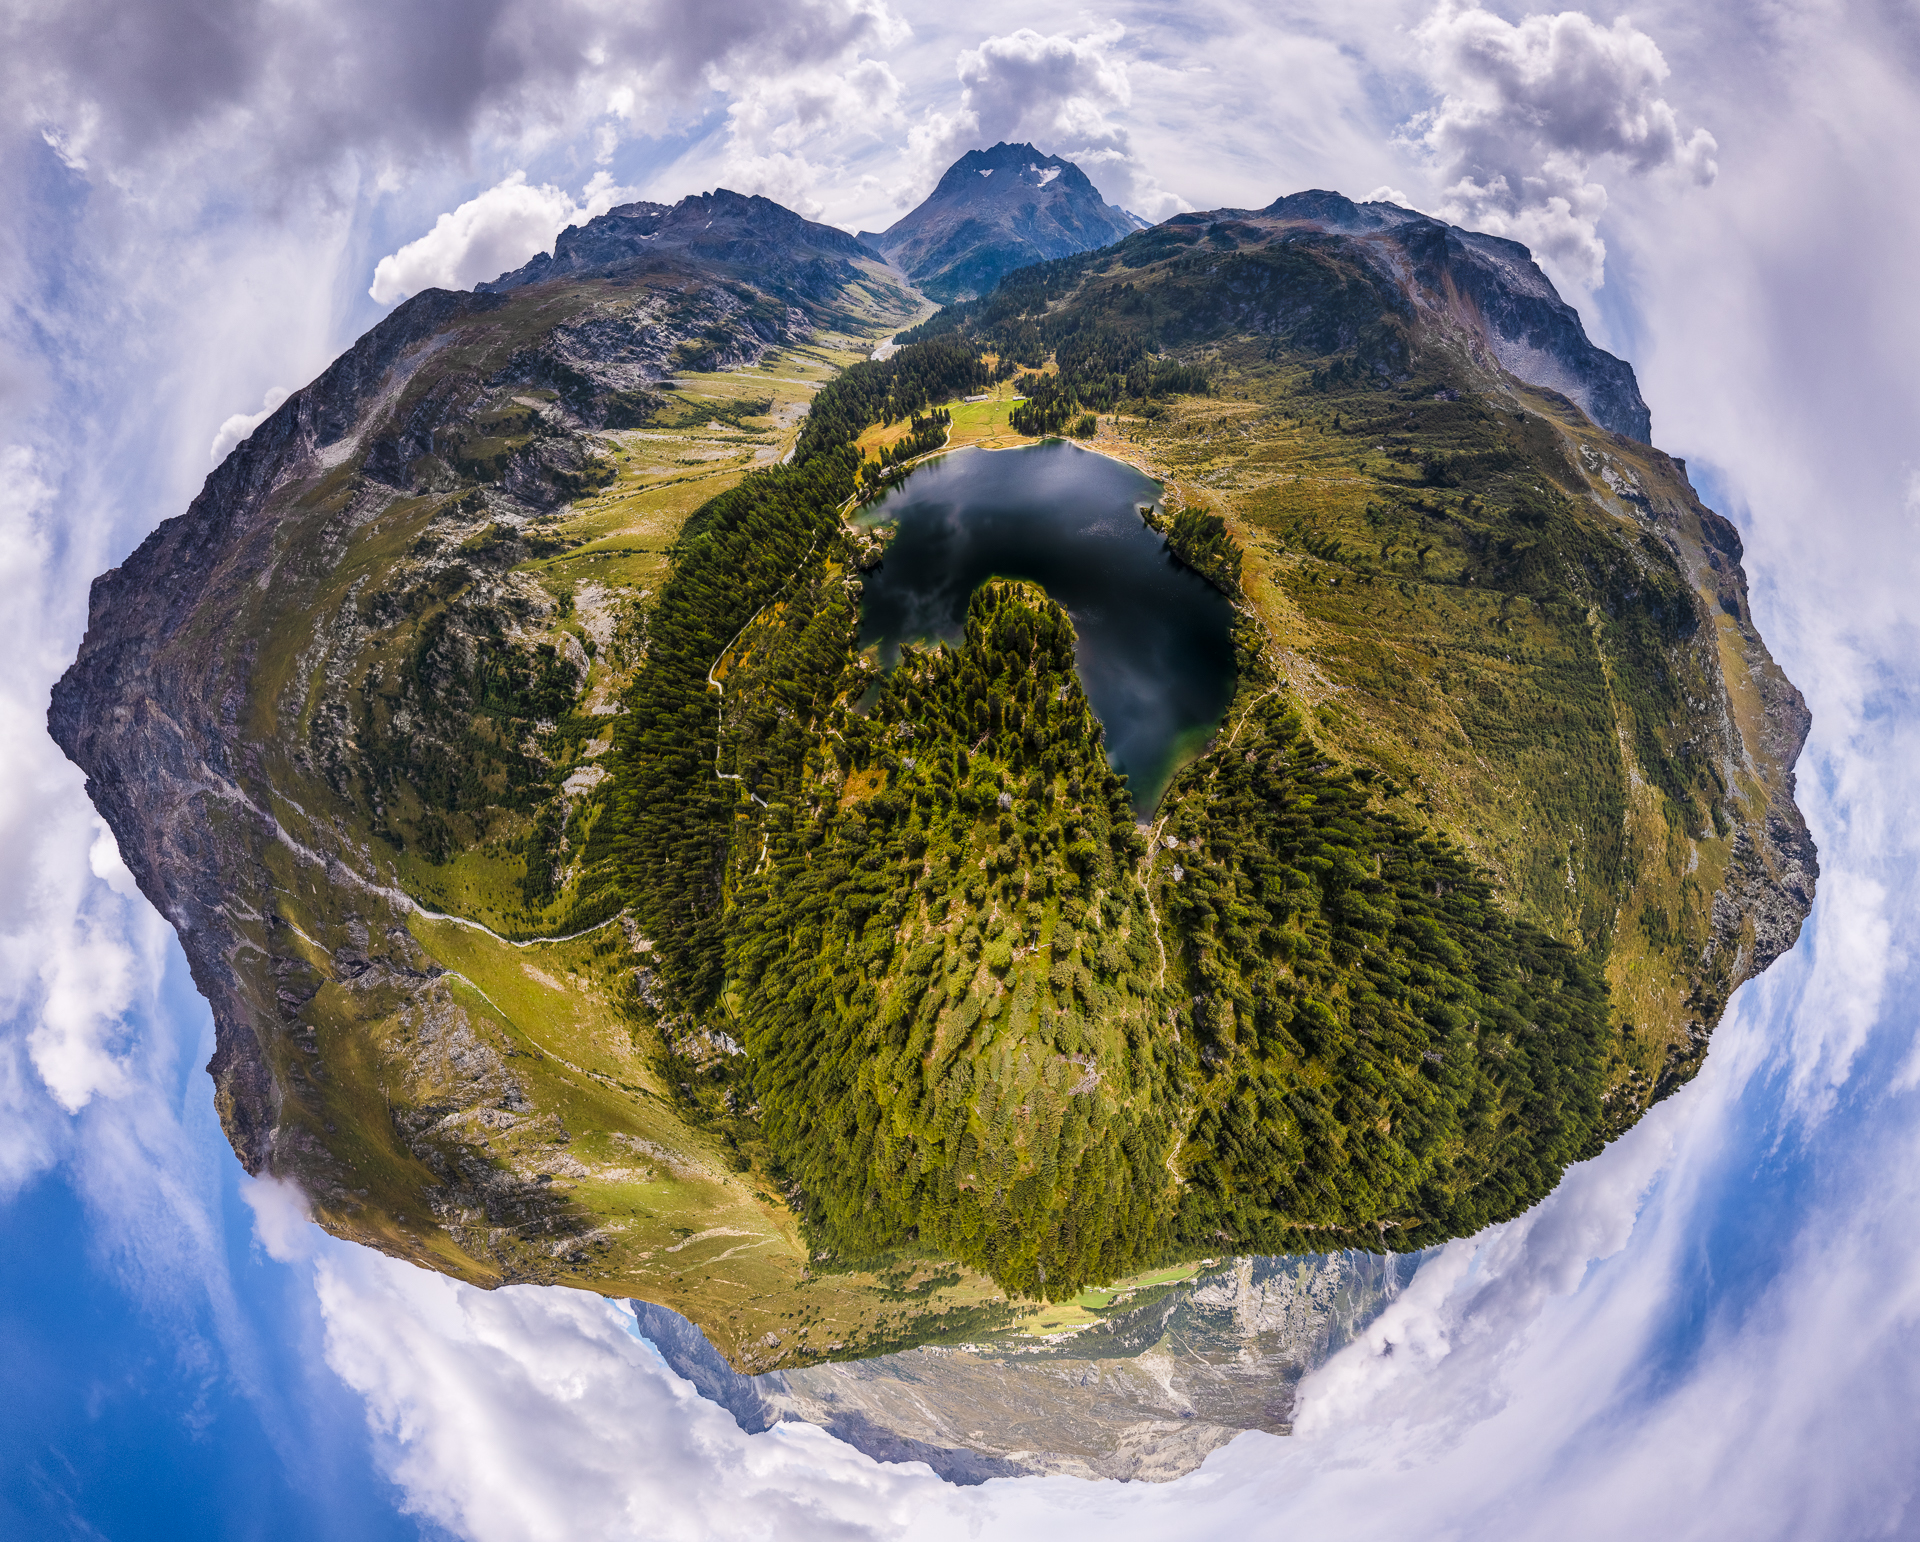
In addition to the panoramas with 9 individual shots, DJI also supports the so-called spherical panoramas with a 360° panoramic view. These are limited in that the drone can only be tilted upwards to a limited extent due to the position of the camera below the rotors. Thus, an upper part of the panorama is always missing. In this mode, the drone automatically takes a total of 26 individual shots in succession, which can be combined with suitable software (I use PTGui), to create a so-called “Little Planet” panorama, for example:
Accessories for the DJI Air 2S
While the DJI Fly More combos already come with a wide range of accessories, there are still a few extras that make a lot of sense. The following accessories have proven themselves to me in the meantime:
Memory cards
The DJI Air 2S has a Micro SD slot, which supports according to DJI cards up to a size of 256GB. Although the drone should also be able to handle even larger cards based on individual statements on the Internet, but I have no personal experience with this. The 256GB is enough for several hours of video and thousands of photos, even in the highest resolution.
Because of the relatively high maximum write rate of the Air 2S in video mode(150MBit/s), the micro SD card should at least meet the specification U3 / V30. Because of my previous positive experiences with the manufacturer, I again opted for cards from SanDisk (SanDisk Extreme Pro 256GB MicroSDXC*). These come with an SD adapter, so I can use them directly in the SD card slot of my laptop.
Although the DJI Air 2S has an integrated storage of 8GB, this can only be considered as an emergency solution in case the micro SD card is left behind or full. In addition, it is very cumbersome to access it via the USB-C port of the Air 2S. The drone has to be turned on for this to work.
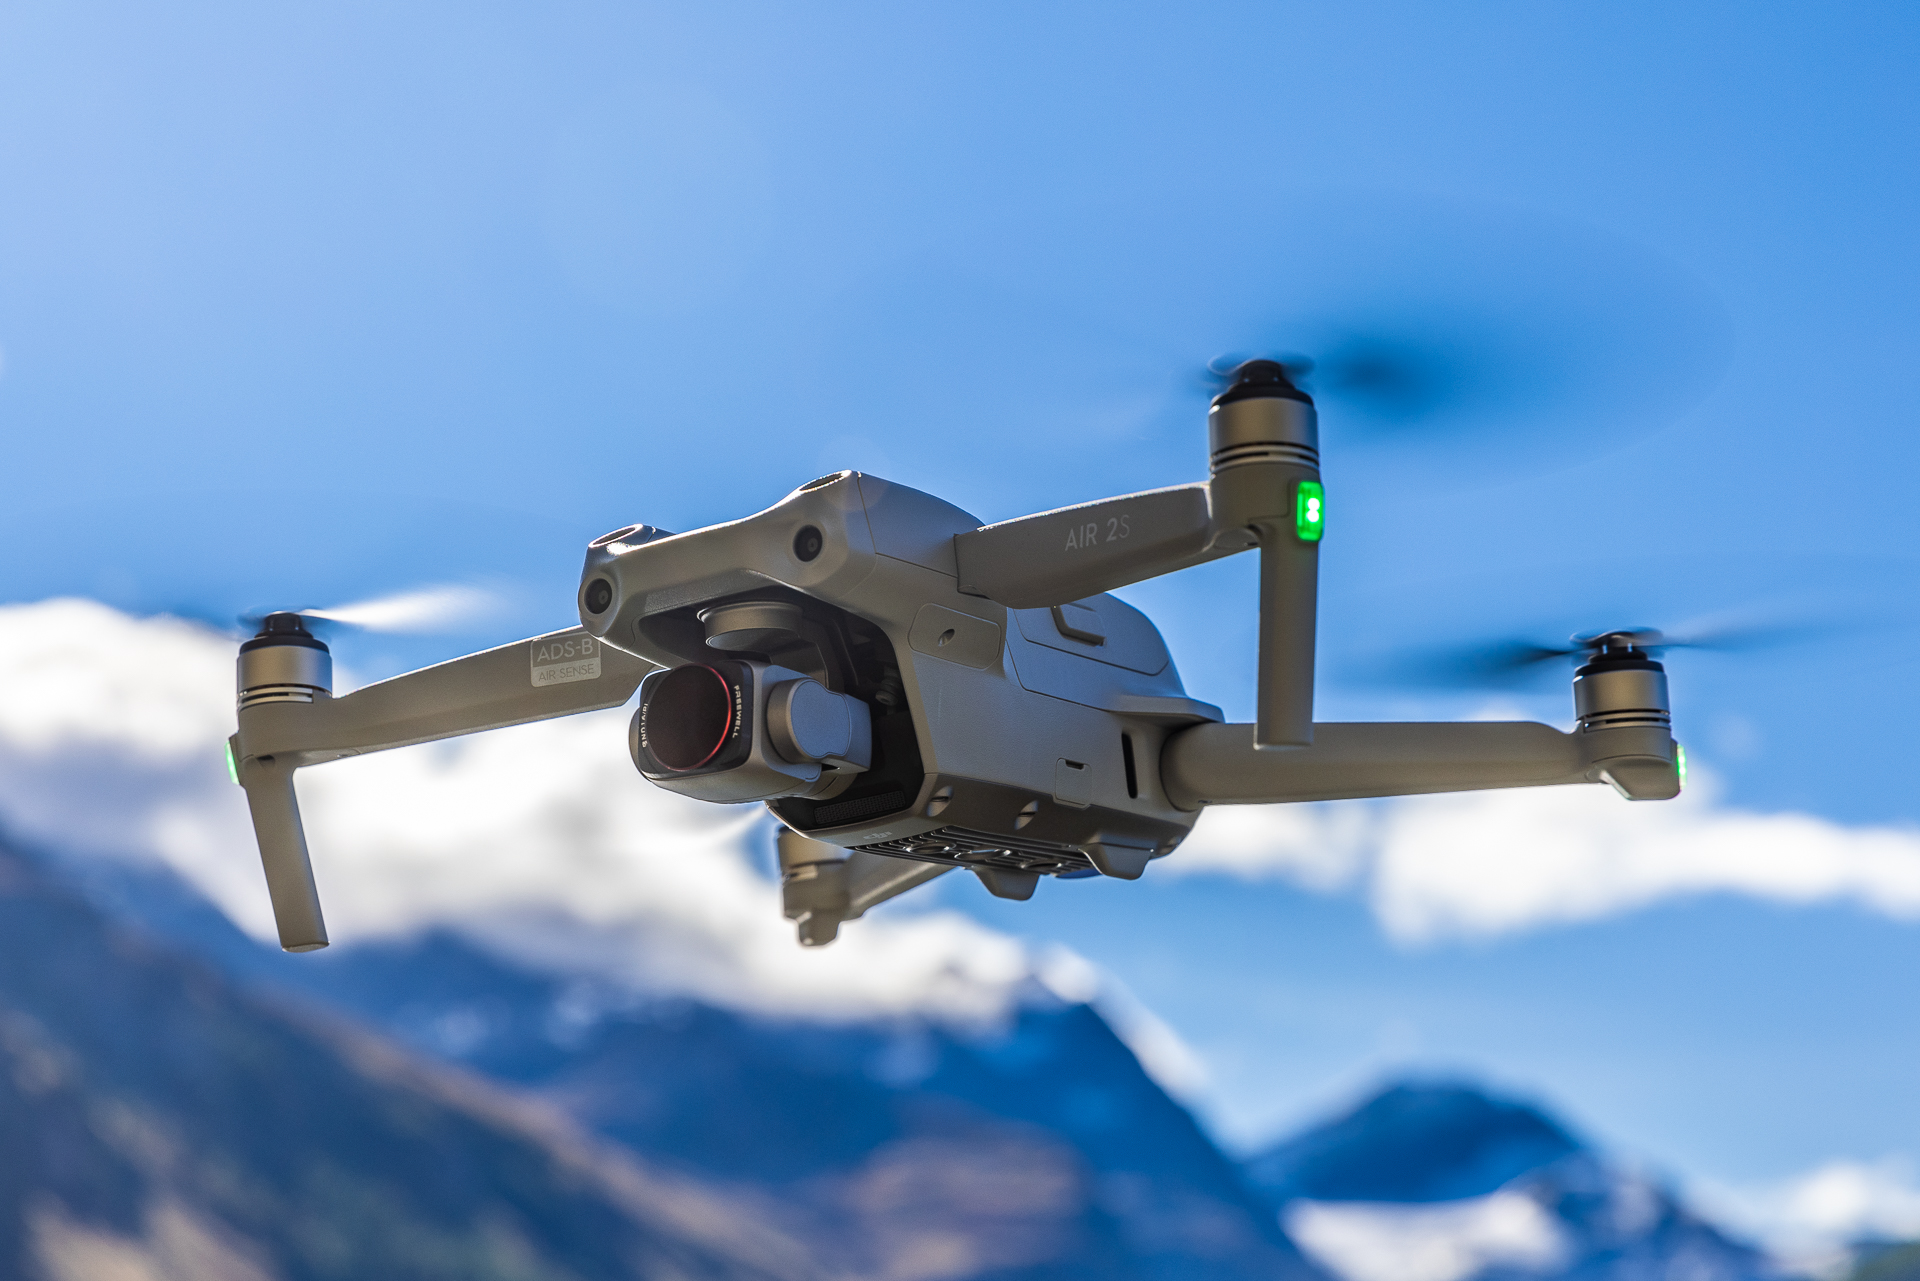
ND / Polarizing Filter
An indispensable filter in my ground-based landscape photography so far is a polarizing filter. I use it virtually all the time when the sun is shining to achieve bluer skies, richer green foliage, and improved long-range vision. It also reduces reflections on water surfaces or glass.
Since I had also become a bit more familiar with video technology using drones in the meantime, it was also clear that gray filters would also be necessary. The lens of the AIS 2S has a fixed aperture of f/2.8, stopping down is not possible. The resulting fast shutter speeds required in bright daylight lead to quite visible image jerks in videos. In order to get the shutter speed into the optimal range (1/2x frame rate, i.e. 1/60s at 30P), ND filters are therefore necessary. Although 4 ND filters (ND4 to ND32) are already included in the Fly More Combo Set, I wanted a combination with a polarizing filter, so I also ordered the combined All Day Pol/ND Kit* from Freewell.

Adjusting the preferred rotation of the polarizing filter is a bit awkward, though. Naturally, this has to be done when the drone is still on the ground. To do this, you can either hold the polarizing filter horizontally in front of your eye, look through it at the desired subject and set the desired rotation, or attach it to the drone and rotate it to the desired position on the ground while watching the effect on the phone screen.
In flight, the phone with the DJI Fly app serves as a display screen for drone control and live video. The phone clips into the top of the remote and connects with one of the included cables (Apple Lightning, USB-C and Mini USB cables are included).
Sun hood
This also worked with my iPhone 12Pro right away and without any problems, but the picture is relatively dark in bright sunlight and therefore difficult to use. It therefore makes sense to use a shading mask. I ordered the STARTRC Sun Hood* for this purpose, which works well for me.
Carrying strap
Another useful accessory is a neck strap for the remote control. I cannot understand why DJI has not made any provisions for attaching a strap. I therefore use the strap from Hensych*. So you can safely sling it with the attached remote control around your neck, which simplifies the operation very much.
Propeller holder
Unfortunately, unlike the Mini 2, the DJI Air 2S does not come with a holder to fix the propellers to the drone when not in use and to protect them when stowed in the bag. I therefore ordered the propeller holders from PGYTECH*, which serve their purpose well.
Car charger
And, if you are traveling by car, as we did this time in Switzerland, a battery charging option in the car is also very useful. The original accessories from DJI are very expensive and only charge one battery at a time. I therefore ordered a replacement car charger* from amazon, which can charge two batteries at the same time and also has a USB port to charge a cell phone or the remote control. I used it several times in Switzerland. The charging process is extremely fast and it has been very effective.
Some more tips and sample images are available in my article “Photography with the drone - First experiences with the DJI Air 2s”.
* = Affiliate Link