As I have already written in my article “Photography in 3 dimensions”, I have now “got up into the air” and bought a drone. Although having recorded some videos with it, I am primarily interested in the still image, the photography, as in most of the articles on this website. Although there are already countless reports and YouTube videos on drones on the Internet, these are mostly about creating videos, photography is often left behind for my taste.
After a good 15 hours of flying with my drones and a good 130km flown, I have now gained some first experiences, about which I would like to report here.
Which drone for photographers?
In photography, my demands have grown more and more over the years. I think many people feel the same way. As already discussed here on my website several times, I actually use a Canon EOS R5 with a huge full-frame sensor and a resolution of 45 megapixels as my main camera. With it I use lenses from 14 to 600mm focal length. In the meantime, I have become accustomed to the quality of results possible with this camera and the extensive processing possibilities.
Would I use this as a standard also in drone photography, it would be only possible to photograph with a very large and expensive drone, which would also be difficult to transport and operate - not to mention the legal aspects (insurance coverage, drone license). I didn’t want that, so a compromise was necessary.
On a mood at the beginning of this year, I took advantage of a low-priced offer on amazon and bought a DJI Mini 2 in the “fly more combo” complete set to gain my first experience with drones. My expectations were initially quite low, I initially saw the whole thing as a gimmick.
However, the “Fly more” package, which was delivered the very next day, made a big impression on me. The DJI Mini 2 is surprisingly small and light (<249g). When folded, it fits easily in the palm of my hand. The folding mechanism for the rotor arms is ingeniously thought out and makes an amazingly stable impression. Everything fits functionally into a small shoulder bag that is included. The three batteries can be charged together in the included carrying case or directly in the drone via USB-C. The operation of the controller and the DJI-Fly app are intuitive to master without much study of the manual. Everything is very well thought out, and DJI’s many years of experience in drone construction are evident everywhere.
Although the photo results were surprisingly good for the size of the DJI Mini 2, they still did not meet my requirements in photography. For filming (at least up to a resolution of 4K/30p), however, it is really good - at least for my (so far) modest demands.
So I continued to wait for the so-called “sweet spot” in drone development - the ideal compromise for me between image quality, portability and affordability.
“Sweet spots” in technical developments are rare, but they have the potential to create major transformations. I’m thinking, for example, of the transformation from vinyl records to CDs, from tube televisions to flat screens, and many others. A new technology often only comes into play when it falls below a certain cost threshold.
In 2003, for example, I believe this was achieved in digital photography with the release of the Canon EOS Digital Rebel. It was the first digital system camera for under $1000, at that time my entry into digital SLR photography. However, I had not yet seen the “sweet spot” in drone development for photography.
My minimal requirements for photo drones
In terms of image quality in photography, my current minimum is a resolution of about 20 megapixels (even the new Canon EOS R6 or the professional DSLR Canon EOS 1DX III don’t have a higher resolution) and a 1″ sensor, corresponding to the sensor size of my Sony RX-100 VI, which I like to use for smaller city trips. In good light, it delivers quite usable results.
Since my drone will usually be used during the day in good light for landscape photography, and the object isolation achievable with a large sensor should not be an issue, this seemed sufficient for the beginning. Whereby thanks to the excellent stabilization of the current drones in poor lighting conditions, long exposures are definitely possible. More about this later.
Interchangeable lenses or a zoom lens on the drone seemed to be unnecessary. A good wide-angle lens should be sufficient. Since the drone is flying, it is no problem to fly closer to or further away from a subject. If it should be even more wide-angled, you can also stitch panoramas, but more about that later.
In addition, the model should be easily transportable, otherwise I would certainly not use it in the field. A folding mechanism for the rotor arms, as presented by DJI for the first time in 2016 with the DJI Mavic, seems to be optimal. The drone should fit in my backpack next to my camera gear or be stowable in a small extra bag. The battery capacity should also be sufficient for longer day trips. Professional drones often only have flight times in the single-digit minute range.
Until now, the cheapest model with this specification was the Mavic Pro 2 with just such a 20 megapixel 1″ sensor and Hasselblad optics (The traditional camera company Hasselblad has been acquired by DJI). I had already flirted with it several times before, but the price and the weight were still a bit too high for me. But then appeared in April 2021 the
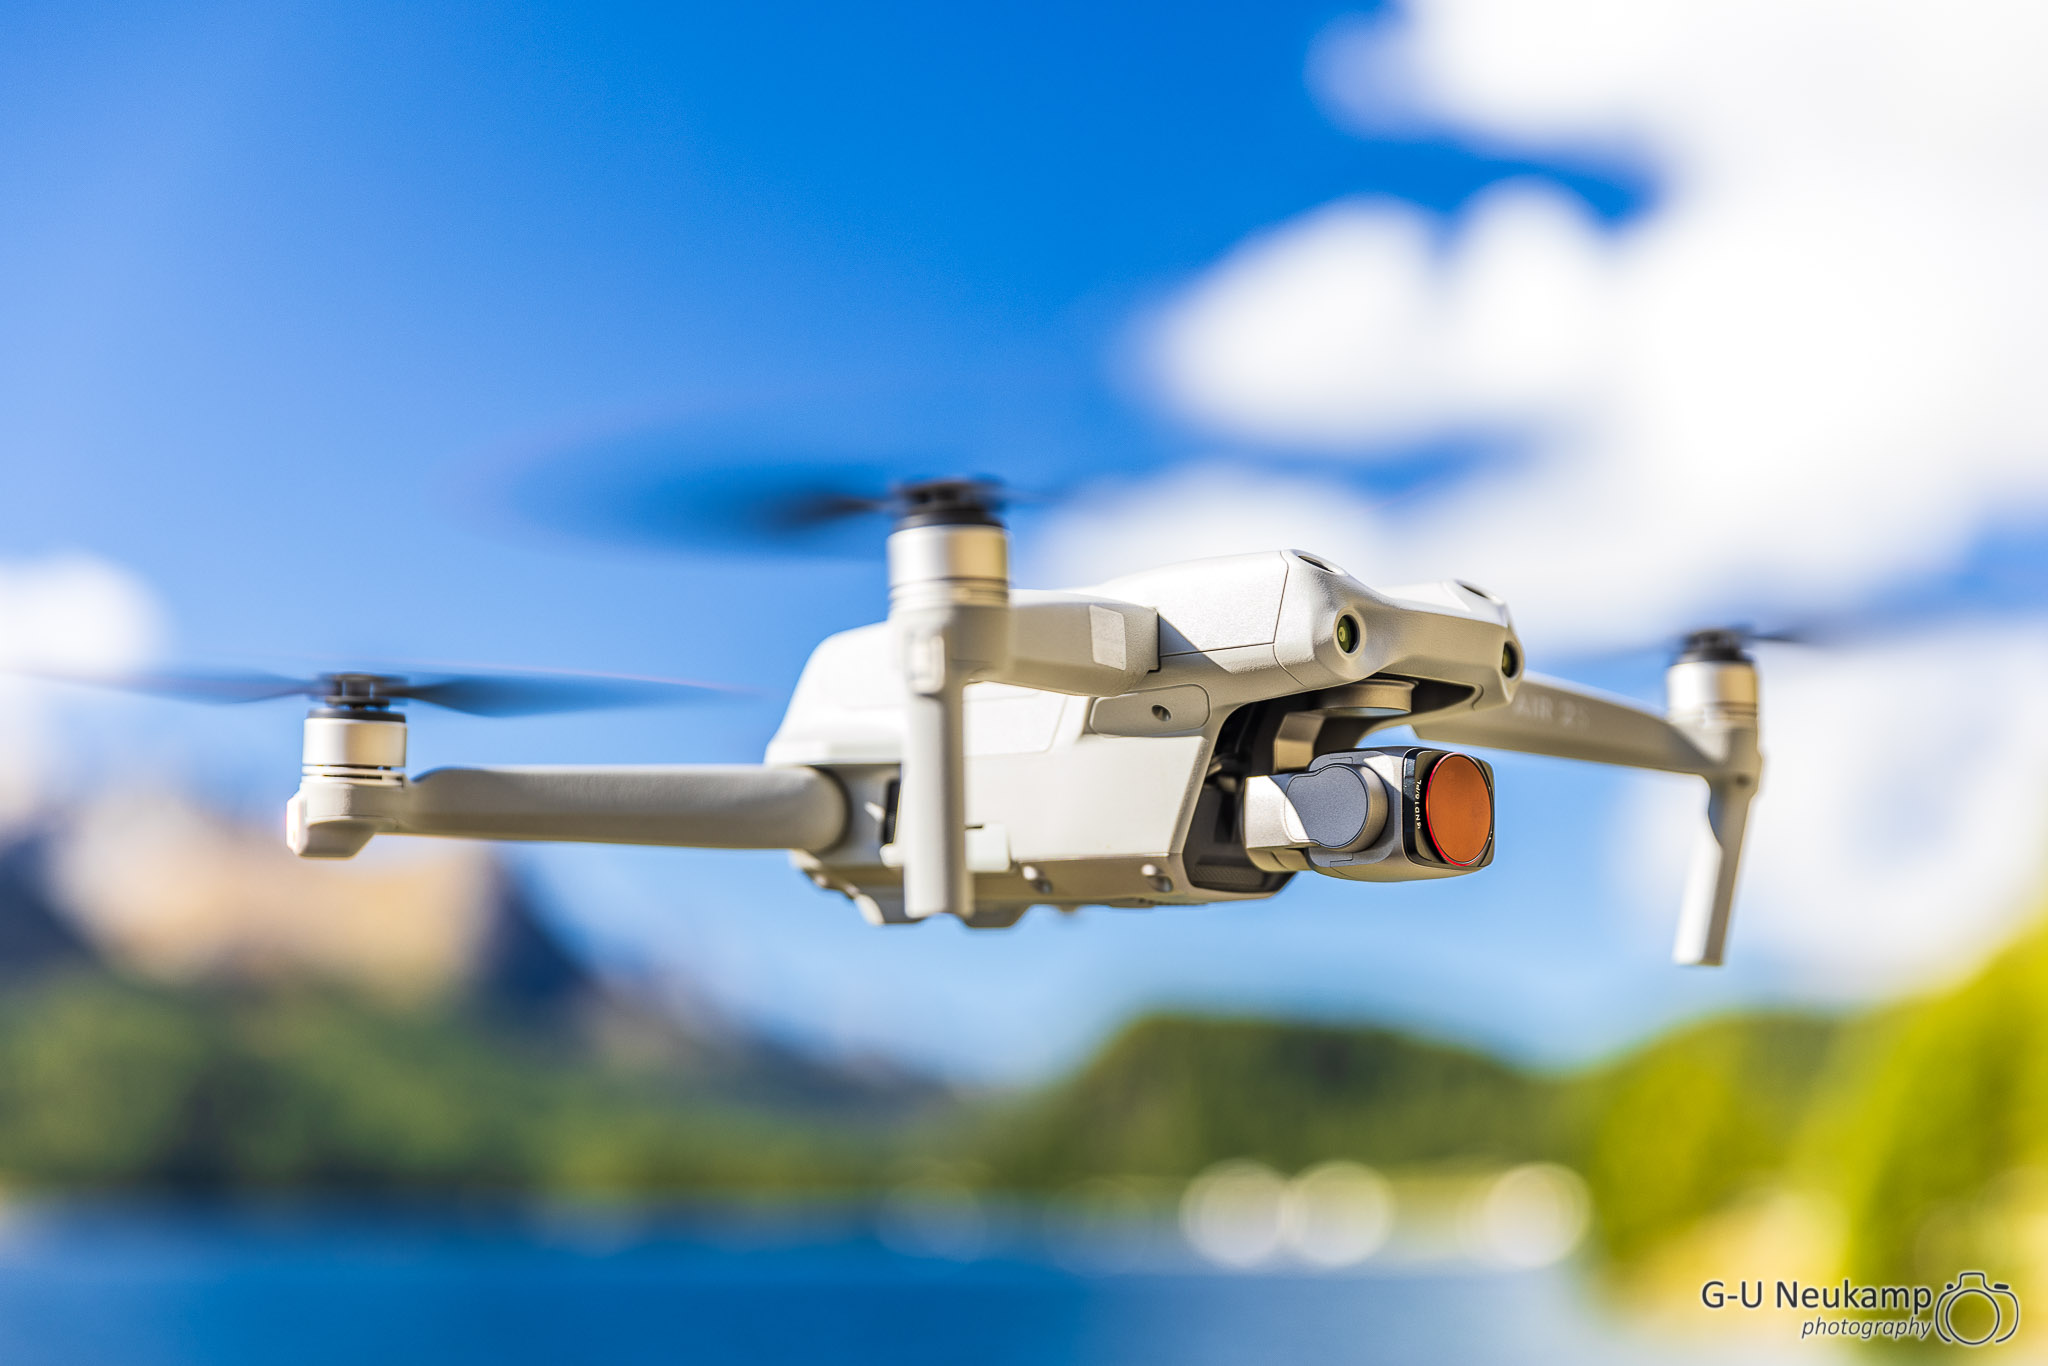
DJI Air 2S
with very similar specifications compared to the Mavic 2 Pro, in some cases even better functionalities, and a combat price of under $1,000. It too has a 1″ sensor with a resolution of 20 megapixels (3:2 format, 5472 x 3648 pixels), a wide-angle lens corresponding to a fullframe focal length of 22.4mm. Lens movement and stabilization is handled by a 3-axis gimbal. While the lens does not wear the Hasselblad logo, it is also of very good quality as far as I can tell so far. Unfortunately, however, the adjustable aperture that was still present on the Mavic 2 Pro has been omitted, so that it is only possible to shoot at open aperture (at f/2.8).
Due to the Corona pandemic, we had planned a vacation trip by car to Switzerland this year. I therefore looked into Switzerland’s drone regulations and was pleased to find that there are currently only few restrictions in our vacation area (Engadin). Switzerland has not yet adopted the stricter EU regulations and is currently sticking to its own less restrictive regulations. This would therefore be an ideal opportunity to get further into drone photography.
When I saw an offer on amazon, I decided to buy it (but of course it didn’t stay at $1000,-, because I had chosen the “fly more combo” with “care refresh”). One day later the Air 2S arrived. I charged the batteries, attached the eID and went outside. I had already had my first drone experience with its little sister, the DJI Mini 2, drone insurance and pilot registration were in place, and the operation of both controllers is identical.
How to fly a drone?
For those who have never operated a drone before, the following is a brief basic introduction to the subject:
Before flying in public for the first time, two things must be clarified first according to current legislation (at least in the EU):
- You need a drone liability insurance. If you already have a private liability insurance, you can ask the insurer whether they offer an extension in this regard. Otherwise, there are many cheap offers, I myself have signed a drone insurance via the mobile app GETSAFE and currently pay € 3.55 per month.
- In order to operate a drone in public space, registration as a drone pilot is generally required. In Germany, the Federal Aviation Authority is responsible for this. Registration can be done online and is currently free of charge. You will receive an eID from there, which must be attached to the drone. For drones weighing 250g or more, including the DJI air 2S, the so-called “small drone license” is also required.
I have already given addresses and further details in my previous article. For the first flight attempts, you should choose an open remote place and check whether drone flights are allowed there. There are also suitable mobile phone apps for this, such as DRONIQ or Map2Fly for Germany. Of course, the weather should also be suitable; the UAV Forecast app provides very useful information on this. If these conditions are all met and the batteries are fully charged, you can start flying.
The operation
of current drones is now extremely easy thanks to the sophisticated technology. Basically, thanks to GPS/GLONASS and a built-in compass, they are able to determine their position accurately at any time and maintain it in the air without further intervention of the “pilot”. This works even in strong winds up to a certain strength without any problems. As soon as you power it up, the drone starts tracking GPS satellites and accurately determines its position. As soon as this is done, the DJI app sends a corresponding spoken message.
All functions are controlled with the included remote control via bidirectional radio transmission. This has a really remarkable range (according to official information from DJI 8-12km with a clear line of sight). However, according to the current legal regulations, drones are not allowed to be flown outside of the line of sight anyway. At the same time, the drone sends a live video image from its camera back to the remote control.
The monitor for most consumer drones, including the Mini 2 and Air 2S, are mobile phones (iPhones and Android phones are supported), which are connected to the remote control with a USB cable and mounted to it with a clamp. On the mobile phone, an APP (here the DJI Fly App) receives the data and displays it on the cell phone screen:
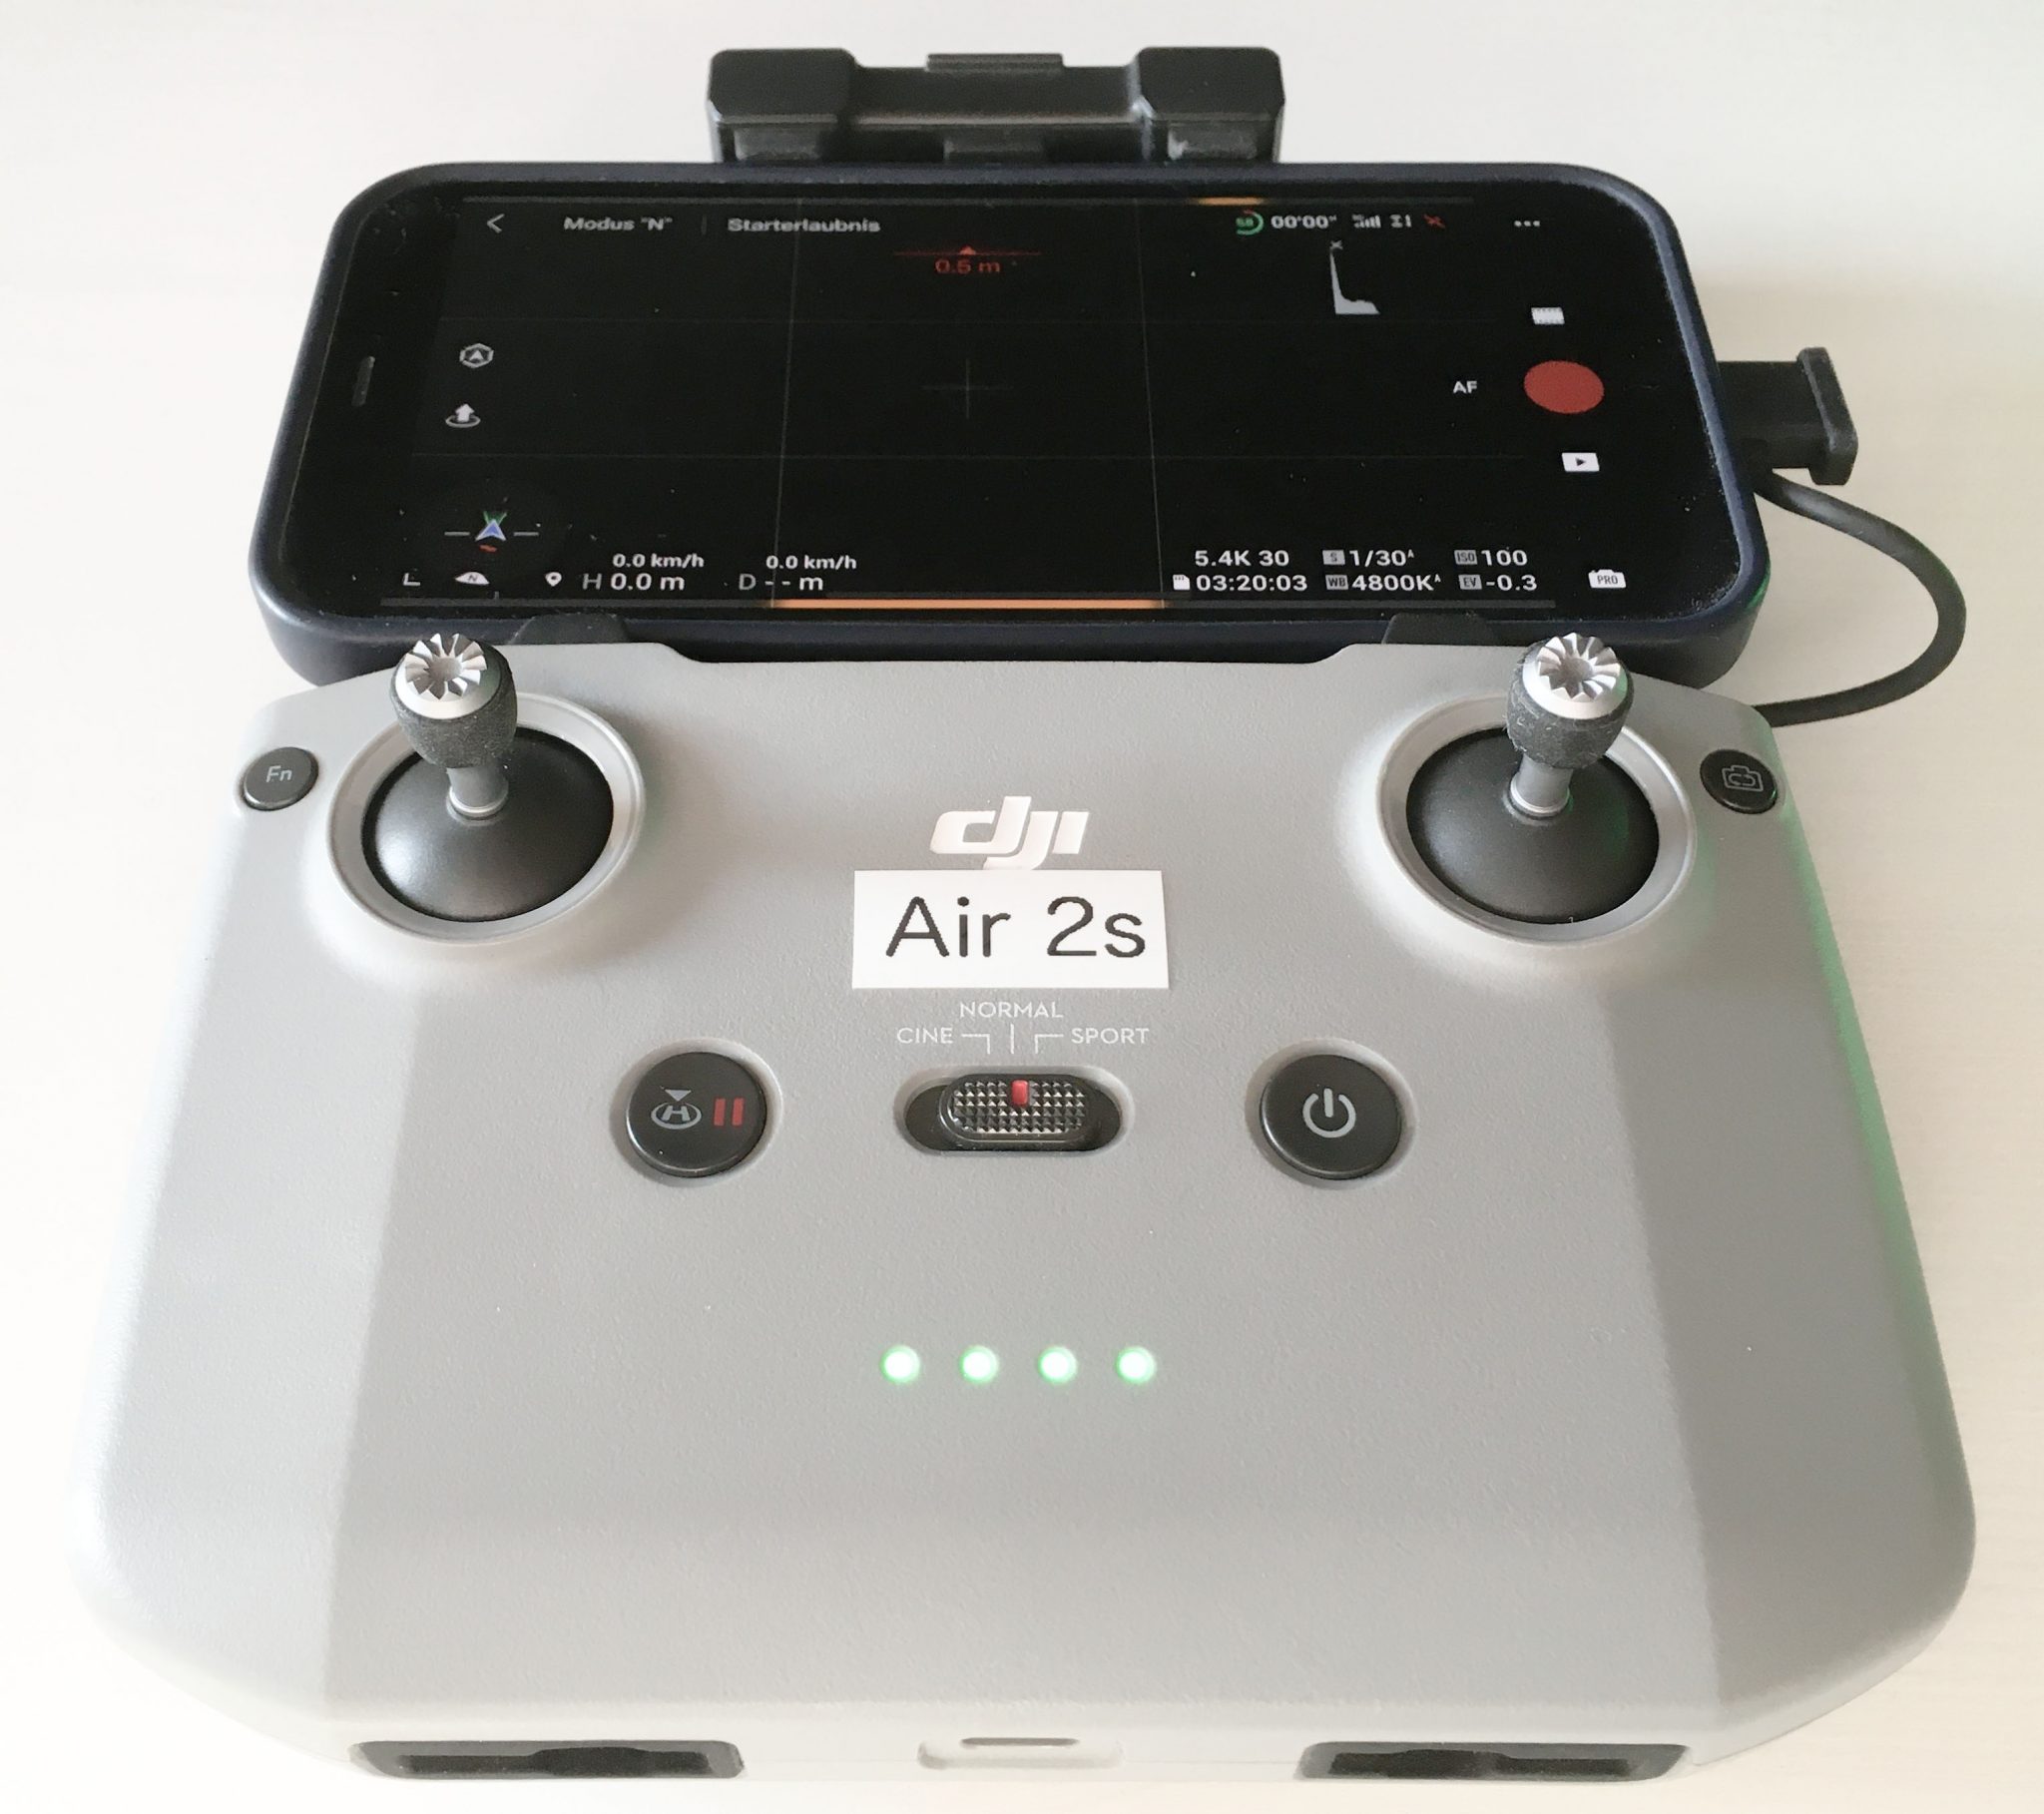
The screen of the cell phone then displays all essential information as well as the current video image from the drone. In the picture below, the drone is still on the ground, but has already been “ready for takeoff”. The video mode with the highest resolution (5.4K 30) is set. You can switch to photo mode on the controller at any time by pressing the button at the top right of the right joystick.

The drone can then be started via the icon ![]()
![]() and longer pressure on a start button that then appears centrally on the cell phone screen. This effectively eliminates the possibility of unintentional activation. The rotors then start automatically, the drone takes off and hovers on the spot at a height of about 1.2m.
and longer pressure on a start button that then appears centrally on the cell phone screen. This effectively eliminates the possibility of unintentional activation. The rotors then start automatically, the drone takes off and hovers on the spot at a height of about 1.2m.
Controlling the drone is simple and intuitive using the two joysticks. The left joystick controls altitude and rotation, while the right one moves the drone forward, backward or to the sides. A rotary wheel on the left shoulder can be used to raise or lower the camera. After a short familiarization, this works without any problems. If you release both joysticks, the drone hovers at its current position.
It could hardly be simpler. To land, simply fly to the desired suitable flat landing spot and move the left joystick down until the drone hits the ground. It then stops the rotors automatically. Alternatively, you can press and hold the “Return to home” button on the controller (center left). The drone will then first fly to the preset safe altitude (to avoid accidentally colliding with trees or buildings), then return to the starting point at this altitude, and finally land slowly on its own. This also happens automatically if the radio signal is lost or the battery runs out. You can start shooting either with the button on the right of the phone or with the right shoulder button on the controller.
The currently selected shooting mode is displayed above the round button on the right; the icon ![]()
![]() means, for example, that you are in video mode. To change the mode, simply tap the icon and another selection menu will open. In the example below, the photo mode with single image recording was selected in this way:
means, for example, that you are in video mode. To change the mode, simply tap the icon and another selection menu will open. In the example below, the photo mode with single image recording was selected in this way:

The Smart mode, which is also available there, takes several shots with different exposure parameters and calculates an optimized image from them. Since I always do this myself in post-processing and the mode only creates a JPG file, I don’t use it. In addition, exposure bracketing with 3 or 5 exposures and continuous shooting can be selected.
In single shot mode, the bottom of the image shows, that the memory card still has room for 4519 exposures in combined JPG and RAW format. An exposure compensation of -0.3 is set here and the automatic exposure ( ![]()
![]() ) is active. The settings can be changed directly by tapping the corresponding value. This can then also be used to switch to manual mode (
) is active. The settings can be changed directly by tapping the corresponding value. This can then also be used to switch to manual mode ( ![]() ).
).
If you slide up the right menu column, you can select the four available panorama modes at the bottom. I use these very often, as they are convenient for creating wide-angle high-resolution images. Below there is a spherical panorama selected:

In addition, the available video modes, MasterShots, QuickShot and Hyperlapse sequences can be selected between these menu items. I don’t want to go into these further here, as there is enough material on the Internet about them, as here we are primarily concerned with photography.
First results
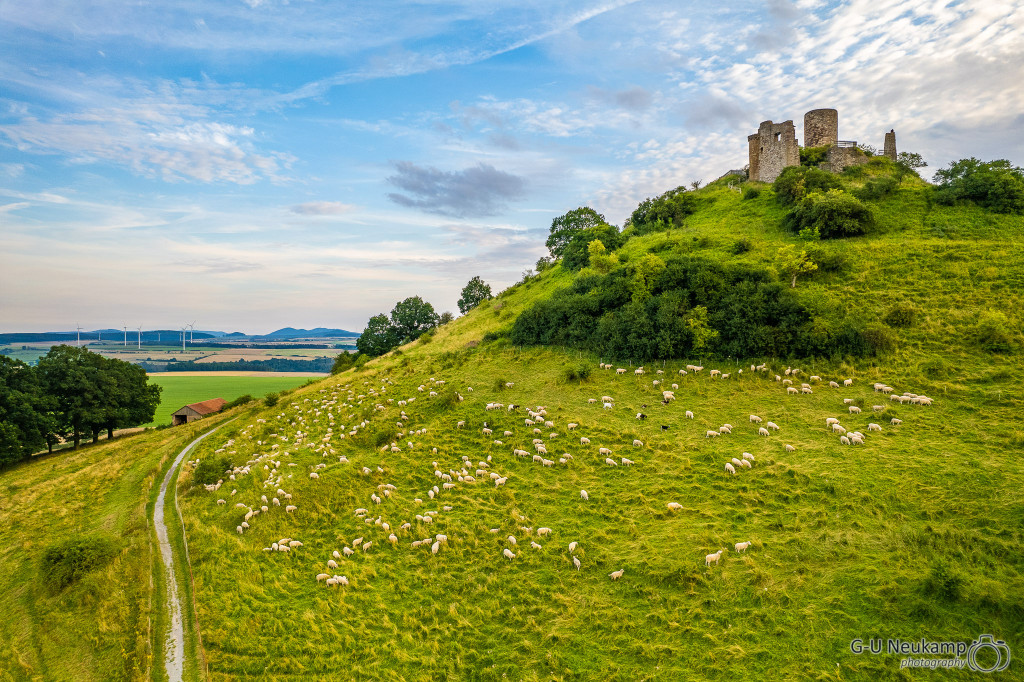
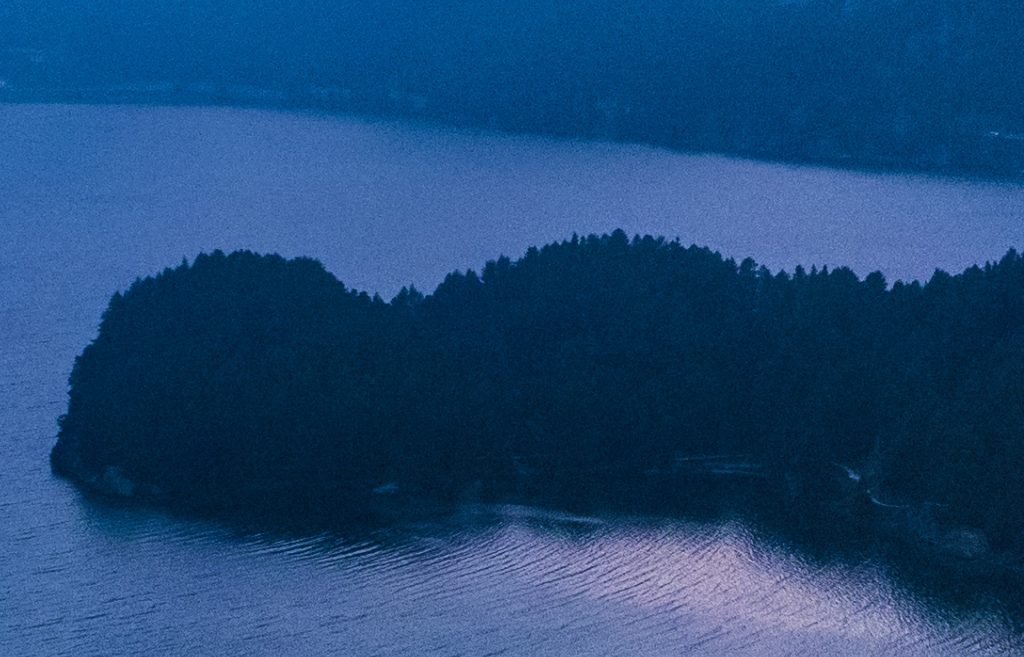
For the first flight tests with the newly acquired DJI Air 2S, I chose our “local mountain” in Warburg, the Desenberg with the castle ruins on it. I was particularly interested in the dynamic range of the 1″ sensor. As always with my cameras, I work with the Air 2S exclusively with RAW files. It supports the widely used DNG format, which is directly supported by virtually all RAW converters. Unfortunately, however, you can only choose between saving JPG and JPG+DNG, so I always have to manually delete the JPG data that is superfluous for me. First, as a first example, a shot from my first flight without any processing in Lightroom:

I then processed the raw image file (in DNG format) in Lightroom and was amazed how much detail was still present in both highlights and shadows:
The sharpness is also quite good, here is a detail of the above image in 100% magnification:

In addition to the well-functioning automatic mode (aperture priority at open aperture f/2.8 - the Air 2S lens unfortunately does not have an adjustable aperture, the Mavic 2 Pro can do that better), all exposure parameters (exposure time, ISO value, white balance) can be set manually on the Air 2s. The lens features autofocus, you can select a focus point manually by tapping on the screen. However, the focus can also be set manually if desired. Due to the relatively small sensor size and the wide-angle optics (KB equivalent 22.4mm), you usually don’t have to worry about this though, all pictures are usually in focus automatically.
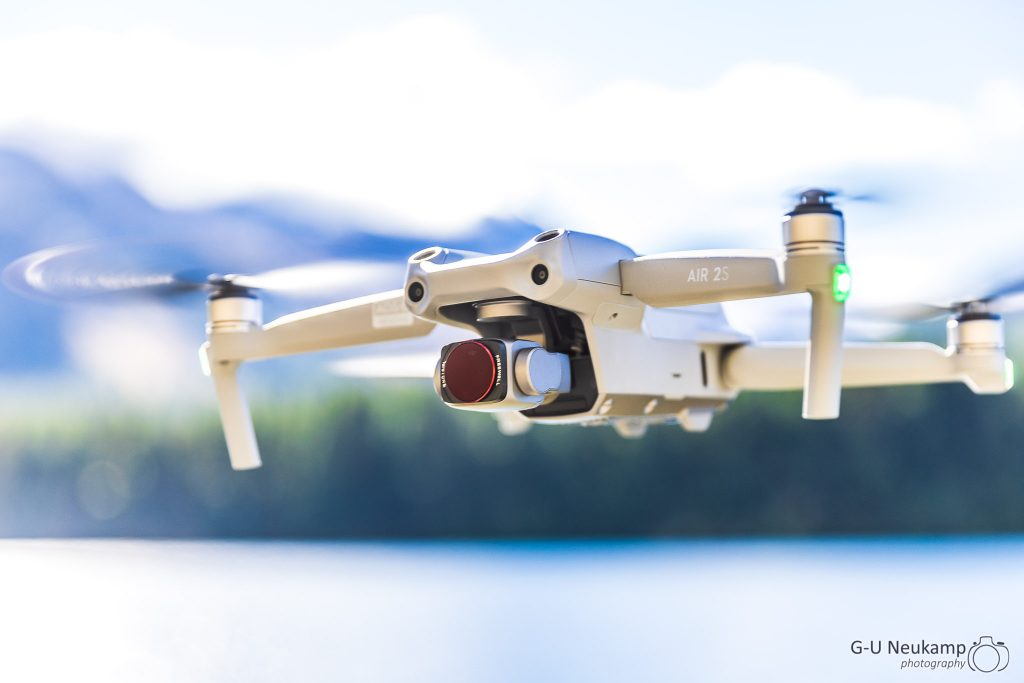
Unlike the Mini 2, the Air 2S offers an easy option to use filters in front of the lens. The “Fly more combo” already comes with 4 ND filters from ND4 to ND32. However, these are actually only necessary in video mode. However, a polarizing filter is useful in landscape photography, which I use practically all the time in sunshine. I have already dealt with this in more detail in my previous drone article and also here, so I won’t repeat it here.
Exposure bracketing
In addition to single shot mode, the DJi Air 2s also supports continuous shooting, interval shooting and exposure bracketing (AEB) with 3 or 5 shots in increments of 2/3 stops. I have also developed the above image as an HDR from 5 AEB shots in Lightroom:

To be honest, thanks to the high dynamic range of the 1″ sensor, I don’t see any significant gain here. However, the function has the advantage that you can select the optimally exposed image from the exposure series for further processing. This is the image that just has sufficient detail in the highlights. In this case it was the image exposed with +2/3. I therefore use the AEB mode frequently and with pleasure.
May it be a little more?
As mentioned above, I am used to the EOS R5 with its 45 megapixel resolution. I also have wider-angle lenses (up to 14mm) available there, which I like to use frequently, especially for landscape shots. Even before that, I often created panorama shots from several single shots with my cameras, e.g. here. Even most current mobile phones have such a function, where you pan the phone slowly from side to side.
This function is also supported by the DJI Air 2s, which even performs it completely automatically. Since the drone rotates optimally on the spot, there are also practically no parallax errors, which often make post-processing of conventional shots without a tripod very difficult.
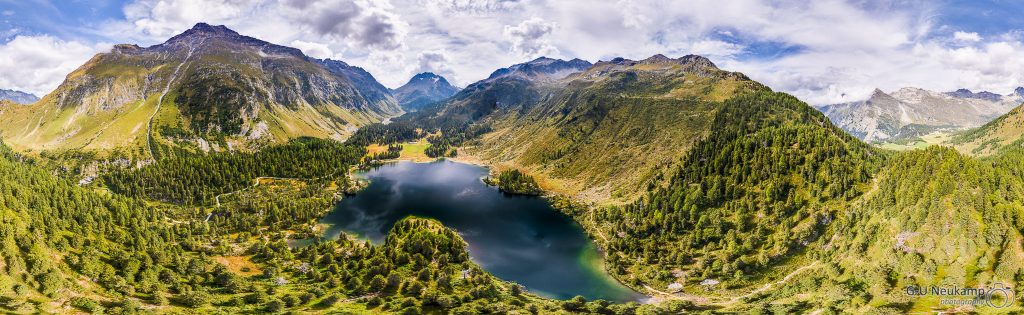
The DJI Air 2S offers 4 panorama modes:
- A wider angle panorama from 9 shots (3x3)
- A horizontal 180° panorama from 21 shots (3x7)
- A vertical panorama from 3 shots
- And an almost complete spherical panorama of 26 shots.
“Almost complete” because the camera can only tilt up about 30° due to the rotors and the central part of the sky is therefore missing from the image. By default, the Airs 2S can also stitch the panoramas itself, but this again only generates a JPG file and sometimes only works insufficiently.
Therefore, I always compose the individual shots myself from the created individual DNG files. To do this, I either use the panorama mode available in Lightroom Classic or, for more complex panoramas, the specialized program PTGui, which offers many more options and can, for example, also create the so-called “Little Planet” panoramas. I like and often use the 3x3 panorama, which gives an image width comparable to a 14mm lens:
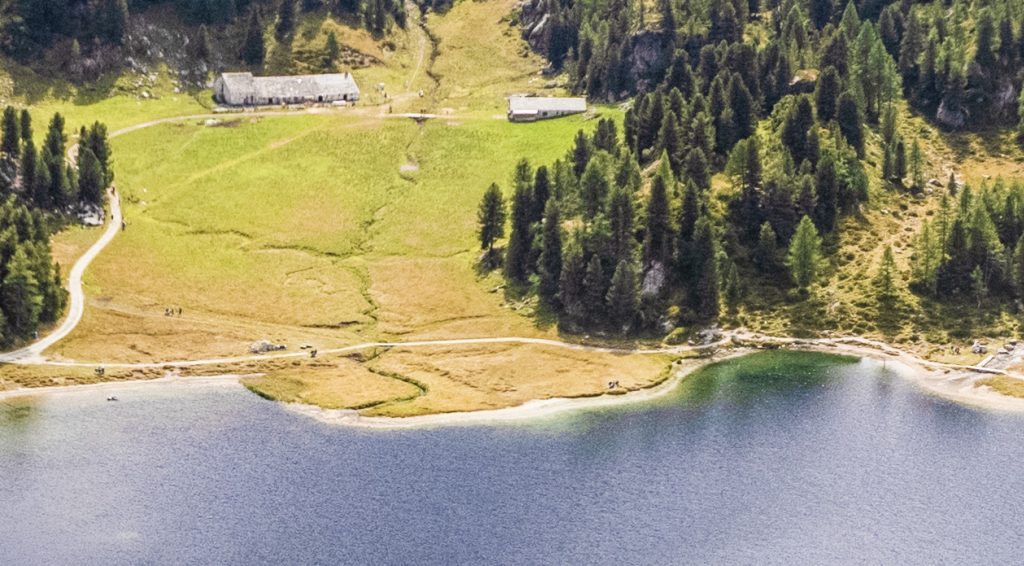
By stitching the images together, the pixel count of the created panorama is also increased. The processed panorama above has a resolution of 9736x6060 pixels, i.e. 59 megapixels. The image can be printed as a large format poster without any problems. Here is a detail of the above image in 100% resolution:

By the way, I deliberately use the automatic exposure of the Air 2S in panorama mode. The individual images are then exposed differently (in the above series from 1/100 to 1/320). However, each individual image uses the dynamic range of the sensor optimally. In my experience, the unavoidable differences in brightness of the individual images are excellently compensated by Lightroom Classic and PTGui when stitching them together.
Little Planet
A special form of presenting a 360° panorama is the so-called “Little Planet”. The image section shown in this way corresponds approximately to the image of a 180° fish eye directed downwards. The resulting round panoramas look like little planets. This effect can be created very easily from the images taken with the “Spherical Panorama” function of the Air 2S using the panorama program PTGui:

The effect is amazing. For comparison, here is a conventional 360° panorama in landscape format created from the same shots:
Since the image was created from 26 individual shots, the level of detail is almost unbelievable. The original panorama in landscape format has a size of 21560 x 6627 pixels, i.e. more than 140 megapixels. The “Little Planet” panorama even reaches 29232 x 22160 pixels, which is almost 650 megapixels. The sharpness is still very good even at pixel level, as the following 100% crop from the image above shows:
A real pleasure for every pixelpeeper!
And in darkness?
I had already expressed my concerns about the low-light capabilities of the 1″ sensor in the Air 2S above. I already know this from my Sony RX100, which I don’t like to use with higher ISO values. In fact, noise artifacts are already visible at ISO values of 400 on the DJI Air 2S:
Here is a detail of the image above in 100% magnification:
Although noise reduction in Lightroom can still improve the picture, this is always at the expense of details. In my opinion, you should not go beyond ISO 400.
What really impressed me about this shot, however, was the fantastic stabilization of the camera by the gimbal. Since the above image was not blurred despite a relatively long exposure time of 1/13 in windy weather, I wondered whether longer exposure times are still usable.
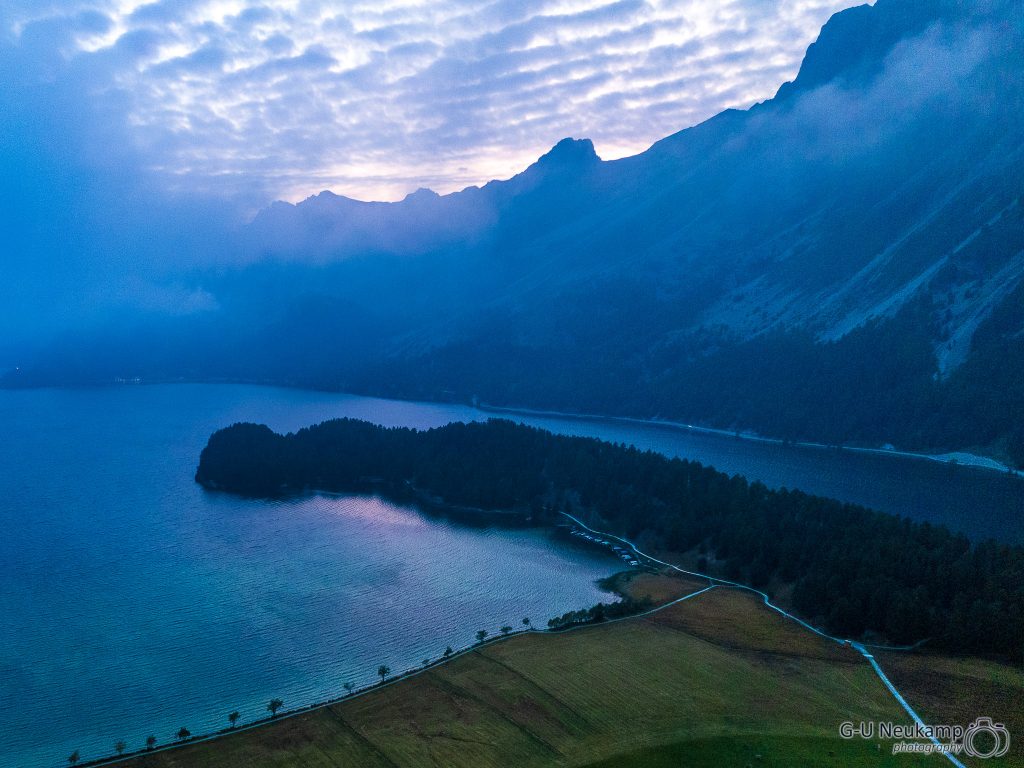
Long time exposures
For this purpose, I have chosen the Maloja Pass in Bergell as a test subject. Here a pass road goes very steeply from the Engadin (approx. 1,800m) down into the Bergell. The road has very narrow serpentines, which should look very impressive from a bird’s eye view? So I drove there one evening and tested long time exposures with up to 10 seconds exposure time. Even with this long exposure time, at least 50% of the shots were sharp, another 25% showed slight blurring, but were still usable. Overall, a very impressive performance of the small drone. Here is a nice example:

And again the 100% crop from the above image:


And for comparison the blurriest image from my series of 6 shots with 10 seconds exposure time each, again in 100% magnification:
Finally, I overlaid the individual shots created in this way in Photoshop to include the light traces of the vehicles. After further processing, the final result looks like this:

Resumée
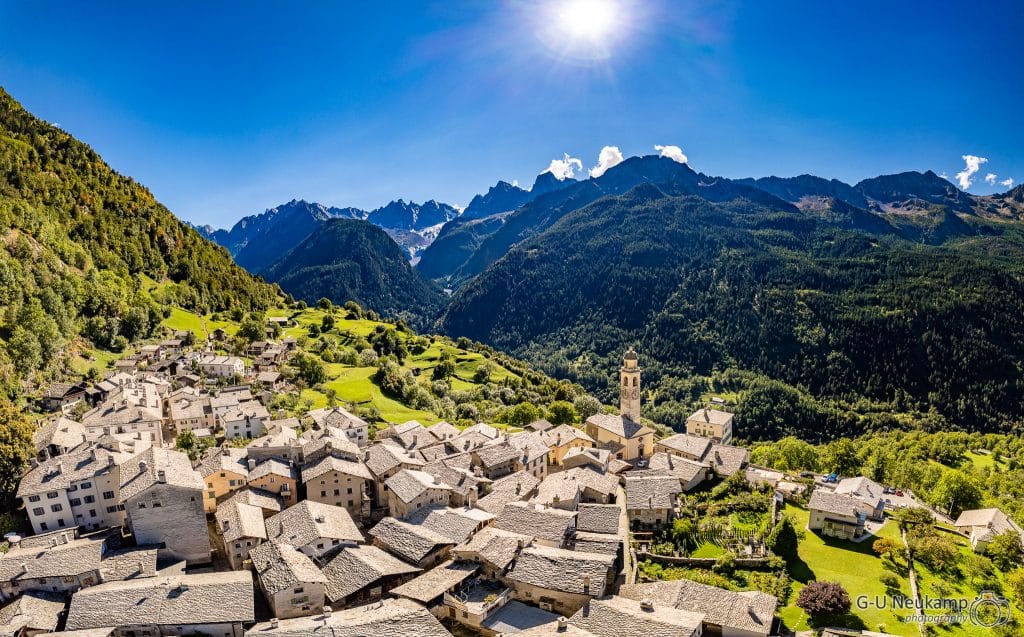
During our trip to Switzerland, the new DJI Air 2S has changed my photo habits significantly. In fact, during the 2 weeks, I took twice as many pictures with the drone as with my EOS cameras. This is largely due to the fact that I often used the panorama mode, which resulted in 9 - 26 individual shots. After processing the photos, the quality of the images excites me more and more. I have therefore selected for a new photo calendar this time exclusively images that were taken with the drones.
Who wants to see more drone images in higher resolution: My new calendar ” Schweiz - Engadin und Bergell” with 13 drone images is now available in the formats Din-A2 to Din-A5 at Calvendo or also via amazon*. It is in german language, an english version will follow soon.
Particularly impressive are the images in the format Din-A2 as a fine arts print.
*= Affiliate Link

excellent review of the Air 2s. How will it compare with the Air 3s
Hello Robin,
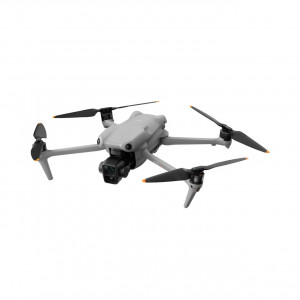
the Air 3s is better in almost every Aspect:
🎥 Camera & Image Quality
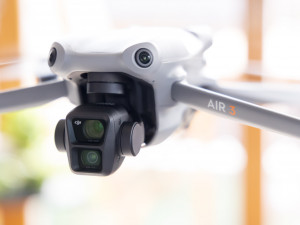
Dual‑camera setup: The Air 3S features a wide-angle + medium tele configuration (equivalent to 24 mm and 70 mm), whereas the Air 2S only has a single 1″ camera. This unlocks creative zoom options and richer framing flexibility
Sensor size & imagery upgrades:
Air 3S: Wide-angle sensor with 1″, capturing 50 MP photos, 14‑stop HDR, plus a 1/1.3″ tele with 48 MP
Air 2S: A single 1″ sensor with 20 MP stills and 5.4K/30 fps or 4K/60 fps video
Low-light & dynamic range: Air 3S wide-angle 1″ sensor + f/1.8 aperture offers significantly better low-light performance and dynamic range than its predecessors
🔋 Battery & Flight Time
Air 2S: Up to ~31 min flight time (3,750 mAh)
Air 3S: ~45 min (4,276 mAh), a big leap over the 2S
Charging convenience: Air 3S-series batteries are USB‑C rechargeable in‑drone and are compatible with smart charging hubs
🛡️ Obstacle Avoidance & Safety
Air 2S: 4‑way sensing (forward/back/up/down) with APAS 4.0
Air 3S: Adds LiDAR + infrared sensors for Nightscape and omnidirectional obstacle sensing – significantly better performance in low-light/night
📶 Transmission & Range
Air 2S: OcuSync 3.0, 12 km max range, 1080p/30 fps feed
Air 3S: Upgraded to OcuSync 4, up to 20 km range, 1080p/60 fps feed
⚙️ Other Upgrades
Storage: Air 3S include internal storage (42 GB) alongside microSD; Air 2S has only 8 GB
Intelligent flight features: Air 3-series brings ActiveTrack 5.0 and Waypoint mode, which Air 2S lacks (it used ActiveTrack 4.0)
Performance: Slightly heavier (~720‑724 g vs. 595 g), faster top speed (~47 mph vs. ~42 mph), and a more refined controller (DJI RC 2 with better video transmission)
The Air 3S delivers the best blend of features: it merges the Air 2S’s superior sensor size with the Air 3’s dual-lens system, adds robust low-light performance, night-time safety via LiDAR, longer flight time, improved range, and smarter flight modes. If you’re after top-tier image quality, enhanced safety, and creative flexibility — with just under 45 min of flight time — the Air 3S is a significant and rounded upgrade.