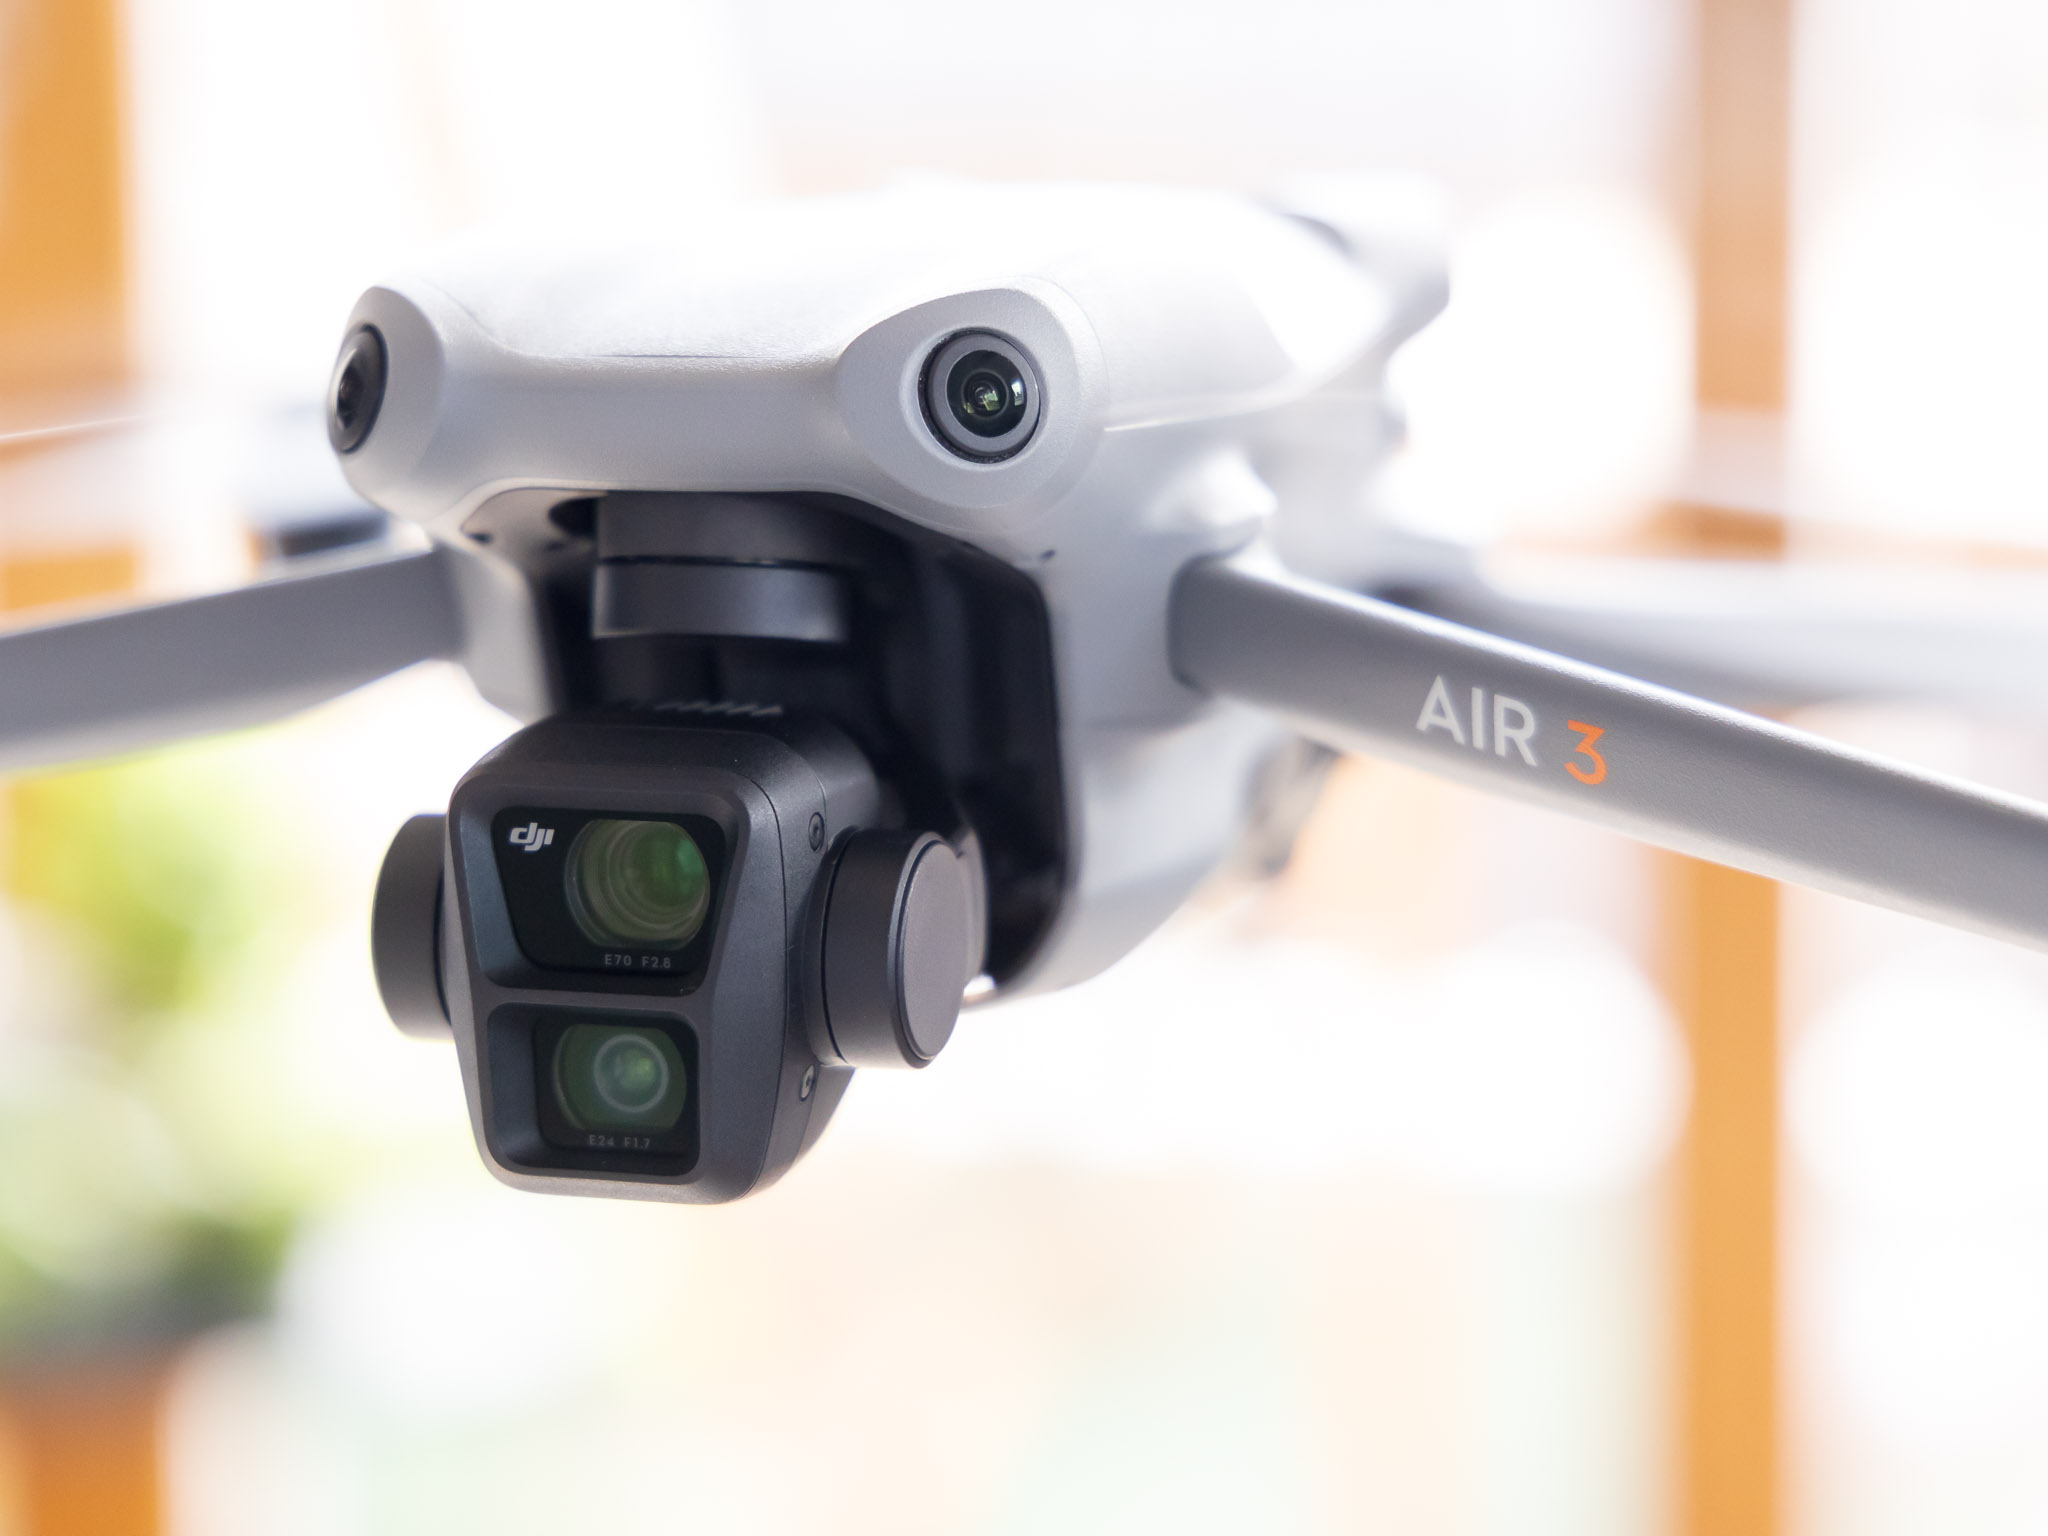
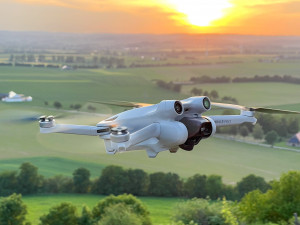
As I had already reported here, I ordered the new DJI Air 3 directly on its day of release. Meanwhile, the new drone has arrived here. Unfortunately, the weather was not very good in the past few days, so I had only few test opportunities. Therefore, here is a somewhat delayed report on my first impression from the perspective of a photographer.
I have again directly ordered the DJI Air 3 Fly-More-Combo*, which includes the drone and the remote control, two additional batteries, an ingenious 3-fold charging dock, spare propellers and a shoulder bag in which everything fits together. To be on the safe side, I also signed up for the Care Refresh package for 1 year, as I have done with all my DJI drones so far. Although I have never had to use this, it gives a certain sense of security.
I do not want to report about the unboxing here, there are already countless videos about it on YouTube. I also expect the rough technical specifications to be known.
Unpacked, the drone makes a very high-quality impression. I already had the predecessor model, the Air 2s. The Air 3 has become significantly larger and heavier, which is especially noticeable in direct comparison with the tiny Mini 3 Pro. The rotor arms fold out further, and the rotor blades have become even larger than on the predecessor. Everything seems extraordinarily stable, the joints have a good resistance when unfolding, nothing wobbles.
C1 certification
In the EU, the new Air 3 is already certified in the C1 drone class at the time of delivery, as confirmed by a sticker on its bottom. That still allows it to fly in the Open A1 category after January 1st, 2024, when the new EU drone regulations will come into effect. Open A1 is the category with the least restrictions, where previously only drones under 250 grams were allowed to fly. More information on drone categories and classifications is available directly from the local aviation authority, in Germany this is the Luftfahrtbundesamt (LBA).
To operate the Air 3 in the EU, however, you must be in possession of the small EU drone pilot’s license (EU certificate of competence) and be registered as a drone pilot at your federal aviation authority, in Germany the Luftfahrtbundesamt. Then you are allowed to fly with the DJI Air 3 in the EU drone class C1 even in the vicinity of people. Also, the minimum distance of 150 meters from residential and commercial areas no longer has to be maintained. However, unlike with drones weighing less than 250 g, uninvolved persons may not be flown over with the Air 3.
Mandatory labeling
The DJI Air 3 must be double tagged before its first use:
The UAS operator ID received during registration as a UAS operator from the aviation authority must be legibly attached to the outside of the drone. In addition, it now has to be registered in the firmware of the Air 3. The drone will then permanently transmit its ID during operation. The operator ID has to be added to the DJI Fly app. Drone insurance is of course still necessary!
First flight
Because of the bad weather, my first use of the drone was delayed a bit. For the first flight, I took the drone back to our local hill, the Desenberg near Warburg. There I had already tested the predecessor model Air 2s for the first time.
As mentioned several times in my previous drone articles, I mainly use my drones for photography. This was therefore also the focus of my first tests. In particular, I was interested in the image quality of the two cameras that are now installed in the Air 3. In addition to the usual wide-angle lens, the Air 3 now also features a light telephoto lens, which is equivalent to a full-frame 70mm lens in terms of the angle of view.
This means that I now have the focal length range of my preferred 24-70mm lens on my EOS R5 available in the air as well. Here are two first shots with the two lenses:
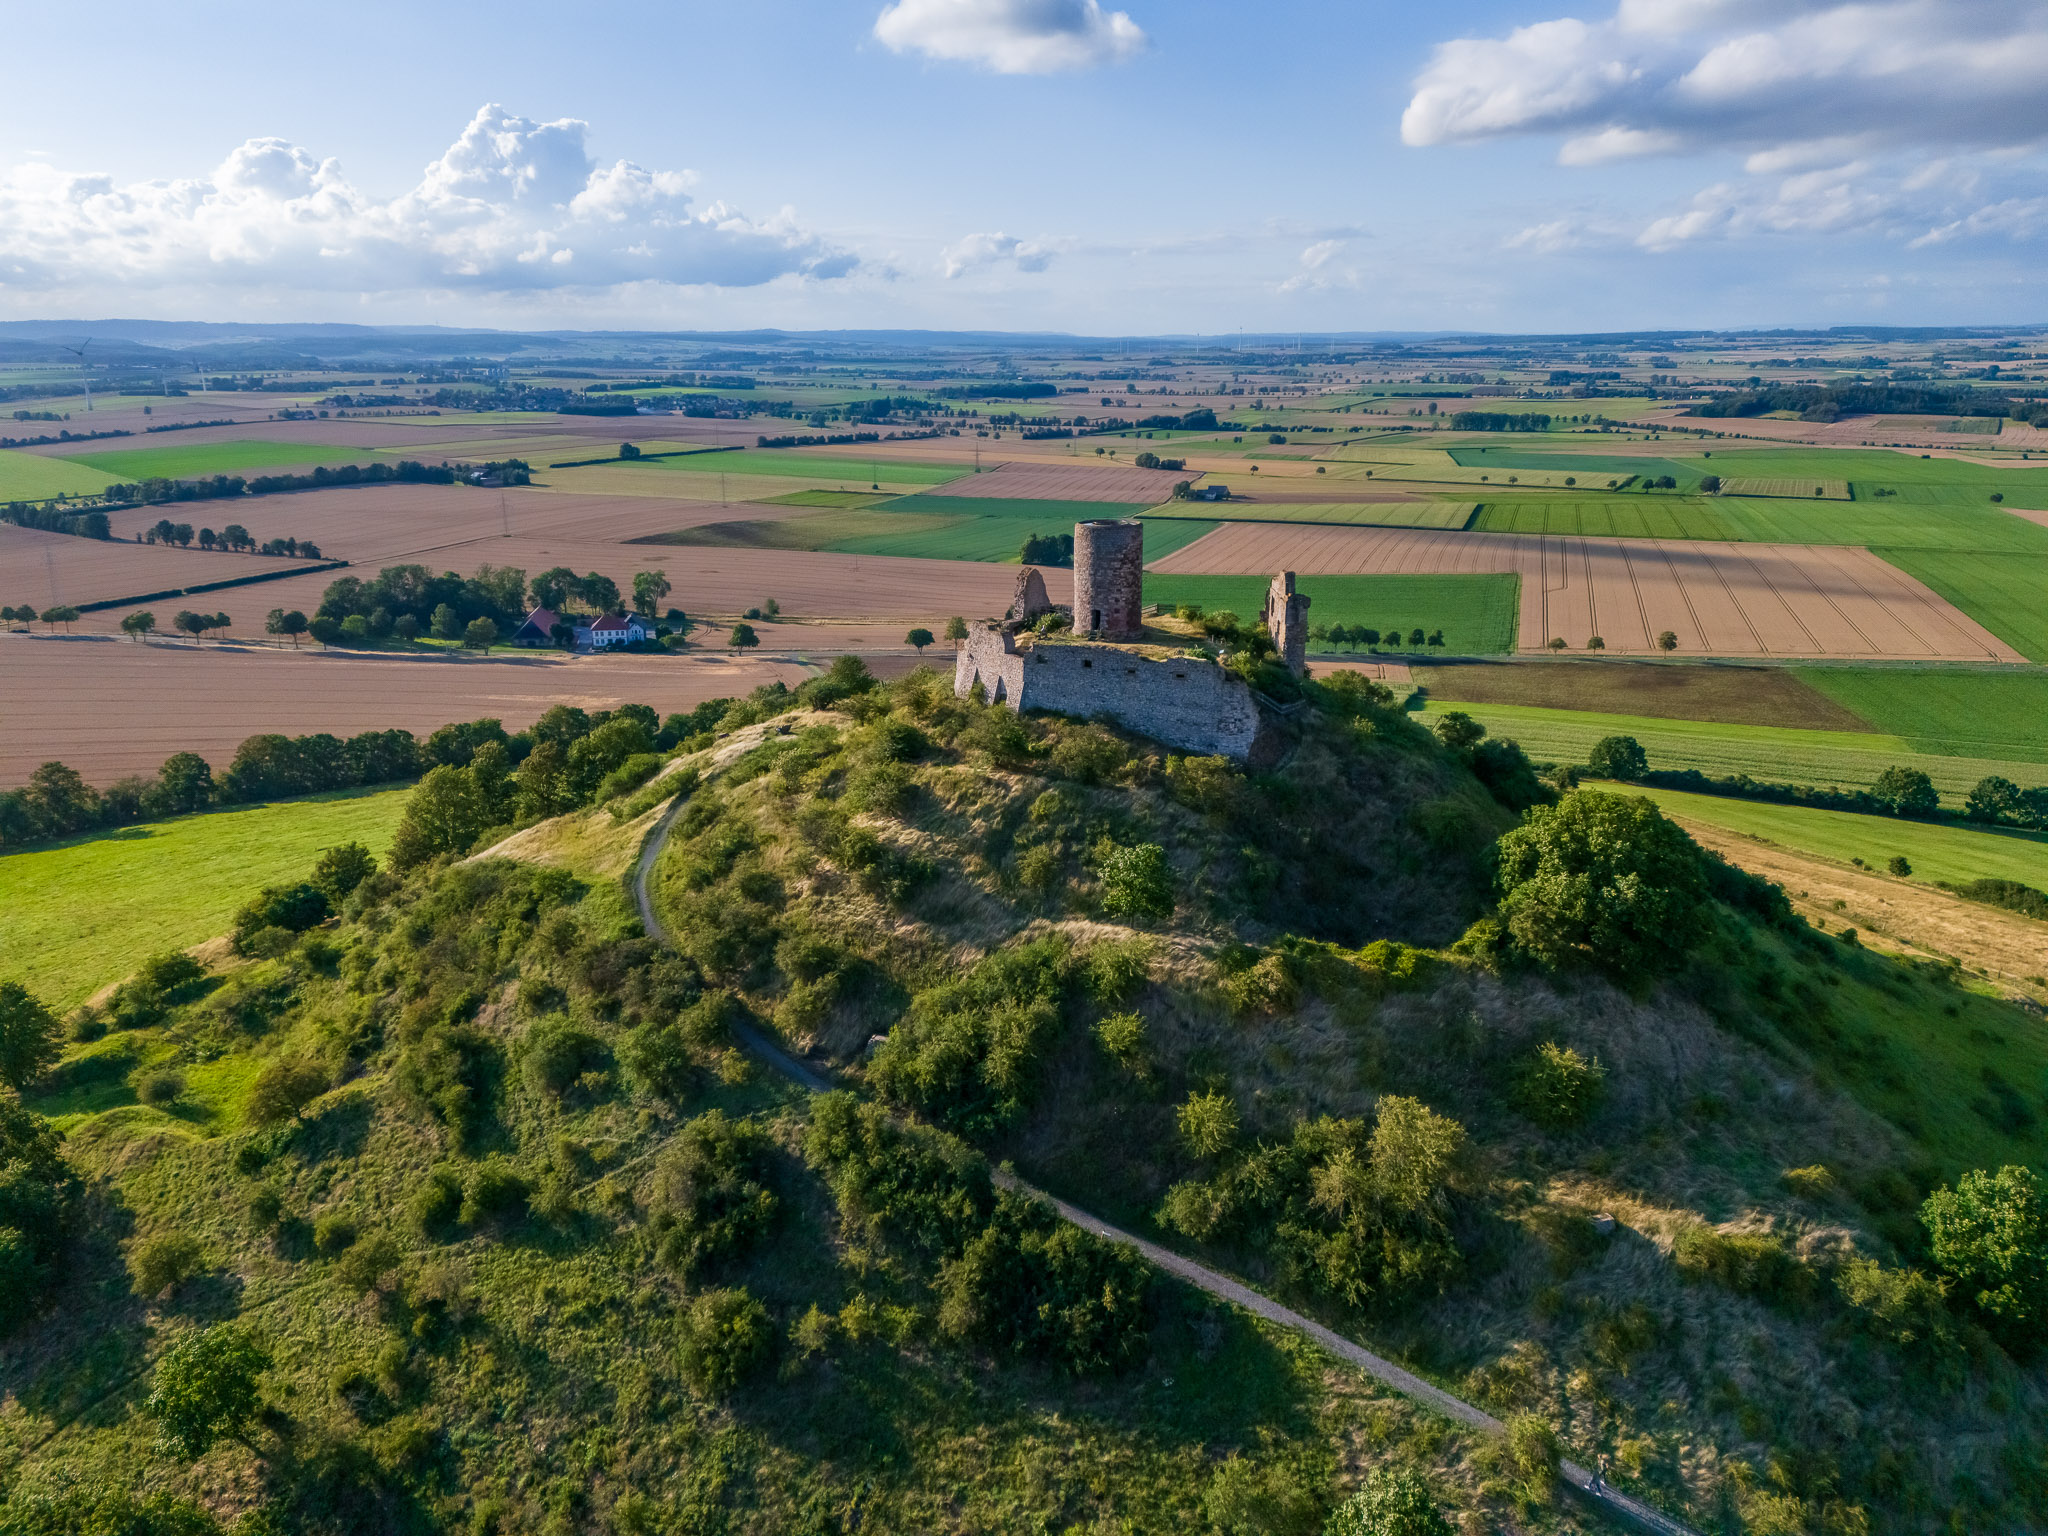
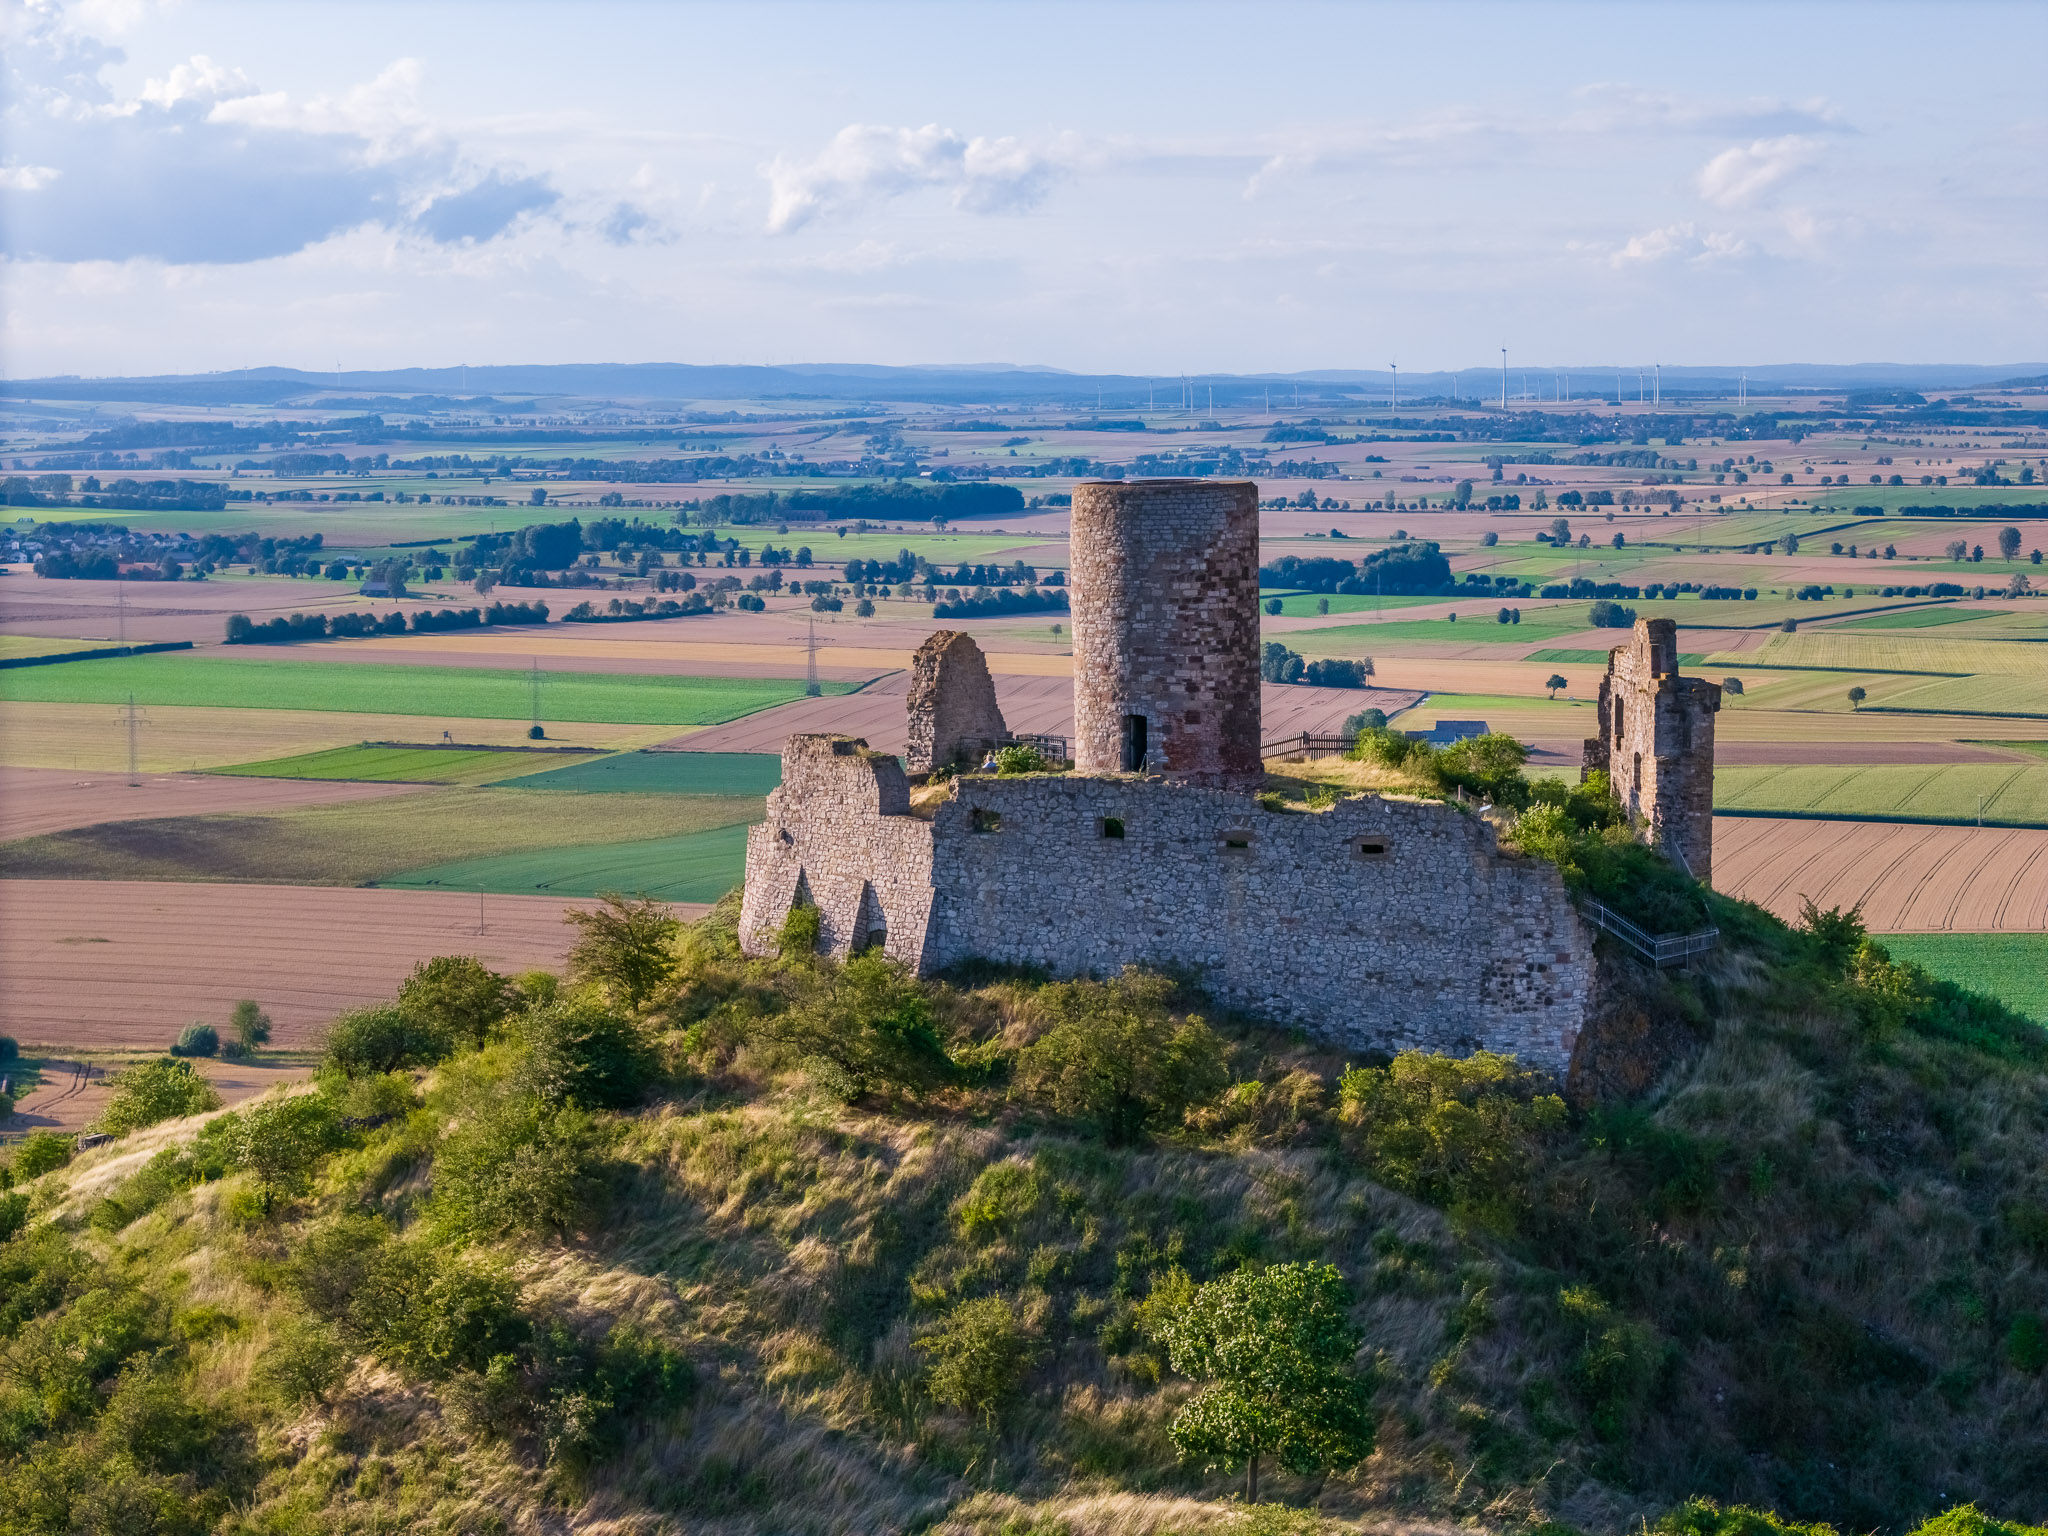
As always, I took all the shots shown here in RAW format. The DJI Air 3 allows you to save the images either as a JPG file, as a DNG file or in both formats at the same time. This is better implemented than on the Mini 3 Pro, where the JPG files cannot be turned off. Since I don’t need them, I have to delete them there manually every time.
Both images were taken with the sensors’ highest resolution of 48 megapixels. Unlike the small DJI Mini 3 Pro*, the 48-megapixel mode is now better integrated in the Air 3. It now also works with exposure bracketing (but only with 3 shots) and in continuous shooting mode.
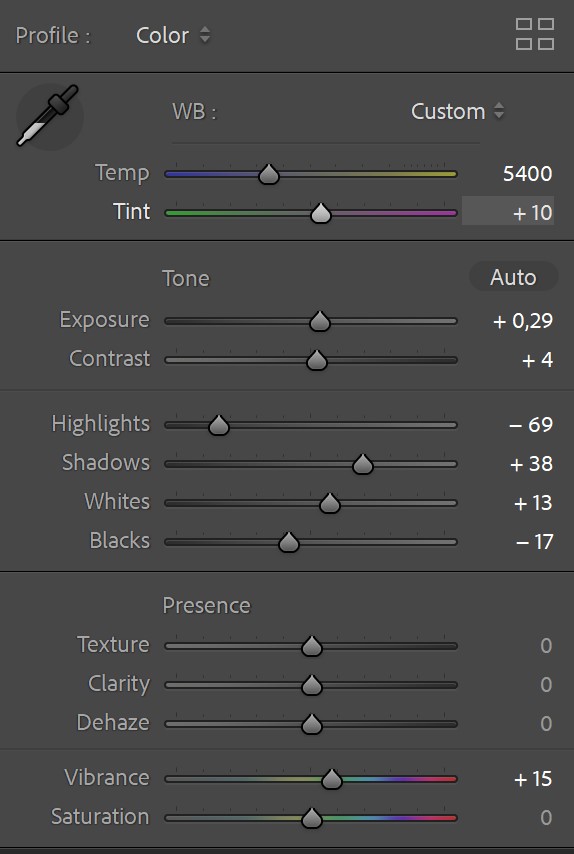
I developed both DNG files in my usual workflow in Adobe Lightroom Classic 12.4. Due to the relatively high dynamic range, the highlights were lowered significantly (-77) and the shadows were raised (+72). Since both cameras have identical sensors (stacked design, 1/1.3 inch), the color reproduction is identical, which I consider a big advantage. The longer focal length allows new perspectives with a visible compression of the background.
I consider the overall image quality of both cameras to be very good considering the small sensor size. Here are 200% crops of each of the two shots:
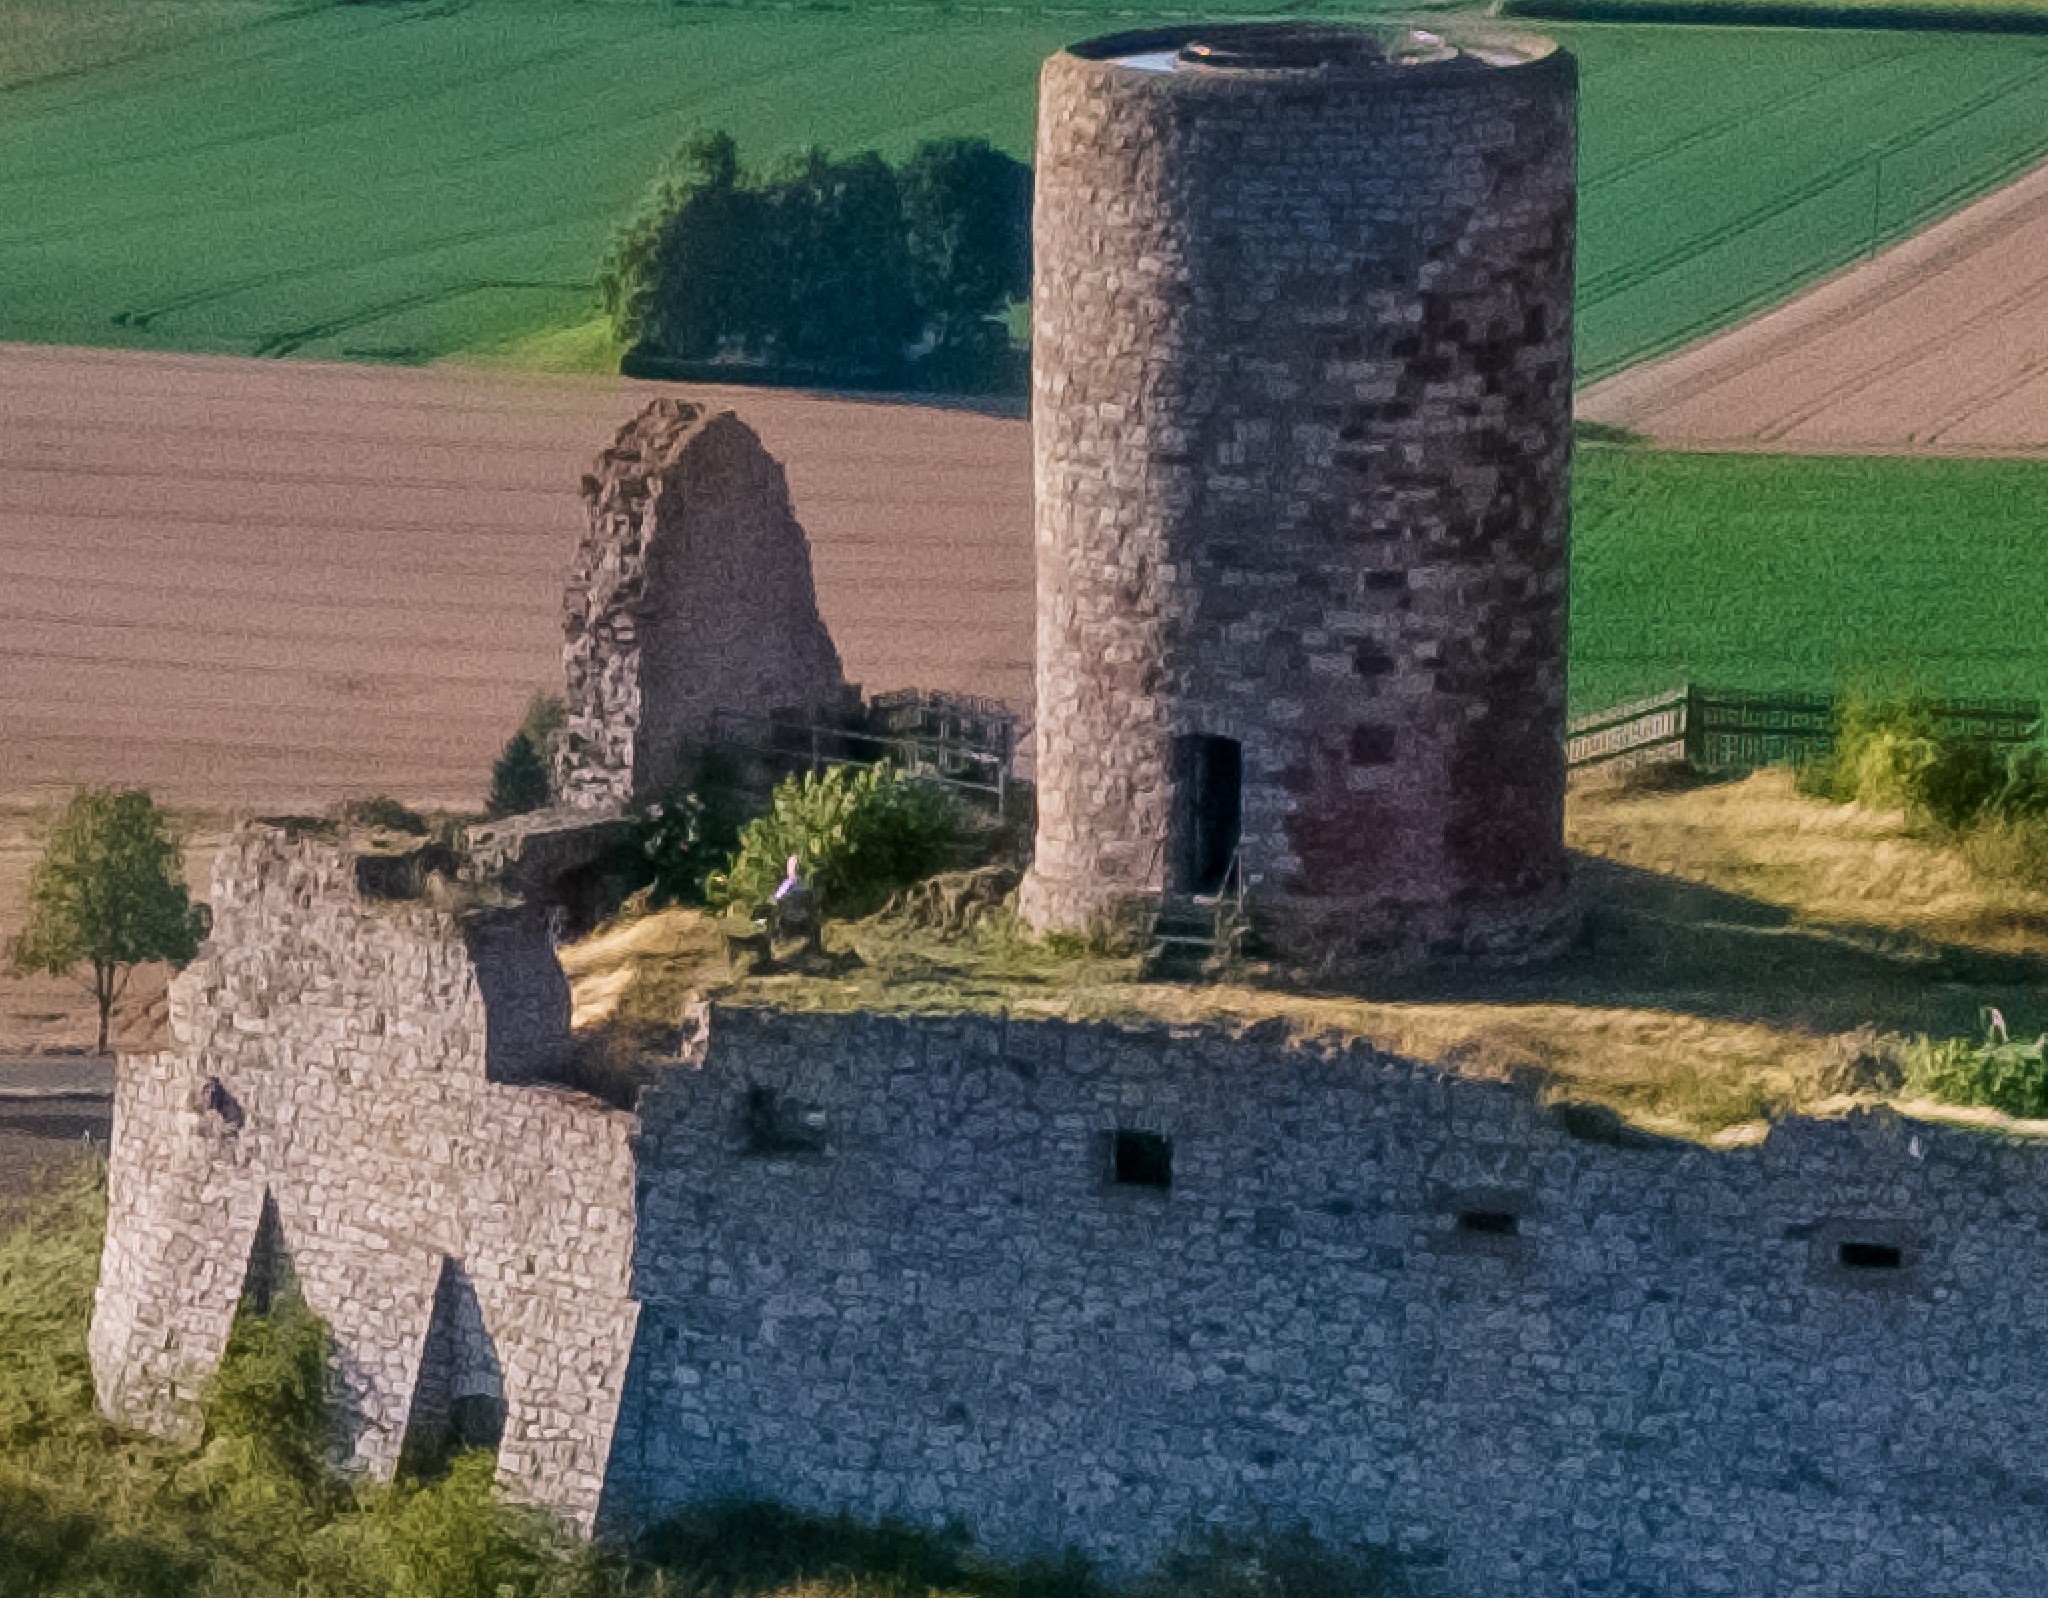
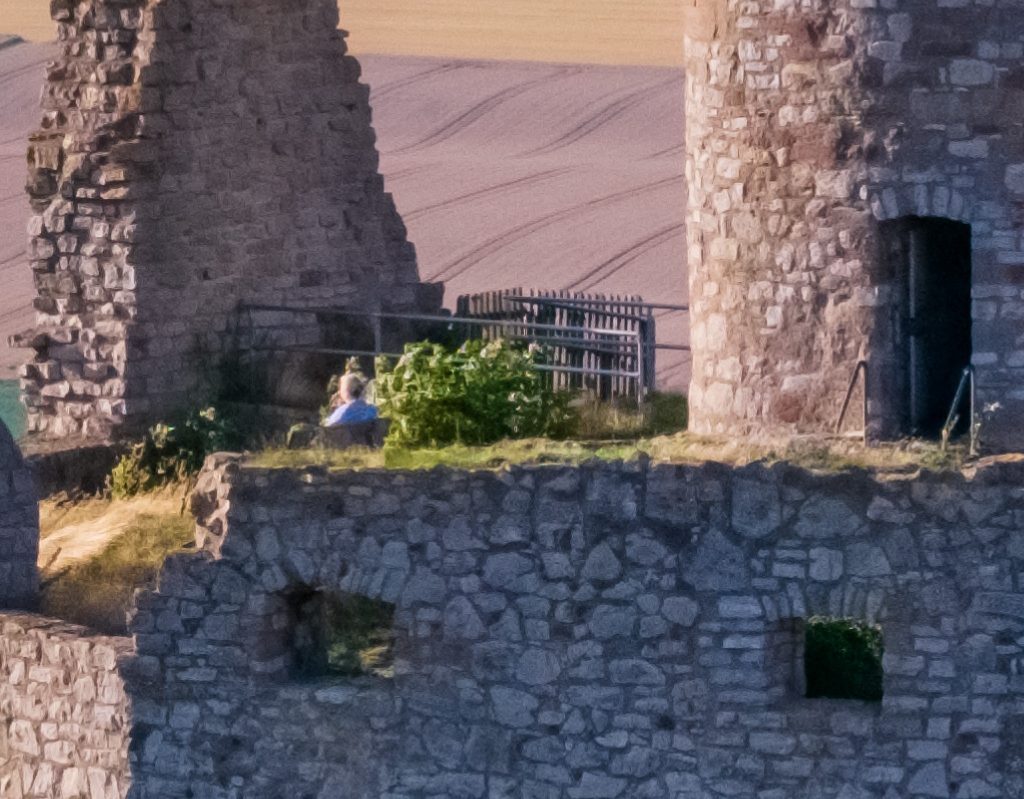
Despite ISO 100, a slight noise can be seen in both images at high magnification due to the small sensor format. Overall, however, I consider the image quality to be very appealing. I also like to use the built-in panorama modes of my drones. Here are a few processed panoramic images from my first Desenberg tour:
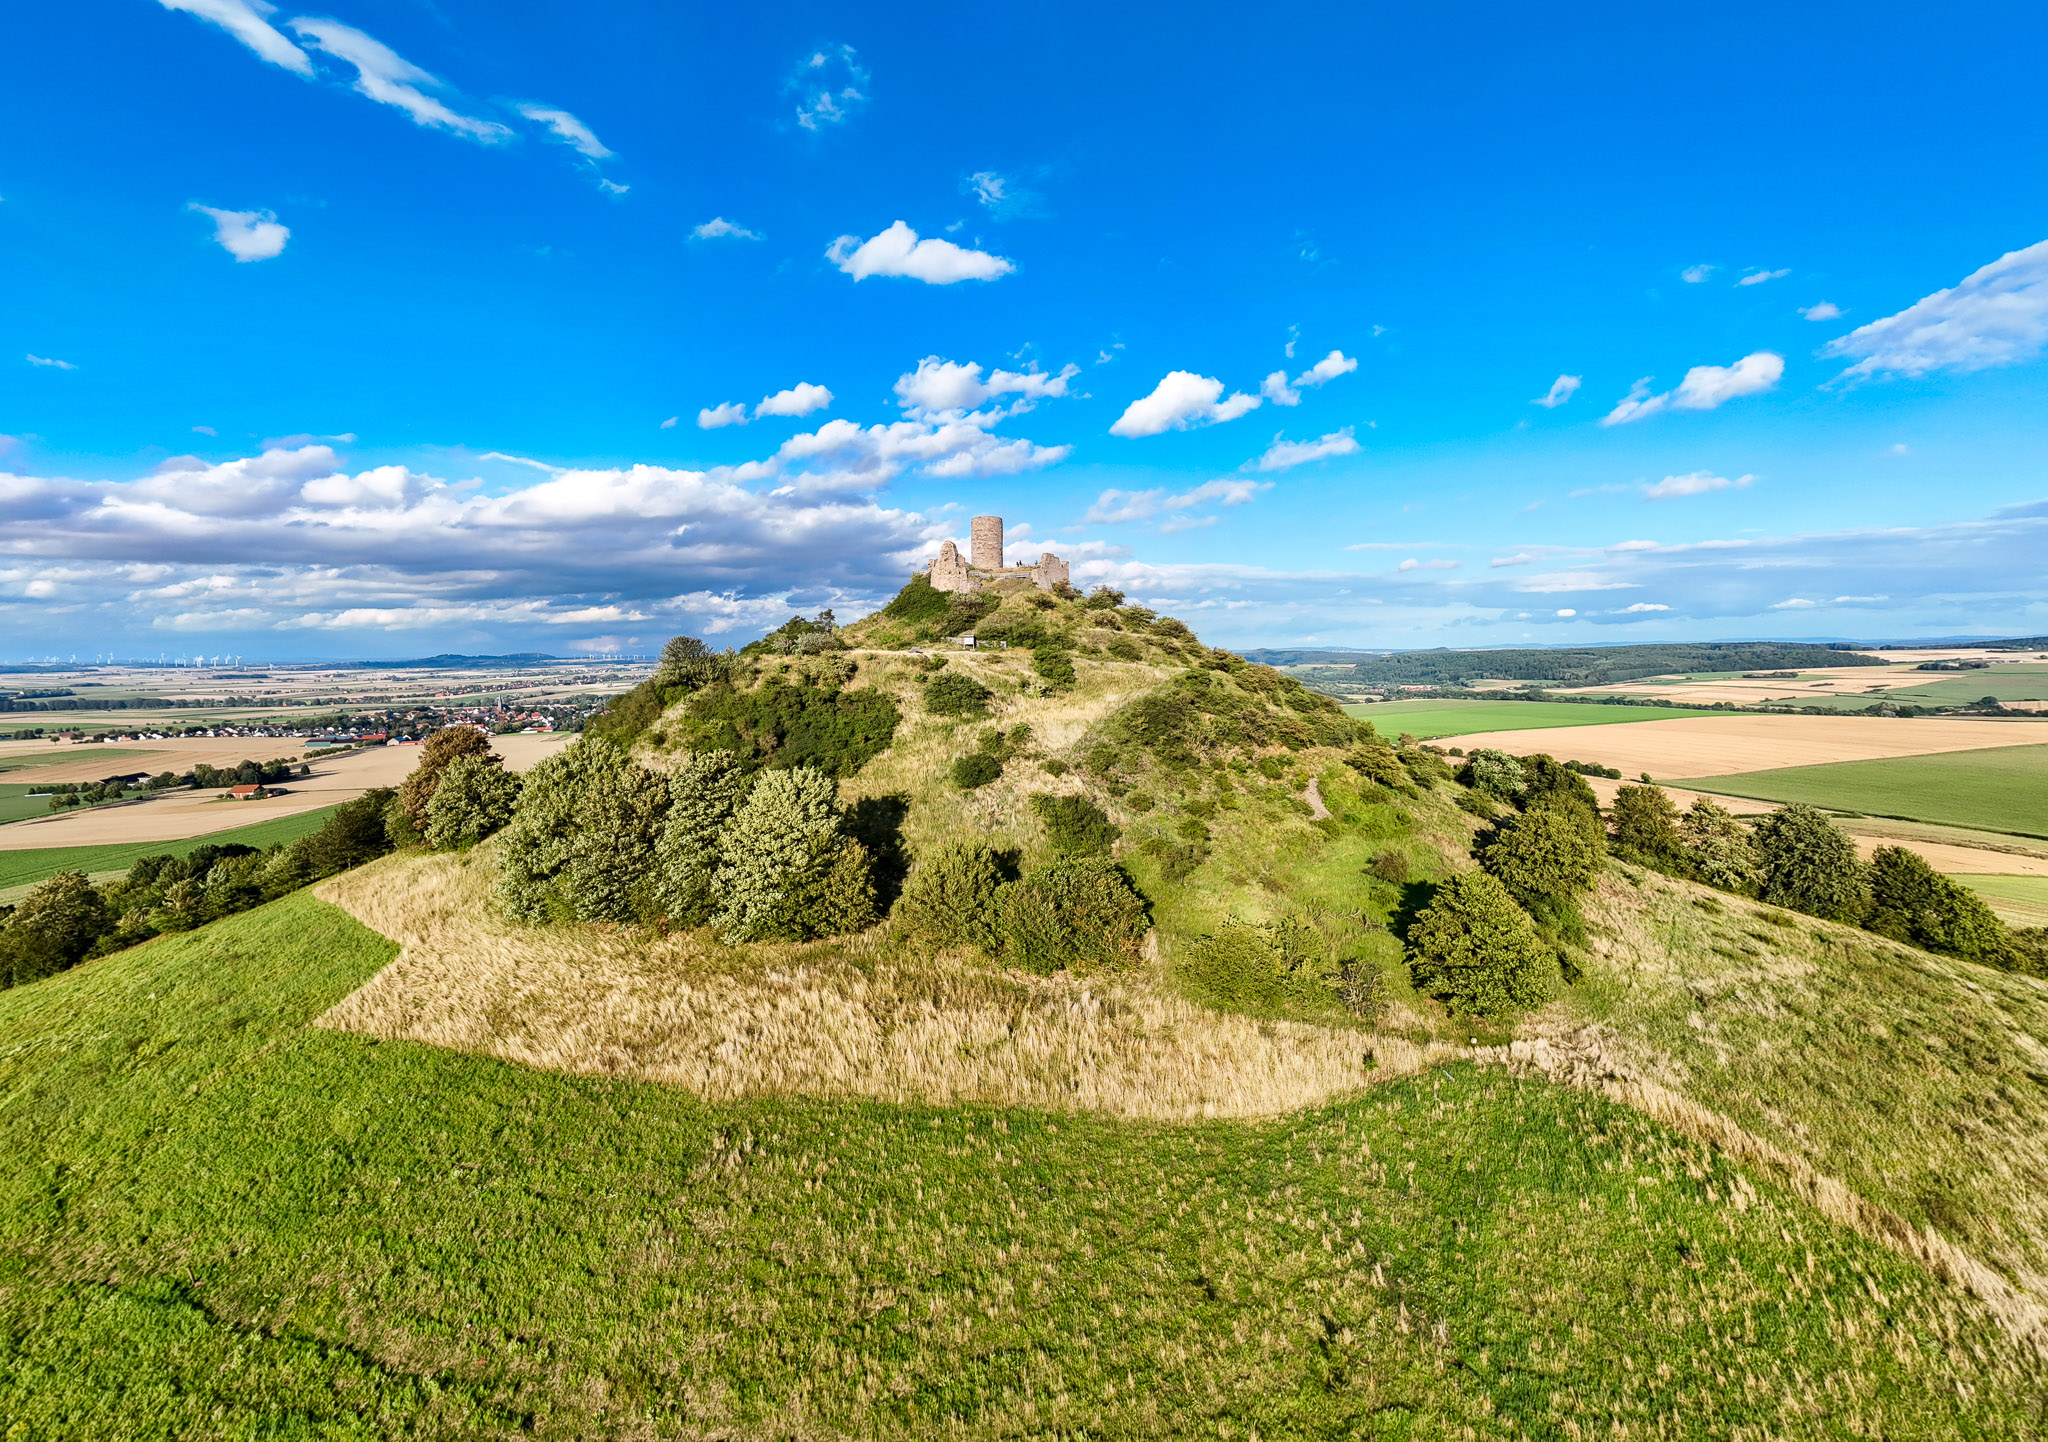
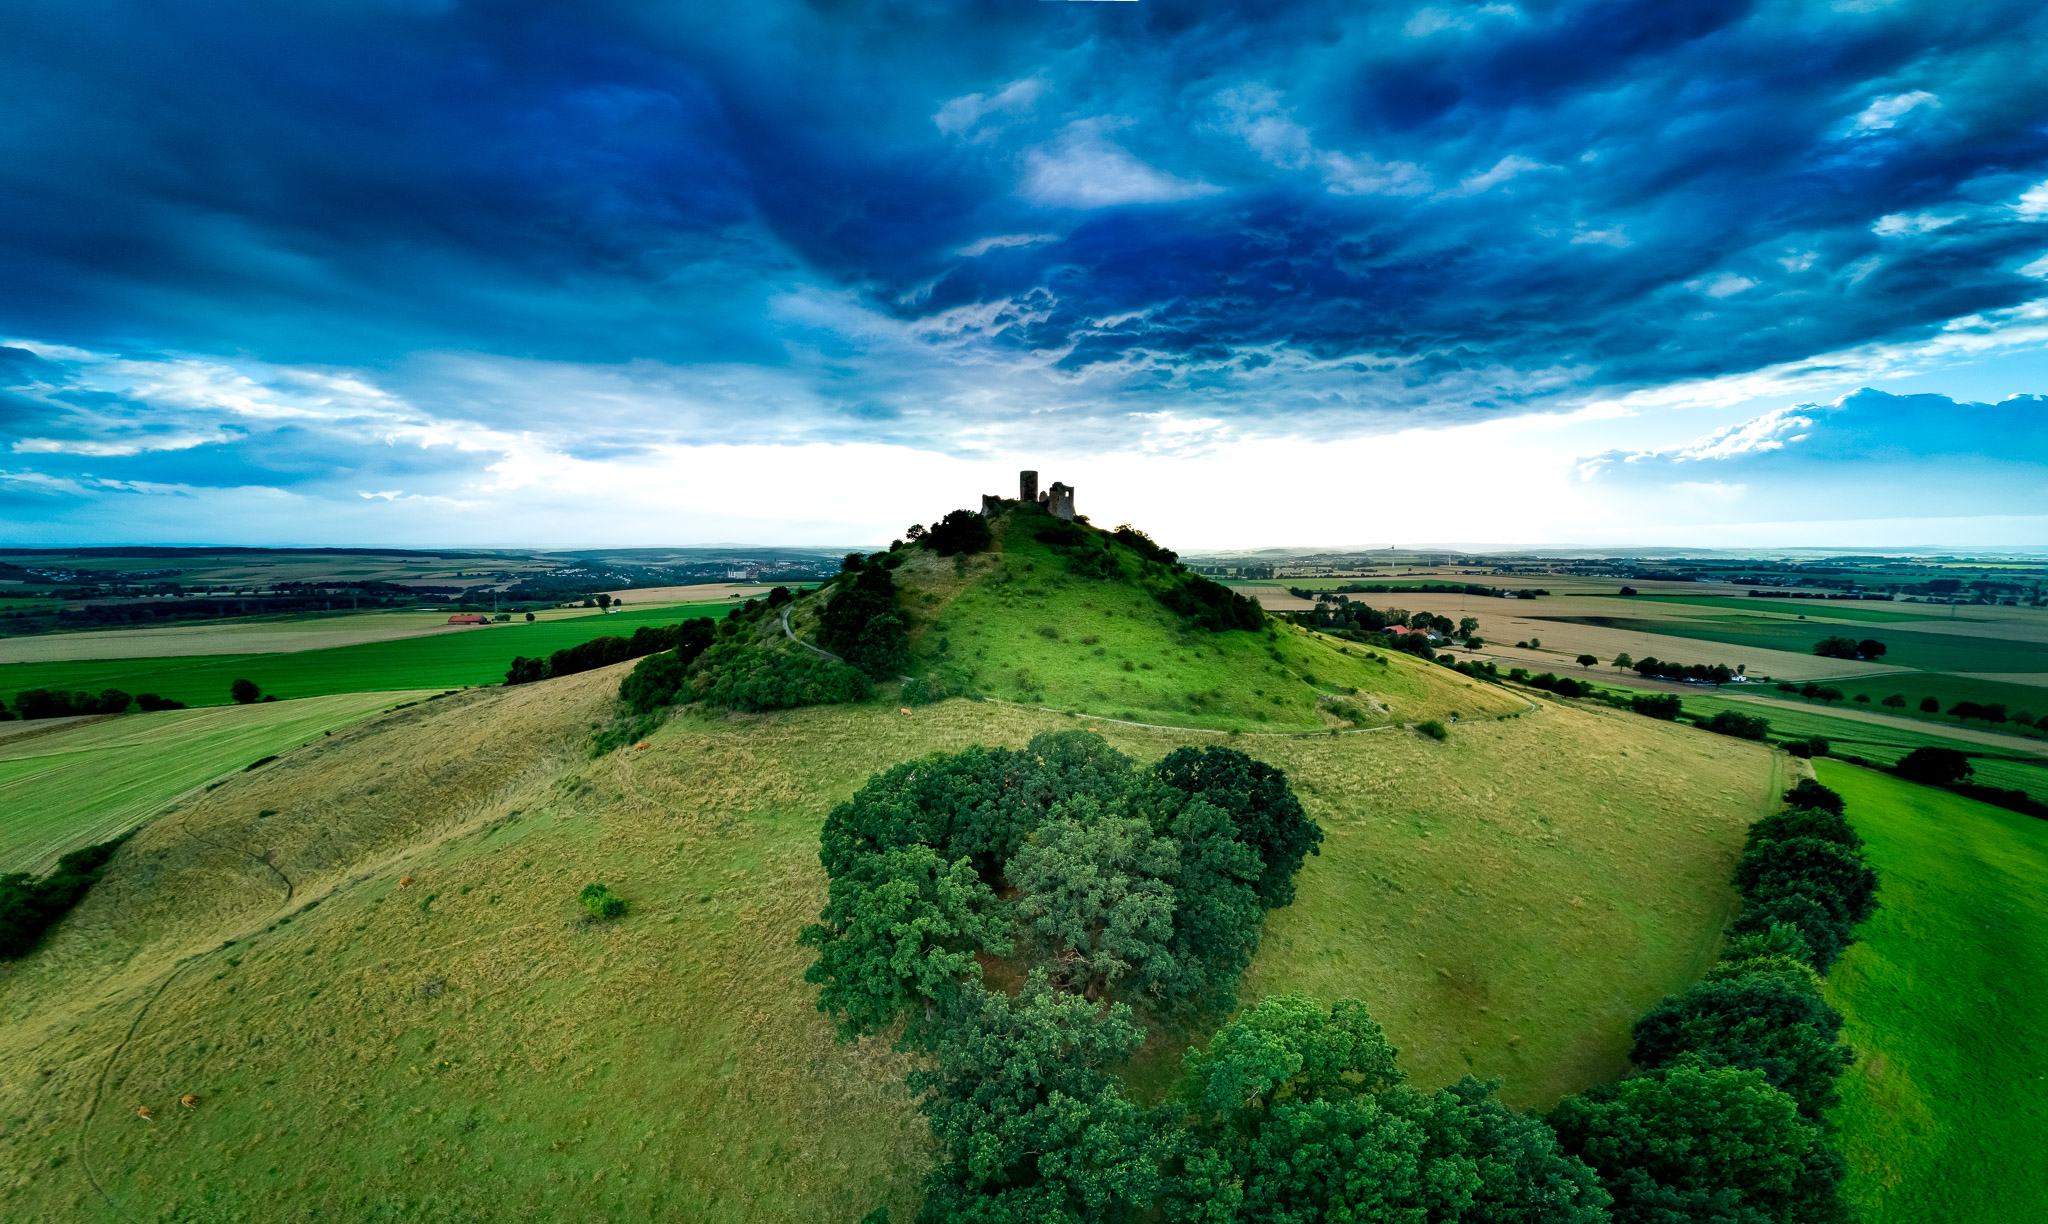
And to finish the maiden flight, a small “Little Planet” panorama I developed with PTGui from the 33 single shots in the spherical panorama mode of the Air 3:
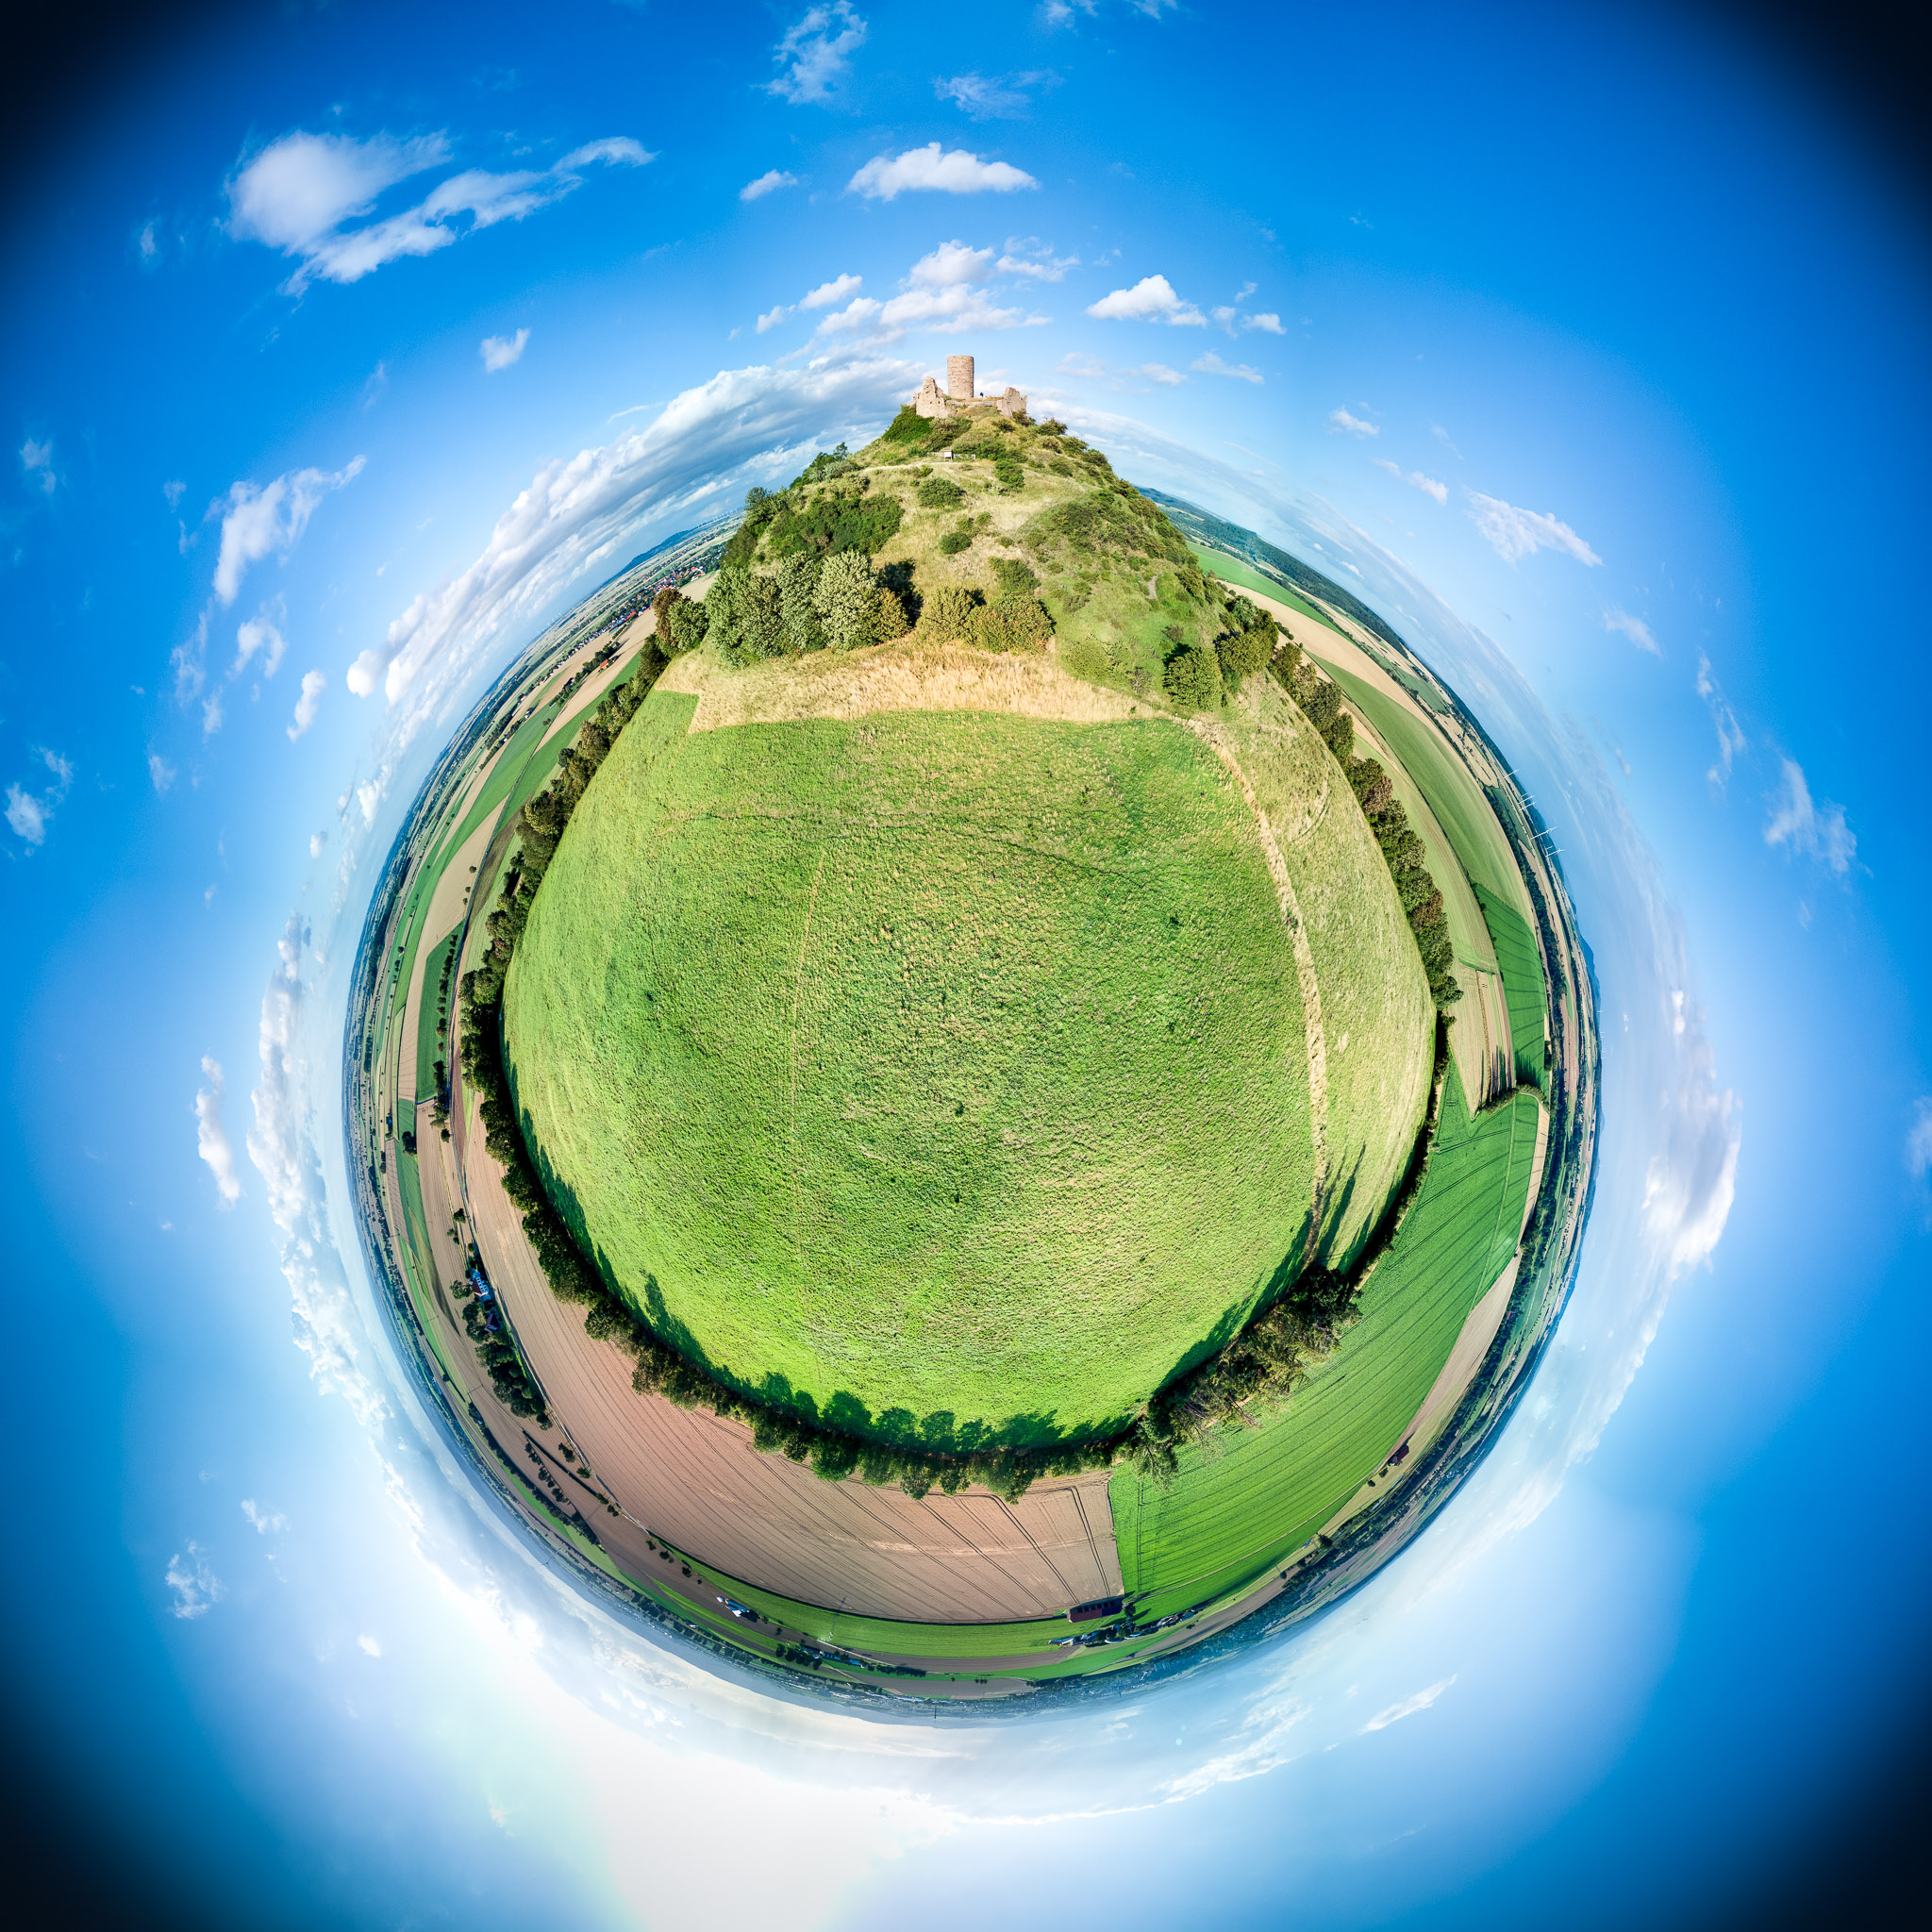
Unfortunately, the Air 3 only supports the 24mm camera in the 12 megapixel mode in panorama mode. However, this already results in a resolution of about 45 megapixels (8000 x 5632 px) for 3x3 panoramas, which should certainly be sufficient in most cases. If even higher resolutions are desired, the single images in 48 megapixel resolution would then have to be created manually.
Comparison with DJI Mini 3 Pro and full-frame camera
Since my Mini 3 Pro also has a 1/1.3 inch sensor with 24 mm KB equivalent focal length, it was only natural to compare the two cameras. According to DJI, the new Air 3 uses a new type of sensor that is supposed to deliver better image quality with the same size as the Mini 3 Pro. It is also said to be even better than the sensor on the previous Air 2s camera, which was significantly larger at 1 inch.
24mm camera
Once again, I chose the view out of my window as the test motif for better comparability. The scene may already be familiar to some from my earlier comparison test of the DJI Mini 3 Pro with the DJI Air 2s.
I positioned both drones directly above each other and took both comparative images with minimal time delay. Both images were taken with the same settings (ISO 100, f/1.7, 1/1250) and processed with the same settings in Adobe Lightroom Classic 12.4:
First, here is the complete view of the two photos:
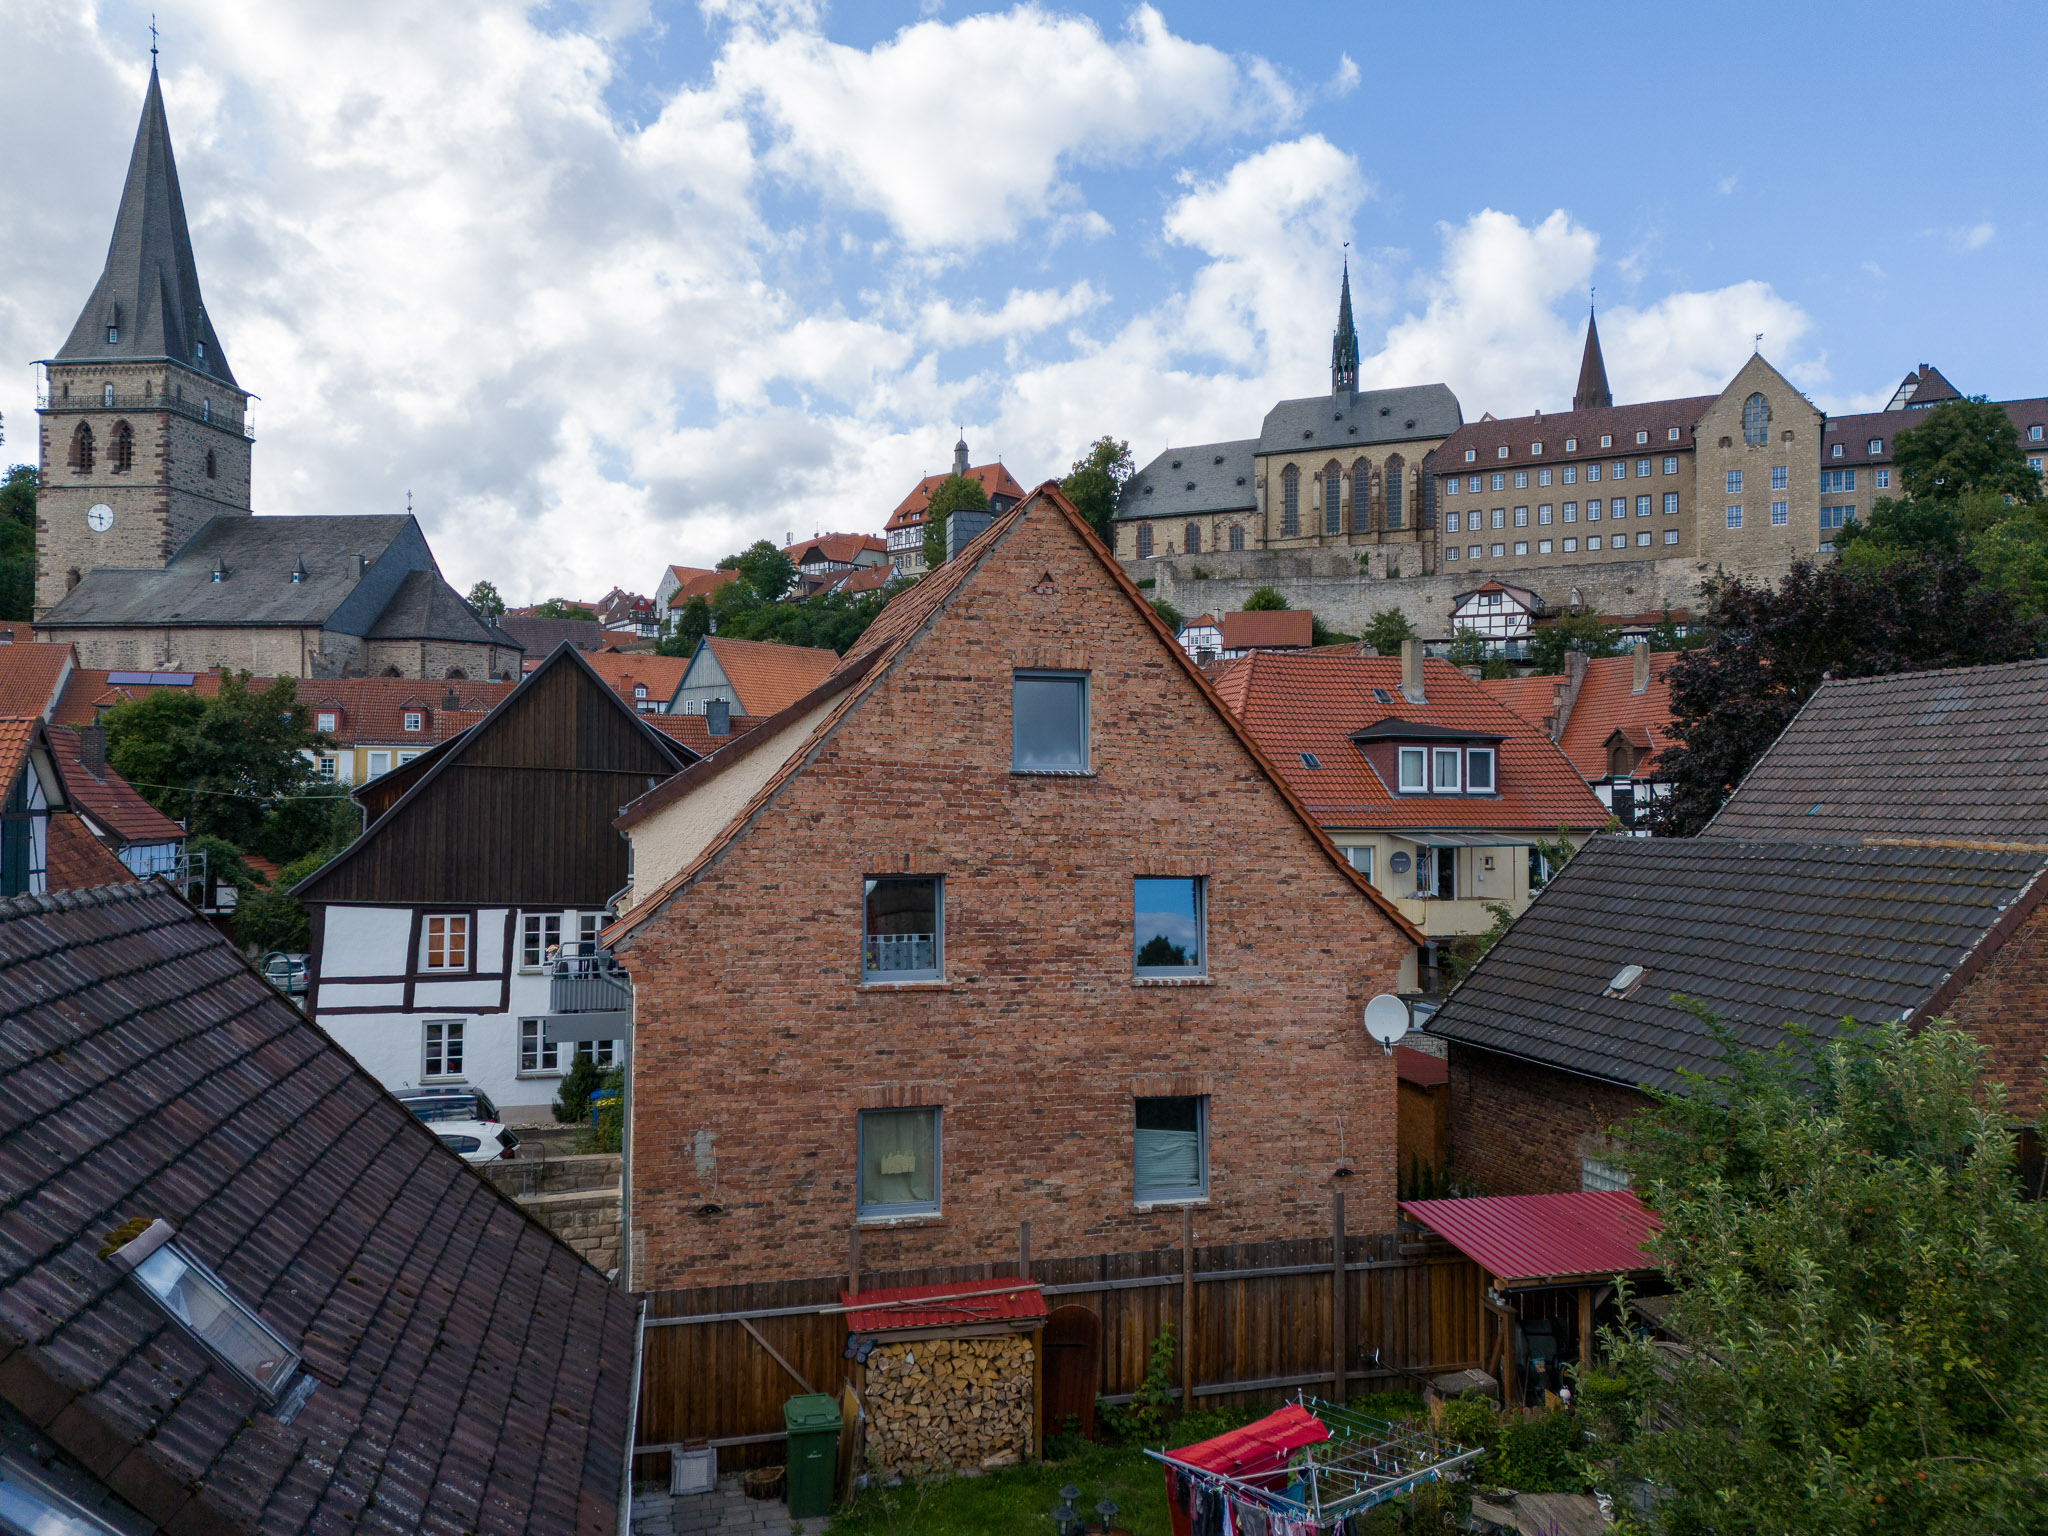
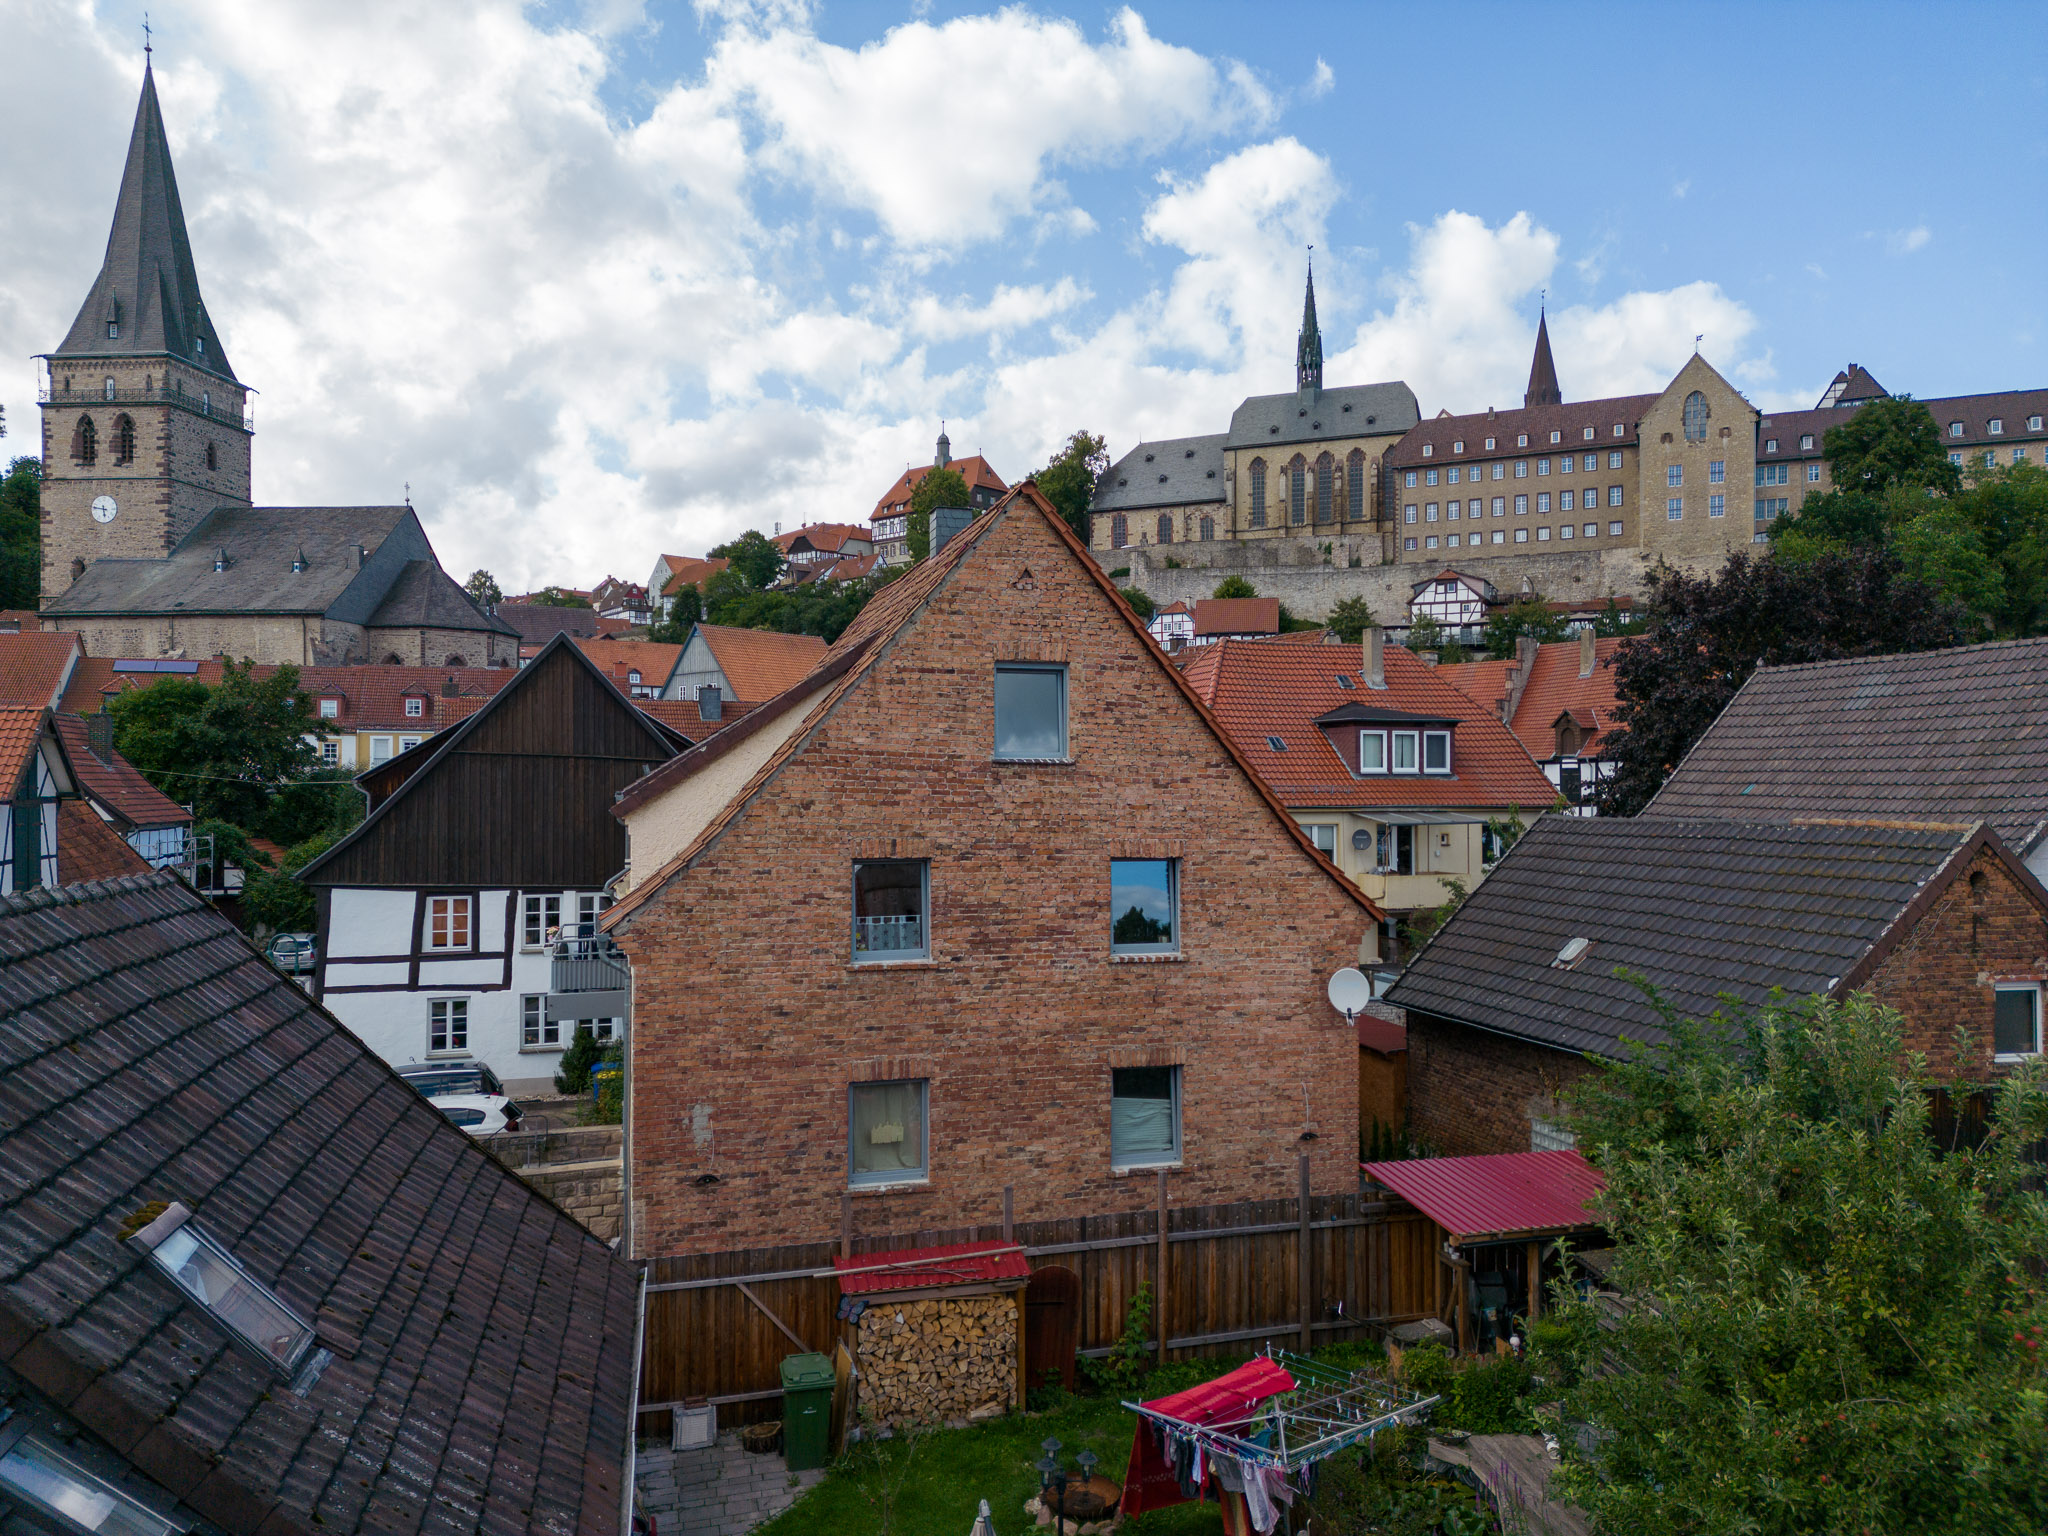
At first glance, the images are not very different. What is immediately noticeable is that the image crop of the Air 3 is slightly smaller than that of the DJI mini 3 Pro. This is probably due to the fact that the Air 3’s DNG file already contains a lens profile that Lightroom automatically applies, seemingly cropping the image a bit. The DNG file of the Mini 3 Pro lacks this profile.
All in all, the quality of both cameras - at least in the resolution of effectively a good 3 megapixels shown here - cannot be complained about. How does it look in the enlargement now?
Picture details
To do this, I again used Adobe Lightroom Classic 12.4 to place the images side by side in a greatly enlarged comparison view. Below I present the corresponding screenshots. Here first a section from the center of the above image enlarged to 400%:
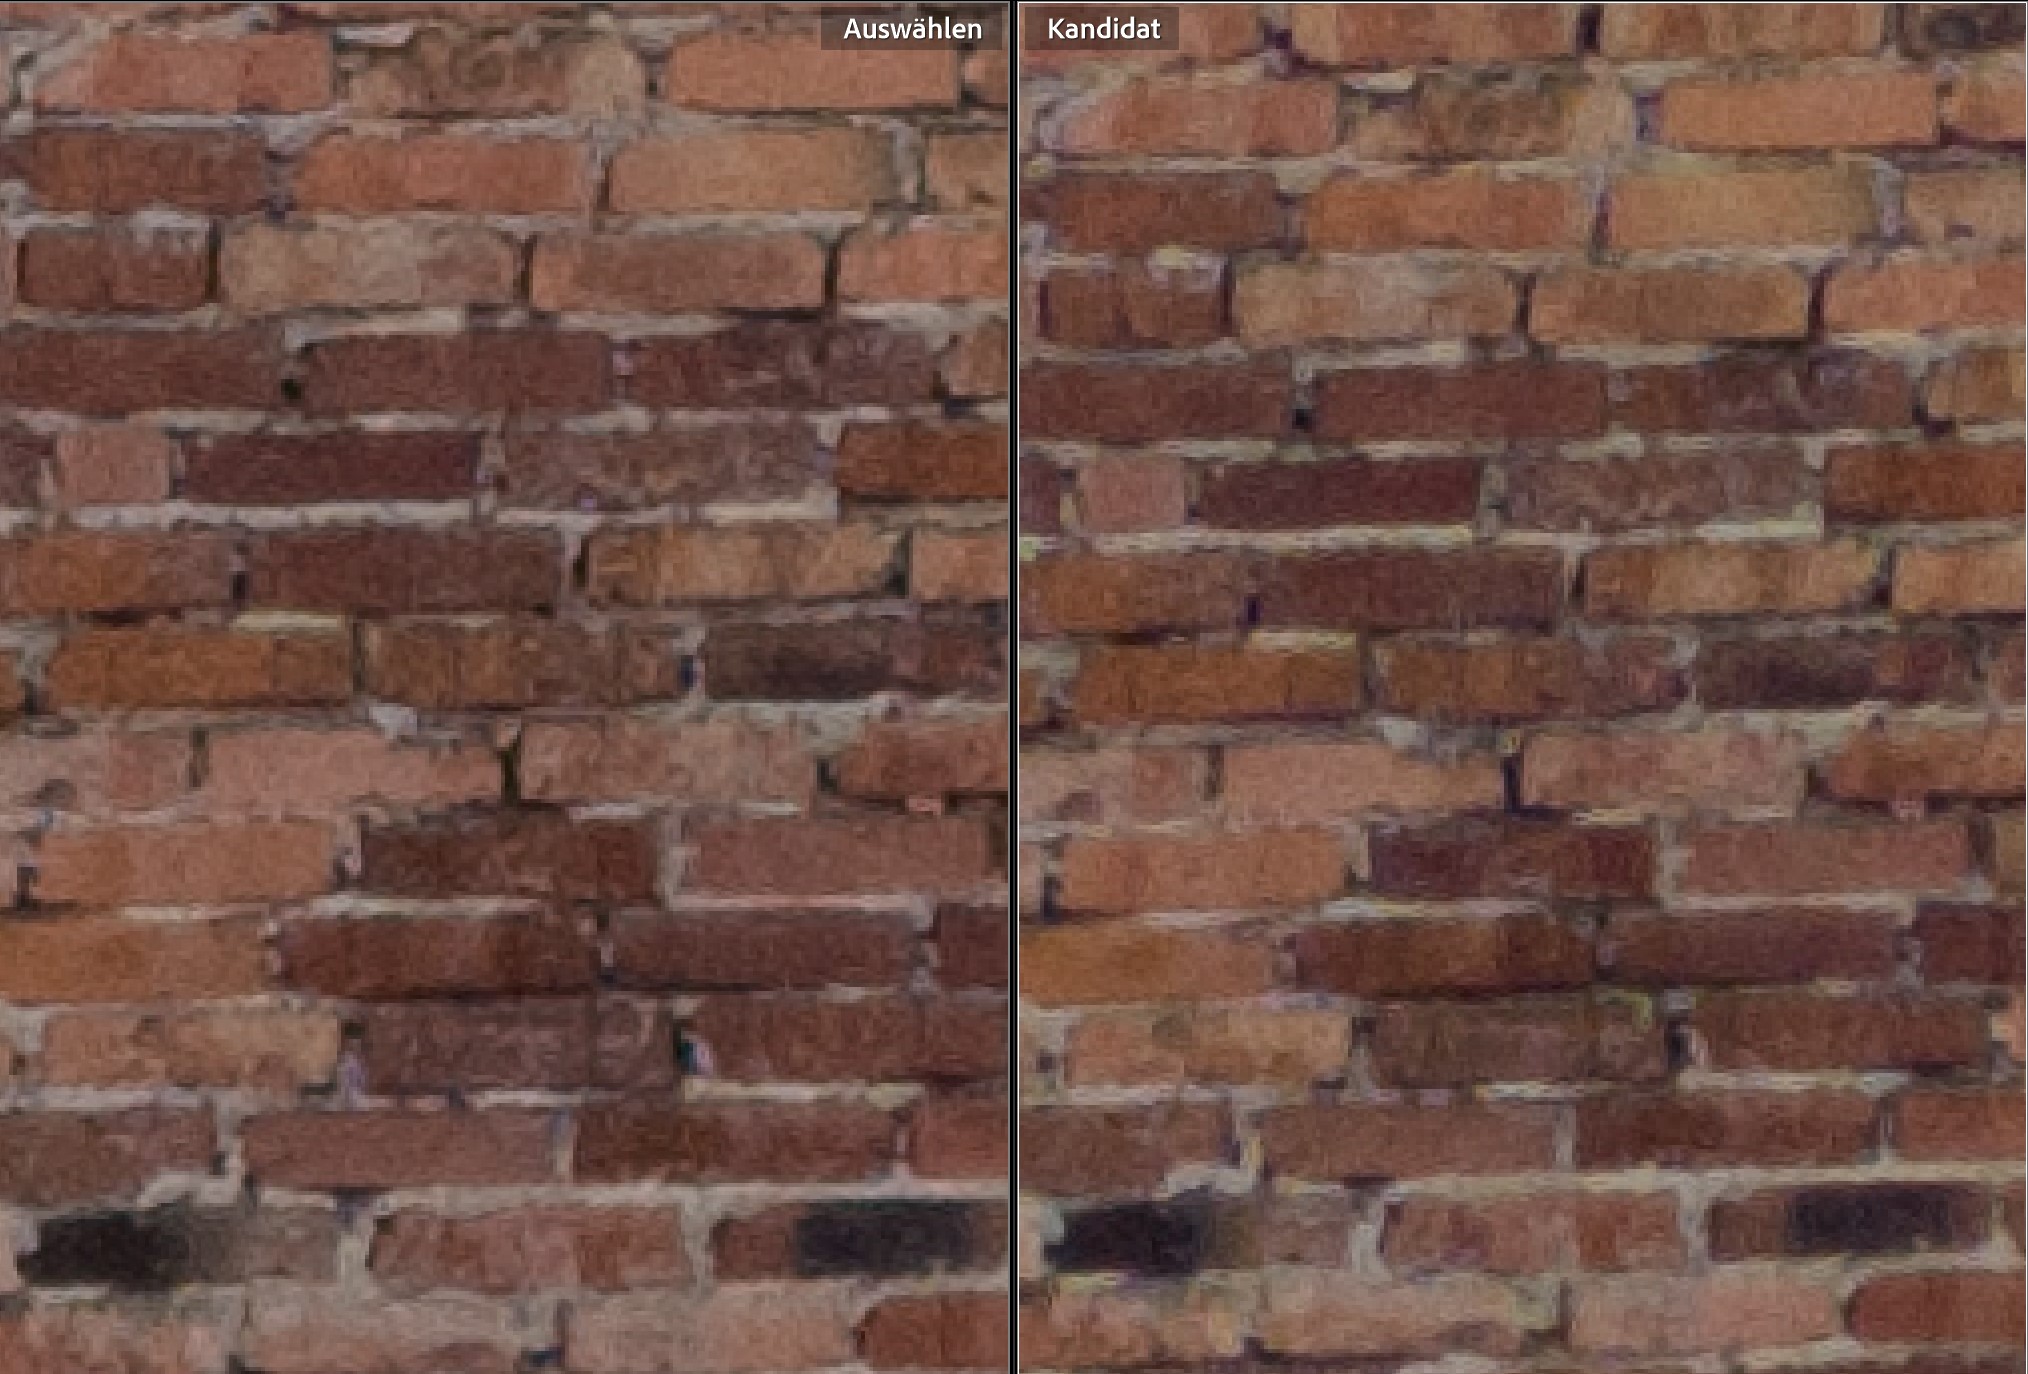
Overall, the sharpness of the two images is comparable at first glance. In my opinion, however, the right image of the Mini 3 Pro shows significantly more artifacts. Obviously, a stronger processing and especially sharpening of the RAW data is already taking place in the drone here. The image looks more disturbed, which is especially evident in the gaps between the bricks, where black lines are visible that do not belong there. For a better illustration, here some more enlarged sections in comparison:
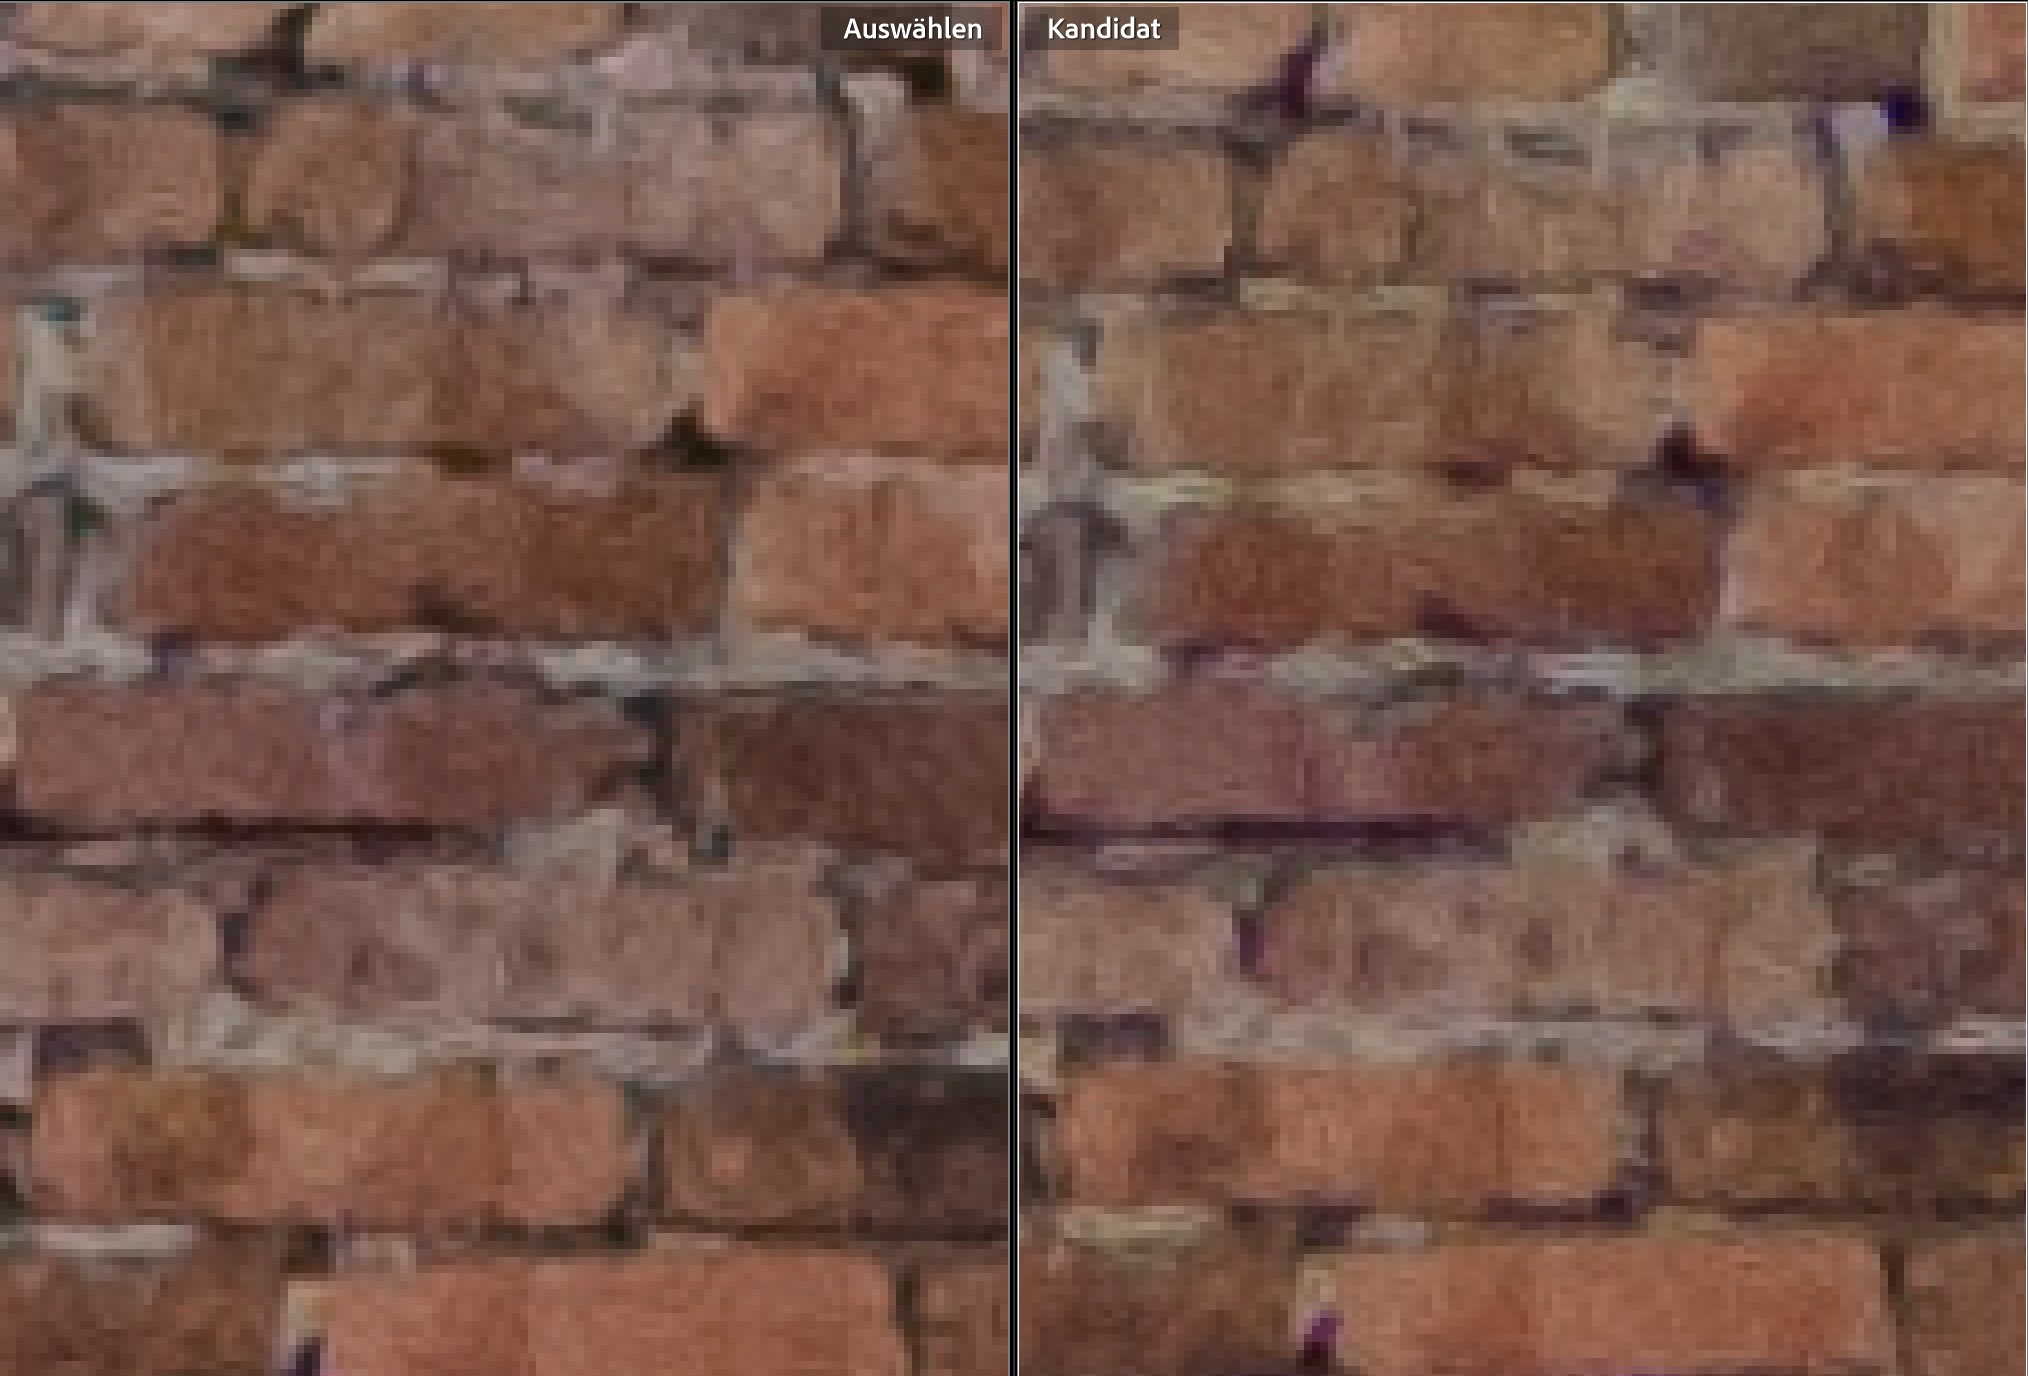
Overall, the left image of the Air 3 seems much smoother to me, there are fewer artifacts to be seen, it looks much more “analog”. The difference is even more obvious in the windows of the building on the upper right of the frames. Here are two more crops of it in 400% magnification:
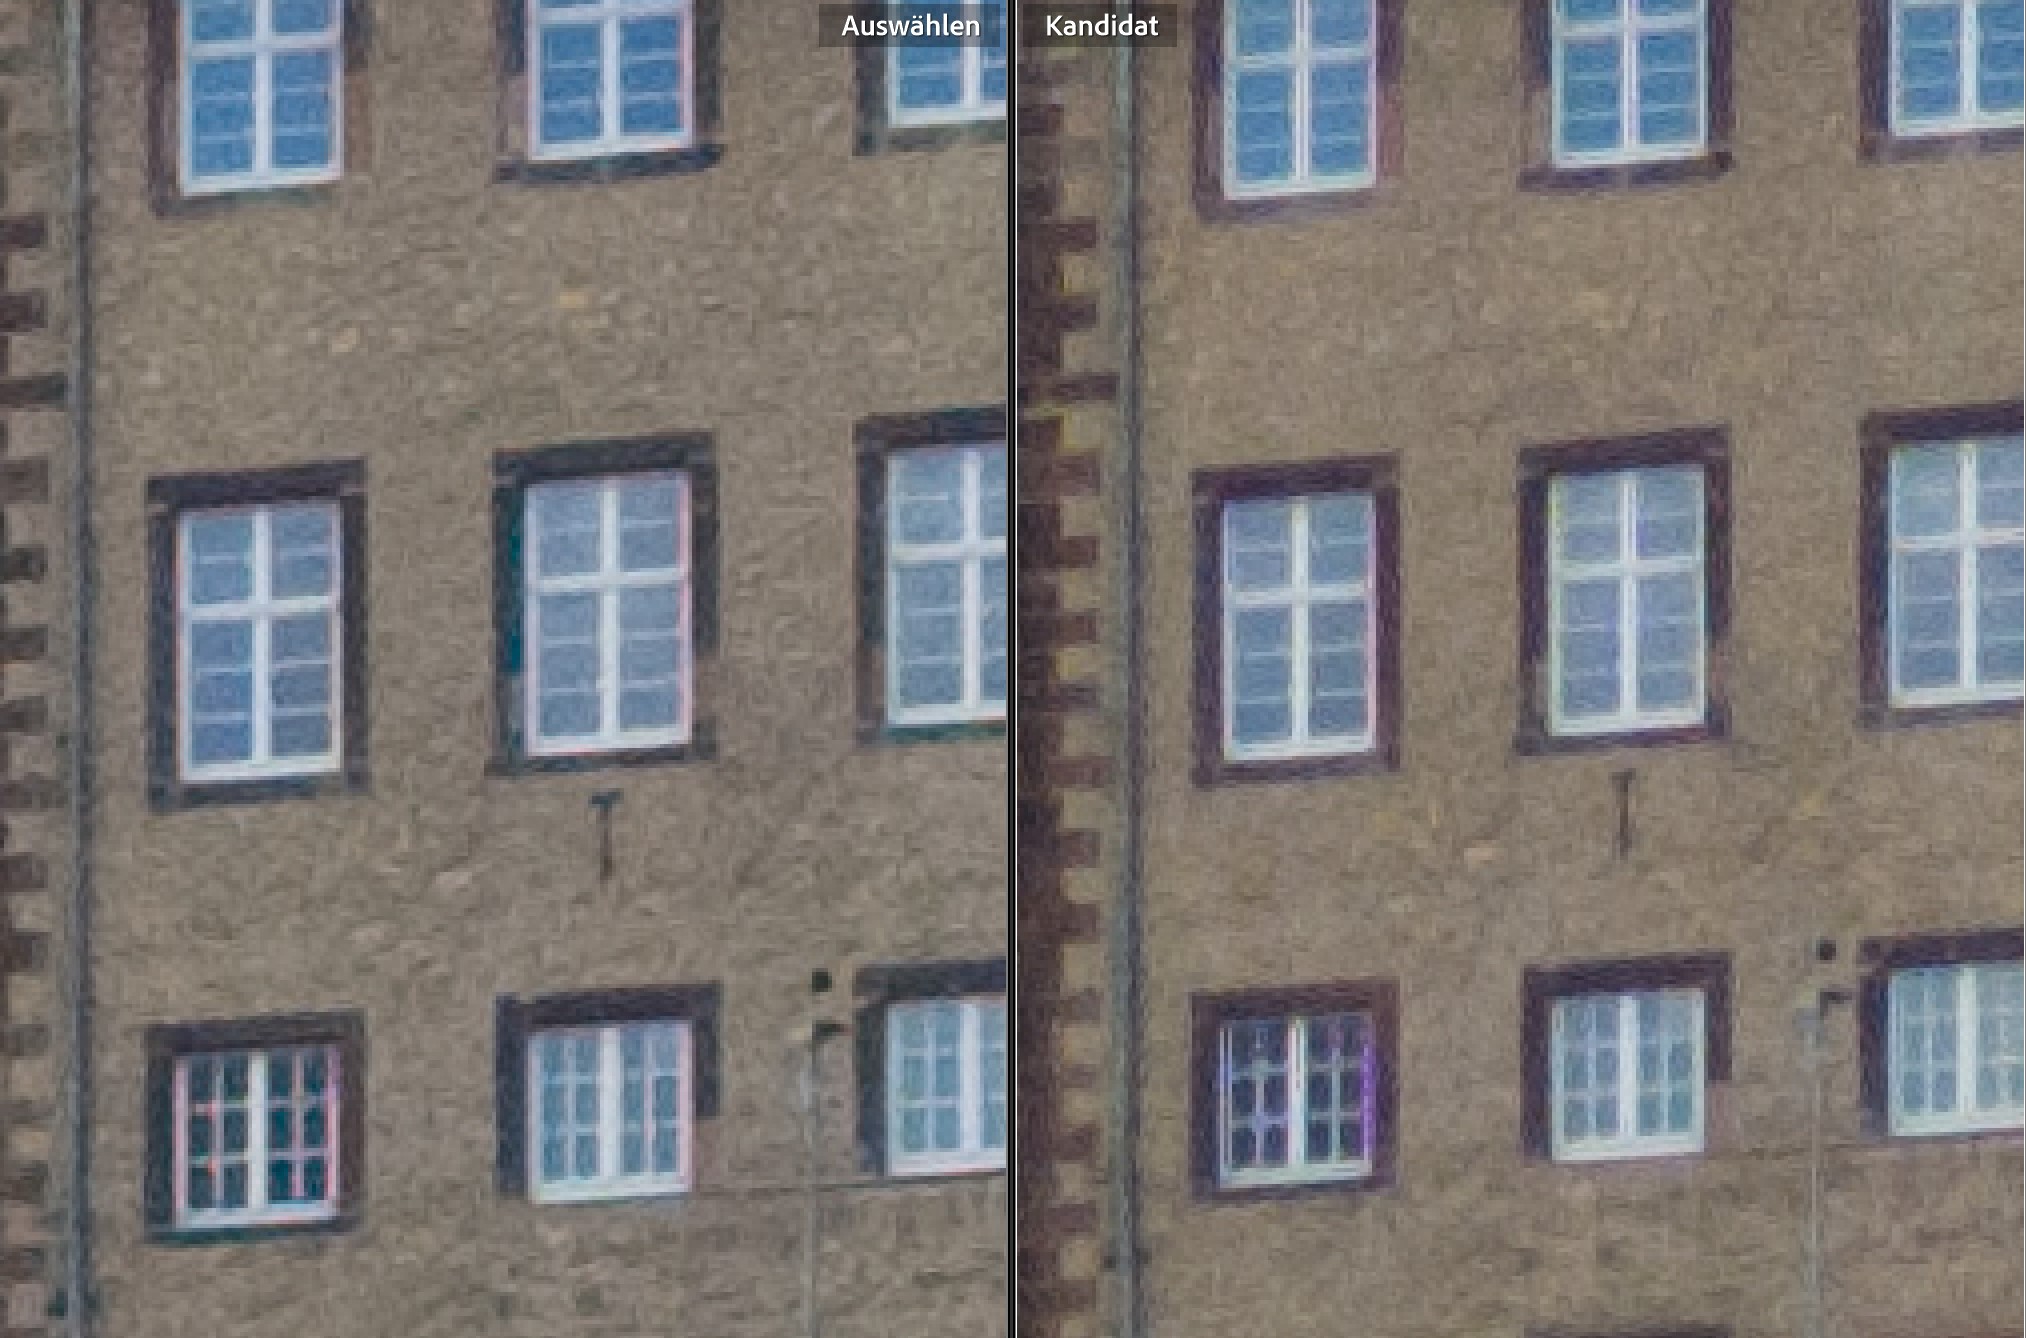
Here, especially in the right image of the Mini 3 Pro, you can see distinct black lines in what should be smooth surfaces of the window frames at the bottom left. To show exactly what I mean, I have zoomed in the window below even more (1600%):
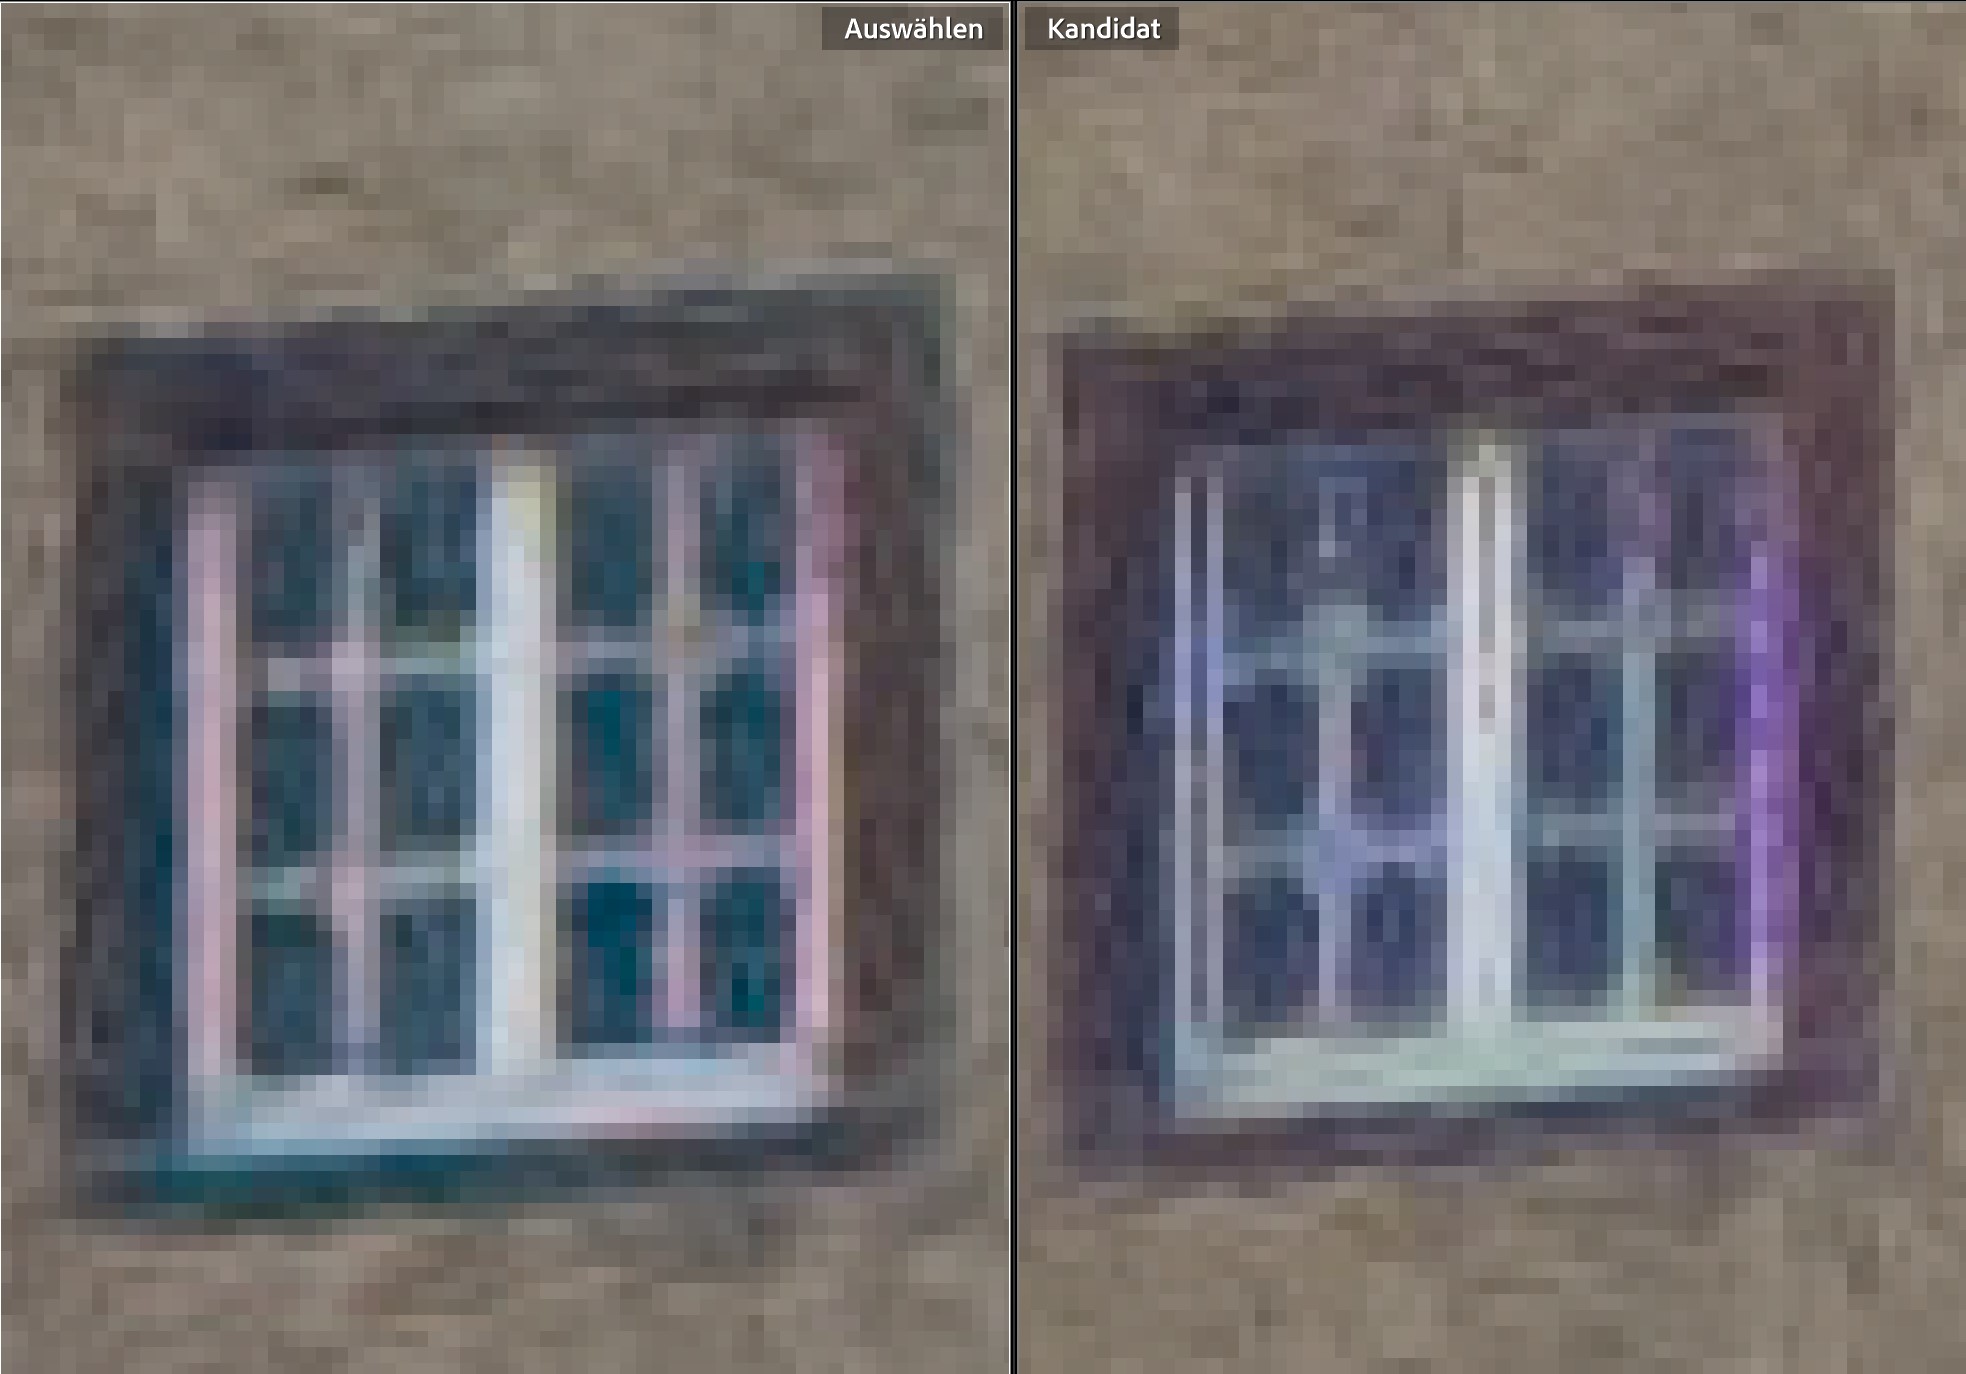
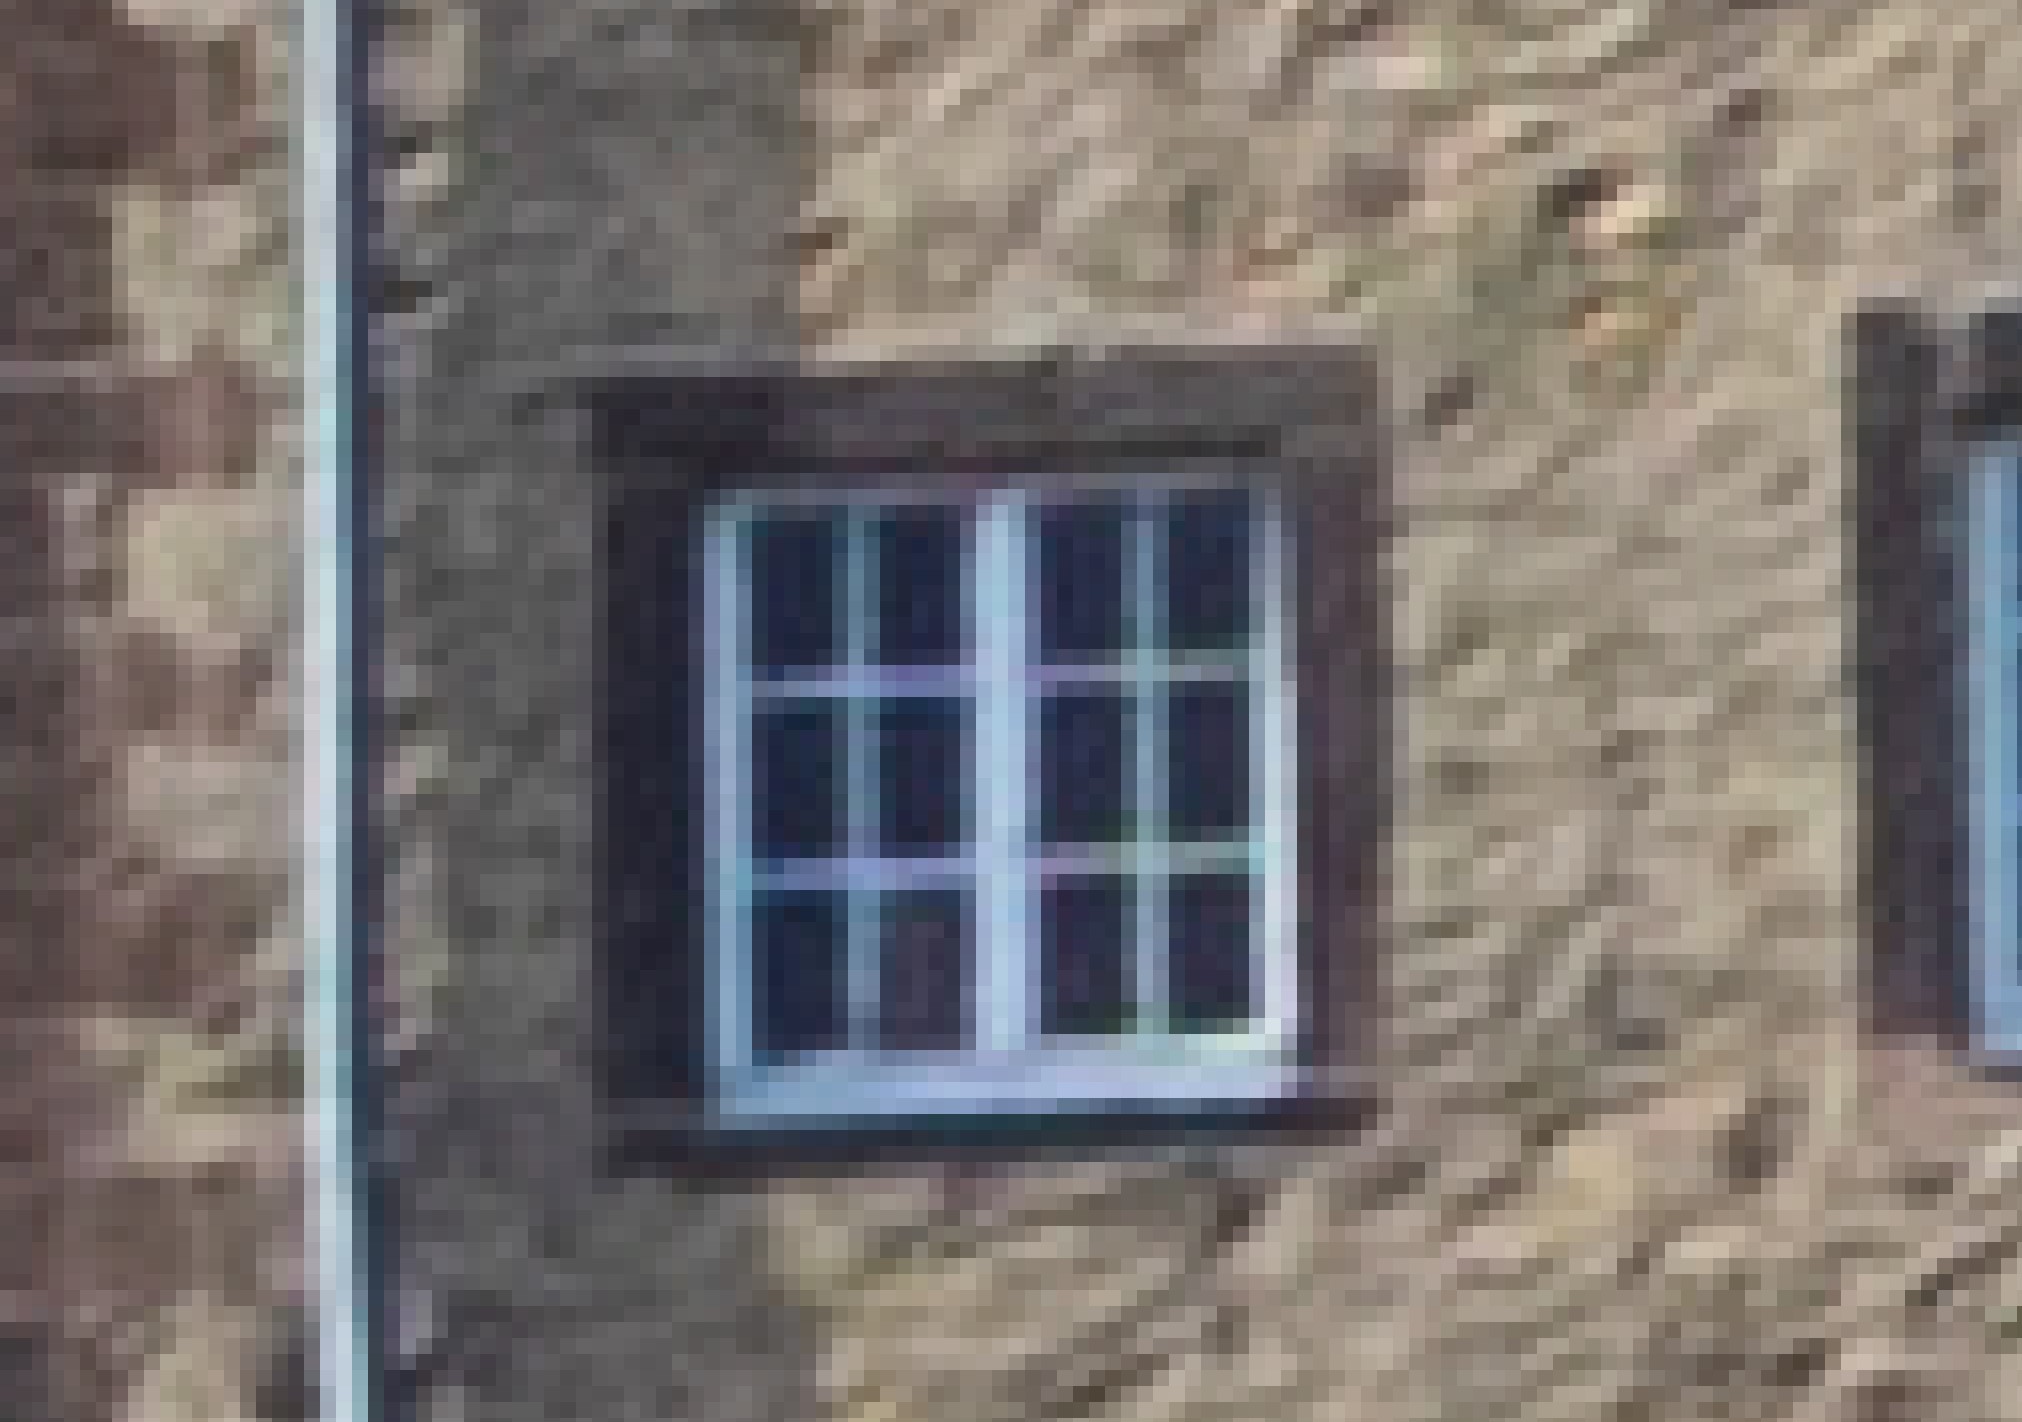
Here, the left image of the Air 3 is clearly better. In case someone thinks that these lines might exist really, I can show an enlarged section from the same region and from the same shooting position with my Canon EOS R5, also with 24mm focal length, for direct comparison:
And while we are at the comparison with the full-frame camera: Here is a comparison of the first two drone shots from the center of the image with the one of my Canon EOS R5 with 24mm as well (always on the right half of the images):
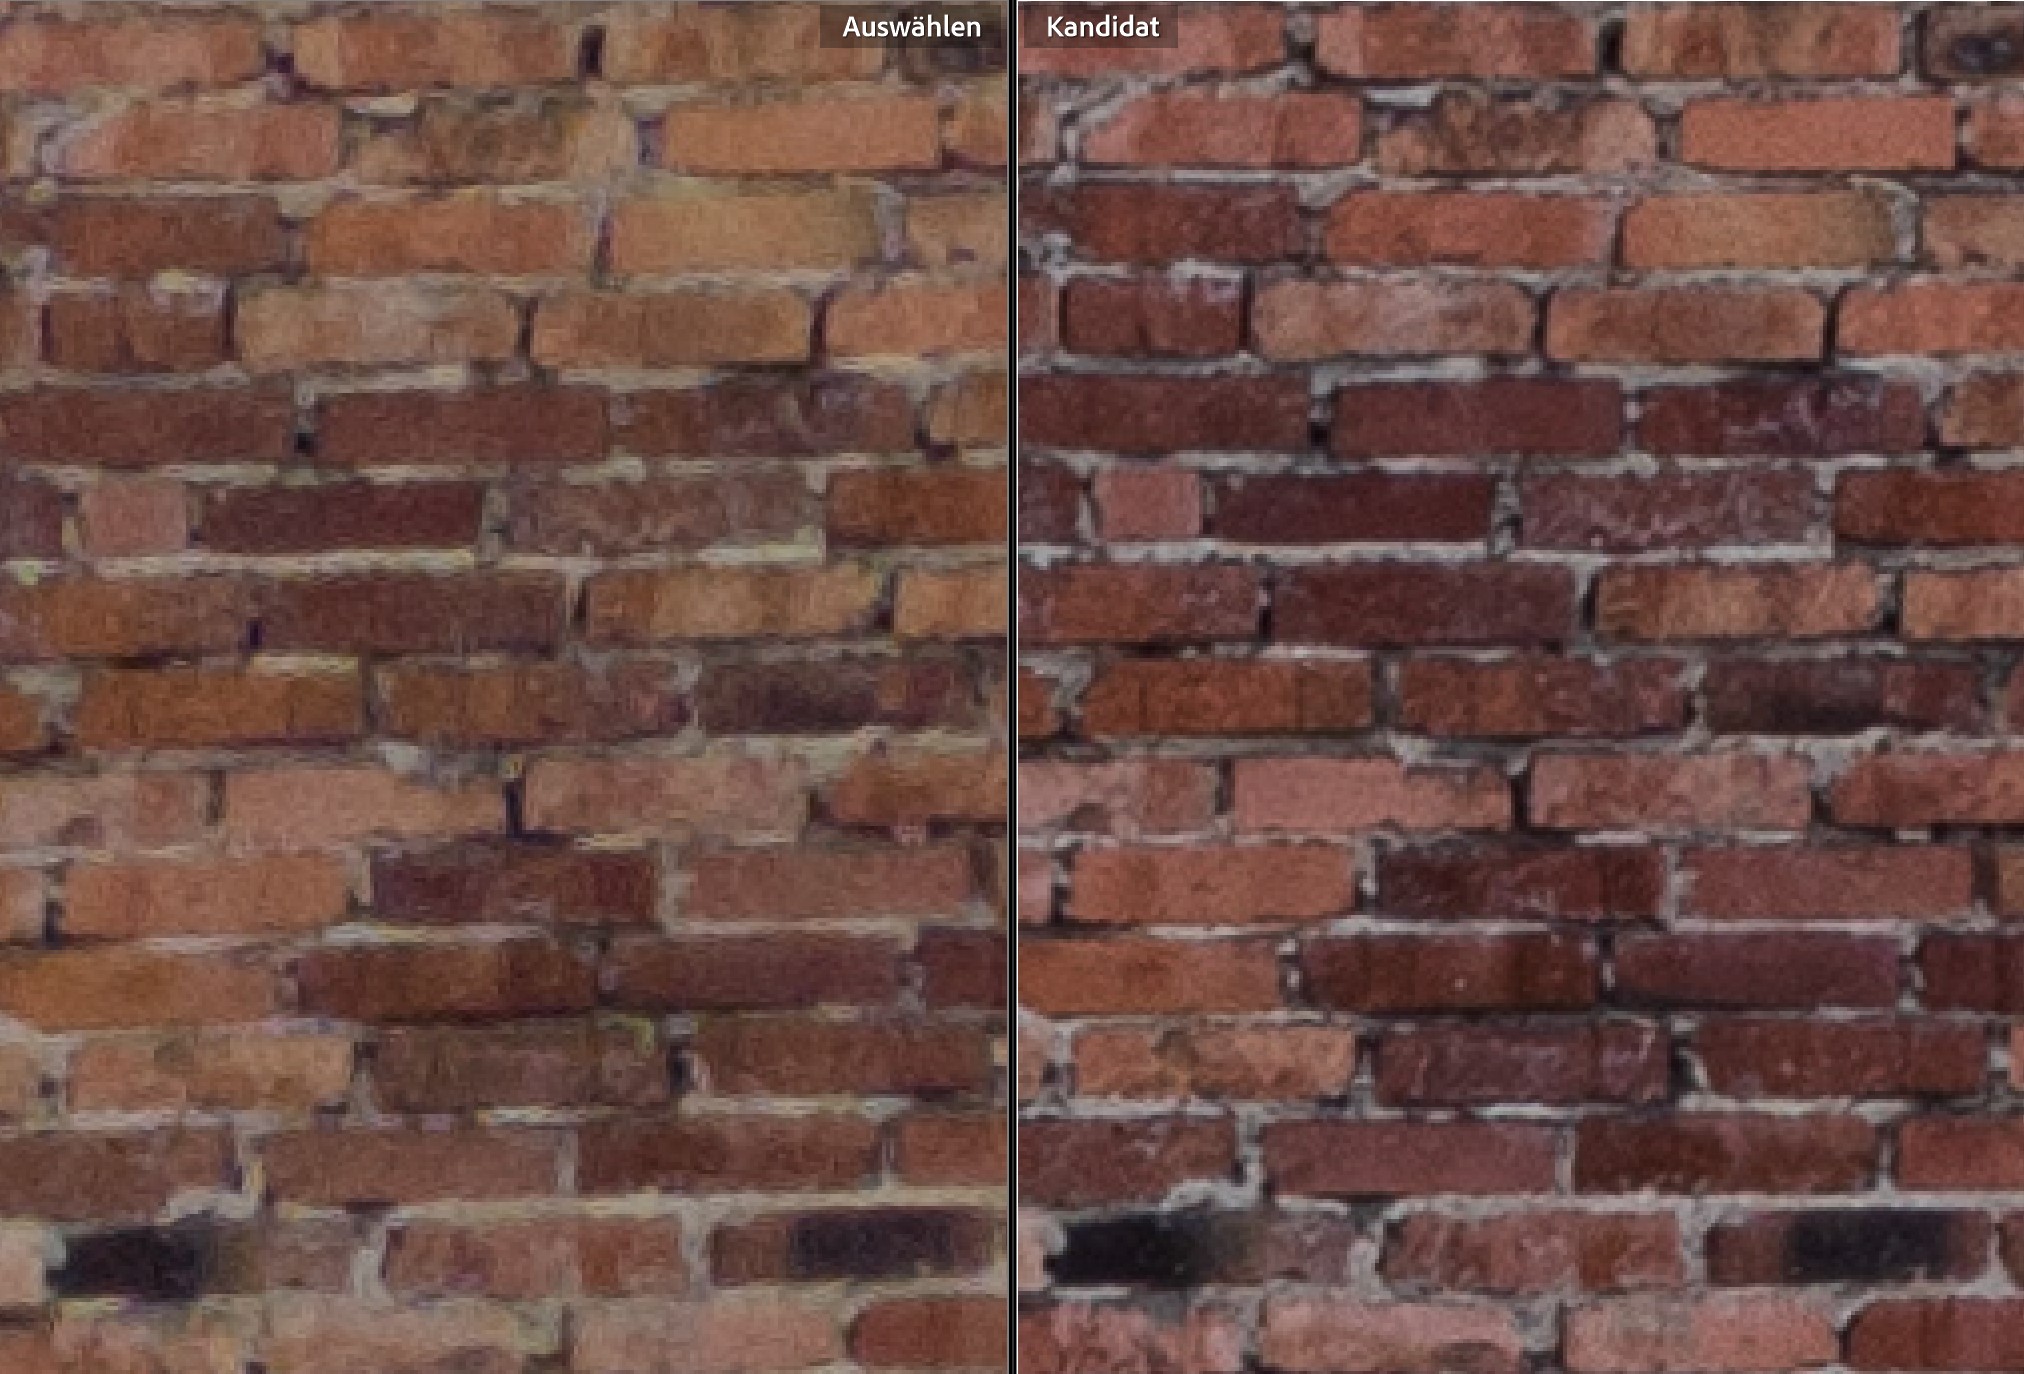
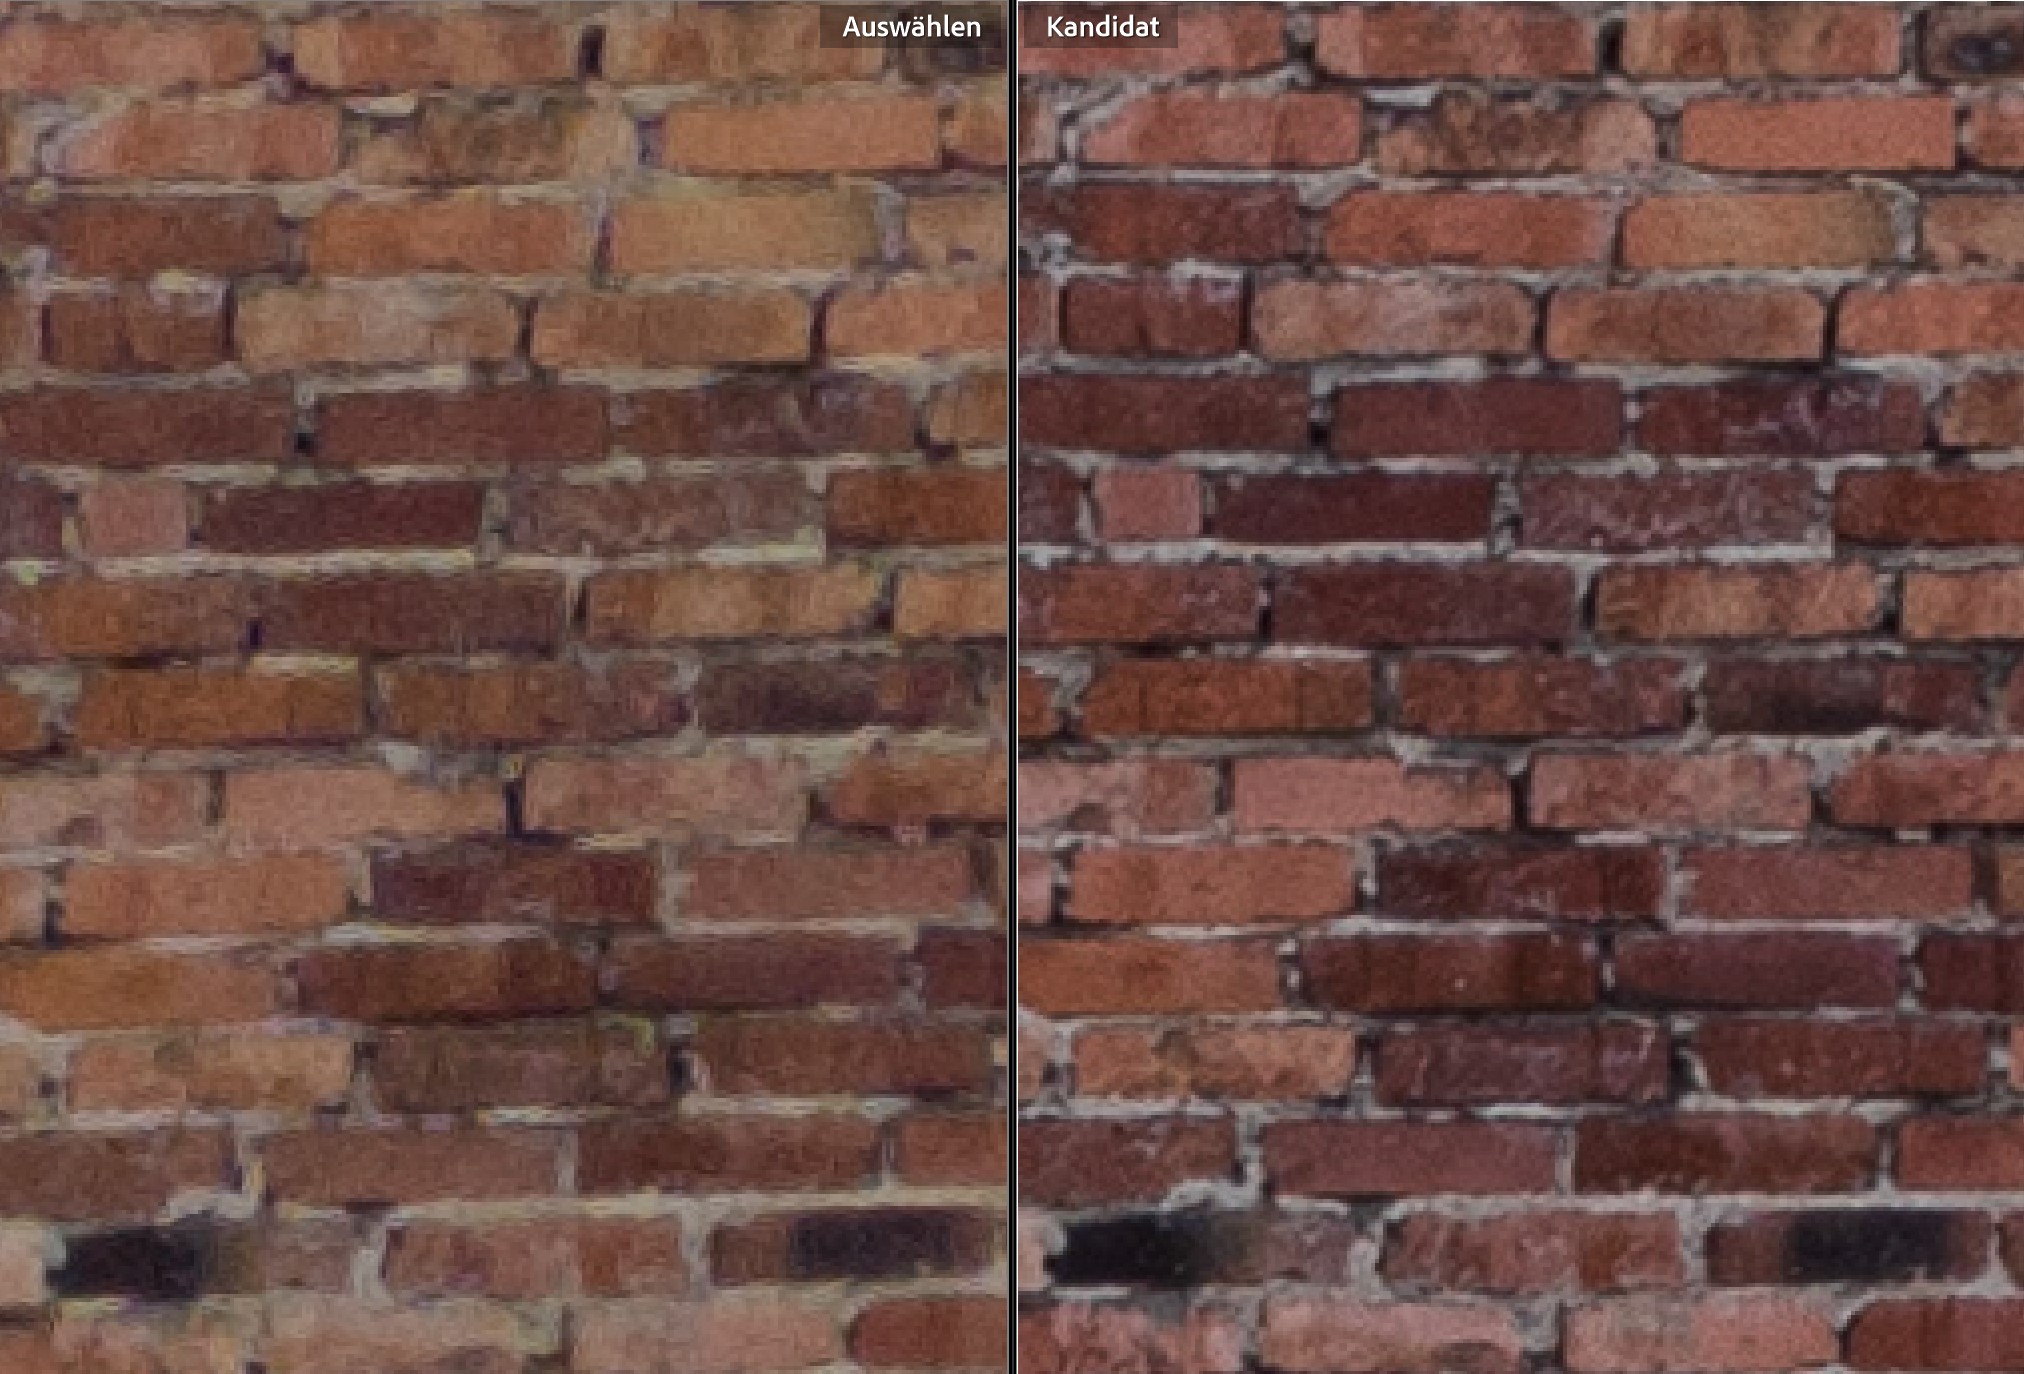
I used the RF 24-105 f/4L lens at 24mm focal length and f/5.6 on my Canon EOS R5. As the image examples show, the shooting quality is still much better with the full-frame camera. Indeed, it would be sad if that were not the case.
Of course, the comparison is very unfair. The Canon lens alone costs more than the DJI Air 3 and weighs as much as the entire drone. If you want to achieve this kind of image quality with a drone, you would have to go for the DJI Inspire 3, for example - but that would be in a completely different price and weight class. In addition, the sun came out in the comparison shot with the Canon R5, which also provides much better contrasts in the image.
Dynamic range
Sensors with a large dynamic range can capture details even from dark areas of the image, which can then be extracted in post-processing. In Lightroom, this is achieved with the “Shadows” slider.
To compare the new DJI Air 3 with the Mini 3 Pro in this respect, I selected a dark crop from the image above at the bottom right and set the “Shadows” slider in Lightroom Classic to its maximum value of +100. This results in the following comparison image at 400% magnification:
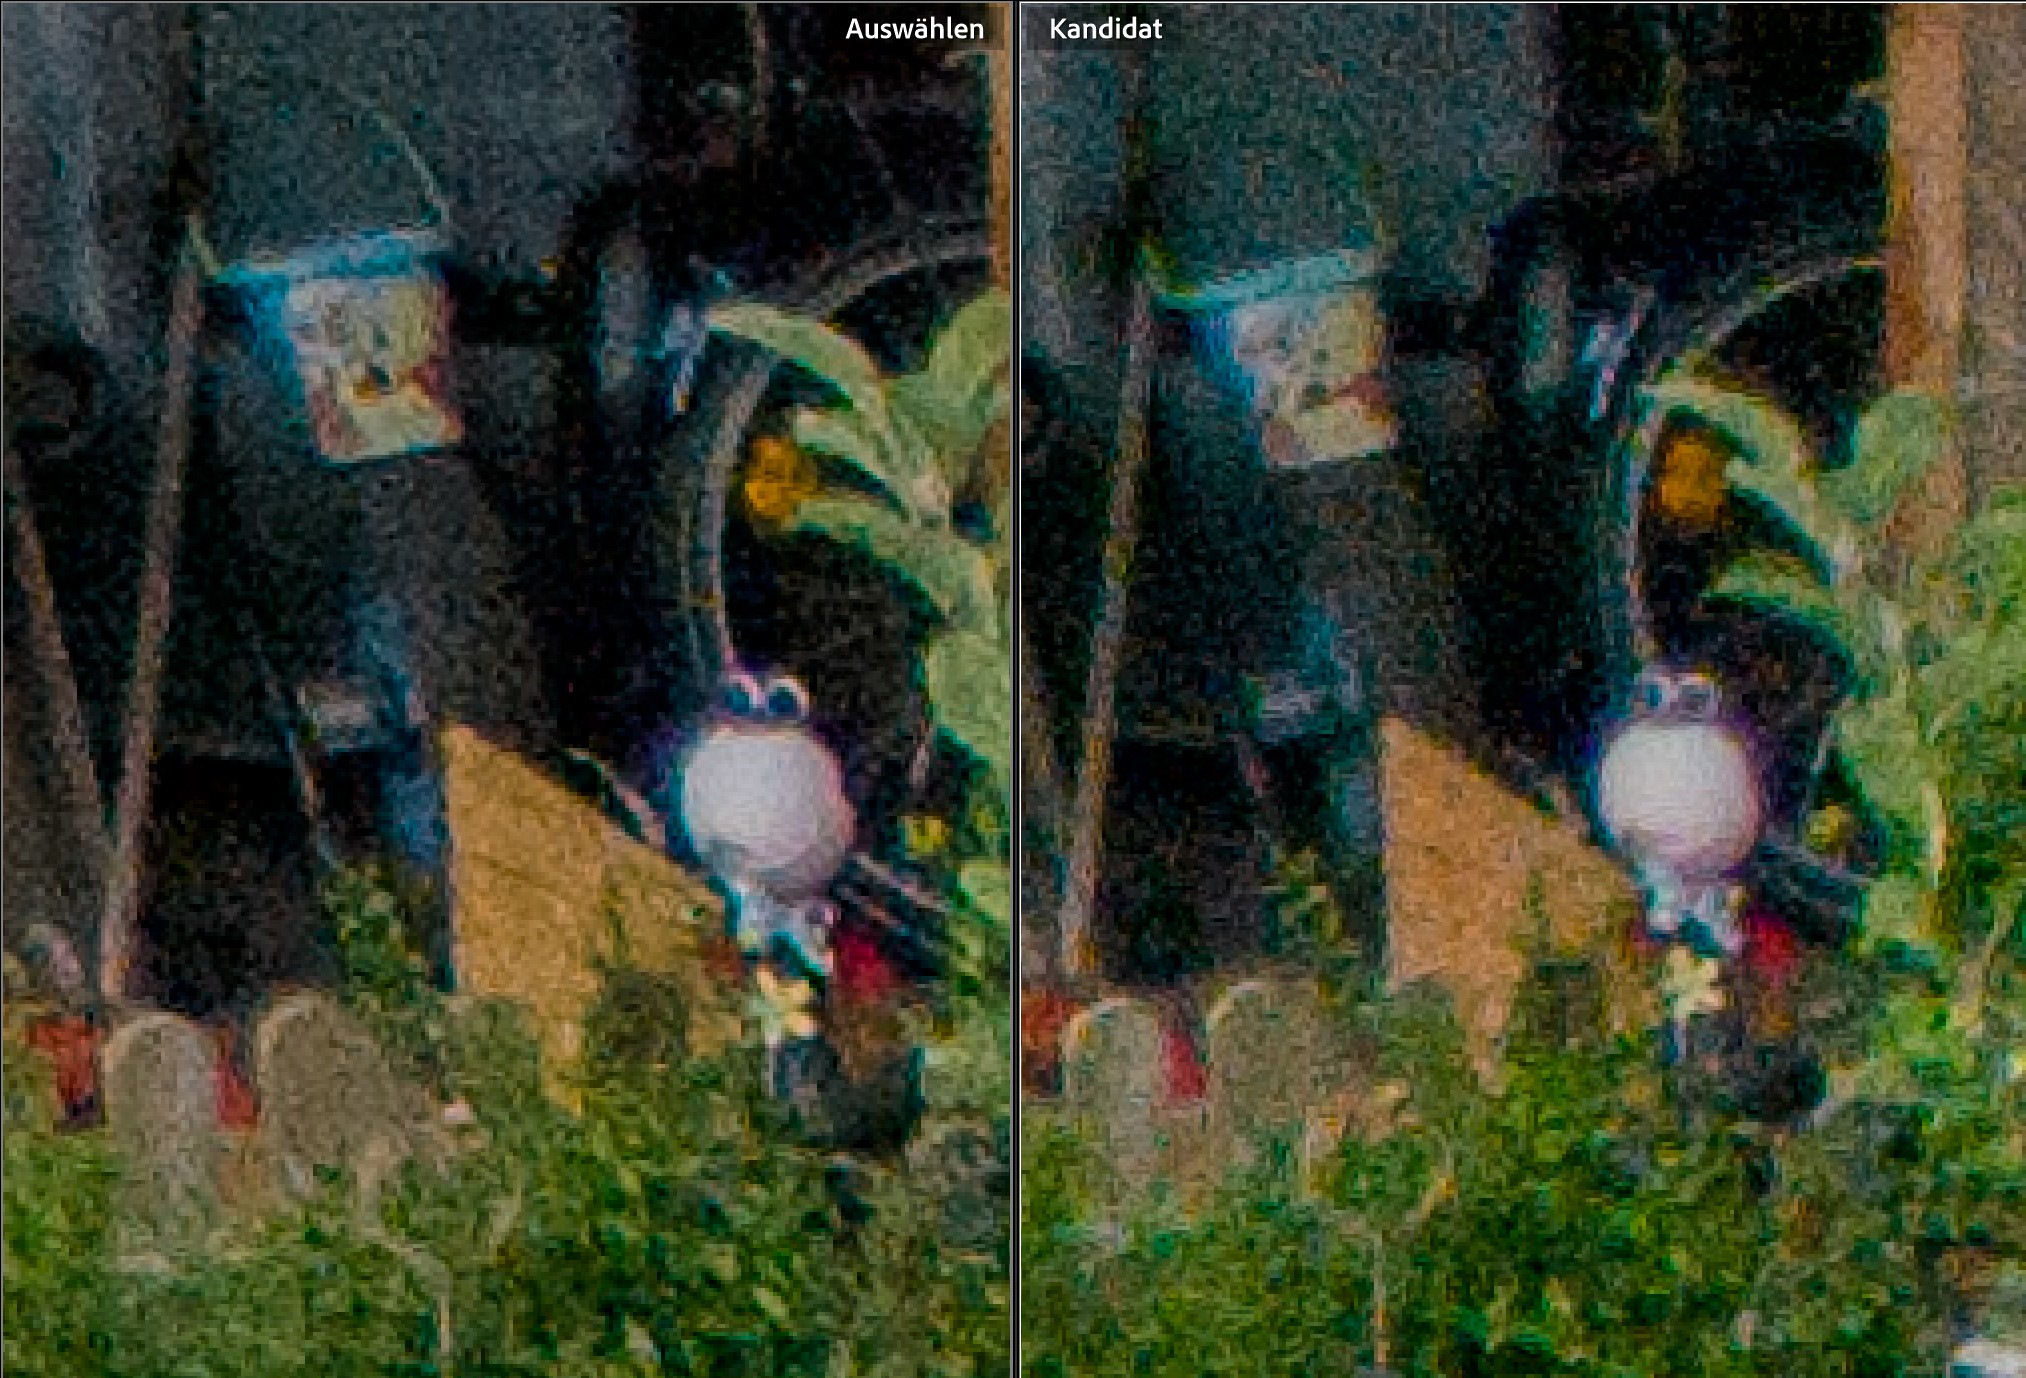
The left picture of the Air 3 shows visibly more details, which is especially visible on the bicycle and the handle of the plastic bucket. However, the colorful motif on the blue plastic bucket is not recognizable in both pictures. Once again, the Mini 3 Pro’s very rough-looking artifacts are noticeable in direct comparison. The picture of the Air 3 also looks much smoother here.
Nevertheless, this is where the small sensors visibly reach their limits when you compare their images with a shot from a full-frame sensor. Here is a corresponding section of the shot with the Canon EOS R5 at 24mm:
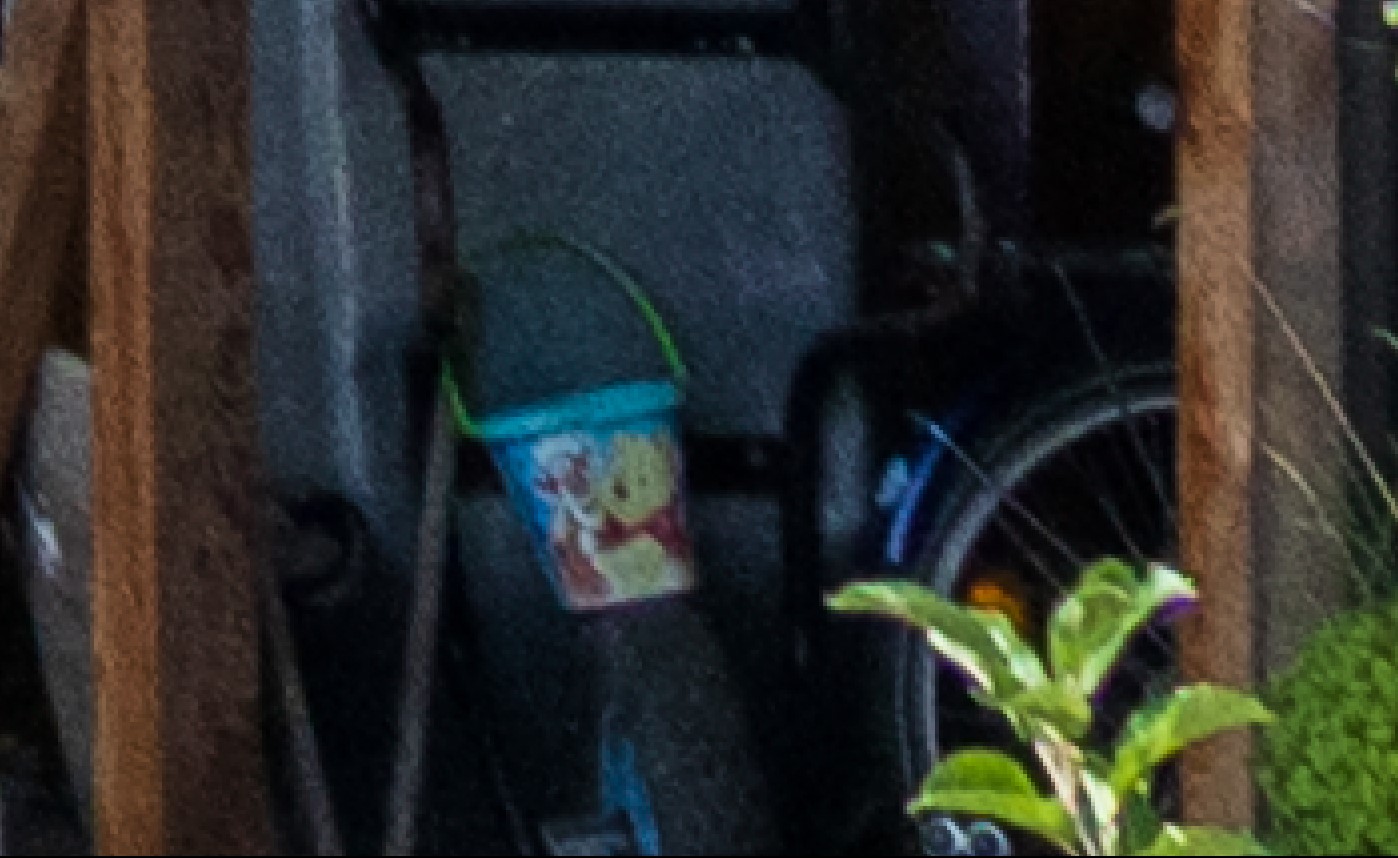
This is the area where a larger sensor really shines. In the shot with the Canon EoS R5, you can recognize Winnie the Pooh and Tigger on the bucket, while the two DJI drones just show colored noise.
Despite all this, the small cameras of the DJI drones do surprisingly well in my opinion. I have no hesitation whatsoever in making large-format prints of the images and have already done so several times.
70mm camera
A very welcome addition to the DJI Air 3 over my Mini 3 Pro is the additional second lens with a full-frame equivalent focal length of 70mm. Since the Mini 3 Pro has to pass here, I only compared it to my Canon EOS R5. On this one, I used the RF 24-105 f/4L lens at 70mm and f/5.6. First of all, the two complete frames:
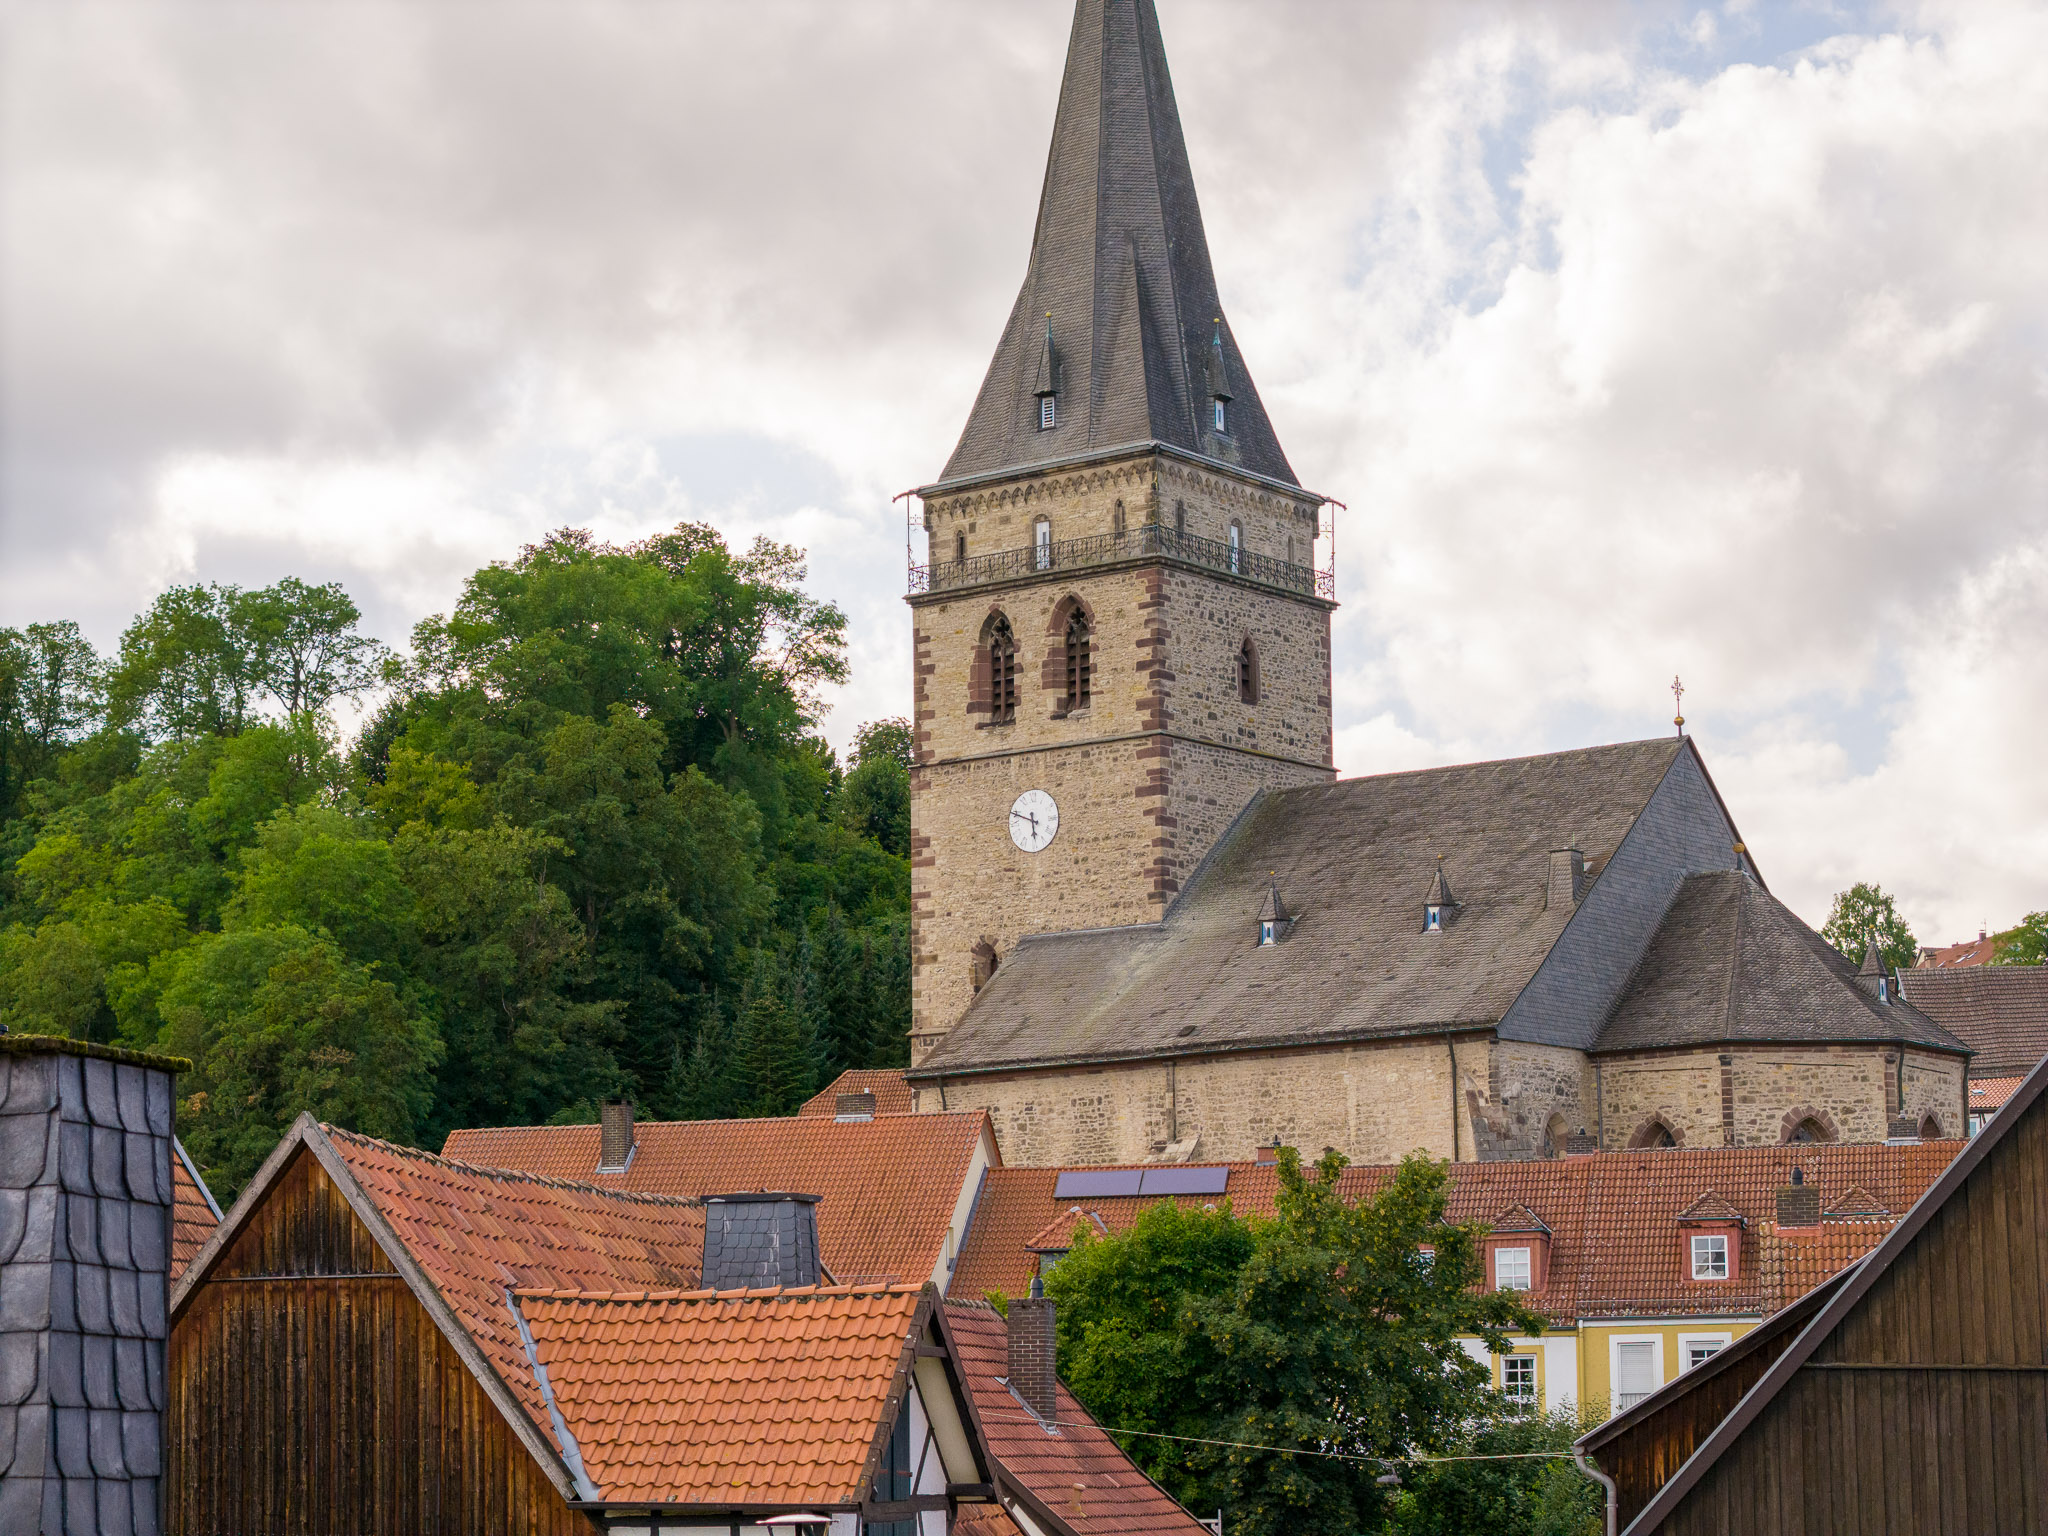
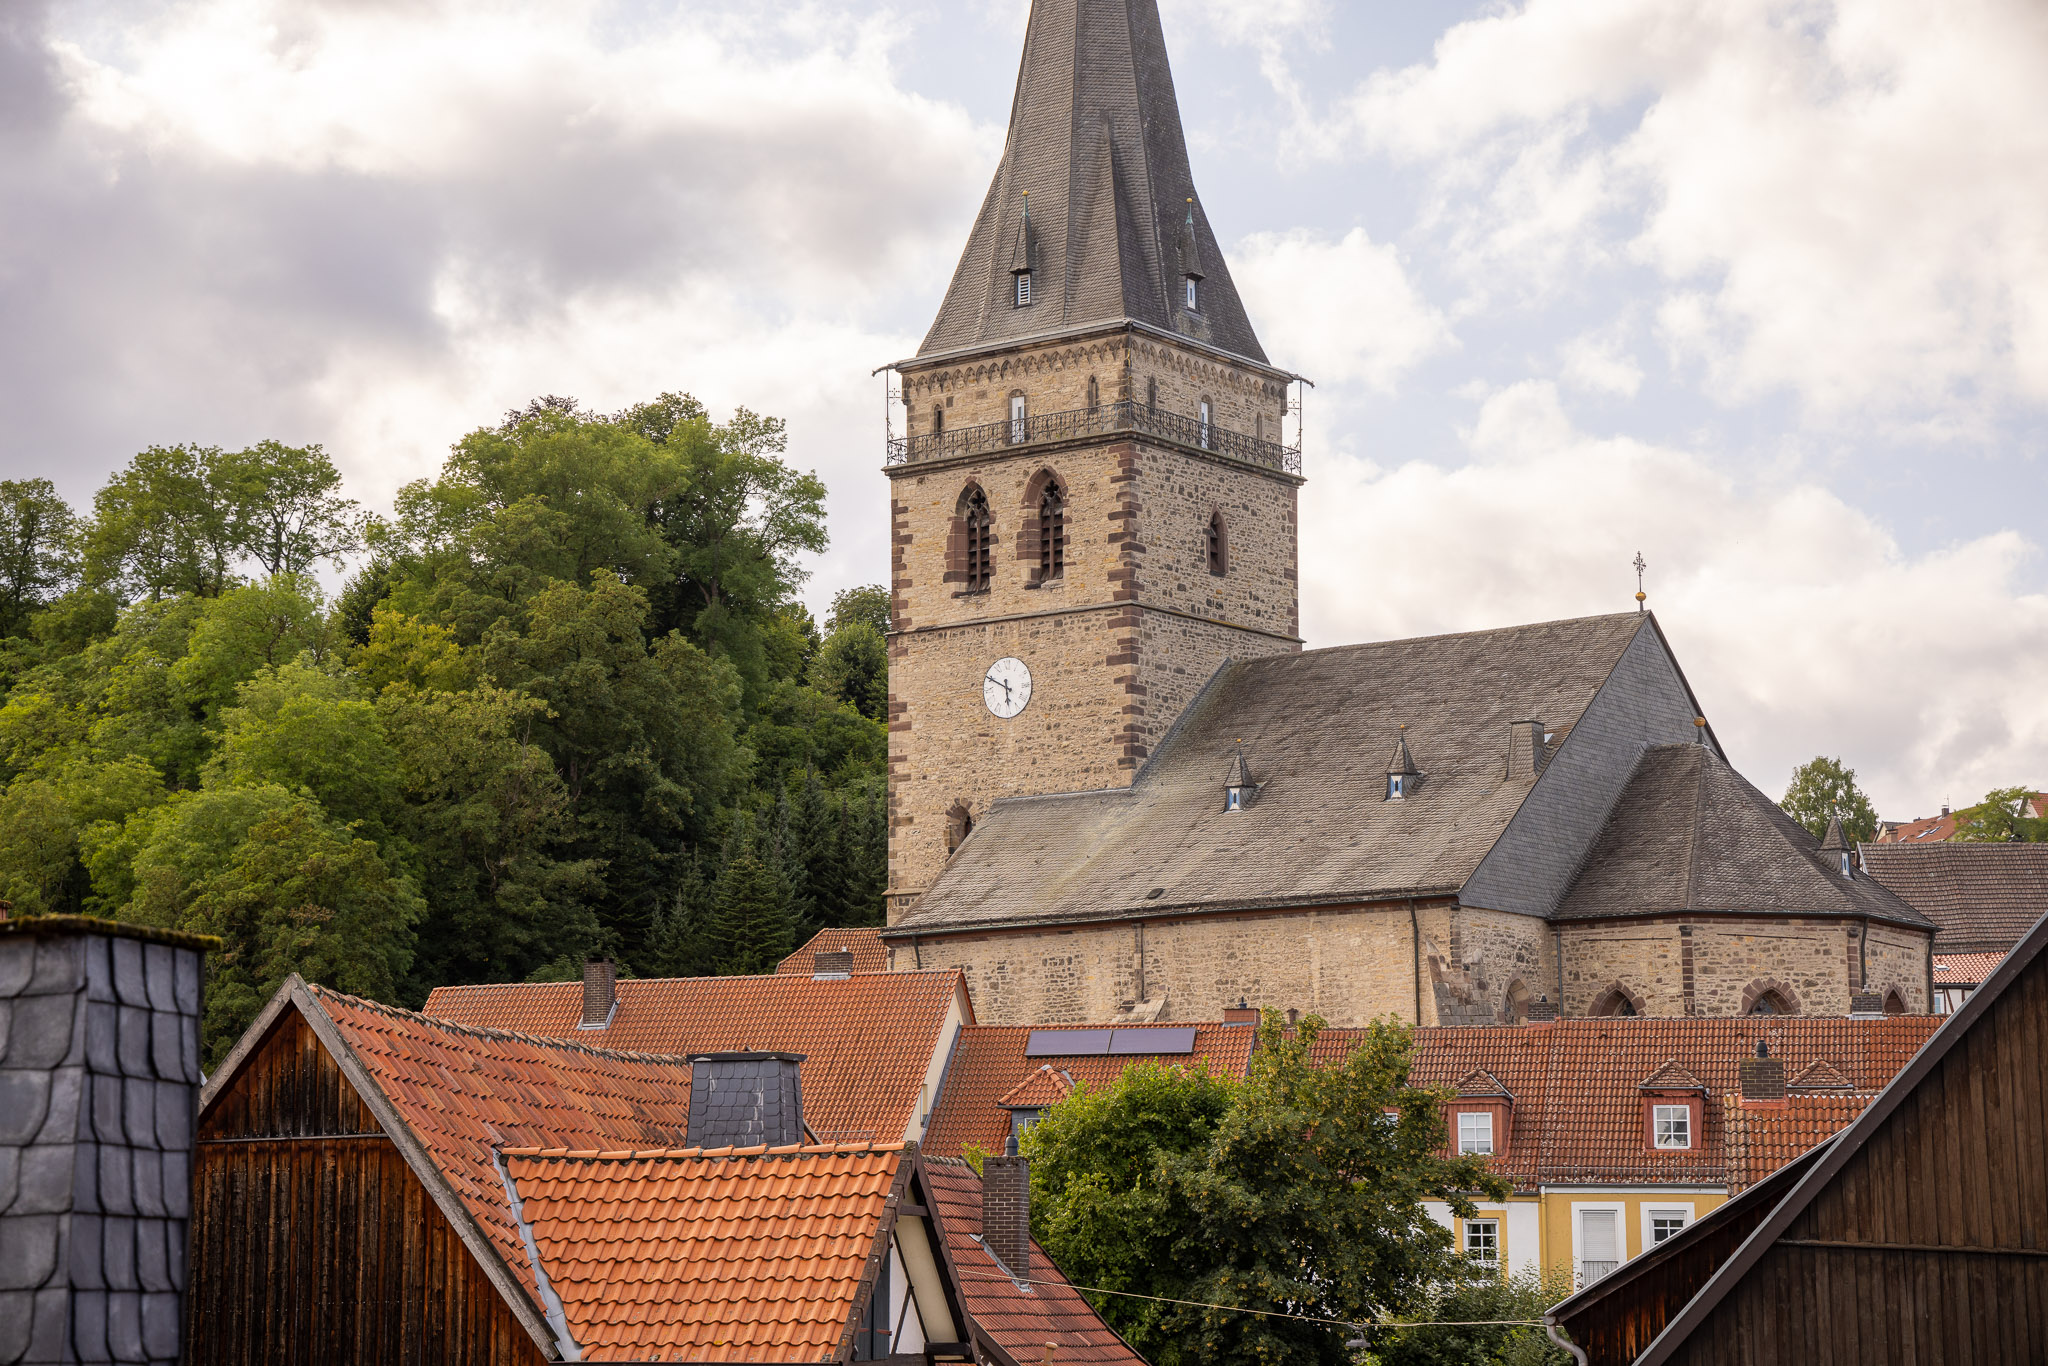
I processed both shots again in my usual workflow in Adobe Lightroom and additionally adjusted the exposure and white balance of the Canon shot slightly to that of the DJI Air 3. Except for the different aspect ratio (DJI Air 3 3:4, Canon EOS R5 2:3), the shots are quite comparable in general appearance.
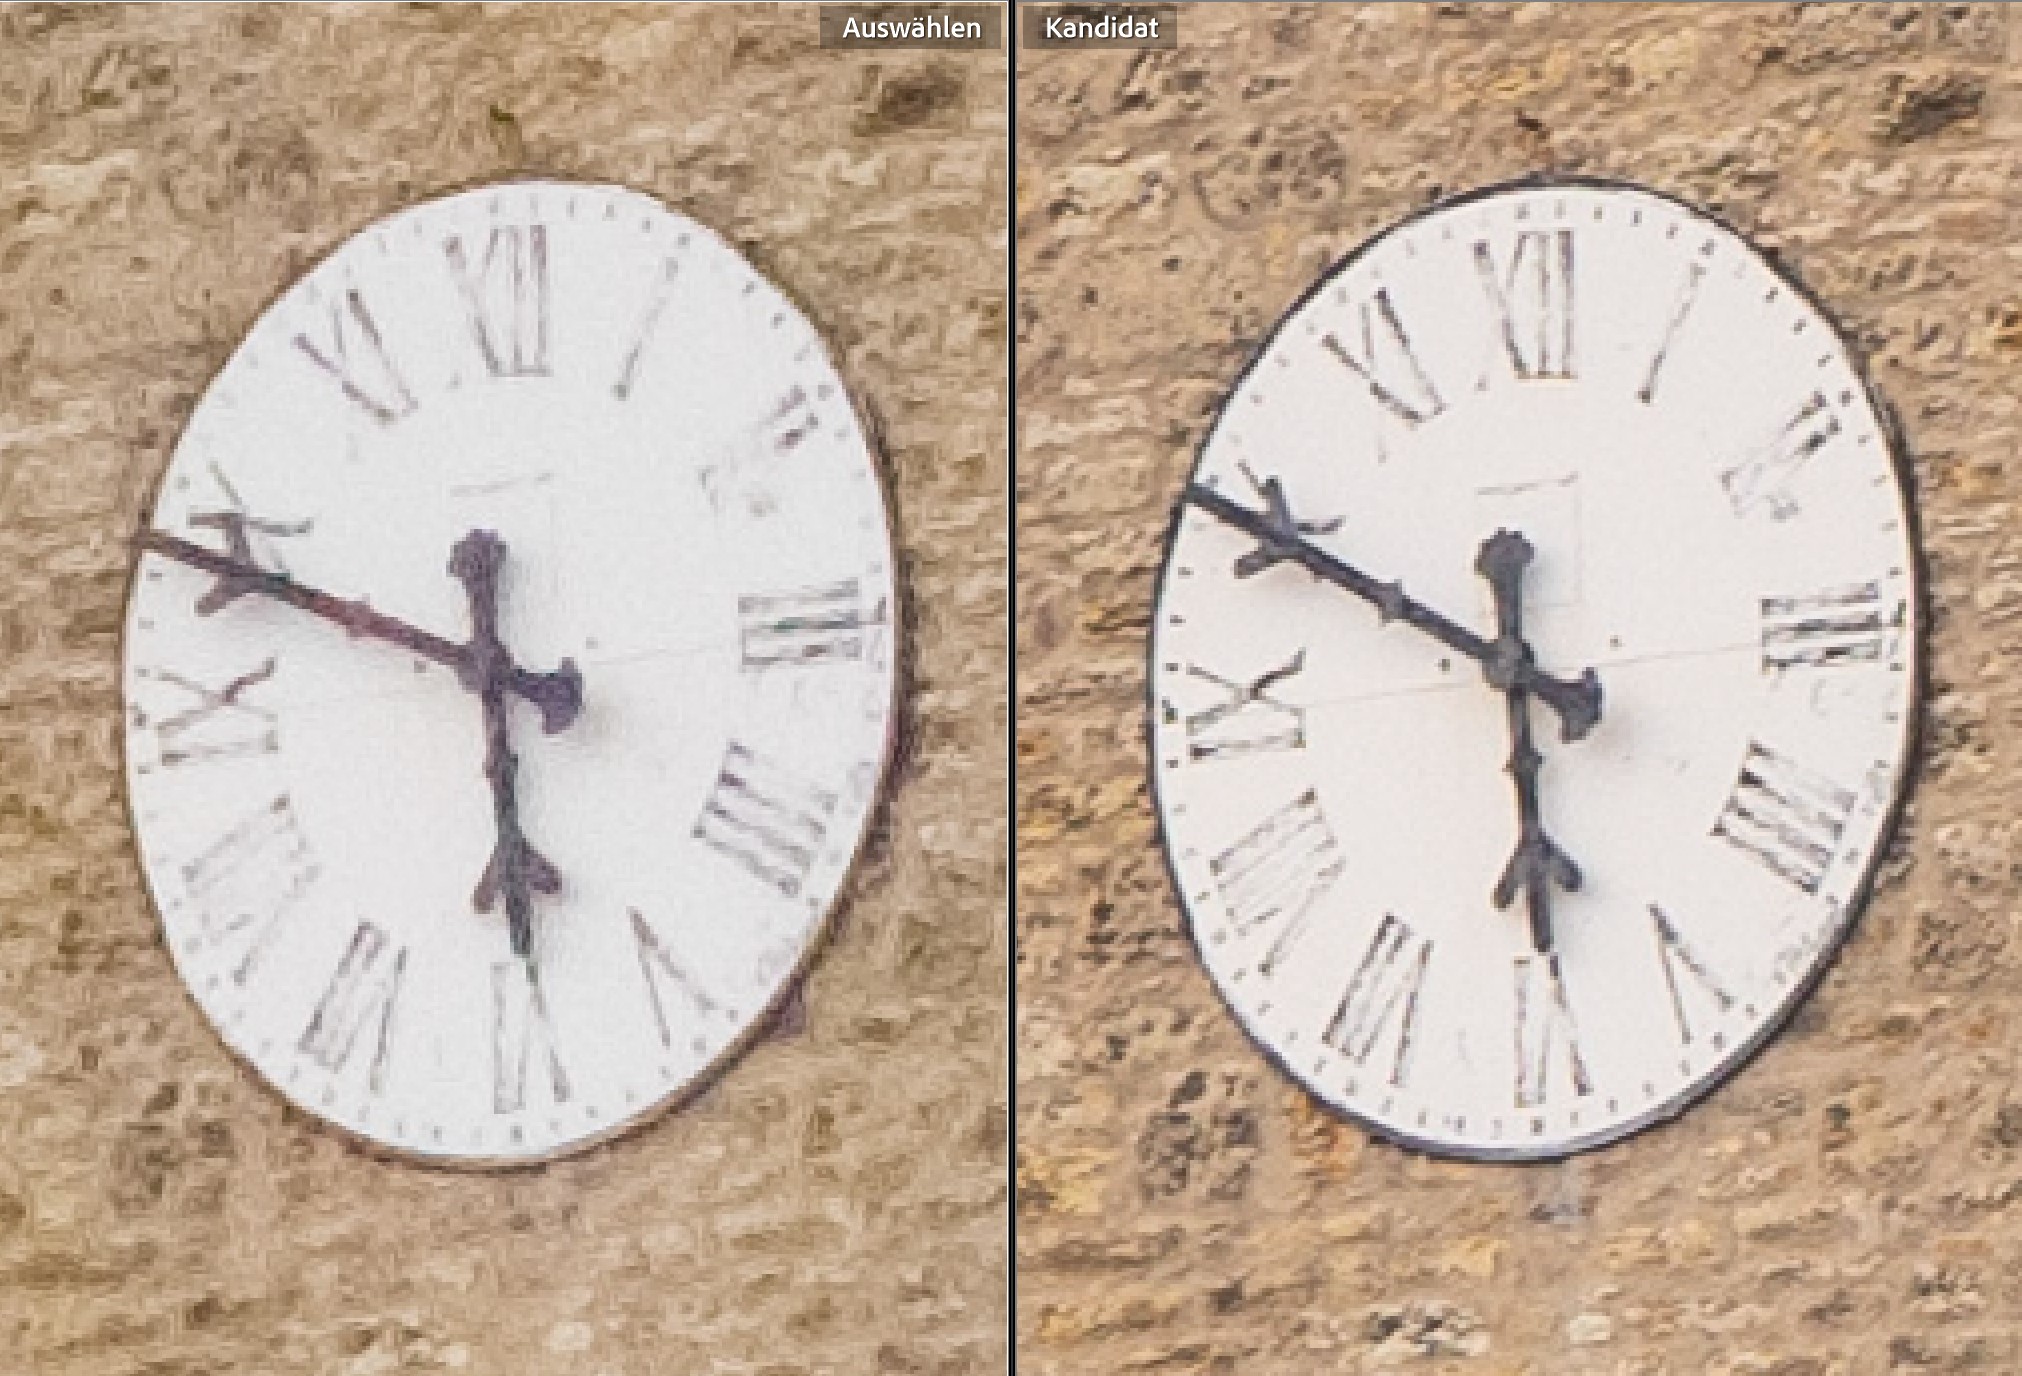
But now for the details. I start again with 400% enlarged crops from the center of the image with the clock in the church tower:
And here is another 400% crop from the right edge of the picture:
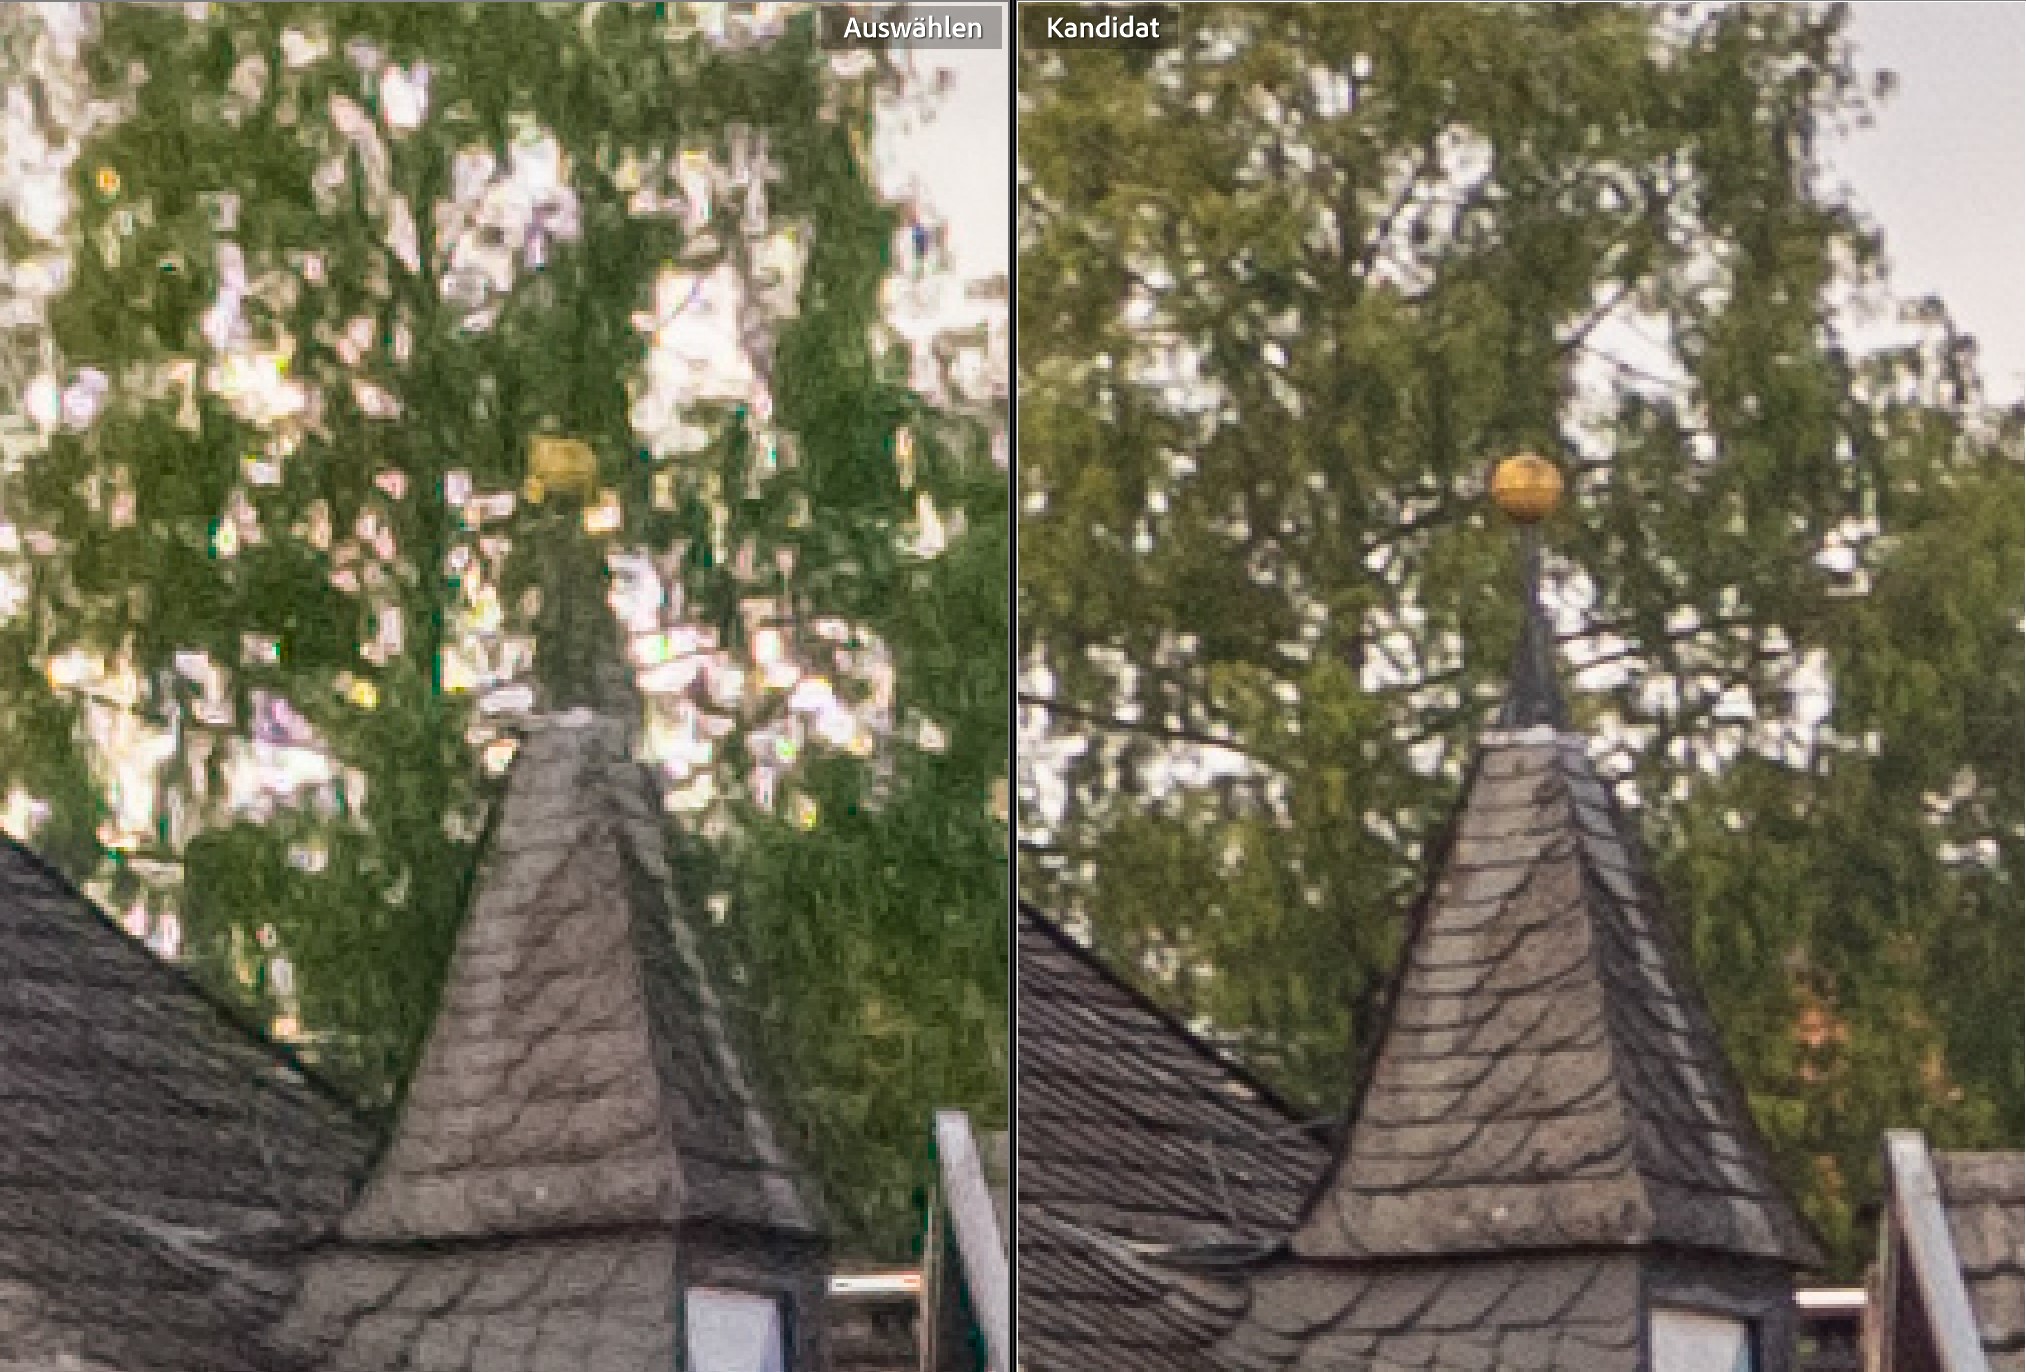
As expected, the Canon EOS R5 clearly wins here. In the right image sections, the full-frme camera reveals much more details and also a much better contrast between the clock hands and the clock face.
Color artifacts in the clock hands and especially in the foliage of the tree are quite noticeable with the DJI Air 3. In my opinion, these are due to the Quad Bayer design of the 1/1.3 inch sensor. It has a nominal resolution of 48 megapixels, but the color filters always cover four sensor pixels at the same time, so that the color resolution only corresponds to that of a 12 megapixel sensor in the classic Bayer design.
Since the corresponding color cannot be determined for each image pixel, it must be approximated from the color information of the surrounding sensors. This is much more difficult with the Quad Bayer design than with classic Bayer sensors. I explained more about this in an earlier article about the DJI Mini 3 Pro.
Résumé
Nevertheless, I am very satisfied with the performance of the Air 3 and also the Mini 3 Pro. The Air 3 takes even better pictures than the Mini 3 Pro. I hope that the Air 3 will soon also be supported by DxO Photolab and PureRAW. The results from the Mini 3 Pro could slightly be improved by using these programs.
I will definitely keep both drones for now, as I think they complement each other very well. The advantage of the Mini 3 Pro is still its unbeatable light weight, so you can practically always have it with you.
The Air 3 is a completely different animal. It flies faster, further and longer and also stays much more stable in the air. During the above shots at Desenberg it was very windy, according to my UAV Forecast App (which I can recommend to everyone) there were gusts of up to 41km/h. Nevertheless, the DJI Air stood like a rock in the waves. I would not have used the Mini 3 Pro in these conditions.
The second 70mm equivalent camera of the Air 3 is a real gain. I’m already very much looking forward to finding new motifs with it soon during our upcoming vacation in Switzerland. Then maybe another article will follow here soon…
*=Affiliate Link
