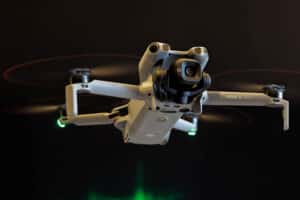
In the meantime, my new DJI Mini 3 Pro, which I had ordered on the release date, has arrived. As promised, I want to report here briefly about my first experiences.
As a photographer, I primarily looked at the photo features of the small drone. I was particularly interested in the quality of the new optics (f/1.7 at 24mm KB-equivalent focal length) and the resolution of the also new 1/1.3″ sensor with its high 48 megapixel resolution in 4:3 format.
First, a few words about the drone itself:
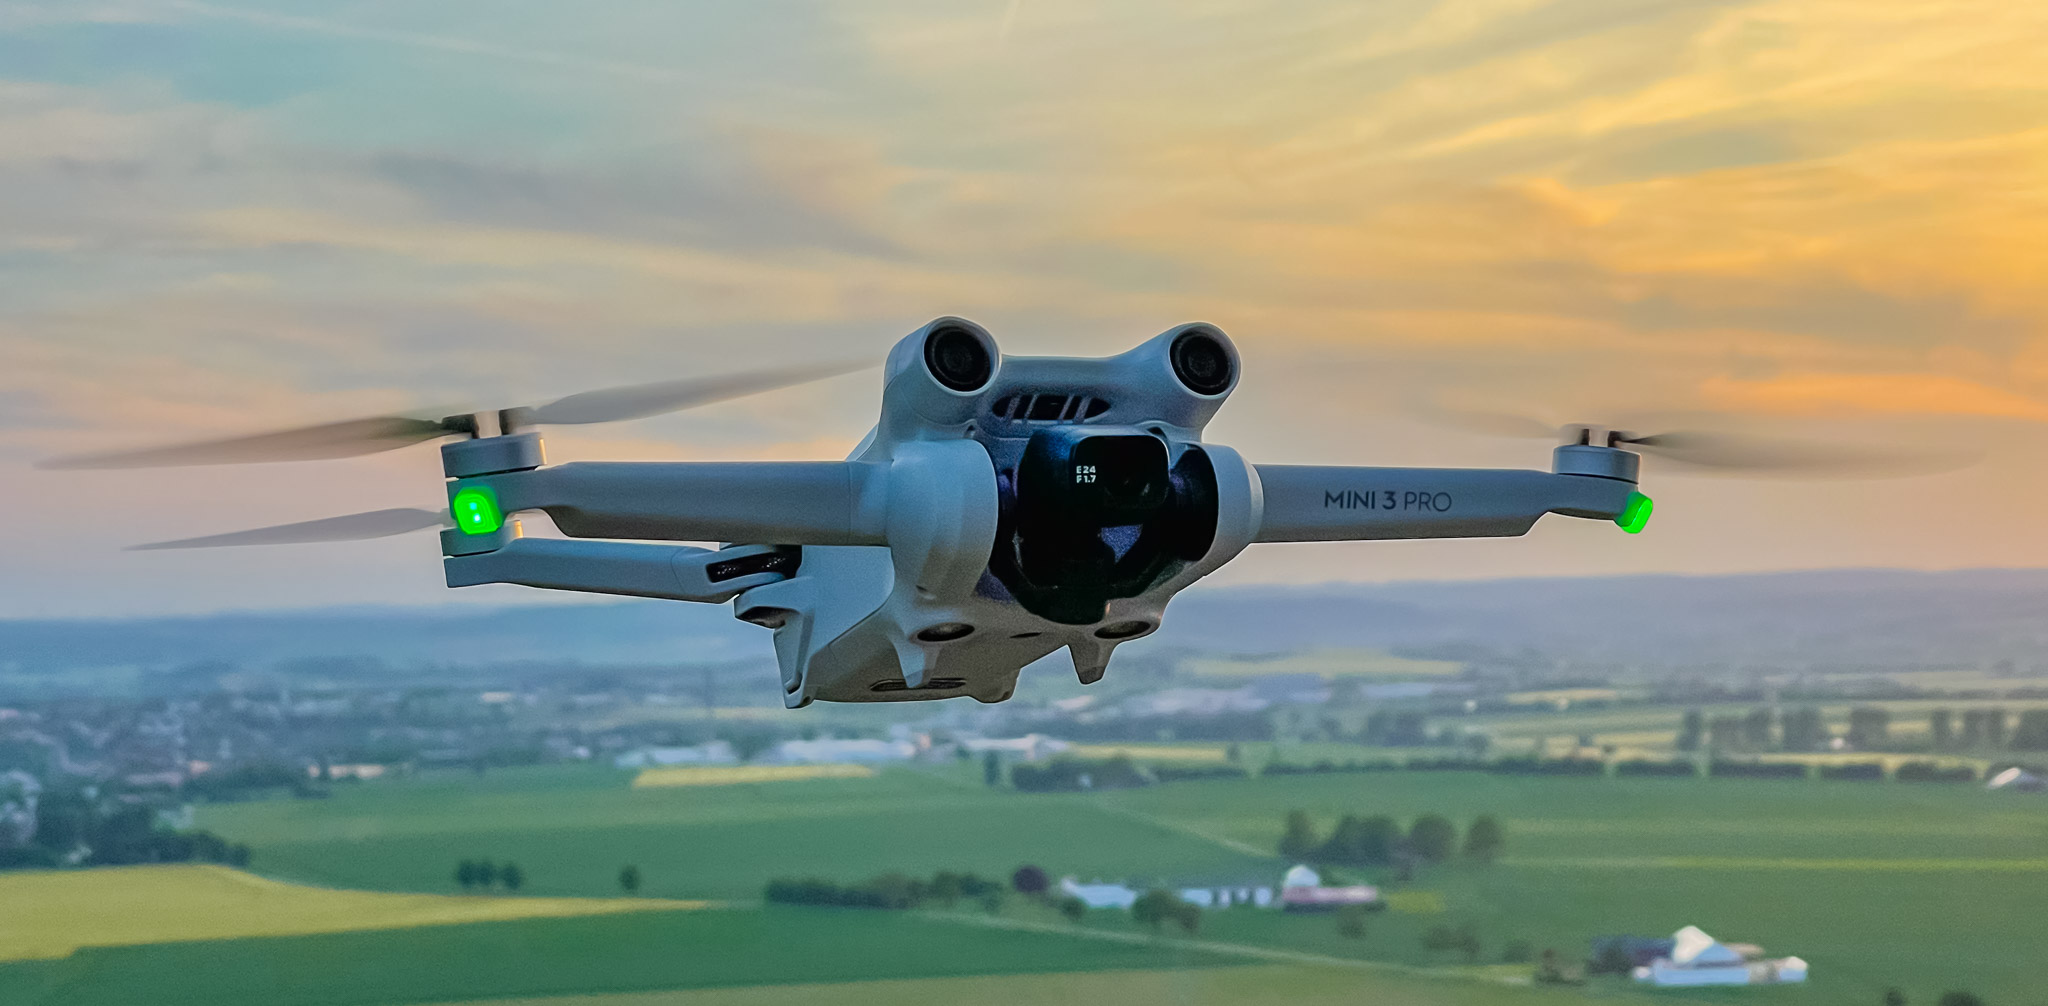
With its indicated weight of 249g printed on the batteries, the DJI Mini 3 Pro is below the important weight limit of 250g, which makes it much easier to operate and at the same time significantly increases its range of use in the EU.
Operating requirements
Drones in their weight class may be used without an EU drone license. However, it is still necessary for their operation to have a liability insurance, to register them with the Federal Aviation Authority as a drone pilot, and to affix the e-ID issued from there to the drone in the form of a sticker. More information on this can be found in my article “Photography in 3 Dimensions”.
Flight areas
The rules and requirements of the EU Drone Regulation are complex and change frequently. According to the EU Drone Regulation, drones are divided into certain classes depending on their weight and function. These classes determine in which areas they may be used and which qualifications the controlling remote pilot must fulfill. Unfortunately, the law was passed faster than the necessary certification centers could be established, so all currently available drones have not yet received official class registration.
However, for drones with a flying weight below 250g, including the DJI Mini 3 Pro, there is a pleasing exception. Even without official certification, they fall into the lowest class A1, which at the same time offers the fewest restrictions regarding the permitted flight area.
In particular in the EU, class A1 drones do not have to maintain a defined minimum distance from residential areas. A wider distance to people is also not required and individual uninvolved persons may also be flown over. Of course, as always in photography, the privacy of uninvolved persons must be strictly observed. For exact details I refer to the many relevant drone pages on the net. Here, the focus is on the capabilities of the Mini 3 Pro as a photo drone.
I purchased the DJI Mini 3 Pro in a set with the RC controller*. A Fly More bundle of the drone, which was available with the last DJI drones, is currently not offered. However, the Fly More Combo with 2 extra batteries, triple charger, bag and more spare propellers can be purchased separately from the Mini 3 Pro. Although I ordered the set immediately, it will not be delivered until later, so I currently have to get along with only one battery.
First flight
The drone is shipped with an inactive battery. This activates automatically during the first charge. A power adapter for the USB-C charging port is not included with the DJI Mini 3 - it was still included with the Mini 2. But since I have various USB-C chargers for my laptops and the Canon EOS R5 anyway, this was unproblematic. By the way, the drone can also be charged well via a powerbank with USB-C PD output*, which is especially helpful when only one battery is available. So I have refueled the drone between two flights using my powerbank. The new DJI RC controller with built-in bright display came already fully charged.
After fully charging the battery and pairing it with the DJI RC remote for the first time, I initially had to download and install a firmware update for both drone and controller, which took about 15 minutes. Then everything was ready to go. After inserting my 256GB Sandisk Extreme PRO* Micro-USB, it was ready to take off.
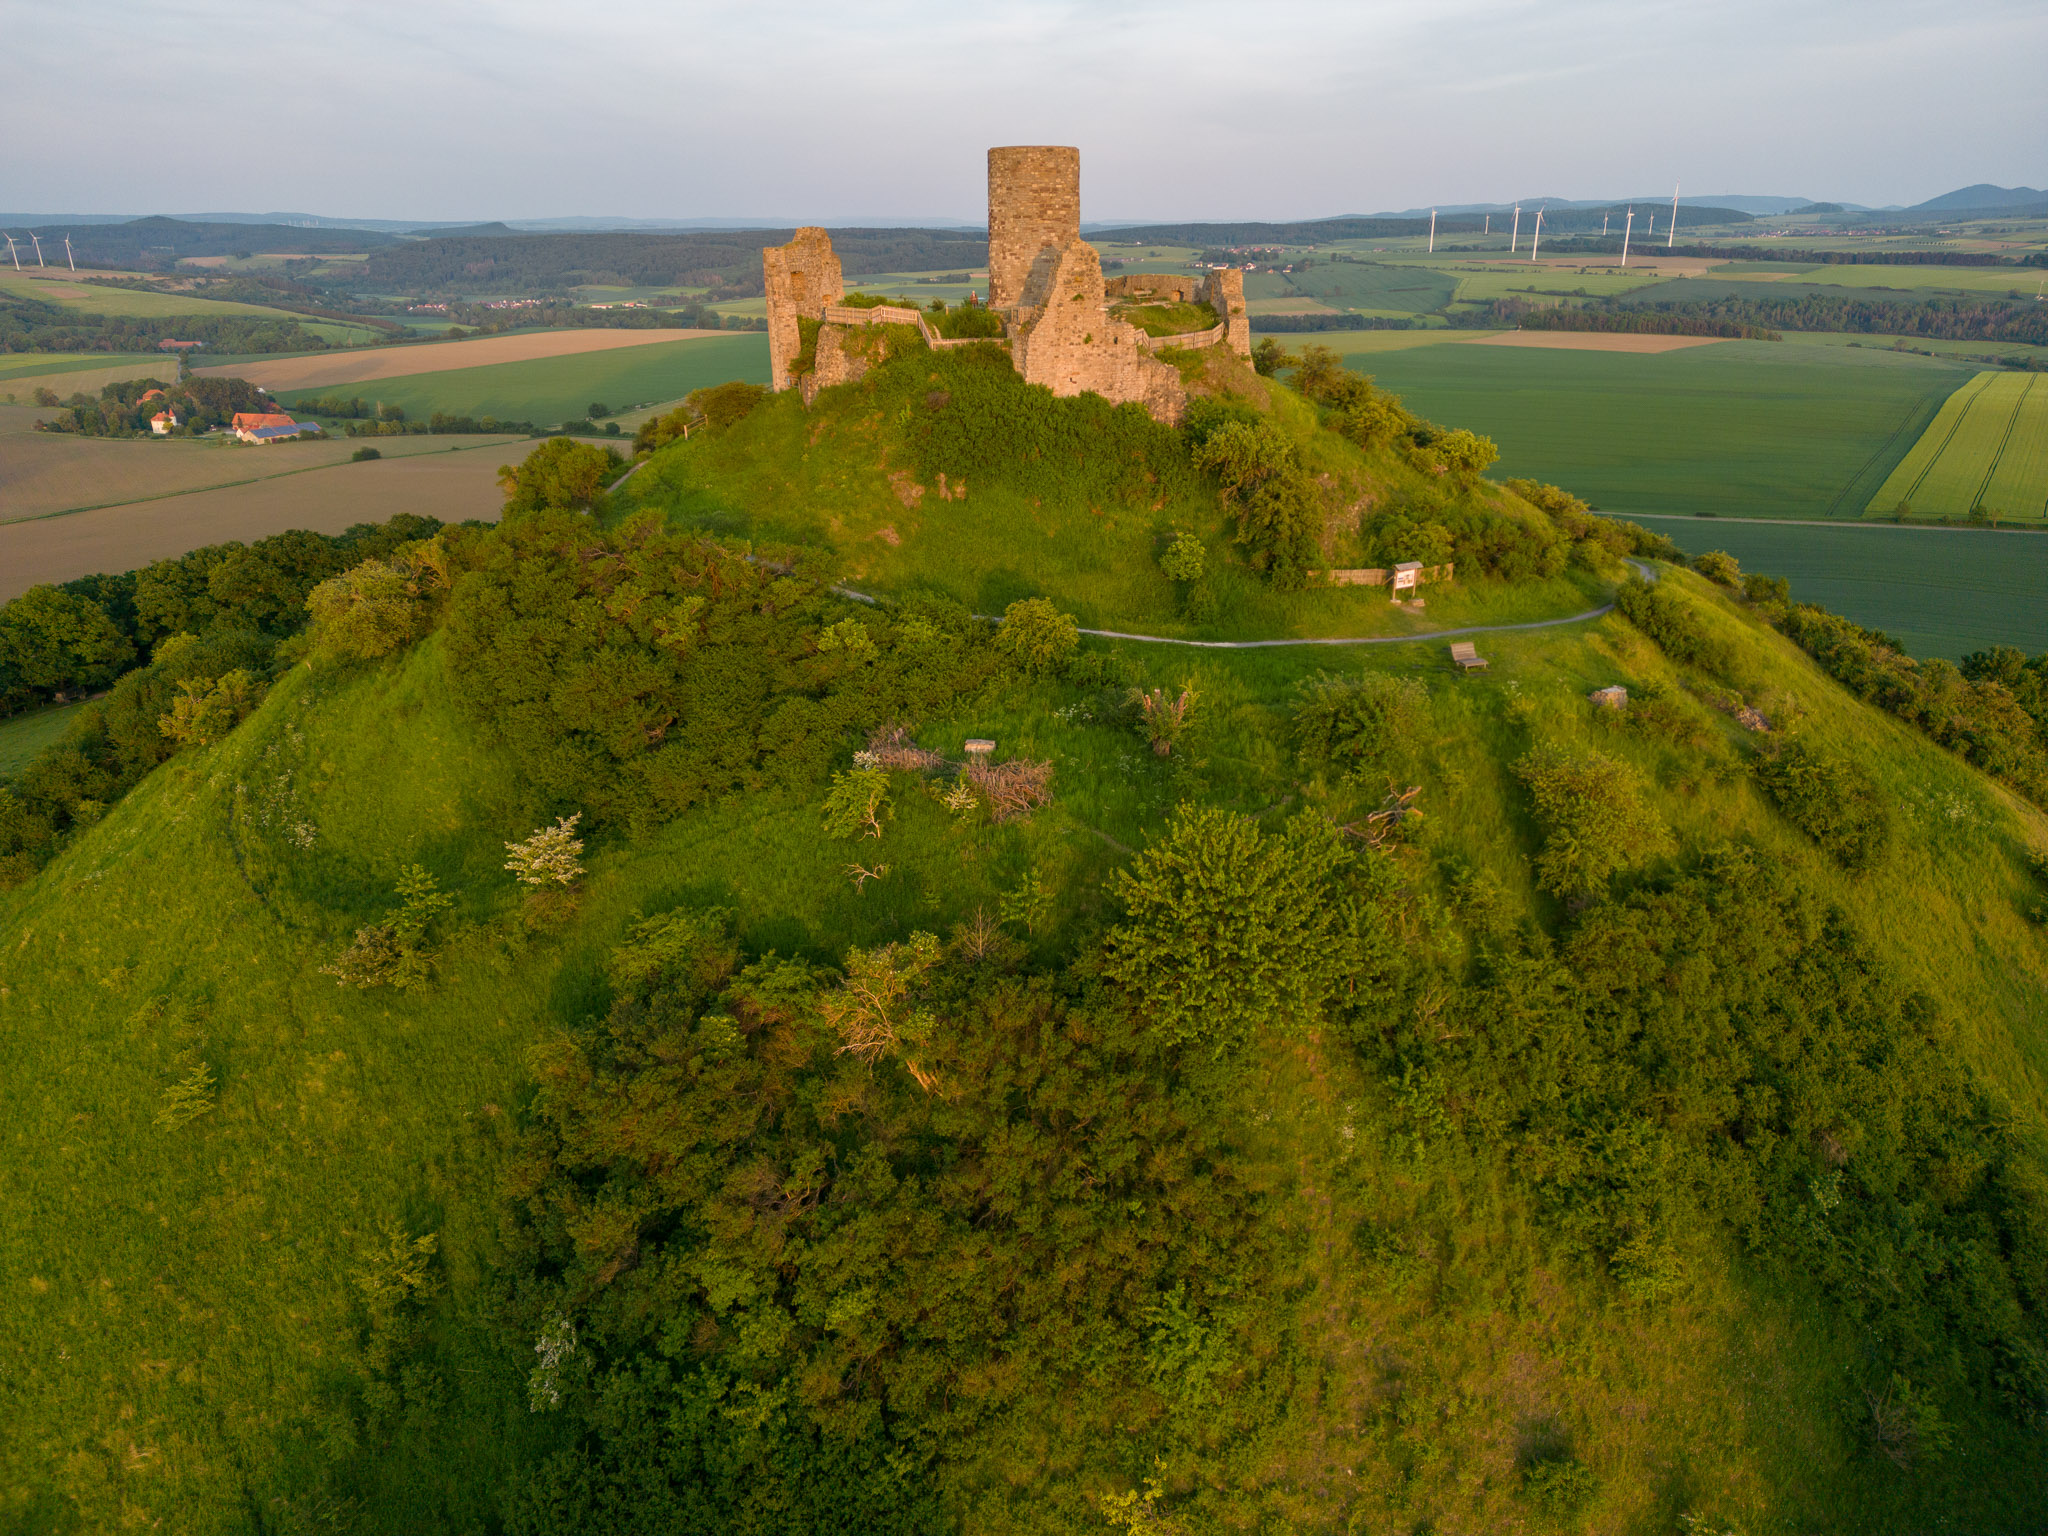
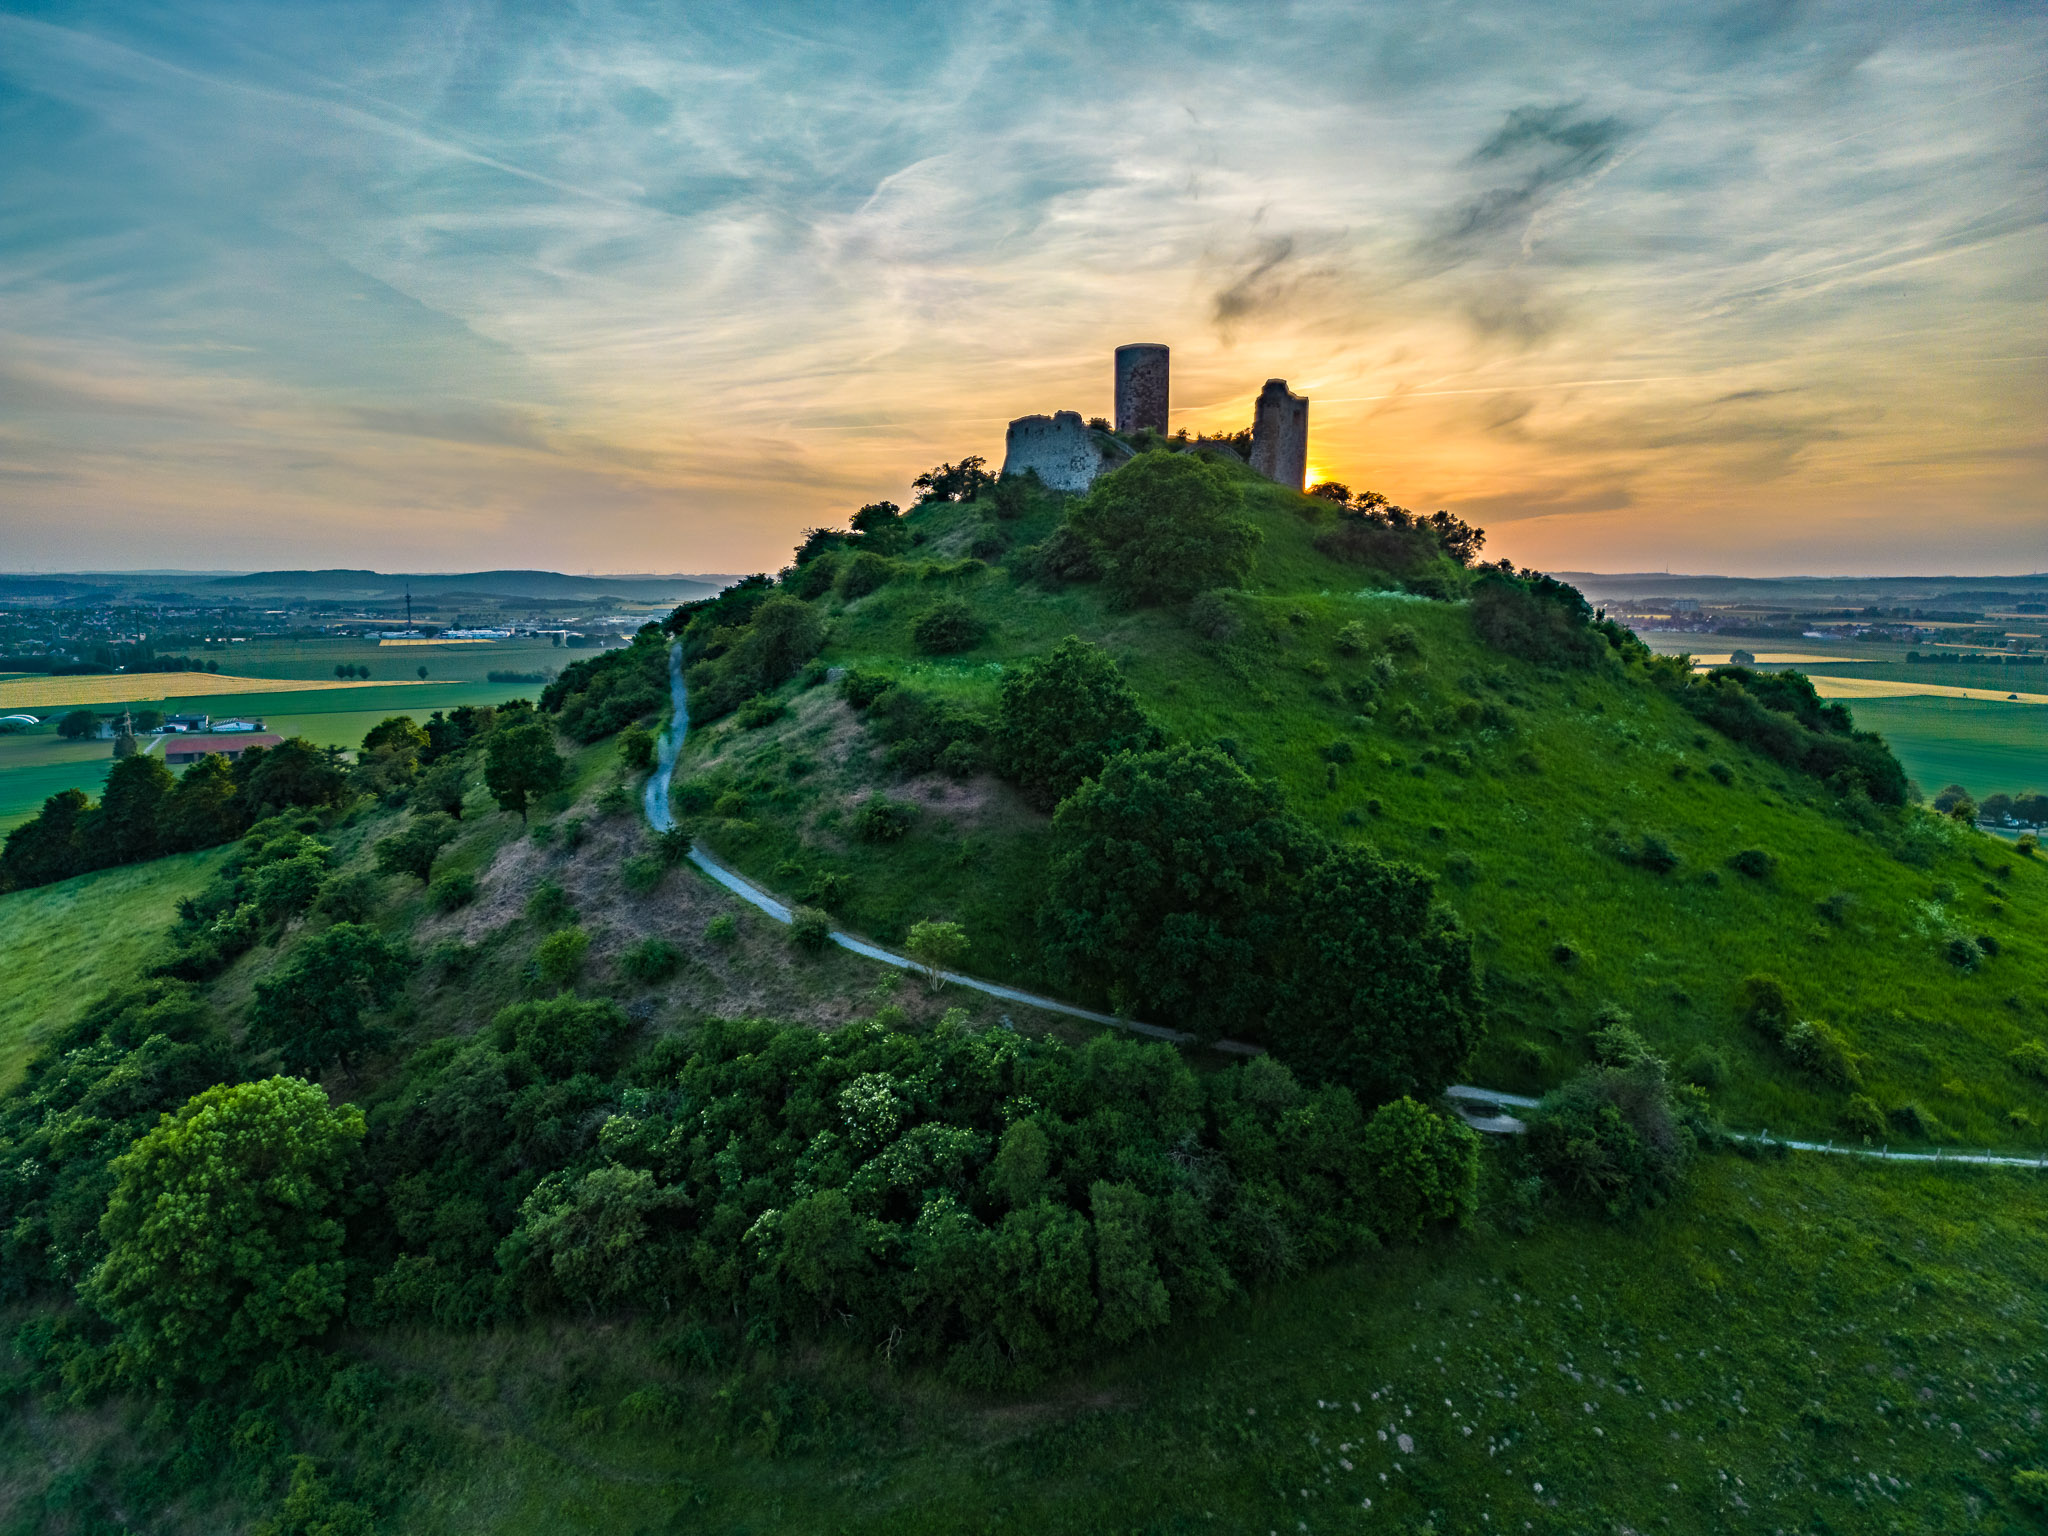
For the first test I drove shortly before sunset to our nearby local mountain, the Desenberg with the castle ruins on it. This was already the object of my previous drone reports, so that a certain comparability of the results is possible.
Operation
Thanks to the new RC controller, operating the Mini 3 Pro has become even easier. The sometimes fiddly attachment of the cell phone to the controller is no longer necessary. In addition, there is one device less to charge.
The drone controls are identical to those of the old controller:
- The left stick controls the up, down and rotational movement of the drone
- The right stick steers it forward, backward or to the sides
- The left shoulder button starts video recording
- The right shoulder button takes a photo
- The left wheel moves the gimbal up (now up to 60°!) and down
- The right wheel is used for digital zooming
Further adjustments are made on the large and bright (700Nits) display, which is significantly brighter than the one on my previously used iPhone 12 Pro.
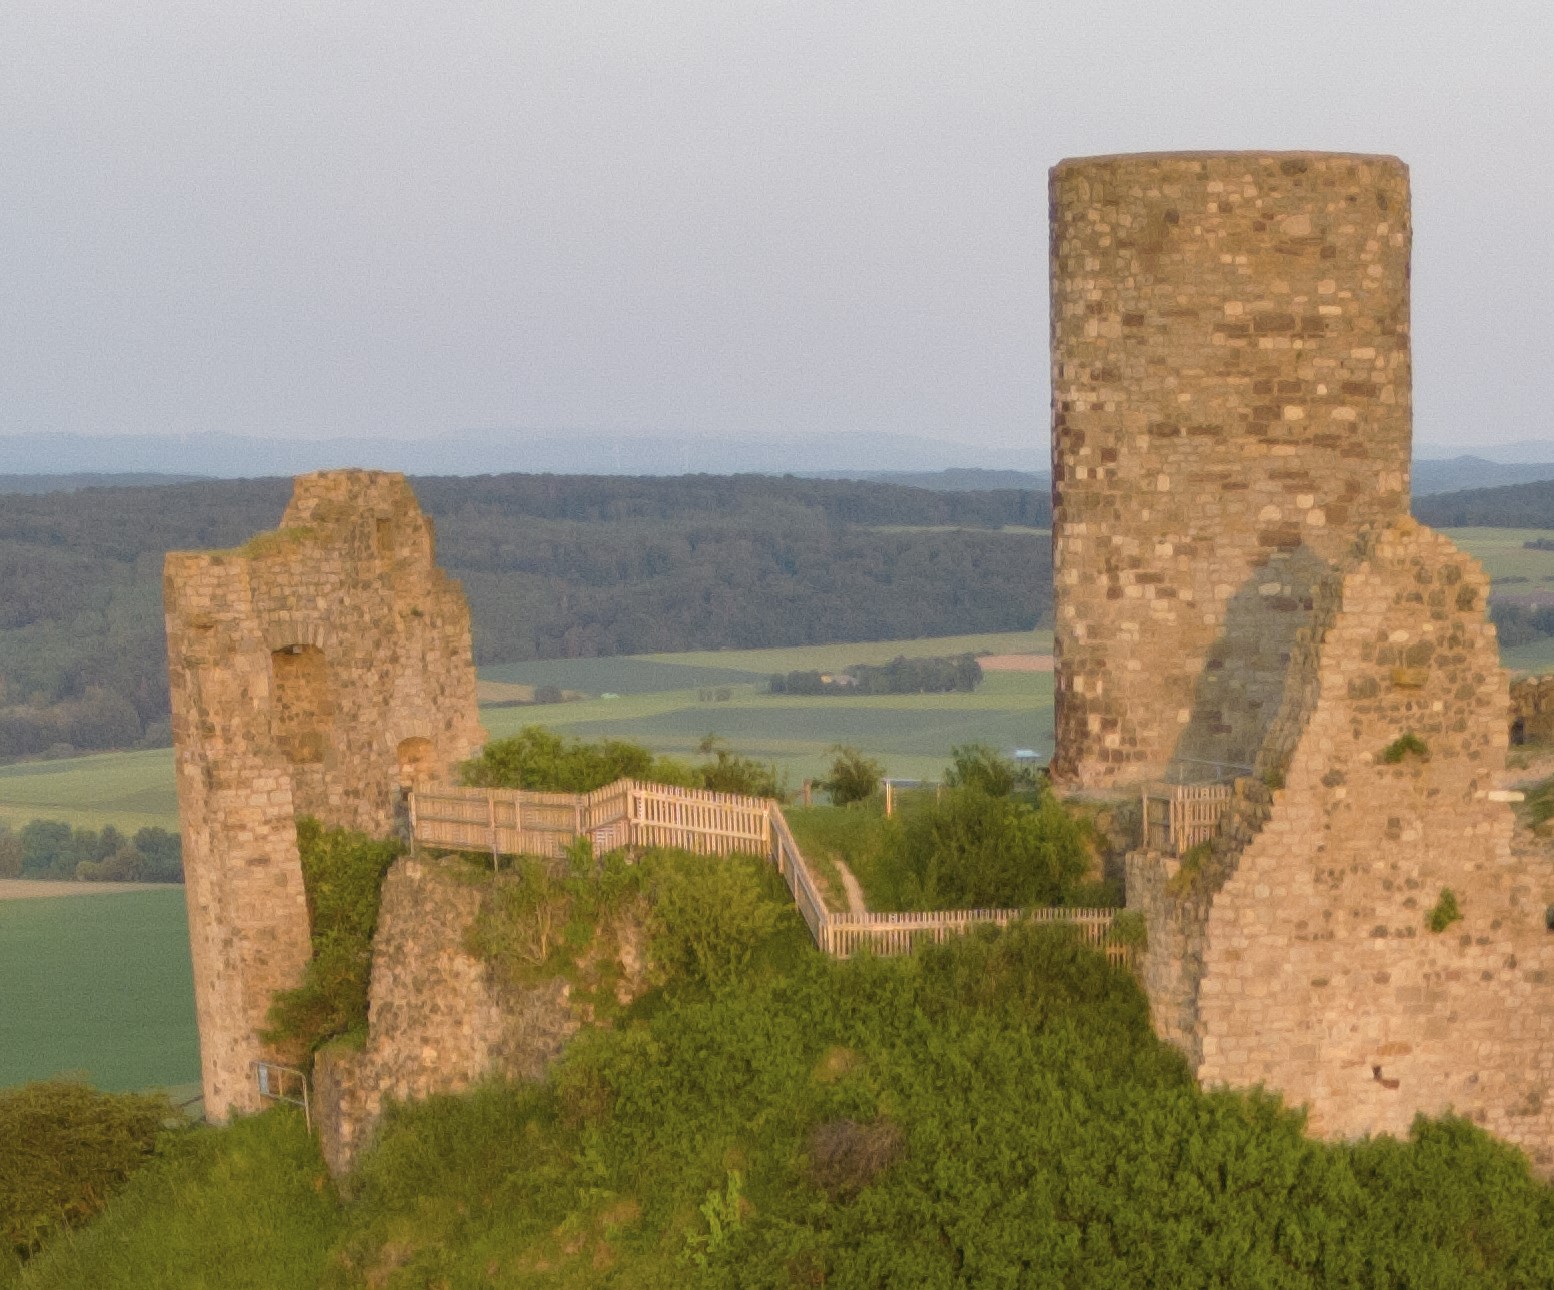
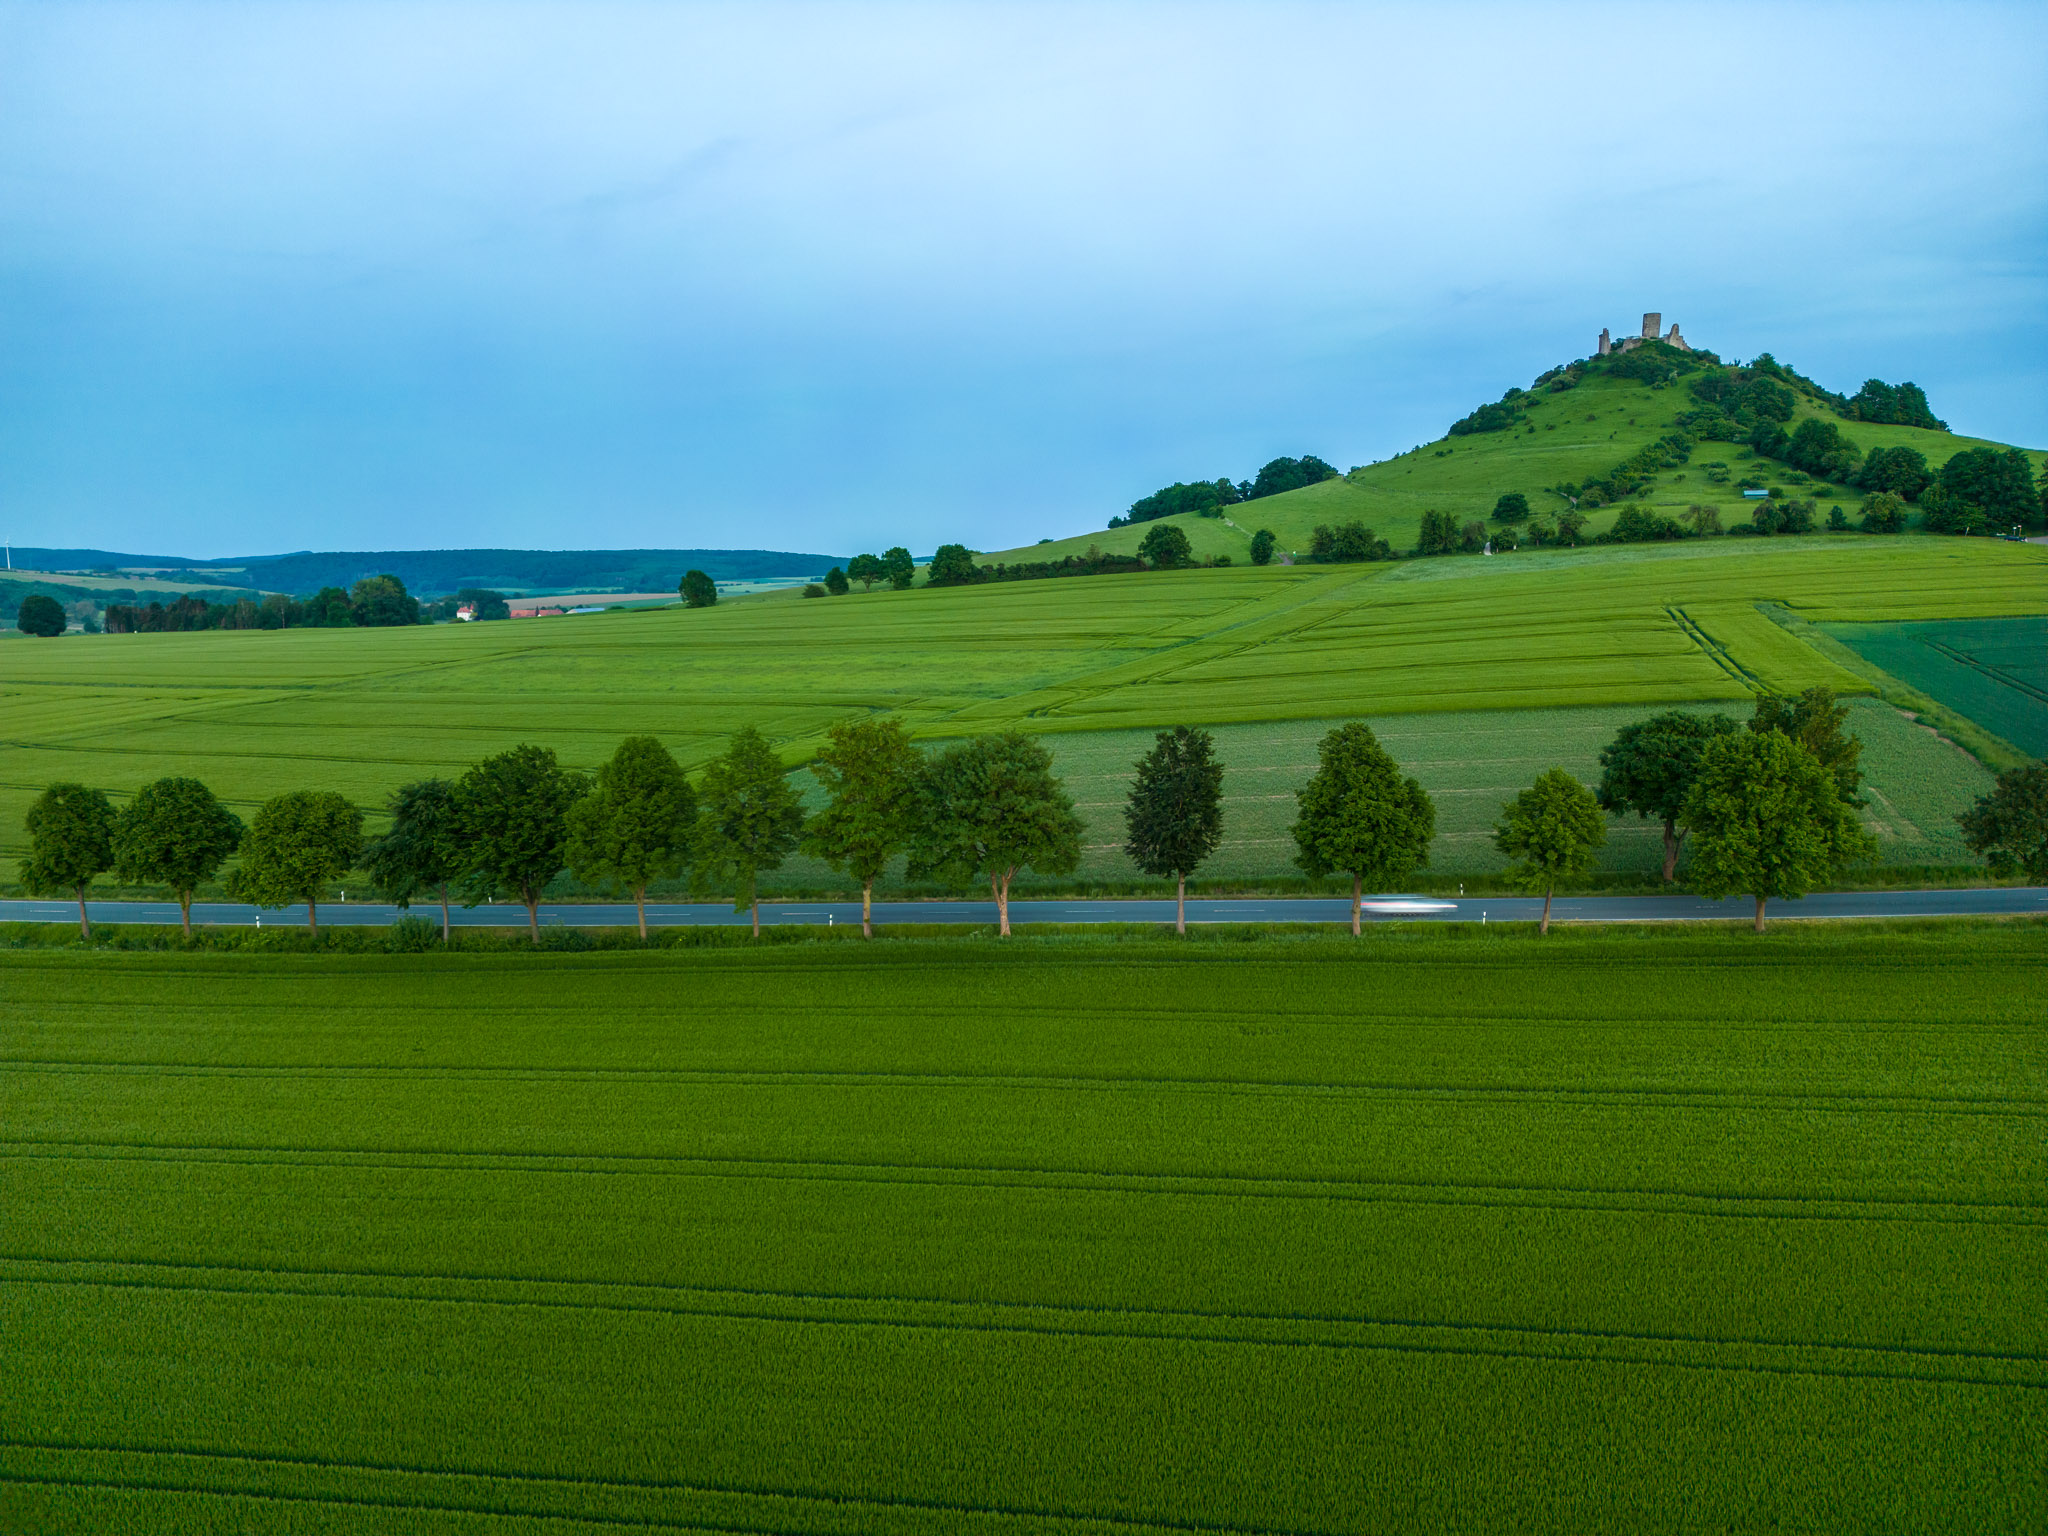
I was primarily concerned about the photo quality, as already mentioned above. Here a first picture of the Desenberg with the castle ruins on it in the evening light shortly before sunset:
In order to be able to rate the richness of detail, here follows a 100% crop from the center of the image and from the upper image area:
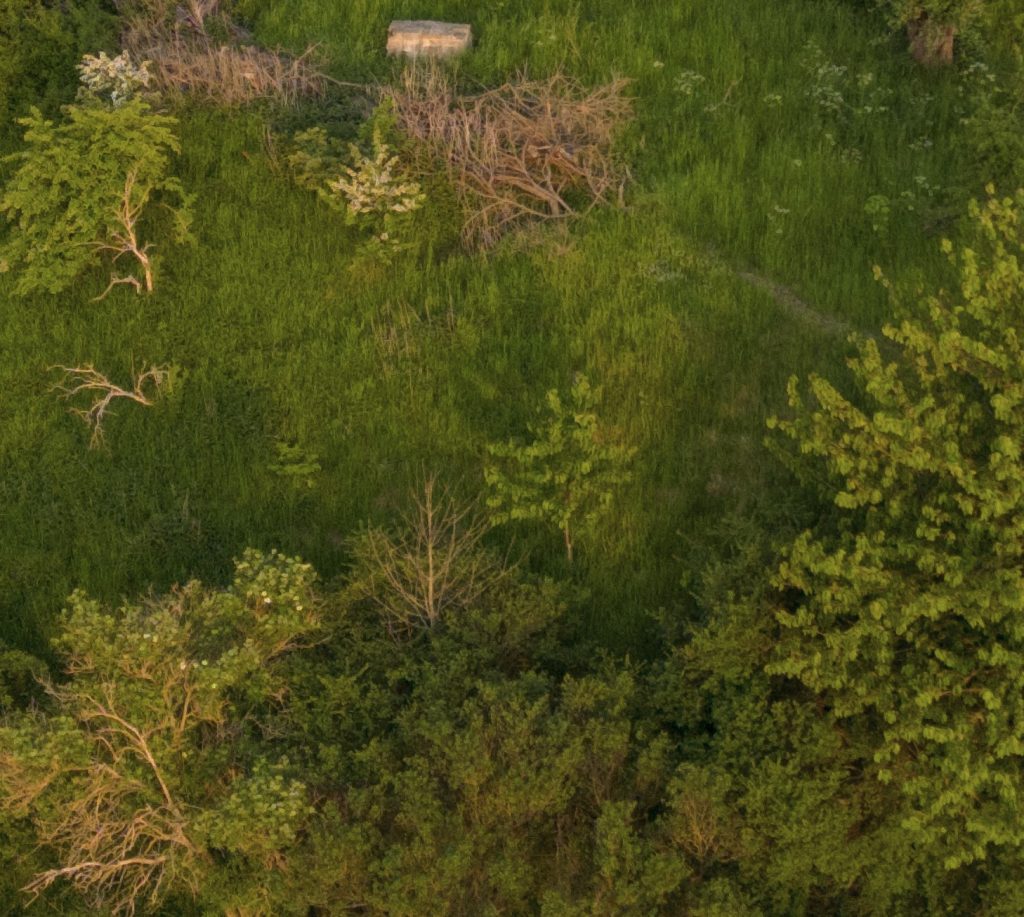
I took the pictures with the full 48 megapixel resolution of the sensor in RAW format. In addition to the compressed JPG format, the DJI Mini 3 Pro supports the DNG format standardized by Adobe, which allows direct editing of the files in Adobe Lightroom. The files created in this way have a considerable size of a good 95 megabytes each!
Unfortunately, the high-resolution 48 megapixel format is only accessible via a separate setting in the photo mode. This results in the fact, that all other photo modes, like exposure bracketing, continuous shooting and panoramas work only with the lower sensor resolution of 12 megapixels. Thus, 3x3 panoramas created this way get a lower resolution than single shots with full sensor resolution.
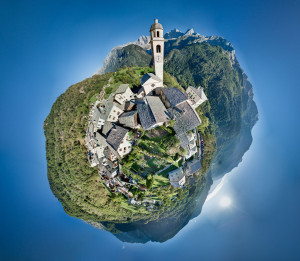
I hope that DJI will revise this in a later firmware version. I managed to take the necessary individual shots for the panoramas separately one after the other. The drone, if you just turn it and move the gimbal up and down, stays in the air as if it were nailed down. So I generated the panorama shown below from 2 rows of 3 shots each in Adobe Lightroom Classic.
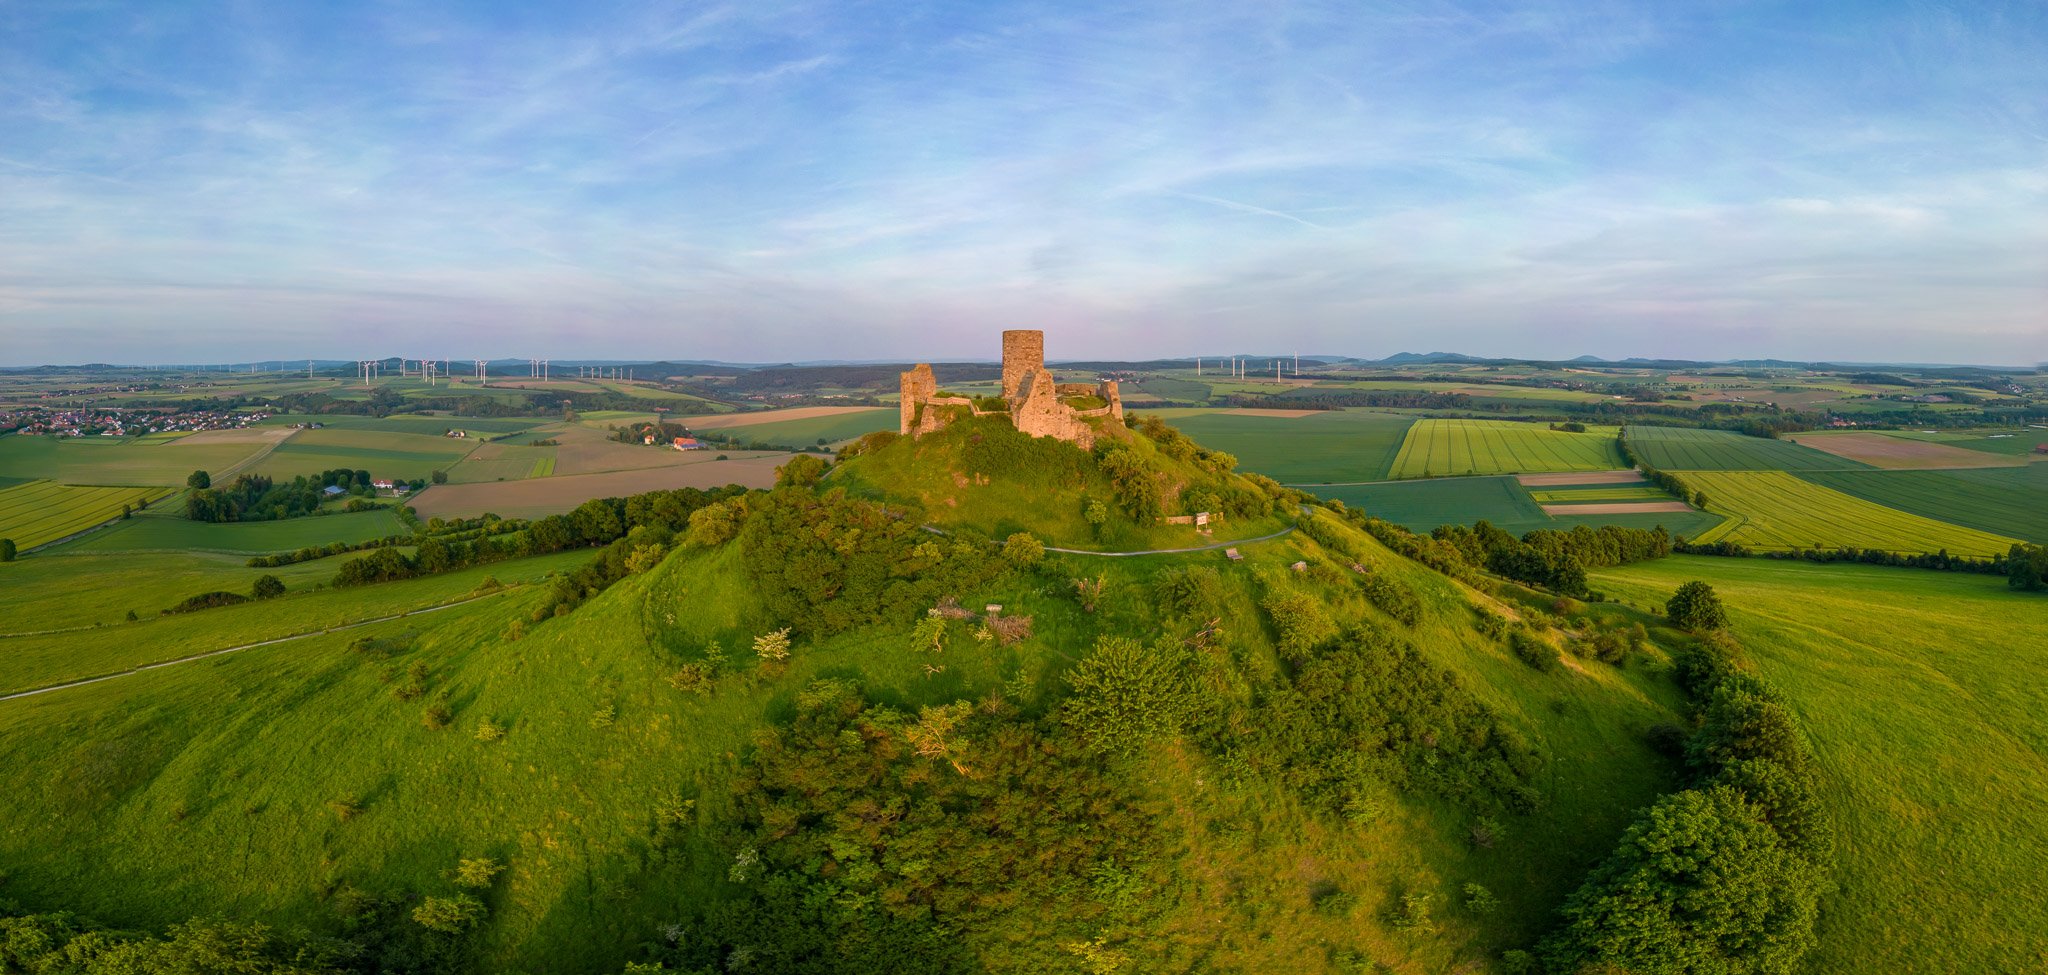
The resulting panorama has a resolution of 120 megapixels.
Firmware wishes
While speaking about my firmware update wish:
It would also be nice if it were possible to take photos in DNG-RAW format only. This is already possible with the DJI Air 2S. I don’t need the JPG files that are compulsorily recorded with the Mini 3 Pro. I always delete them immediately afterwards manually.
Another important wish would be the implementation of an automatic shutter mode. Currently, the Mini 3Pro can only set the exposure either fully automatically or completely manually.
In full auto mode, it autonomously selects shutter speed and ISO value and unfortunately does not display the values it has chosen. Only the exposure compensation can be set in 1/3 f-stops. Unfortunately, it quickly raises the ISO value in poor lighting conditions, which increases the noise. I would often prefer it to just increase the exposure time instead. Because of the drone’s very good stabilization in flight, longer exposure times are often unproblematic.
In manual mode, the shutter speed and ISO value can be set manually. However, you always have to actively adjust the values to achieve a balanced exposure. Using the touch screen of the remote control makes this fiddly and time-consuming.
What I therefore miss very much is an aperture priority with a fixable ISO value, e.g. fixed ISO 100. This could be achieved if the time scale would also offer an AUTO setting. I have just checked it: This is actually implemented on the DJI Air 2S and works without any problems. If I have so far overlooked an option that allows this with the Mini 3 Pro, I would be grateful for corresponding tips.
Image noise
Even at an ISO value of 100, a slight basic noise already appears, which was to be expected with the small pixel size of the 48 megapixel 1/1.3″ sensor. Obviously, the DNG files created by the DJI Mini 3 Pro are already somewhat processed, as you can assume from some visible artifacts. In post-processing, noise correction is usually necessary. Unfortunately, DxO Photolab 5 and DxO PureRaw do not yet support the Mini 3 Pro, so denoising with the ingenious DeepPrime AI algorithm included there, which I highly appreciate, is not yet possible. But even in Lightroom, noise can still be well controlled, at least in sufficient lighting conditions. But what about high contrast conditions, such as backlighting?
Dynamic range
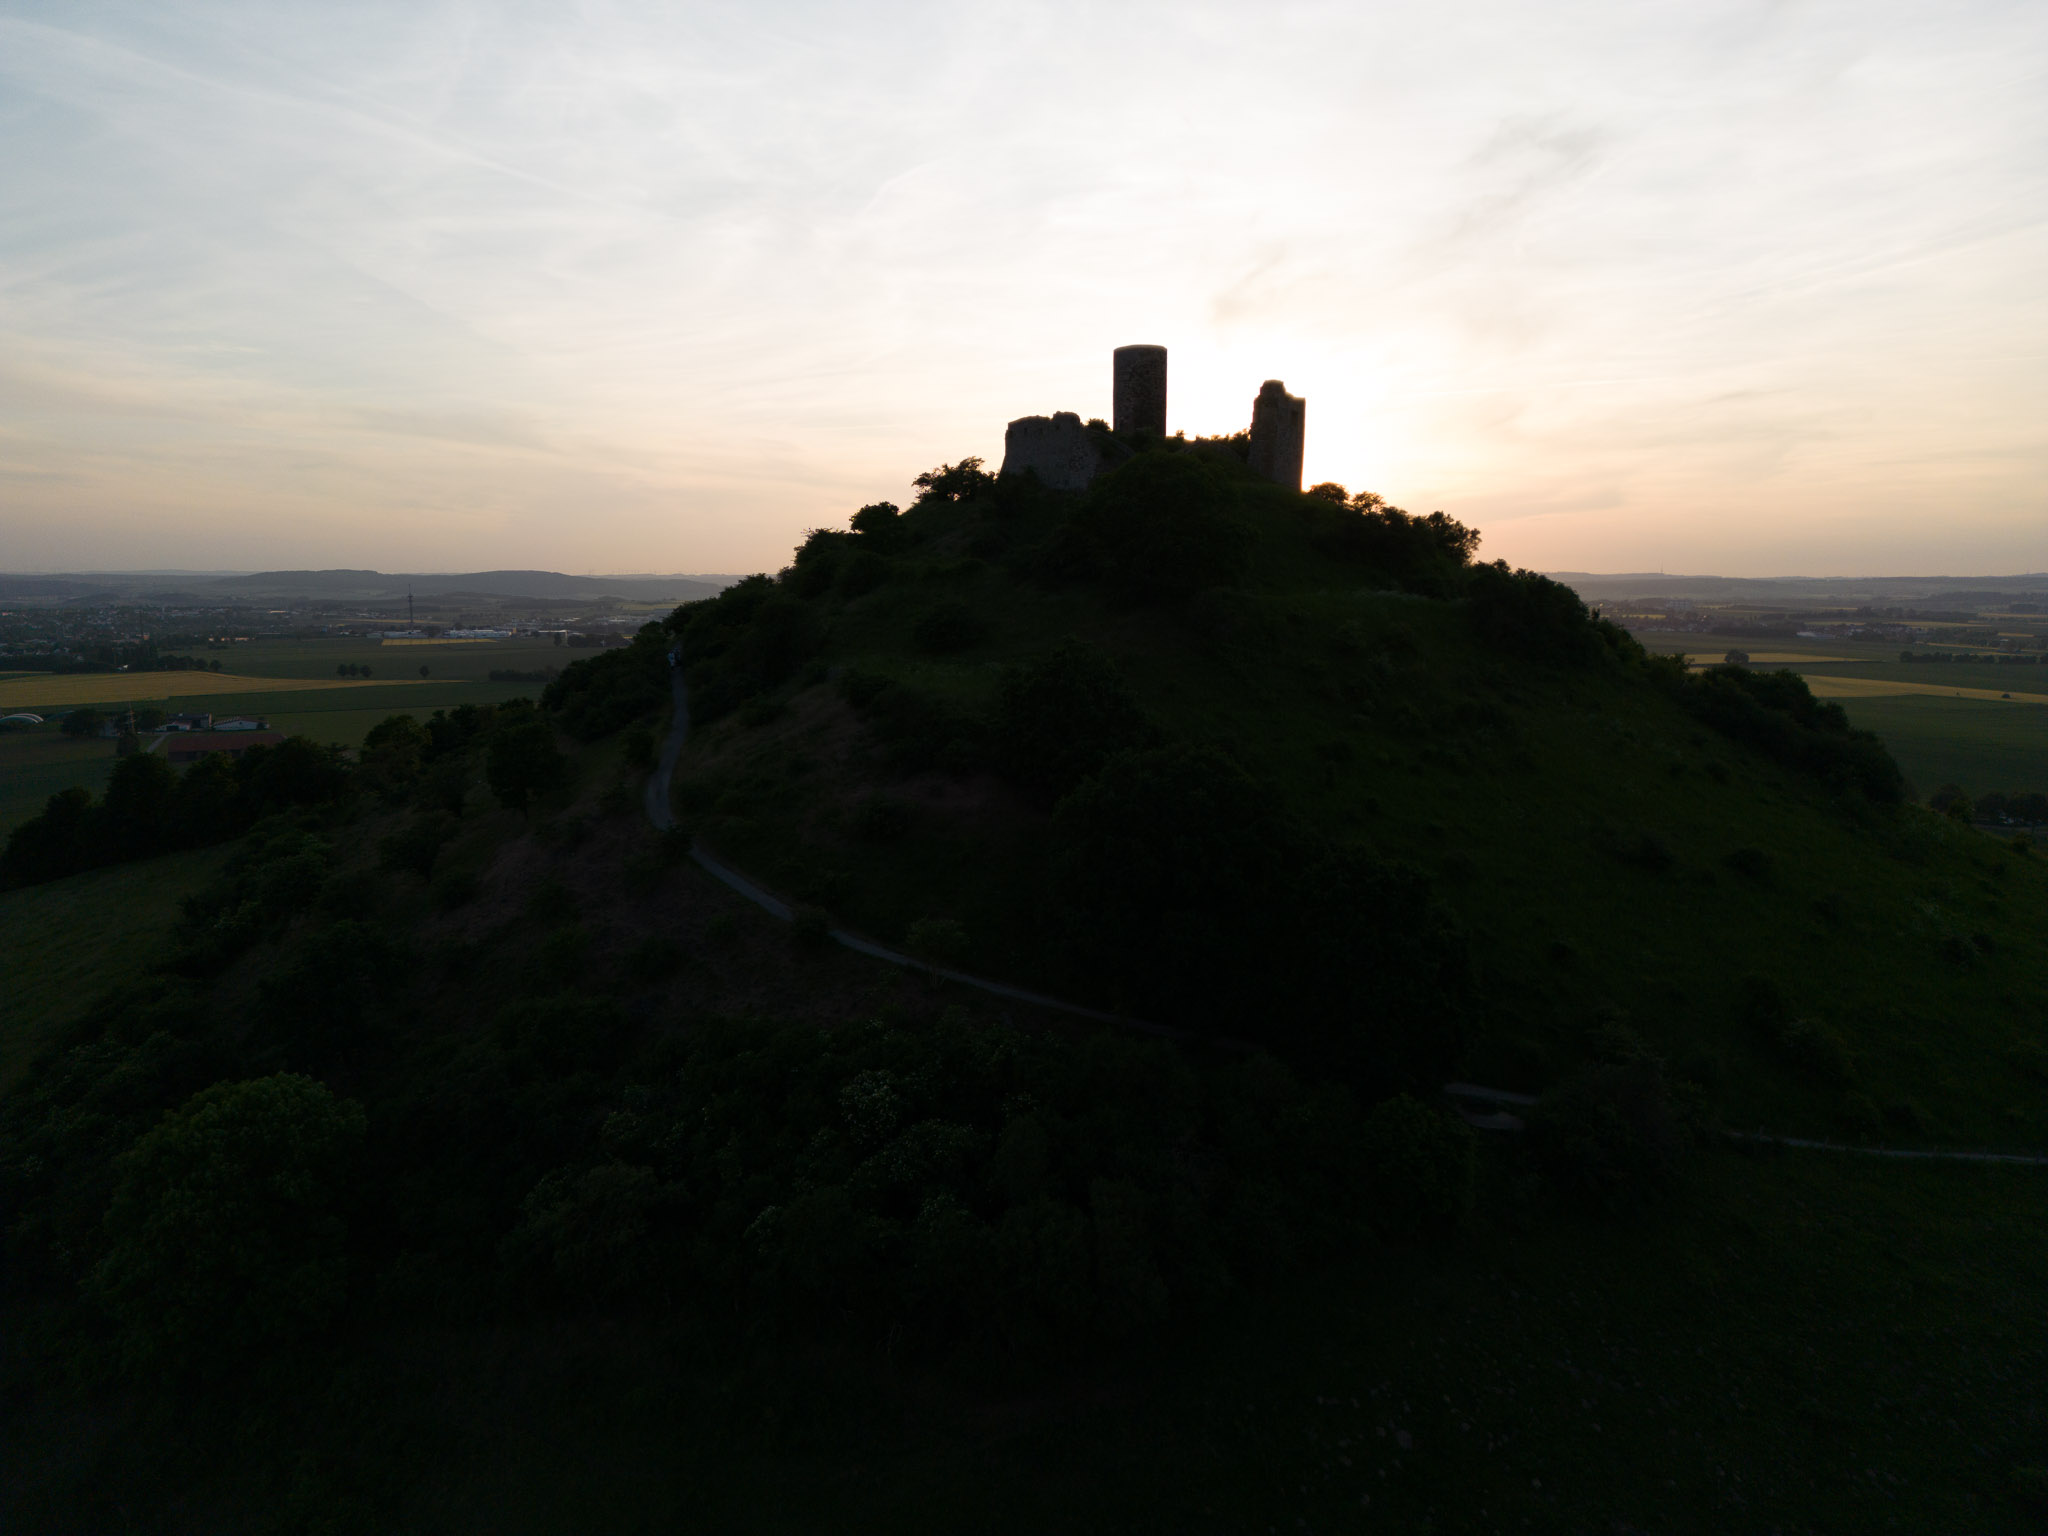
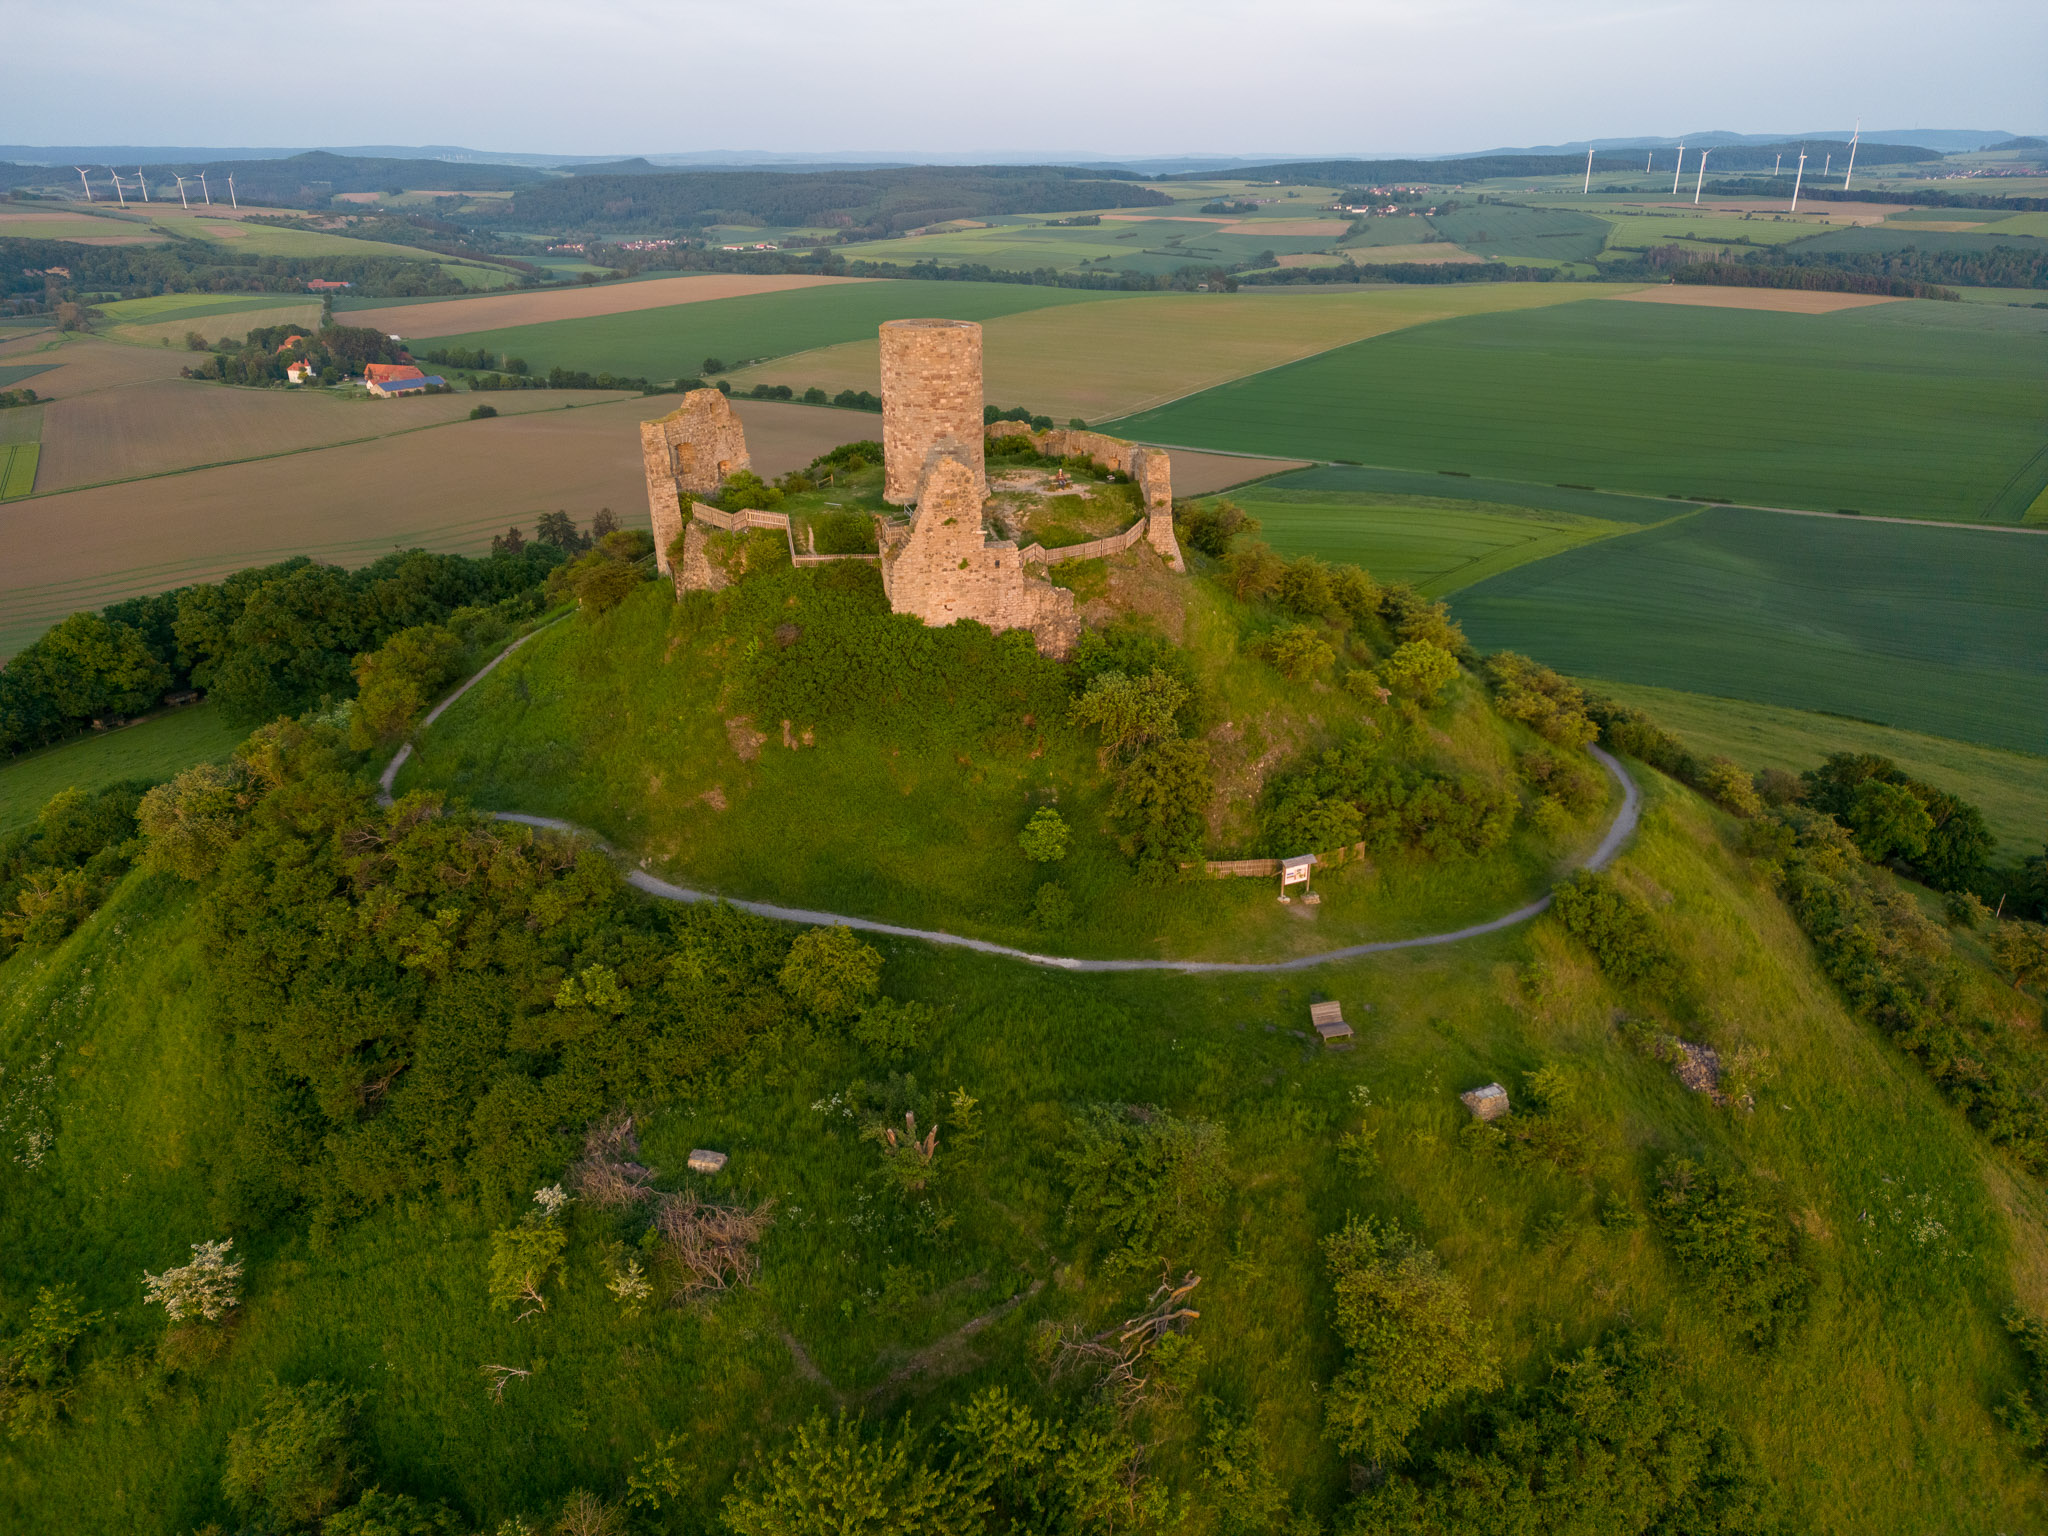
To test the dynamic range of the sensor in RAW format, I took a picture of the Desenberg in the backlight of the setting sun. Here you can see the image as it looks in Lightroom without any processing:
Dann habe ich versucht, in der Nachbearbeitung die Tiefen und Höhen wieder herauszuarbeiten. Ich habe dazu in Lightroom Classic die Belichtung um 0,28 angehoben, die Lichter um 100 reduziert und die Tiefen um 94 aufgehellt. Ausserdem habe ich den Klarheits-Regler auf +32 und die Dynamik auf +61 verstärkt. In der Übersicht sieht das nicht schlecht aus, allerdings ist die Region um die Sonne doch noch immer ausgefressen.
Then I tried to work out the shadows and highlights in post-processing. I did this in Lightroom Classic by increasing the exposure by 0.28, reducing the highlights by 100, and lightening the shadows by 94. I also boosted the Clarity slider to +32 and the Dynamics to +61. In the overview, this doesn’t look bad, but the region around the sun is still washed out.
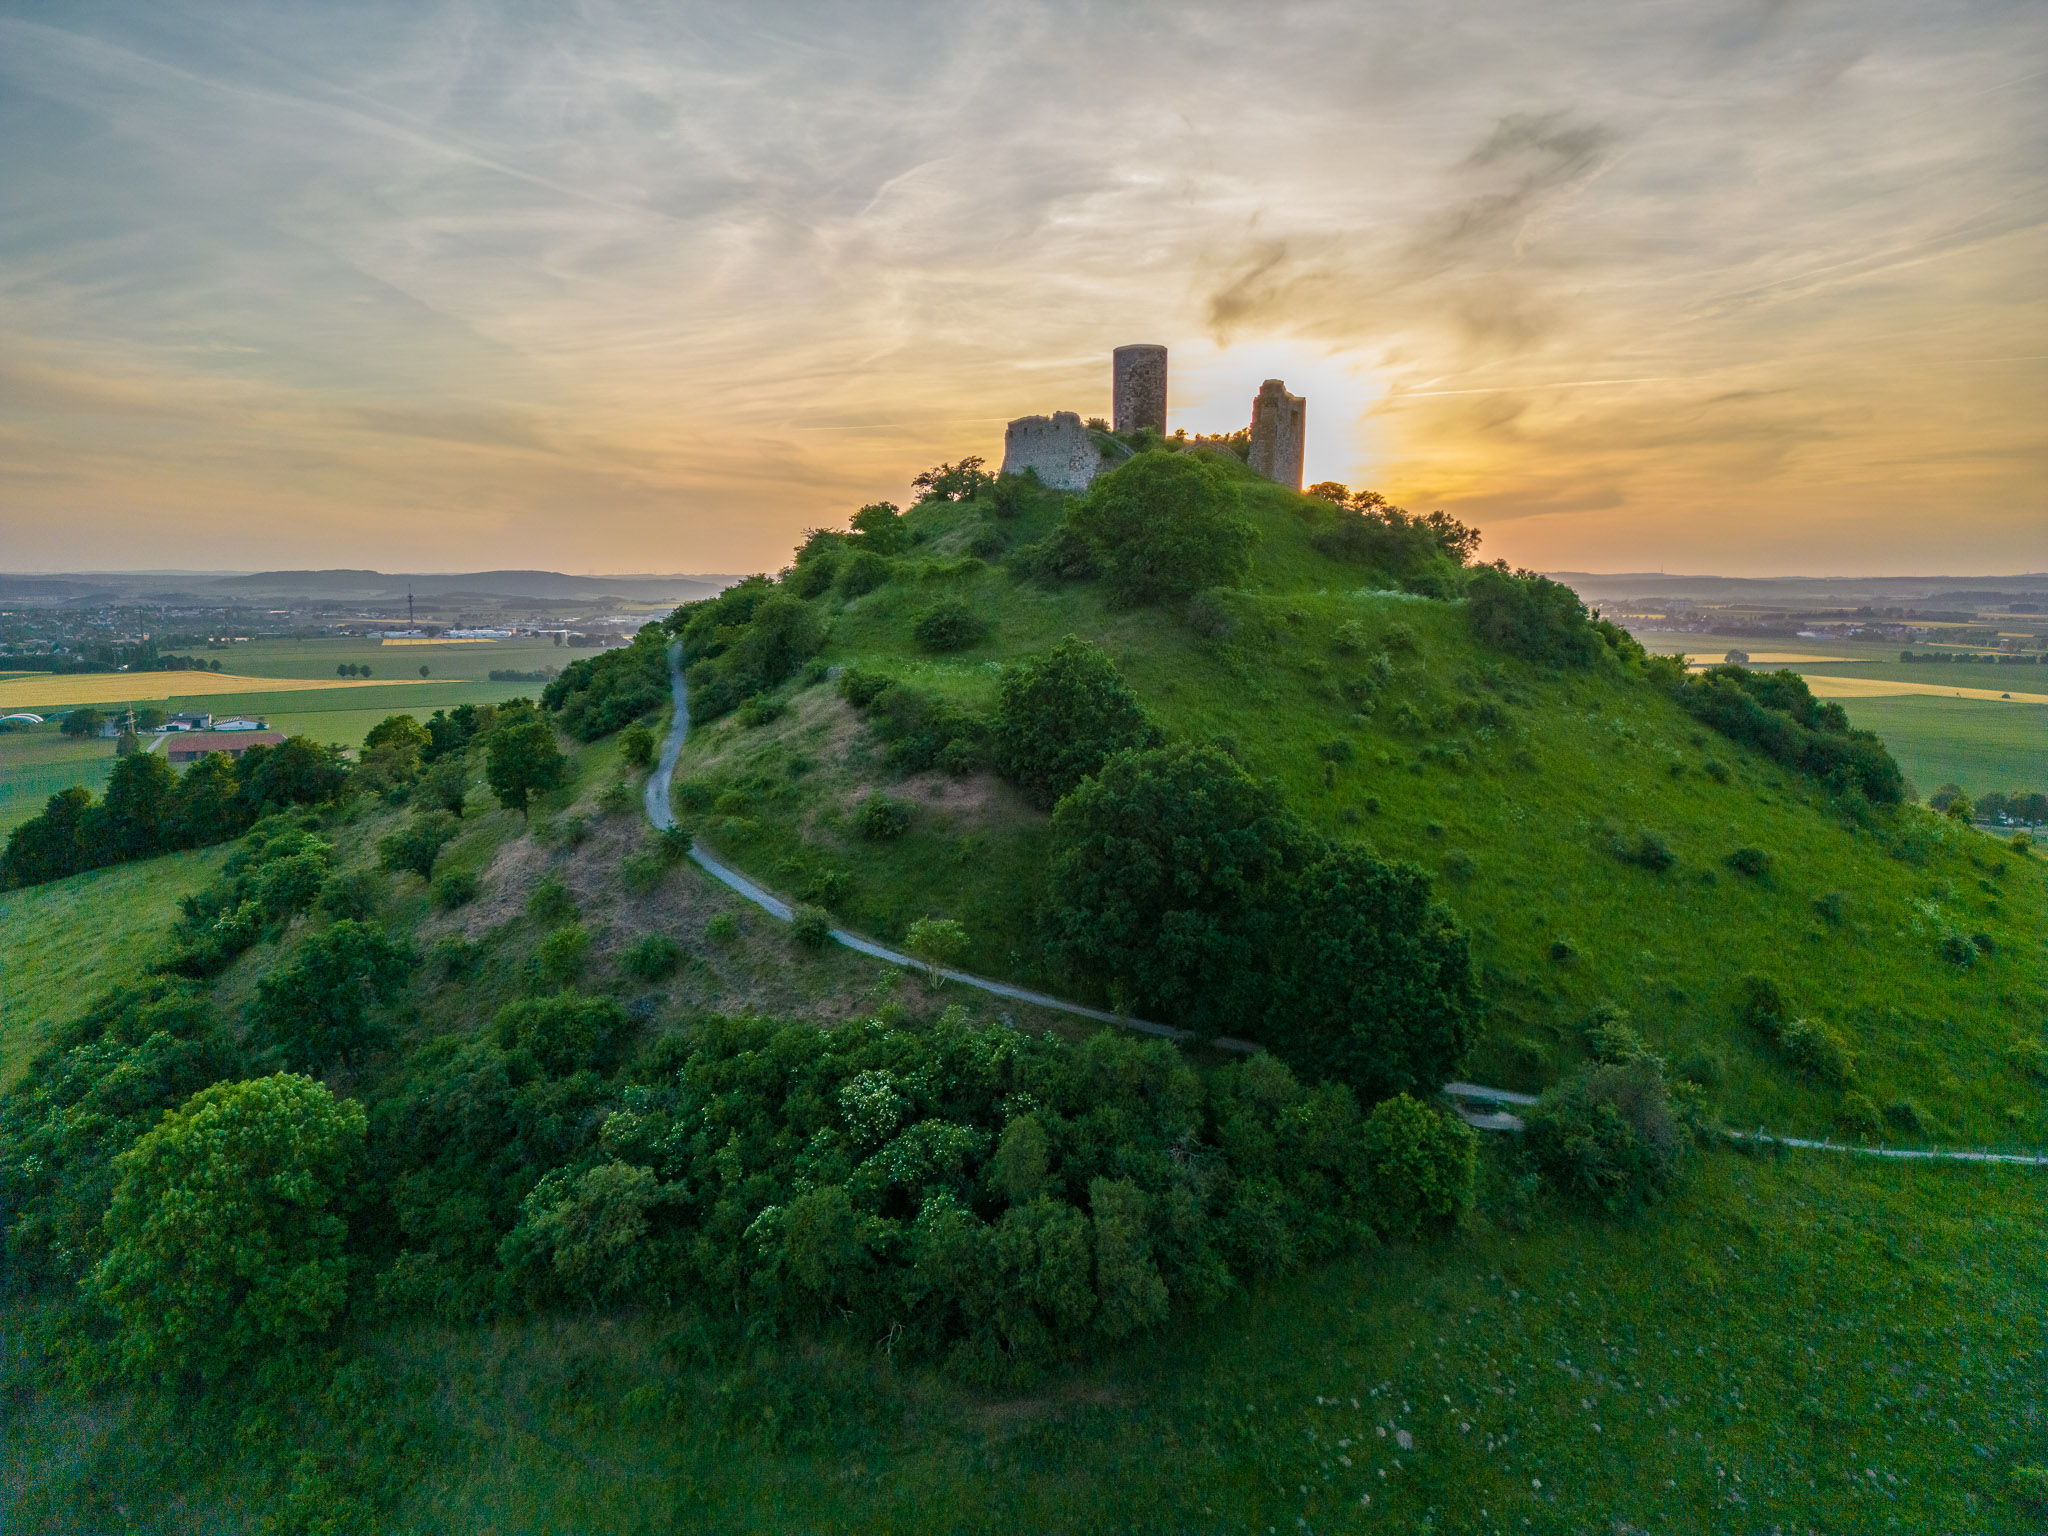
I then created another exposure series (-2, 0, +1.7) from the same spot. Unfortunately, this is currently only possible manually with the Mini 3 Pro, since the existing automatic exposure bracketing only uses the 12 megapixel resolution. I then used the “Merge Photos” option in Lightroom to combine the images into an HDR image. This way, much more detail can be extracted from the highlights:
I find the result very appealing as it is. Especially in the 100% zoom it shows that the clearly visible noise, which arises when increasing the shadows, can be avoided in this way. However, due to the wind movements of the vegetation between the individual shots, the combination of the 3 images naturally leads to a decrease in sharpness. Nothing is for free!
Here is a comparison from the center of the last two images, each at 100% magnification:
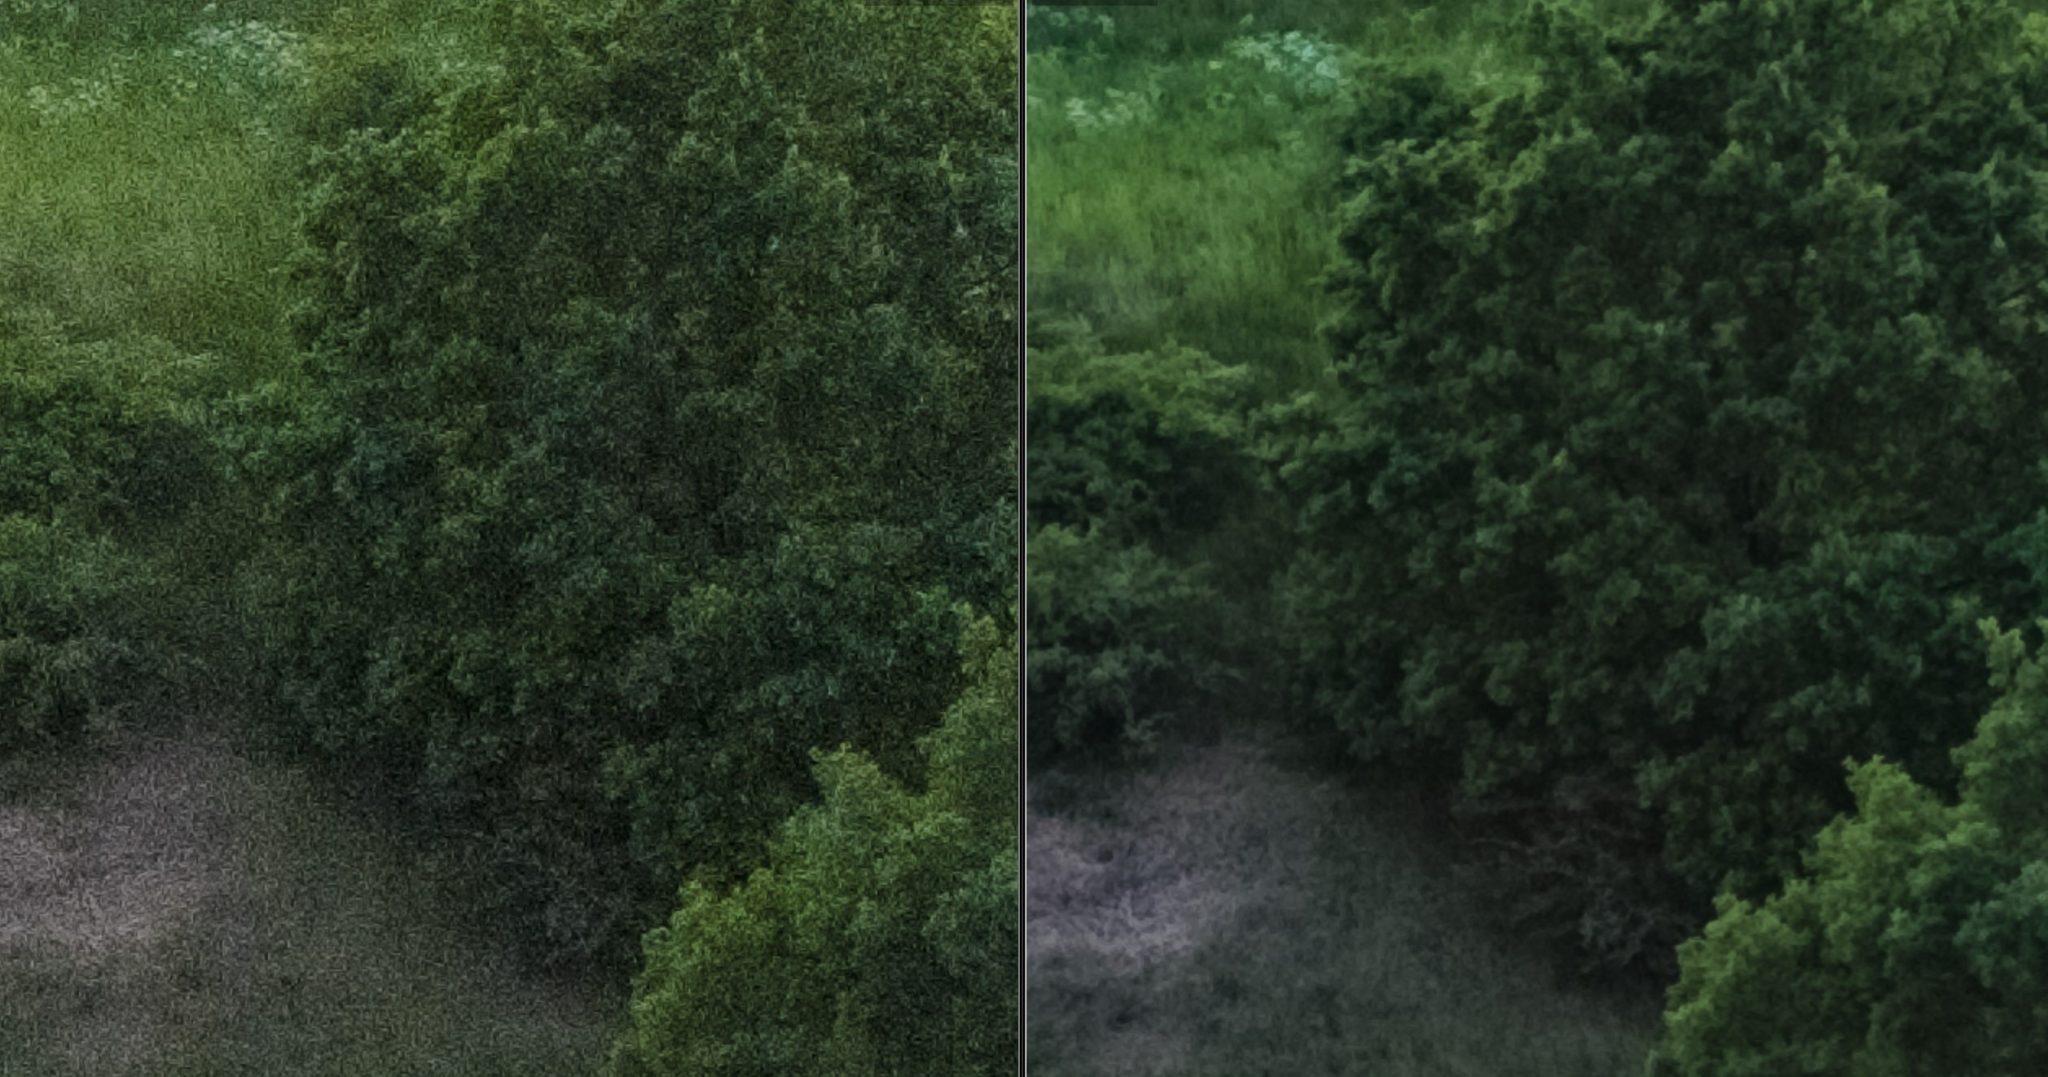
Image resolution
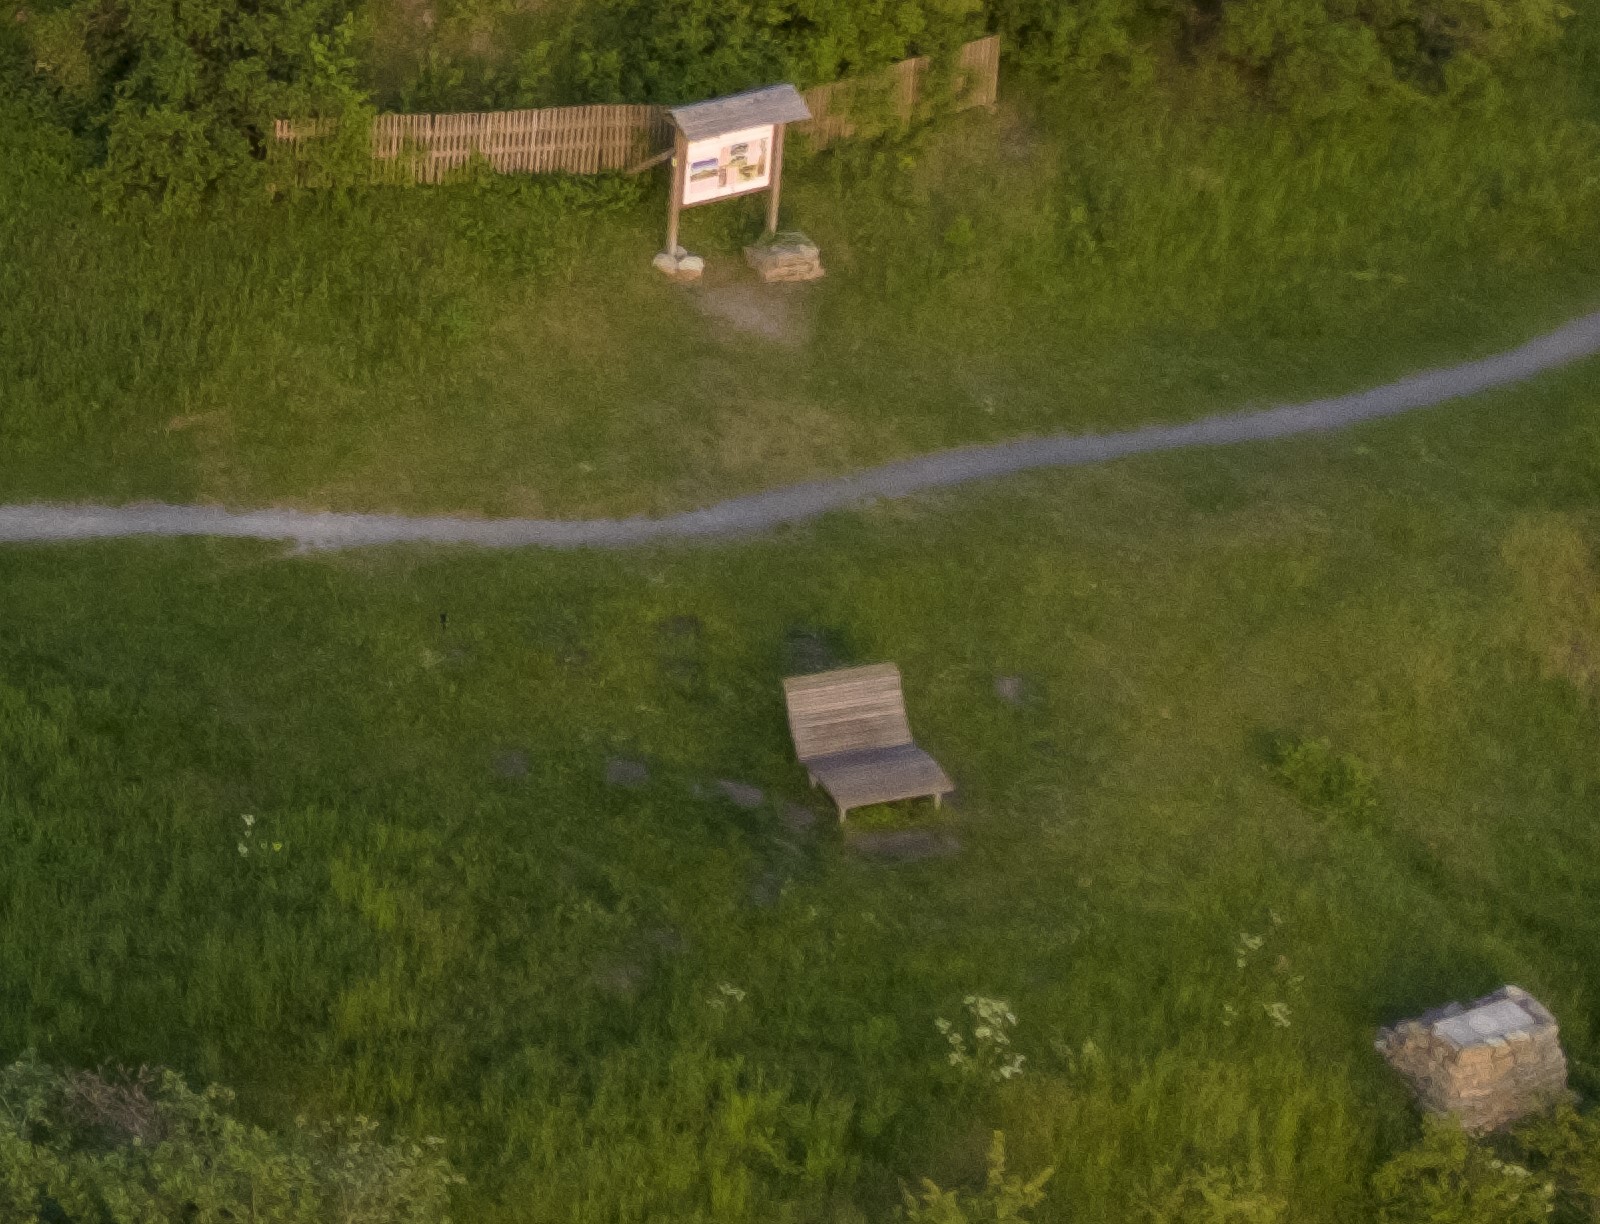
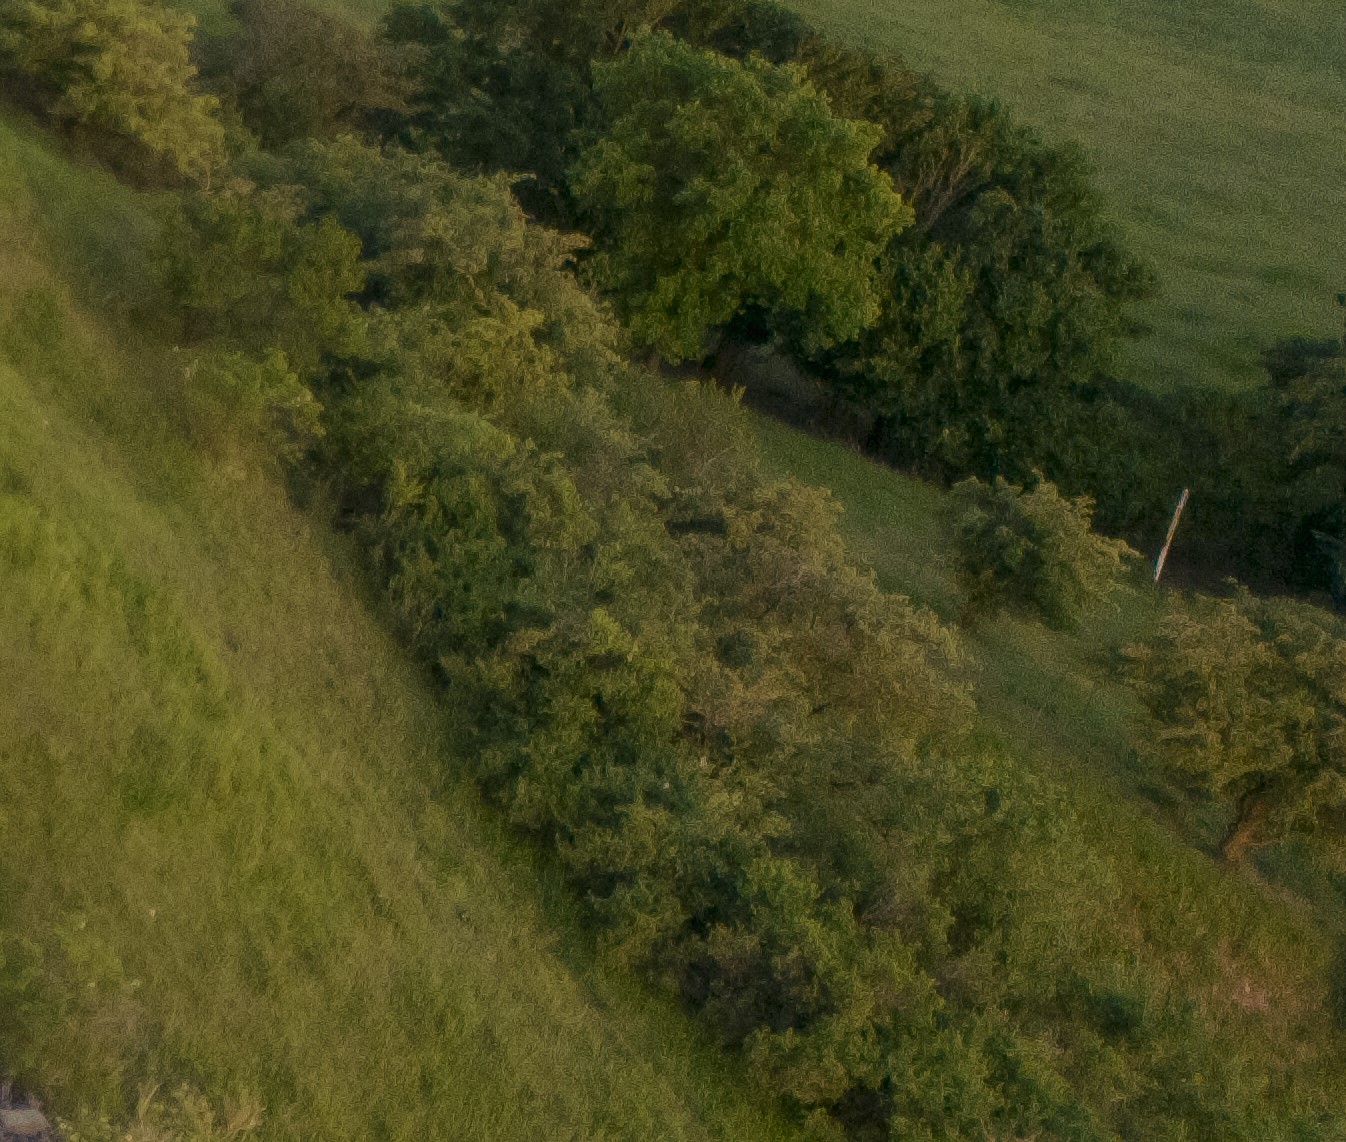
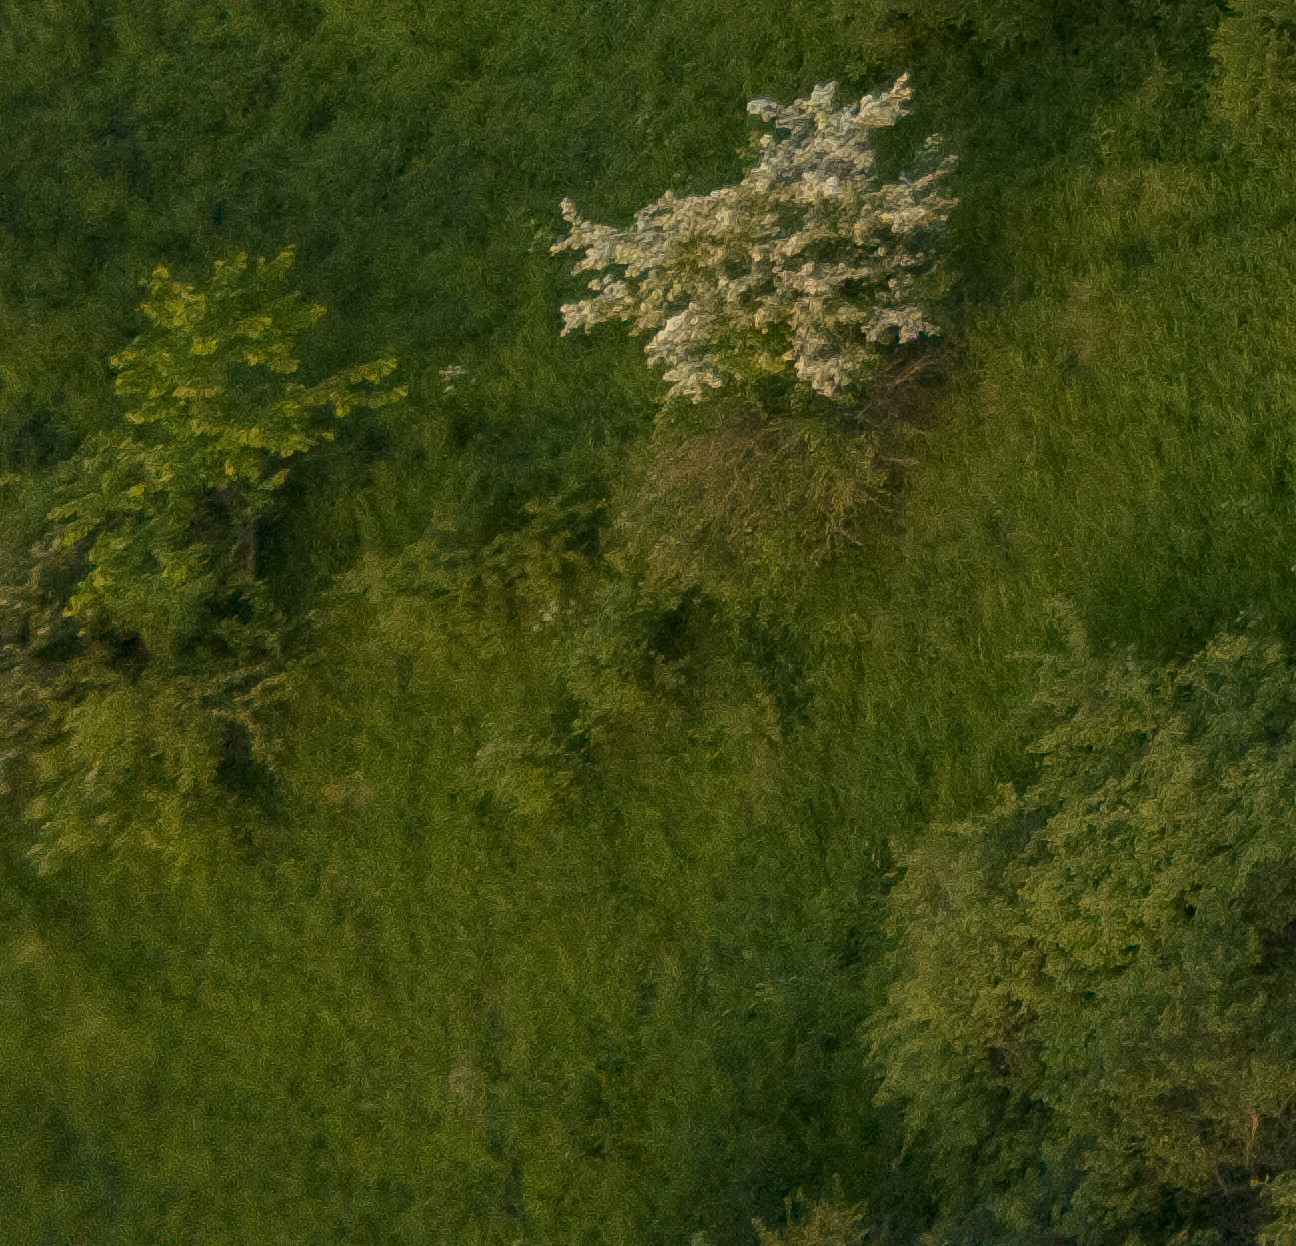
The previous pictures already show that the image resolution of the DJI Mini 3 camera is also quite decent. This is also good in the peripheral areas, but it decreases towards the extreme corners. Here is another example:
And here are three sections from the above image as 100% crops:
Long-term exposure
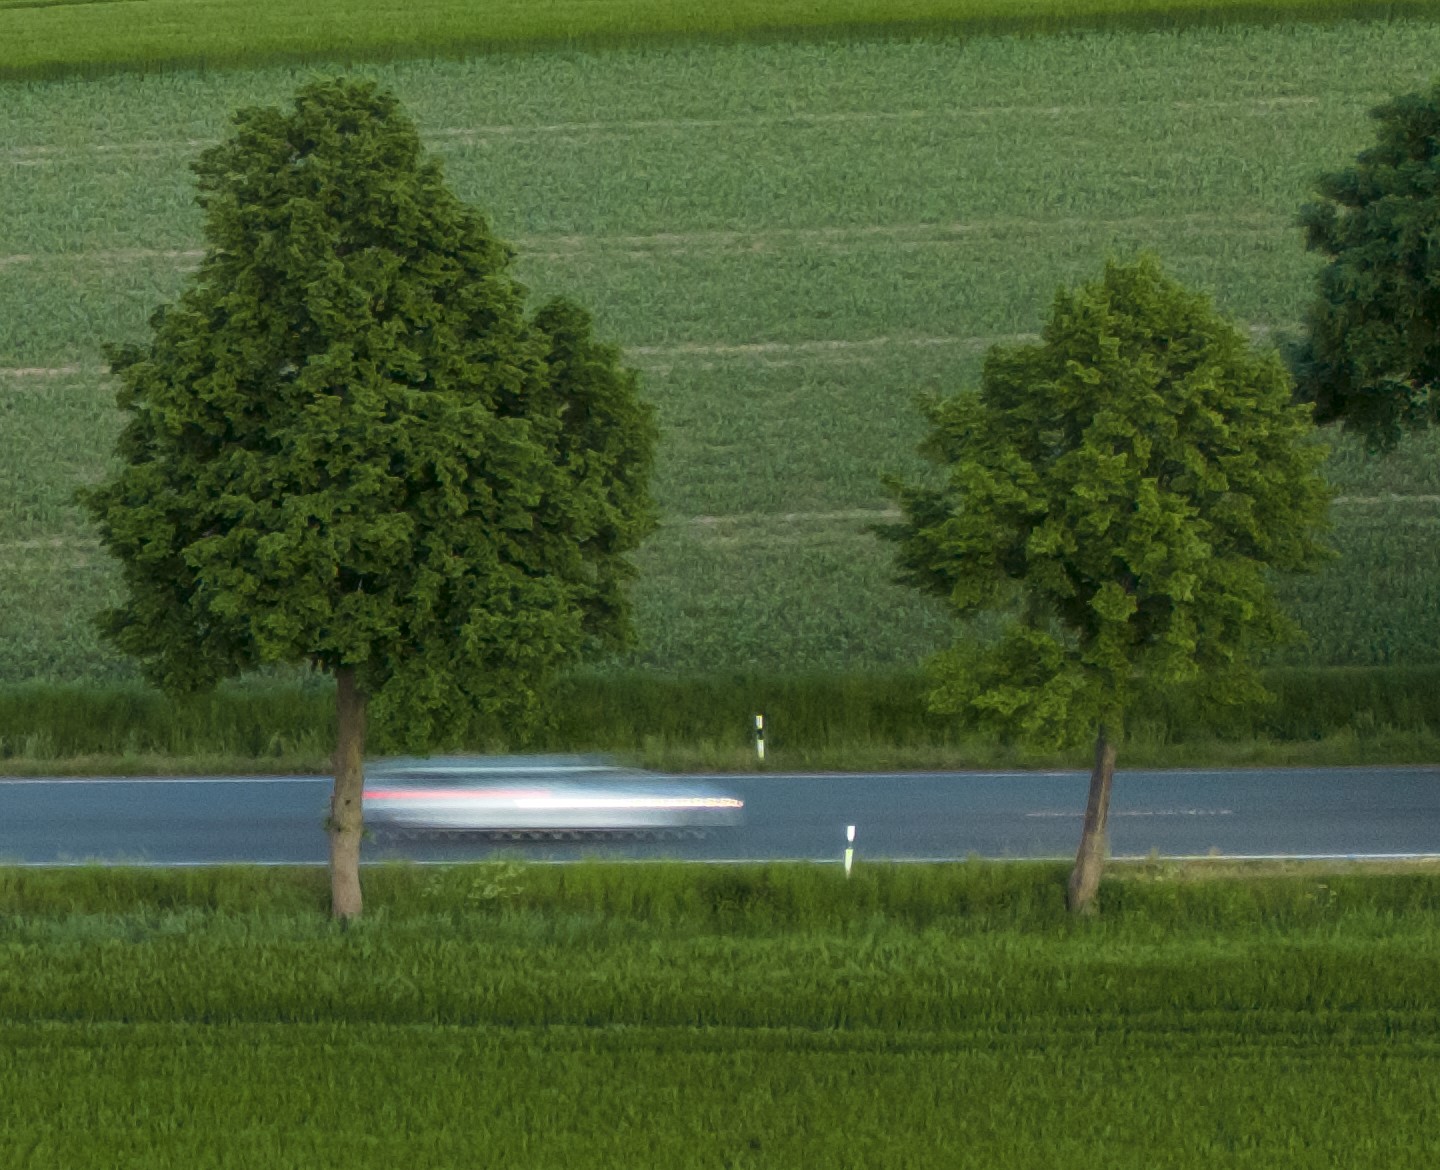
I was very impressed with the flight stability of the drone’s bigger sister, the DJI Air 2S. It allowed for unblurred long exposures with exposure times of up to 10 seconds. I was curious to see how the small Mini 3 Pro would do. It probably wouldn’t get quite as far as the Air 2s: the longest exposure time that can be set is 2 seconds. I have not yet been able to perform an extreme test, but I was able to take a test shot shortly after sunset with an exposure time of 1/6 second, which does not look bad at all:
In light winds, the small drone stood steadily in the air, as the 100% crop from the image above shows:
Soon I will make experiments with longer exposure times. Currently I am still waiting for the availability of ND and polarizing filters for the drone.
Résumé
Overall, I think the results that can be achieved with the Mini 3 Pro are really remarkable considering the small size of the drone. Of course, the image quality does not come close to the results of a full-frame camera like my EOS R5. However, taking into account the resolution differences of the sensors, it is significantly better than that of the DJI Mini 2 (12 megapixels) and in good light, I think, also better than that of the Air 2s with its 20 megapixels.
However, a closer look at the images shows that the Mini 3 Pro has already pre-processed the DNG-RAW files. You can see this quite well for example in the artifacts in the fence laths, which partly appear like JPG artifacts. This is a pity, because it limits the possibilities in post-processing. It remains to be seen what the results will be when the drone is also supported by DxO DeepPrime, perhaps this way even more quality is possible to get out of the RAW files.
The Mini 3 Pro will replace my DJI Mini 2, which I have already sold. Whether it will also replace my Air 2S, I have not yet finally decided. The Air 2S is “a step up”, especially in the video area. But only time will tell whether that will be enough for me to continue using it, or if I will eventually give it up as well.
*= Affiliate Link