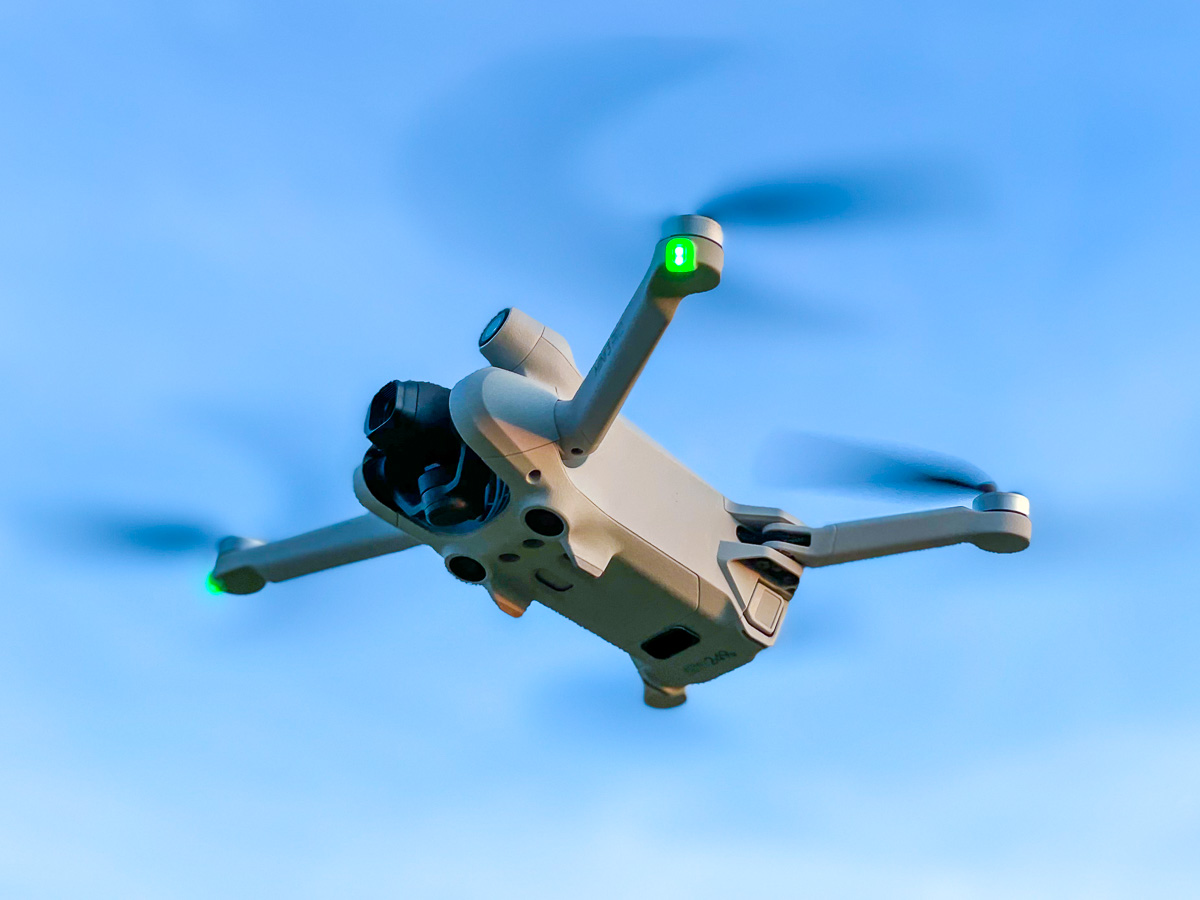
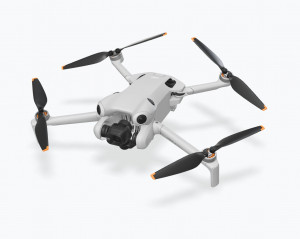
As mentioned in my previous report, I have now bought the DJI Mini 3 Pro with the RC controller* in addition to the DJI Mini 2 and the DJI Air 2S. I have already sold the Mini 2 in the meantime.
As a photographer, I am primarily interested in the quality of the pictures I take with my drones. There are already many very positive reviews on the Internet concerning the video capabilities of the DJI Mini 3 Pro. In the past, I used two different drones for my photos, depending on the circumstances. One was the DJI Mini 2 as a small drone, which is more straightforward to take and use because of its light weight and size. It can be flown legally in many more regions than its heavier weight larger sisters. The price, however, was lower photo quality due to the smaller 1/2.3″ sensor with its lower resolution (12 megapixels). However, the available panorama modes partially compensated for this.
After the first flight tests, I therefore bought the larger DJI Air 2S as a second drone, which offers a resolution of 20 megapixels on its 1″ sensor and thus roughly matches the image quality of a Sony RX-100 - which it actually does. Unfortunately, the use of this larger drone is significantly more restricted by the EU drone regulations.
For more information about the necessary requirements and the regulations that apply in the EU, I would like to recommend my previous article “Photography in 3 dimensions” . In order to use the DJI Air 2s, you will also need the so called “small drone license”, but you can get it online without any problems.
The DJI Mini 3 Pro
now seemed to be able to combine the advantages of both drones in one from its technical data. A first field report about the Mini 3 Pro with some examples is already published on this website.
In order to further evaluate the photo quality of the DJI Mini 3 Pro, I have prepared a photo comparison series between the DJI Mini 3 Pro, the DJI Air 2S and, as a reference, the Canon EOS R5. Formally, the DJI Mini 3 Pro even offers a higher resolution than the EOS R5 (48 vs 45 megapixels).
DJI Mini 3 Pro vs DJI Air 2s vs Canon EOS R5
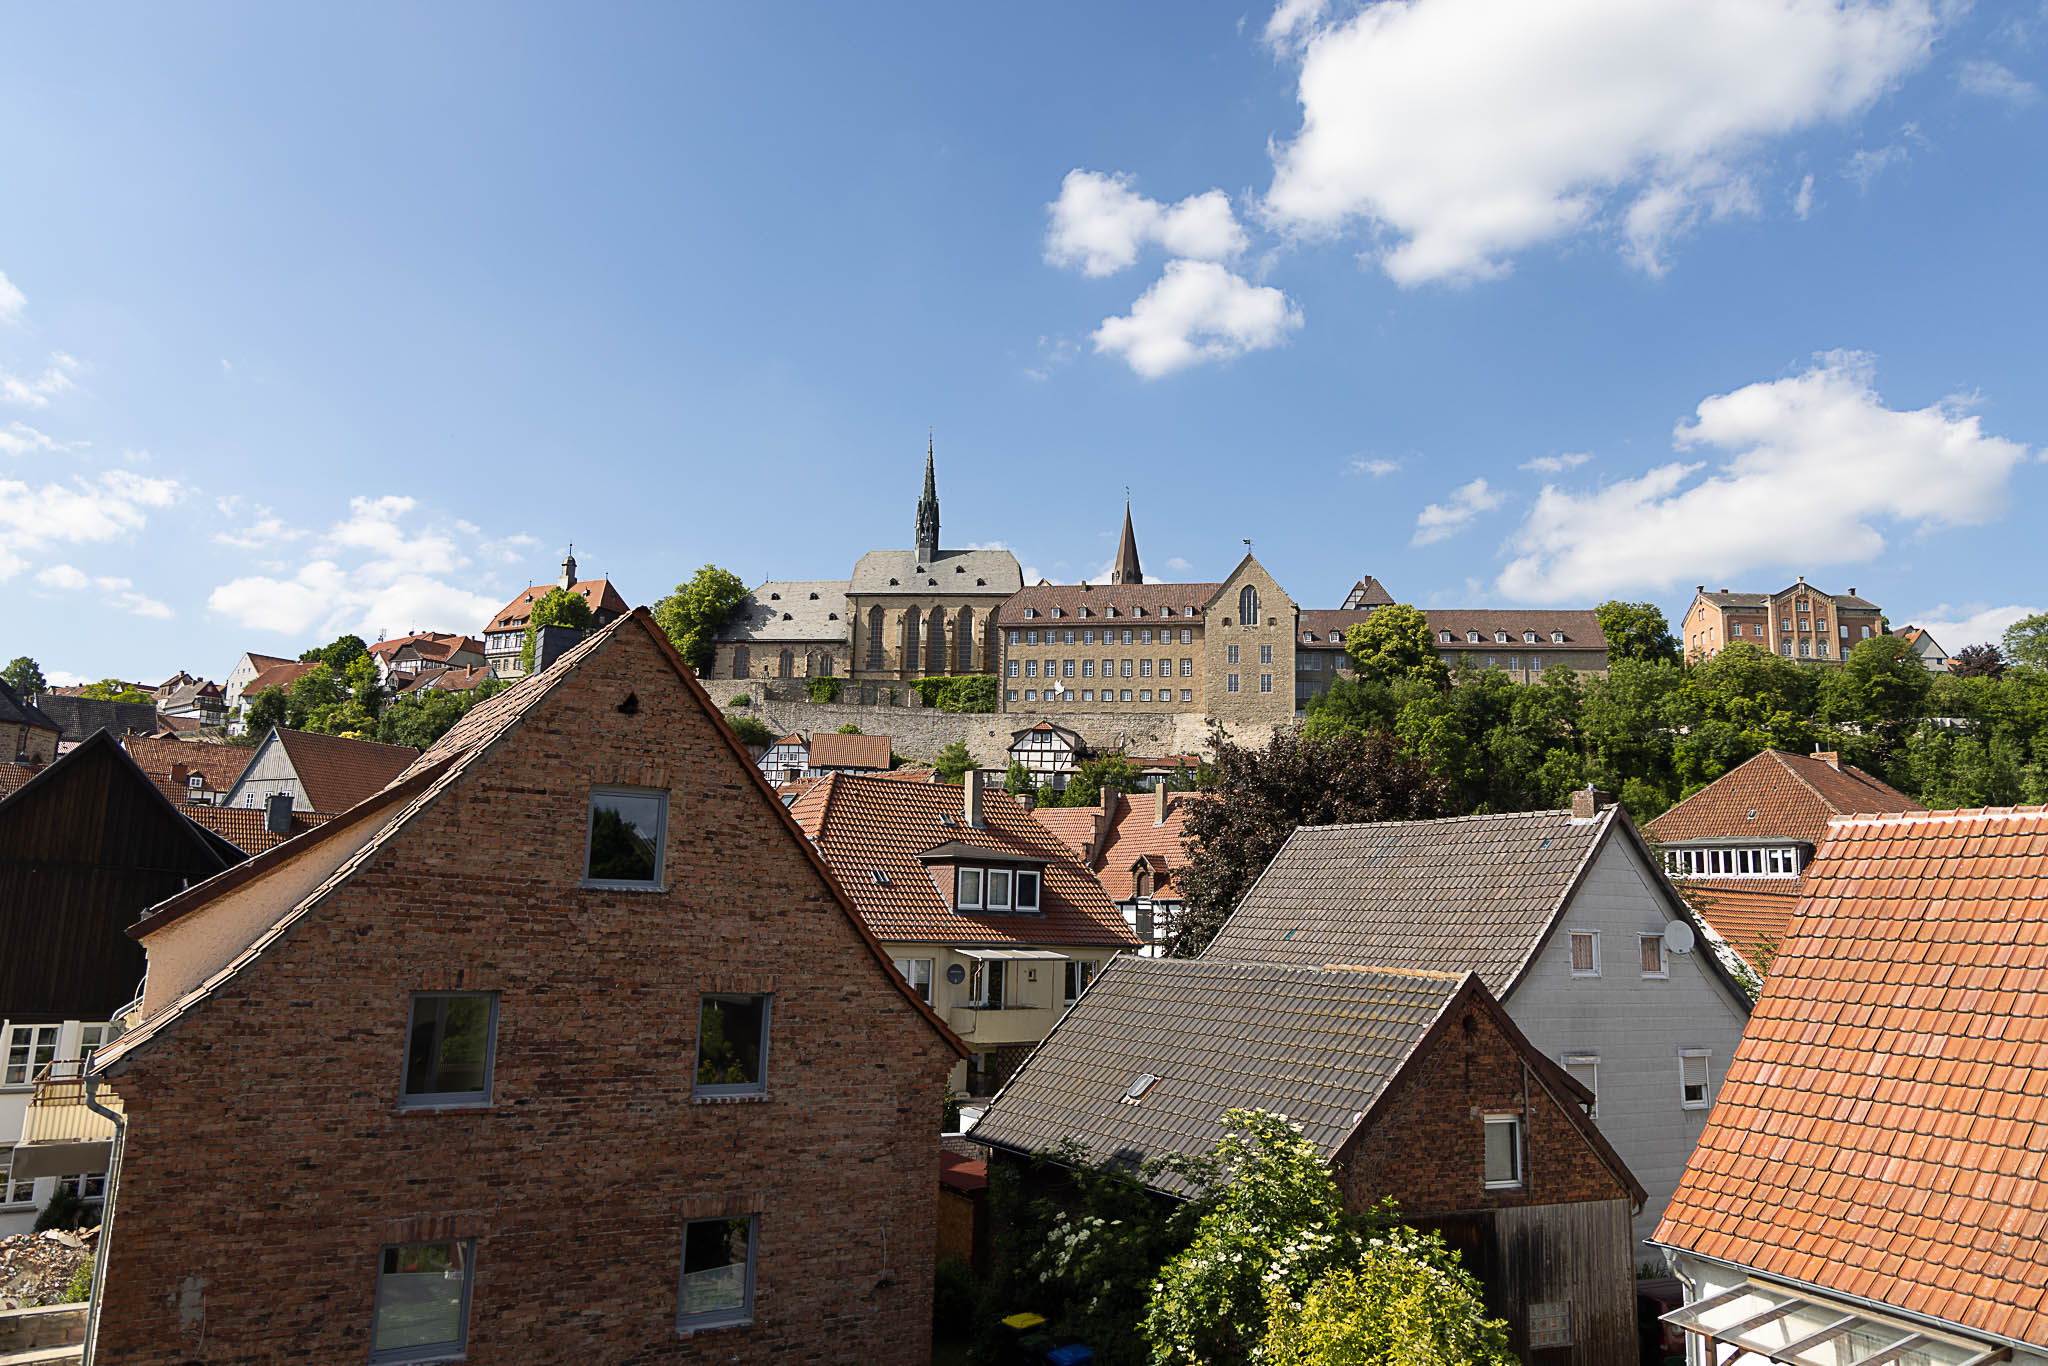
The subject of the photo was the view from my window. First, here are the results of the three photos I took in quick succession. For comparability, I cropped the DJI Mini 3 Pro shot from 4:3 to the 3:2 format of the other cameras. I left the ISO at 100 for all photos and otherwise let the camera auto expose. As always, I shot all images in RAW format (DNG or CR3) and then exported them using the default settings with Adobe Lightroom Classic at 2048 pixels wide initially:
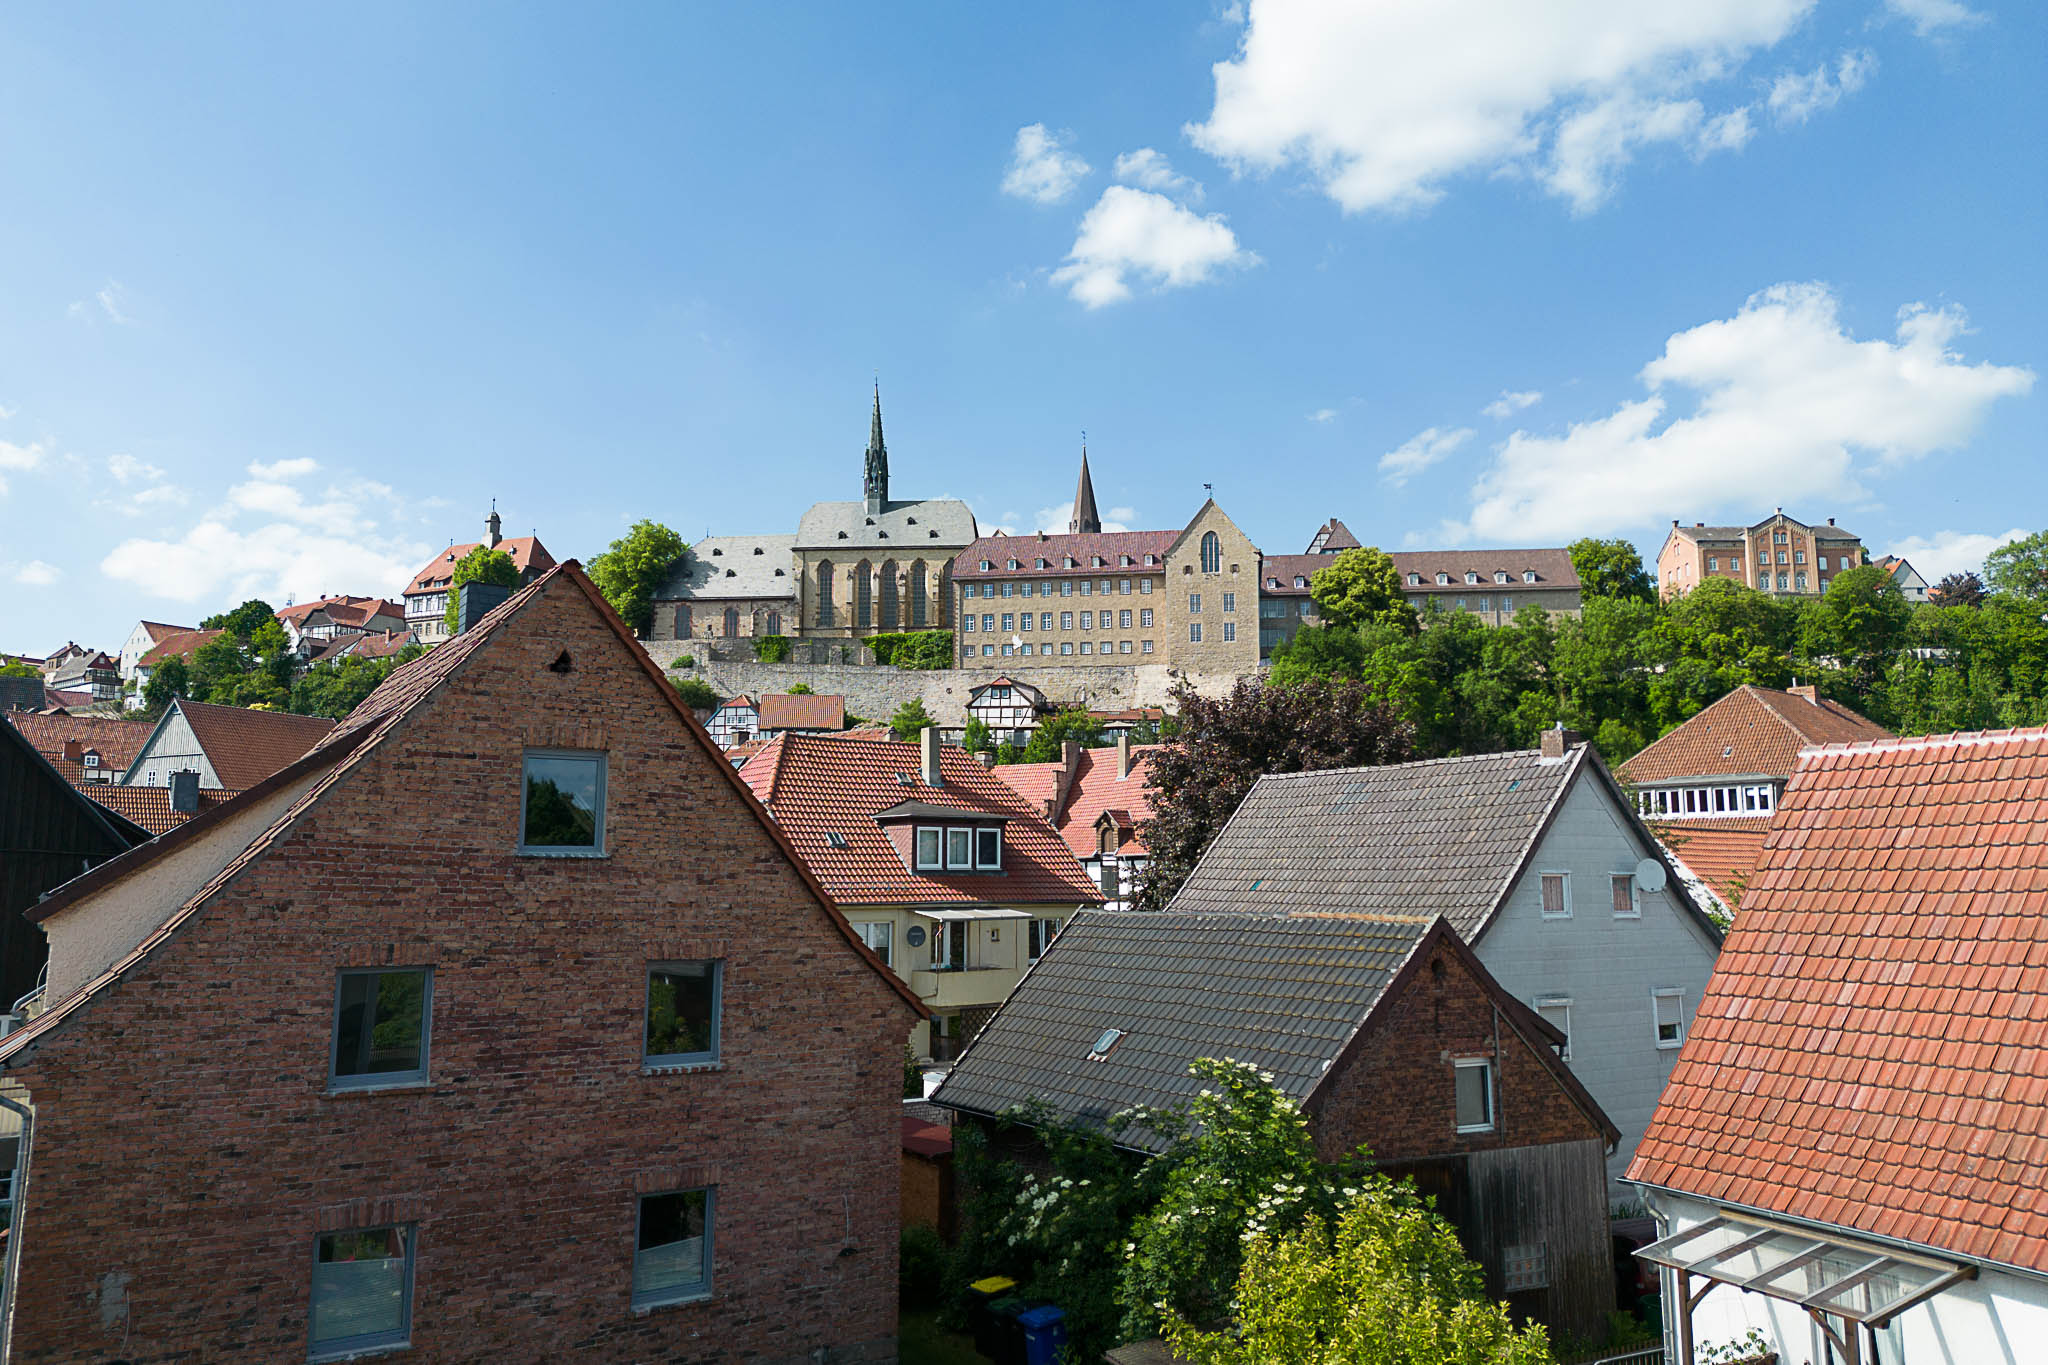
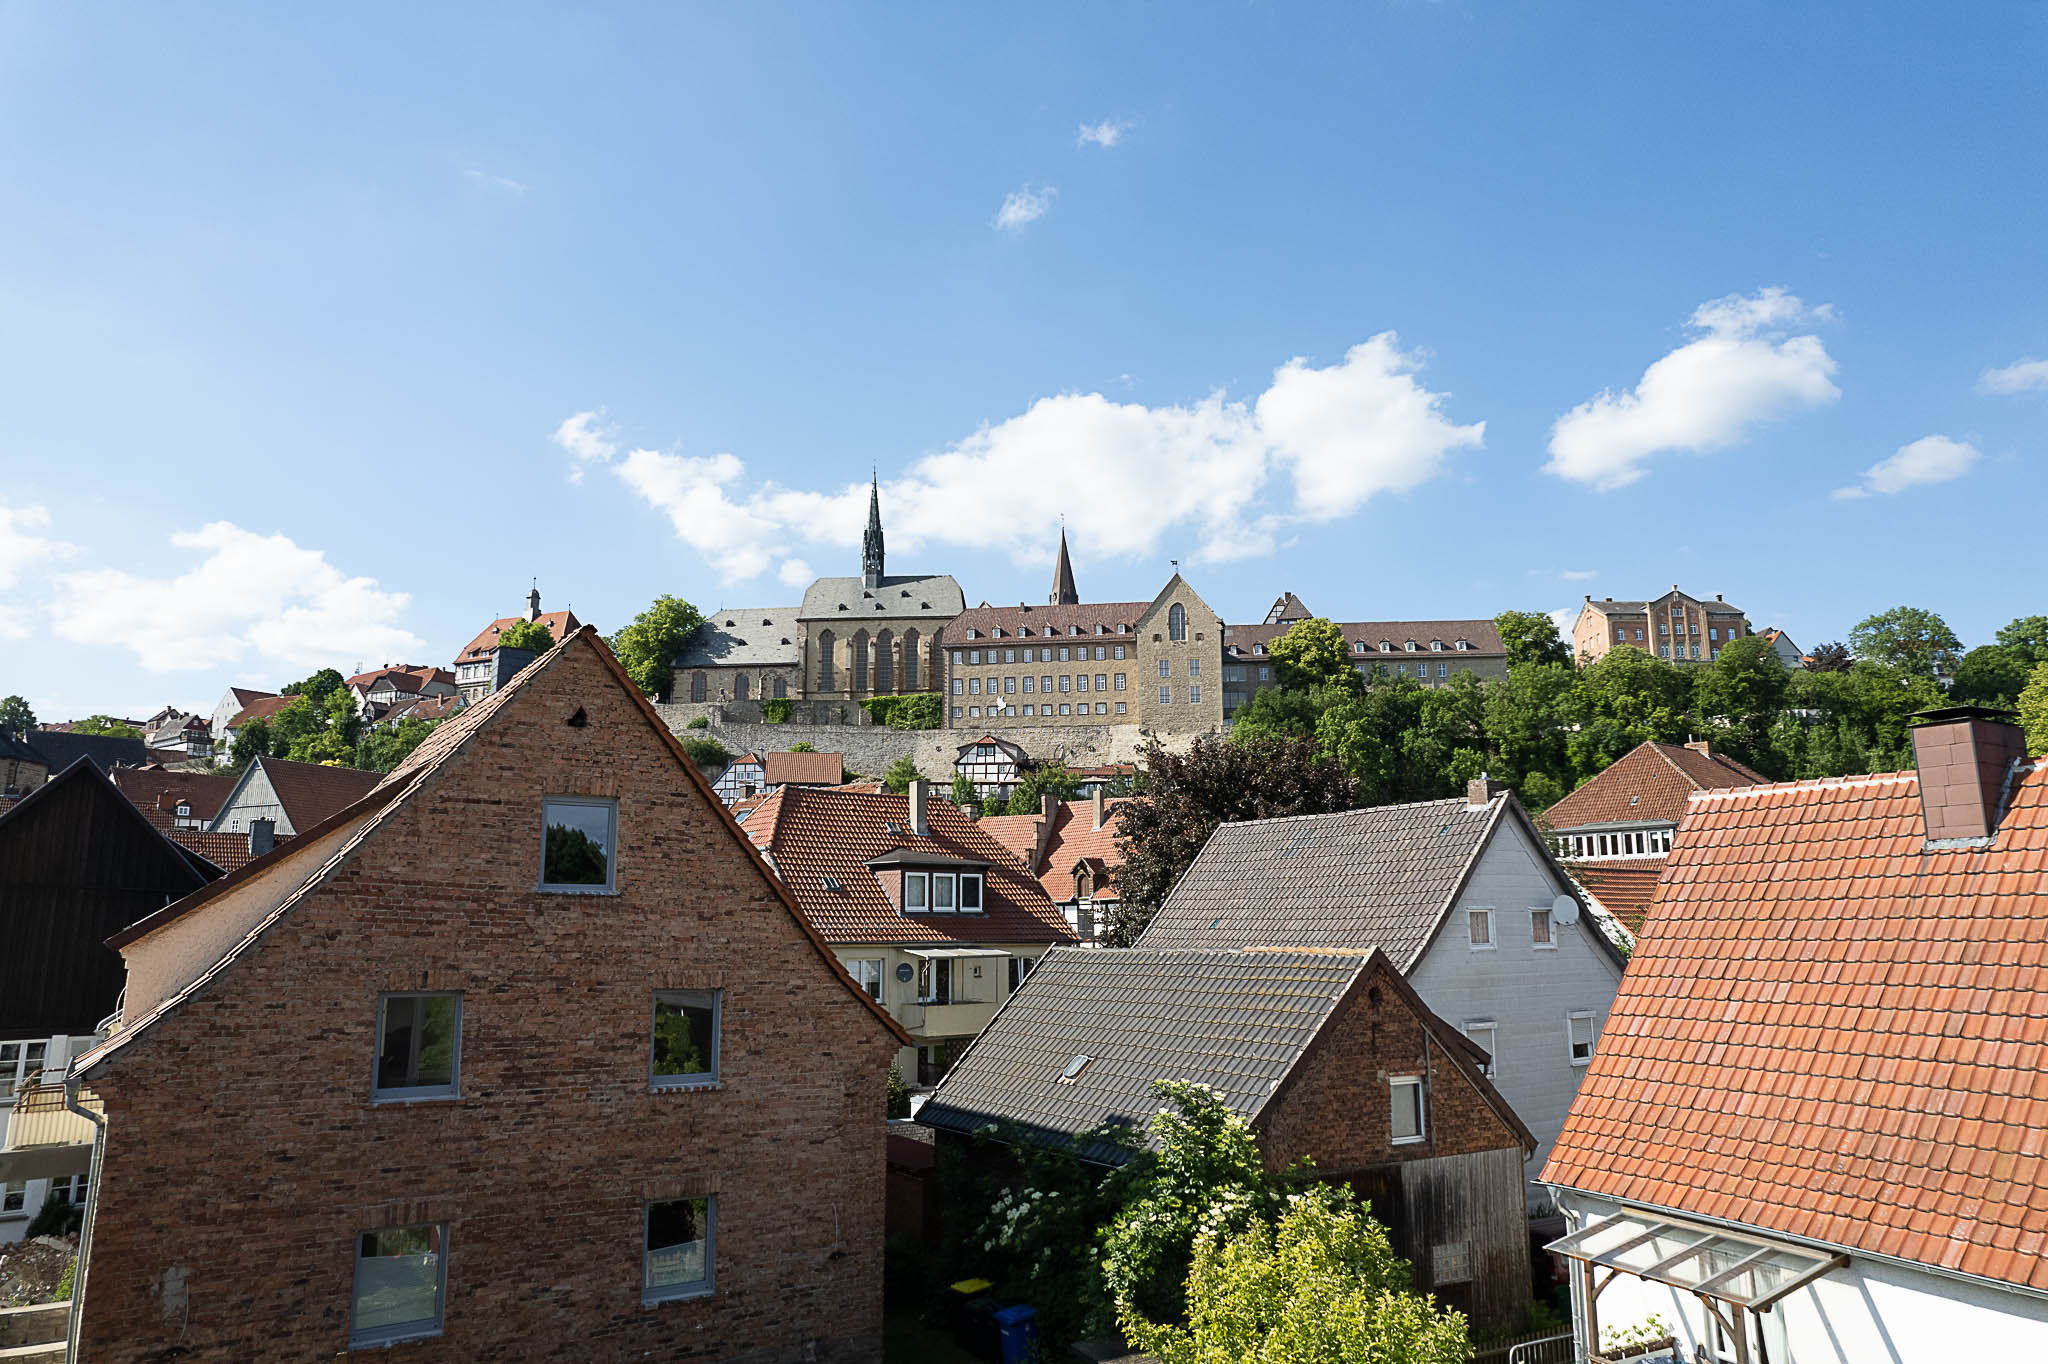
All in all, the quality of the three cameras is not too bad, at least in the resolution of effectively a good 3 megapixels shown here. How does it look in the larger view?
Image details
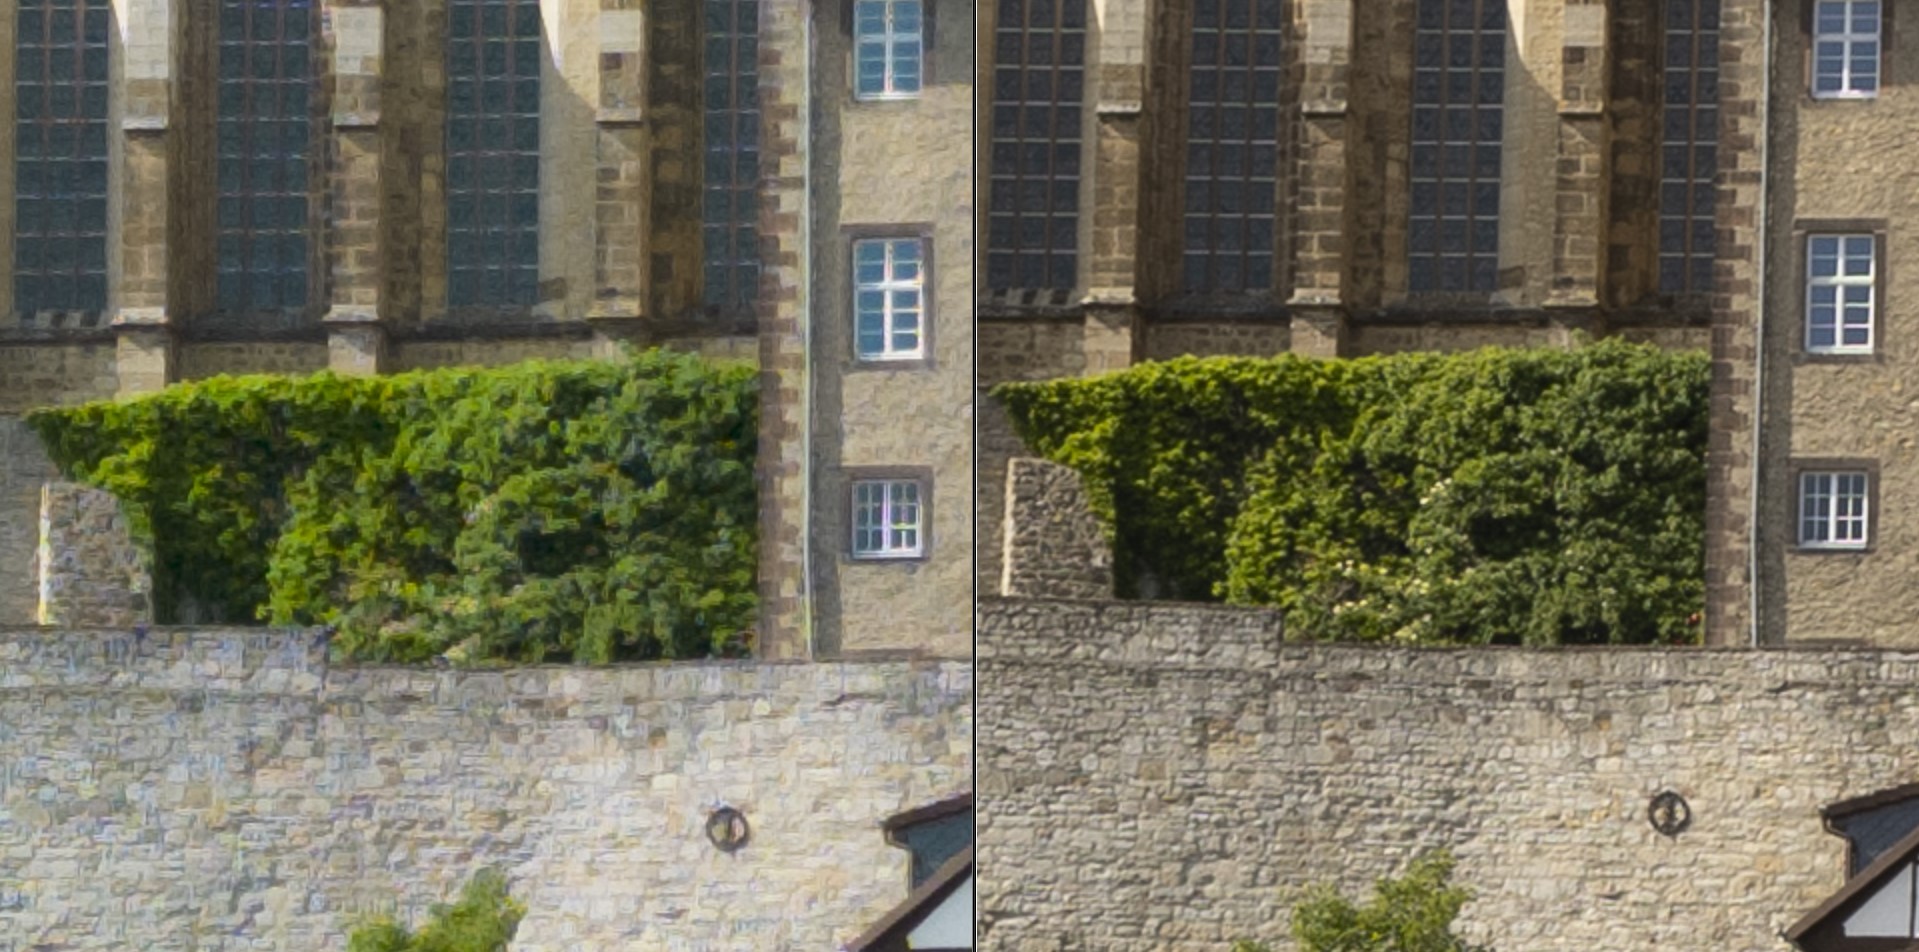
For this purpose, I placed the images side by side in Adobe Lightroom Classic in highly magnified comparison view. Below I show the corresponding screenshots. First, the comparison of the DJI Mini 3 Pro with the DJI Air 2s. Because of the different resolution (48 vs 20 megapixels) of both images, I enlarged the image of the Mini 3 Pro to 200% and the image of the Air 2s to about 350% to achieve a comparability of the details. Here is a crop from the center of the above image:

On closer inspection, the Mini 3 Pro shows a slightly higher resolution in the details than the DJI Air 2s. This can be seen in the window bars, for example. At the same time, however, some artifacts are noticeable in the area of the wall at the bottom of the image. I have the impression that the DJI Mini 3 already applies significant de-noising to the RAW internally.
Now the comparison with a full-frame system camera. The Canon EOS R5 offers a resolution of 45 megapixels on a 24x36mm sensor. I used the RF 24-105 f/4L lens on the camera at 24mm focal length and open aperture. Of course, the comparison is very unfair. The lens alone costs more than the DJI Mini 3 Pro with RC controller:
There is no need to debate, the image of the EOS R5 is clearly more detailed, clearer and sharper.
Here is a second detail from the above photo, which allows you to judge the sharpness a little better. I have chosen a section with the church top for this purpose in each case. With the finely detailed weathercock mounted on the church spire, the resolution of fine details can be judged even better. As before, I show on the left the image of the DJI Mini 3 Pro in 200% and on the right at first the image of the DJI Air 2s in about 350% magnification:
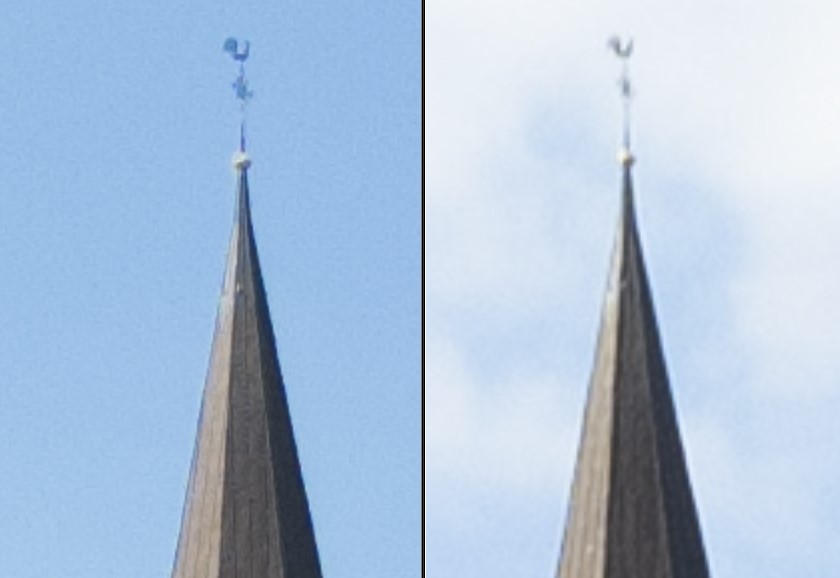
Here you can now clearly see that the DJI Mini 3 Pro offers a much higher resolution of details than the DJI Air 2s. Of course, the Canon EOS R5 is even better here, as can be seen in the image below (both crops in 200% magnification):
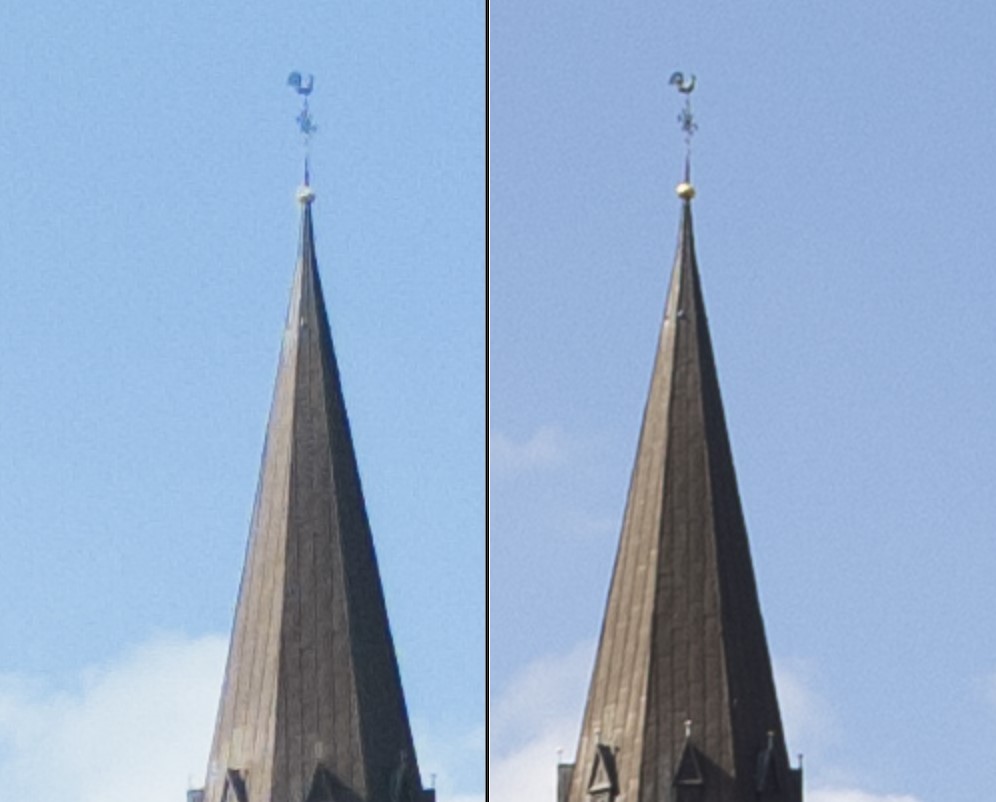
Aber im direkten Vergleich schlägt sich die DJI Mini 3 Pro hier doch wieder ganz gut. Ich meine, dass hier das Ergebnis näher an der Canon EOS R5 als an der DJI Air 2s liegt.
Dynamic range
In addition to the detail resolution of camera sensors, the usable dynamic range is also of interest. To check this, I lightened the shadows in a dark area of the above image to the maximum in Lightroom by setting the “Shadows” slider to +100. The comparison to the DJI Air 2s and the Canon EOS R5, each at an adjusted magnification, can again be seen below. As above, you can see the image section of the DJI Mini 3 Pro on the left:
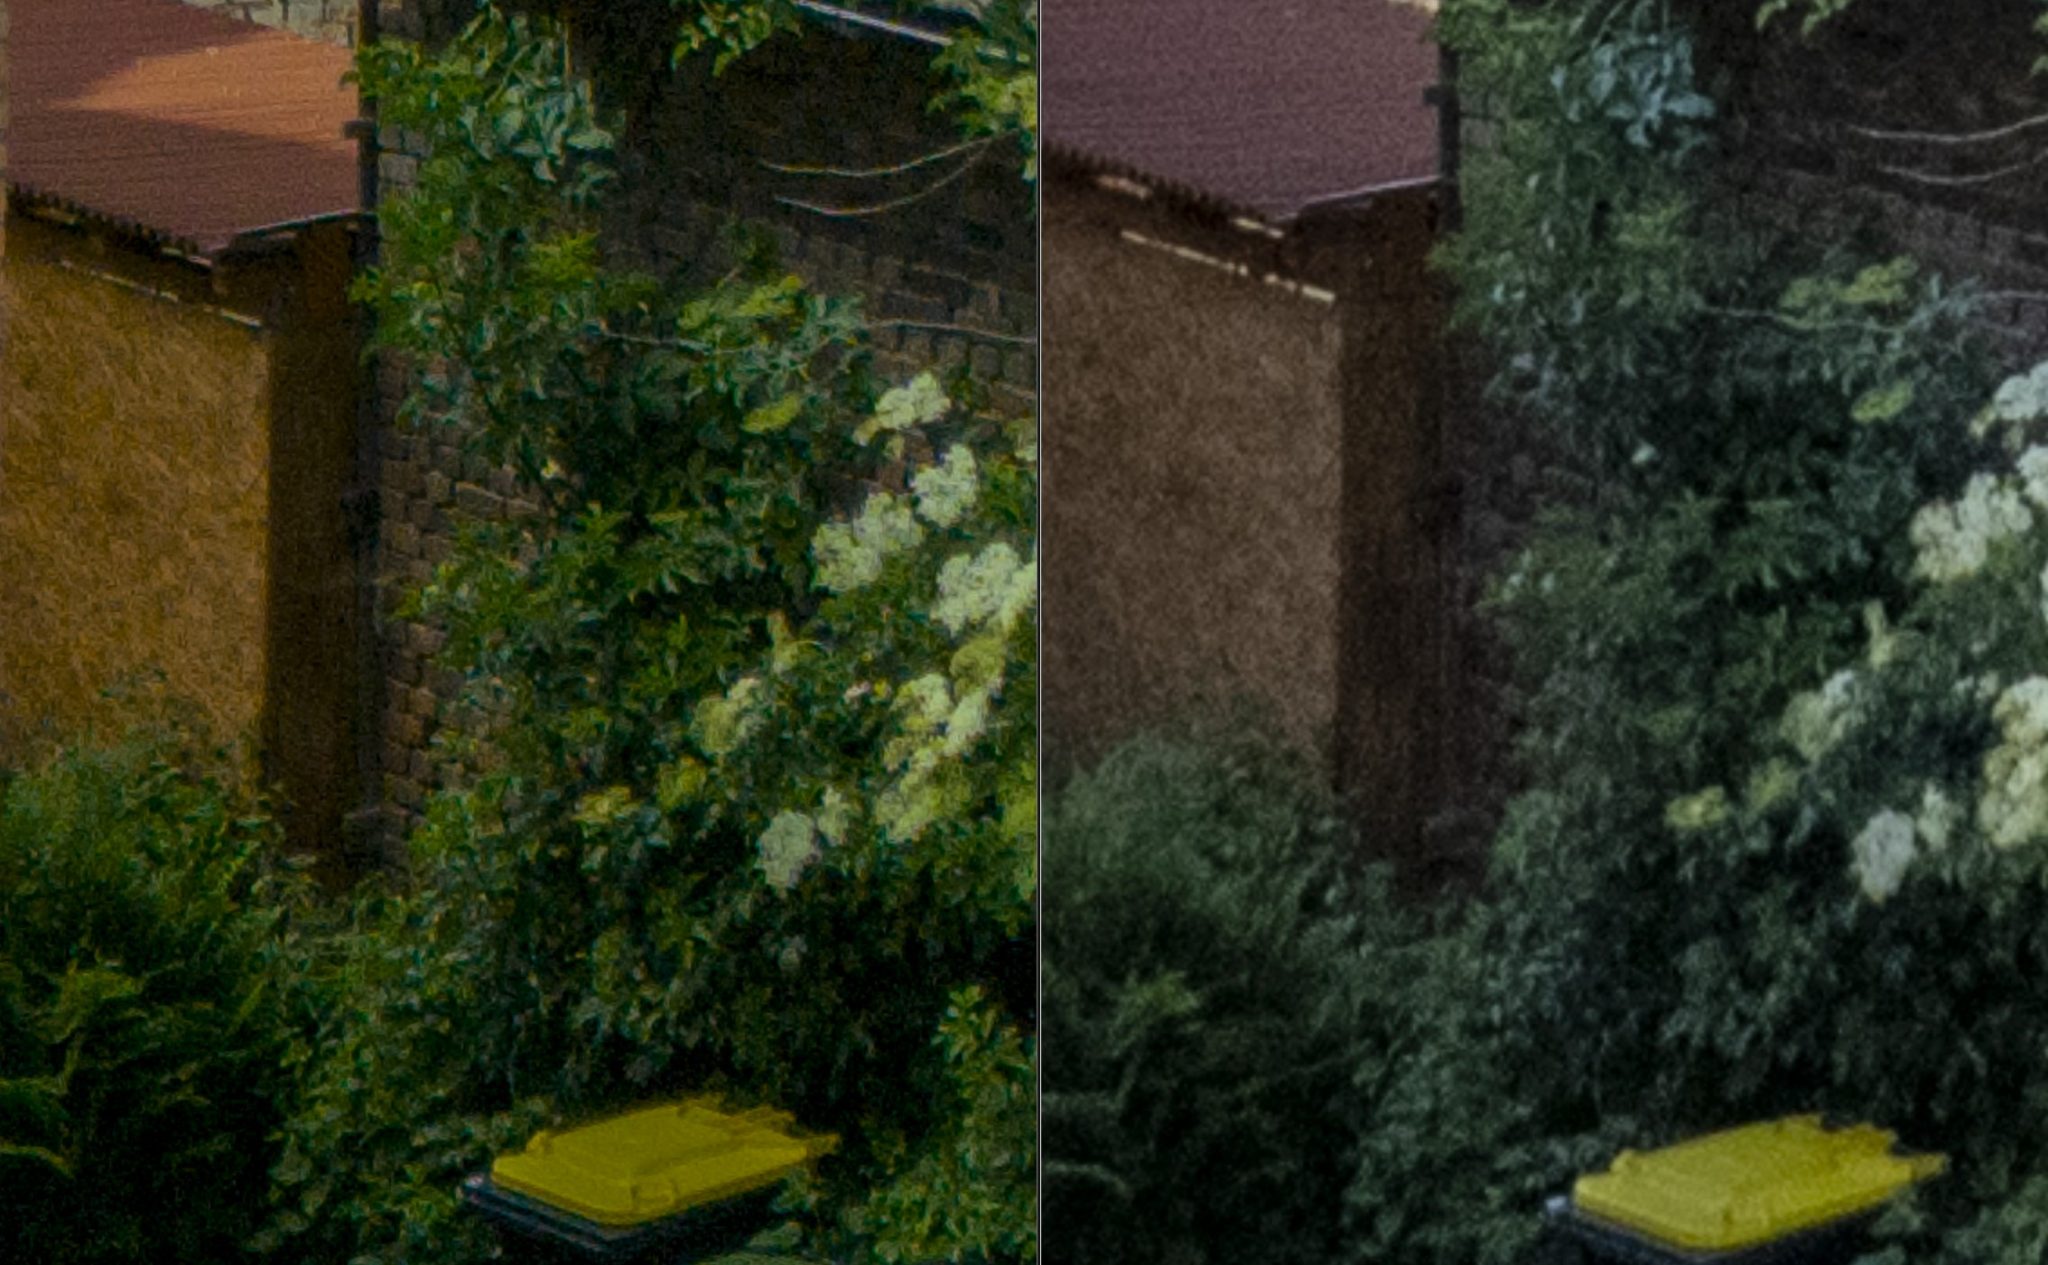
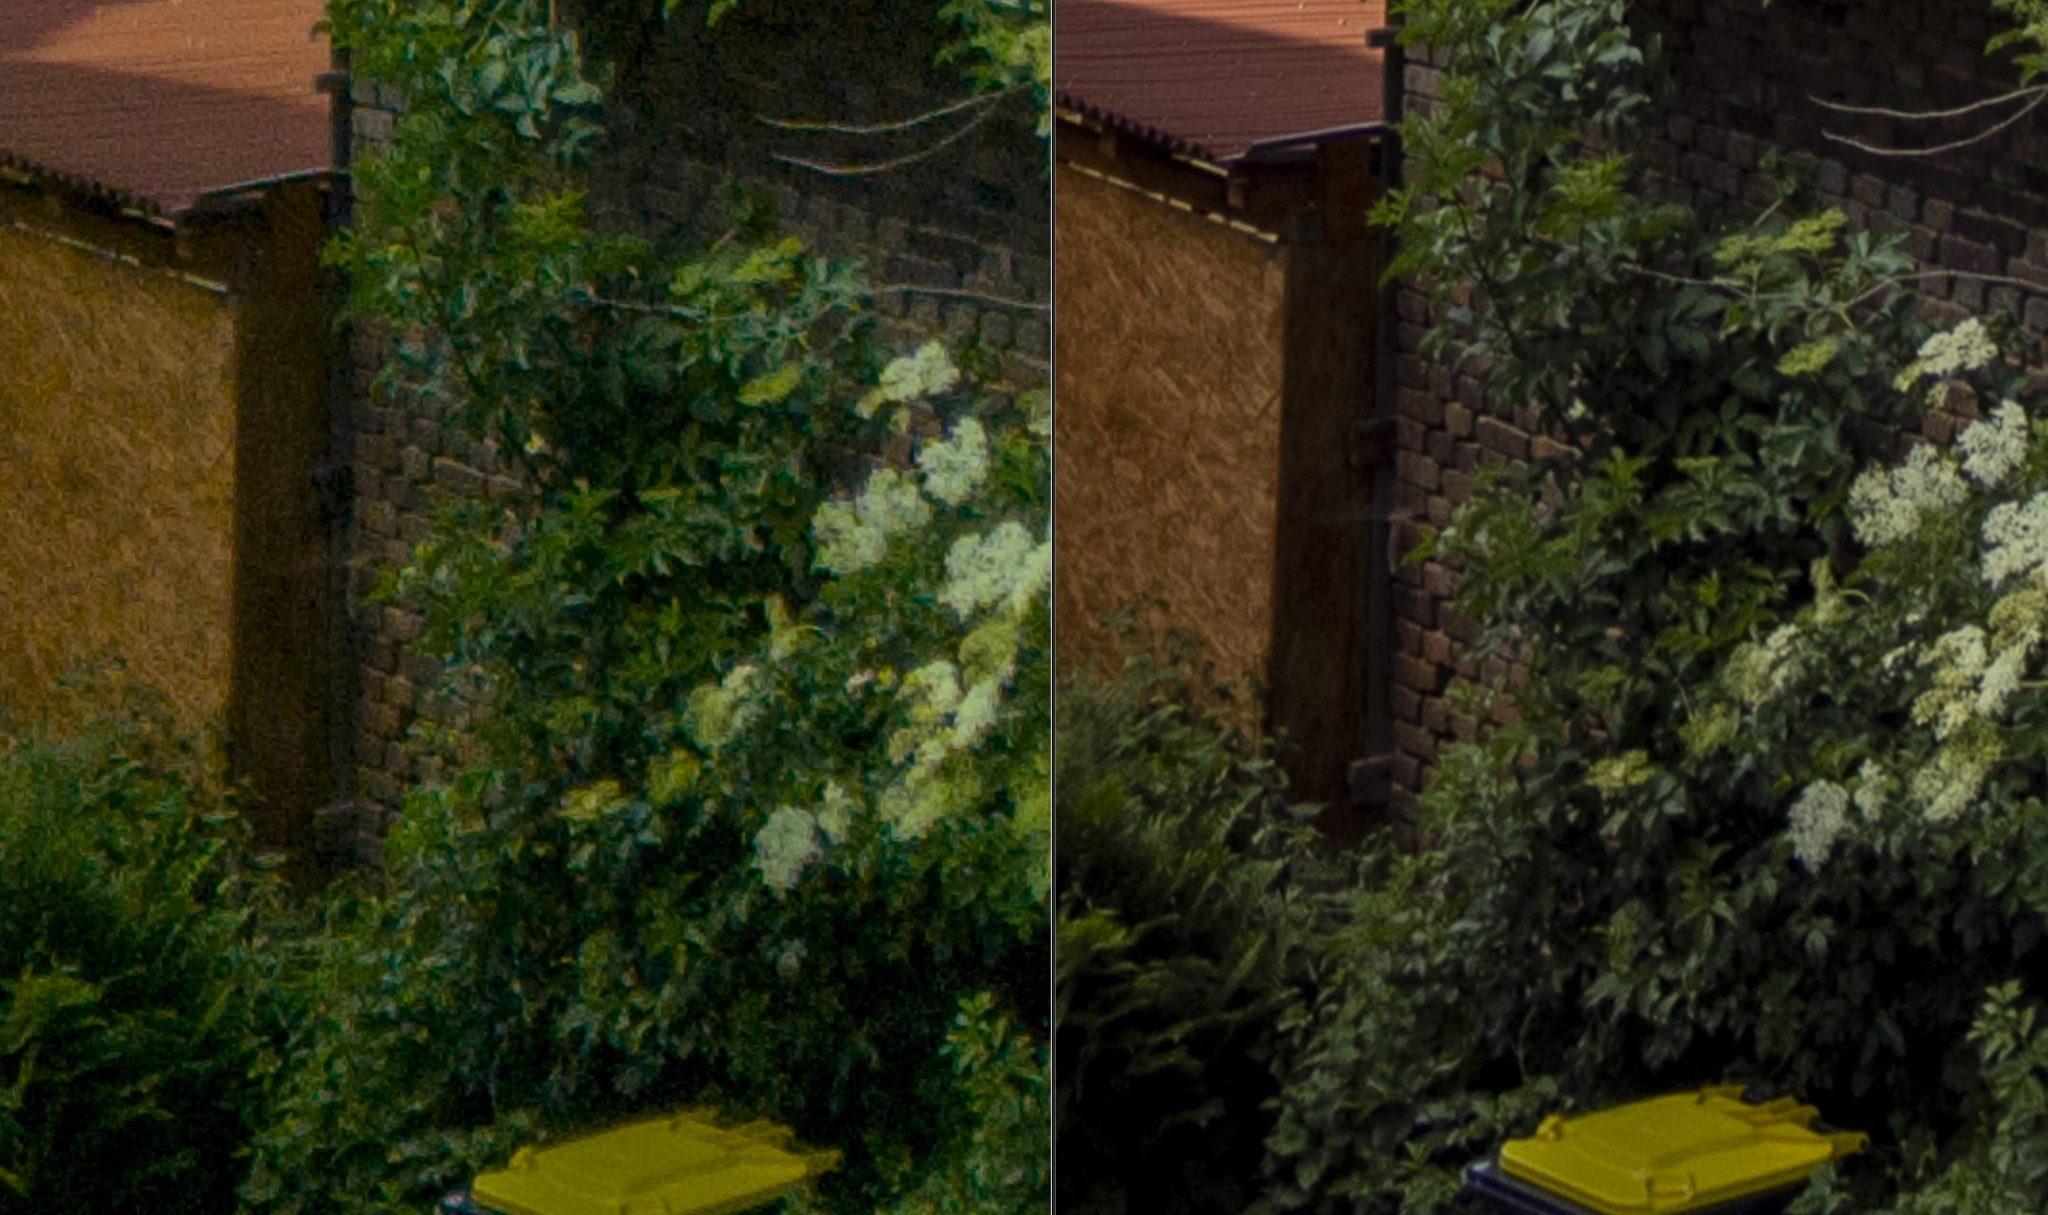
In my opinion, the overall result is really respectable. The DJI Mini reveals more details in the shadow areas than the Air 2s, without a lot of noise there. The Canon EOS R5 is again, of course, much better.
And what else?
A closer look at the image details reveals another special characteristic of the Mini 3 Pro’s photos, which I think can be explained by its specific sensor design. The camera of the Mini 3 Pro uses a so-called Quad Bayer sensor.
To clarify the problem, let’s take a brief excursion:
Bayer Sensor Design
Normally, the light-sensitive pixels of digital camera sensors cannot distinguish colors; they only see grayscales. To distinguish colors, therefore, color filters are placed in front of the individual light-sensitive photocells of the sensor chip, which then only allow light of the relevant color to pass through. Corresponding to the three color-sensitive cones of our retina, these color filters are red, green and blue (RGB). Most sensors use an 2x2 grid arrangement for this, which consists of one red, one blue, and two green filters. Green is provided twice, since our eye is particularly sensitive in this area.
Wikipedia writes about this:
A Bayer filter mosaic is a color filter array (CFA) for arranging RGB color filters on a square grid of photosensors. Its particular arrangement of color filters is used in most single-chip digital image sensors used in digital cameras, camcorders, and scanners to create a color image. The filter pattern is half green, one quarter red and one quarter blue. It is named after its inventor, Bryce Bayer of Eastman Kodak. Bayer is also known for his recursively defined matrix used in ordered dithering.
The color filter arrangement then looks like this:

Therefore, it becomes clear that the sensor resolution of the individual colors must always be lower than the total resolution. The cameras or the RAW converters calculate the color of each individual pixel with more or less suitable algorithms from the color distribution of the adjacent pixels, which never fits to 100%. Effectively, therefore, the color channel green offers only half and the other color channels only a quarter of the specified sensor resolution. This is usually not a big problem, because our eye does not handle this in a fundamentally different way. Our retina contains significantly fewer color-sensitive cells (approx. 6 million so-called cones) than brightness-sensitive cells (approx. 110 million so-called rods).
Quad Bayer
However, the DJI Mini 3 Pro pushes this problem one step further. It has an even lower resolution of the color channels. Here is a comparison of the Bayer and the Quad Bayer arrangement of the color filters:
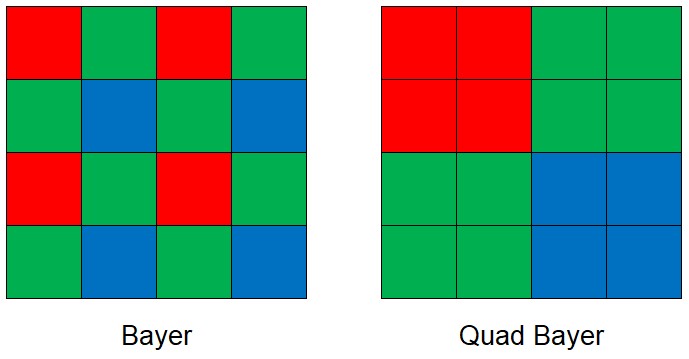
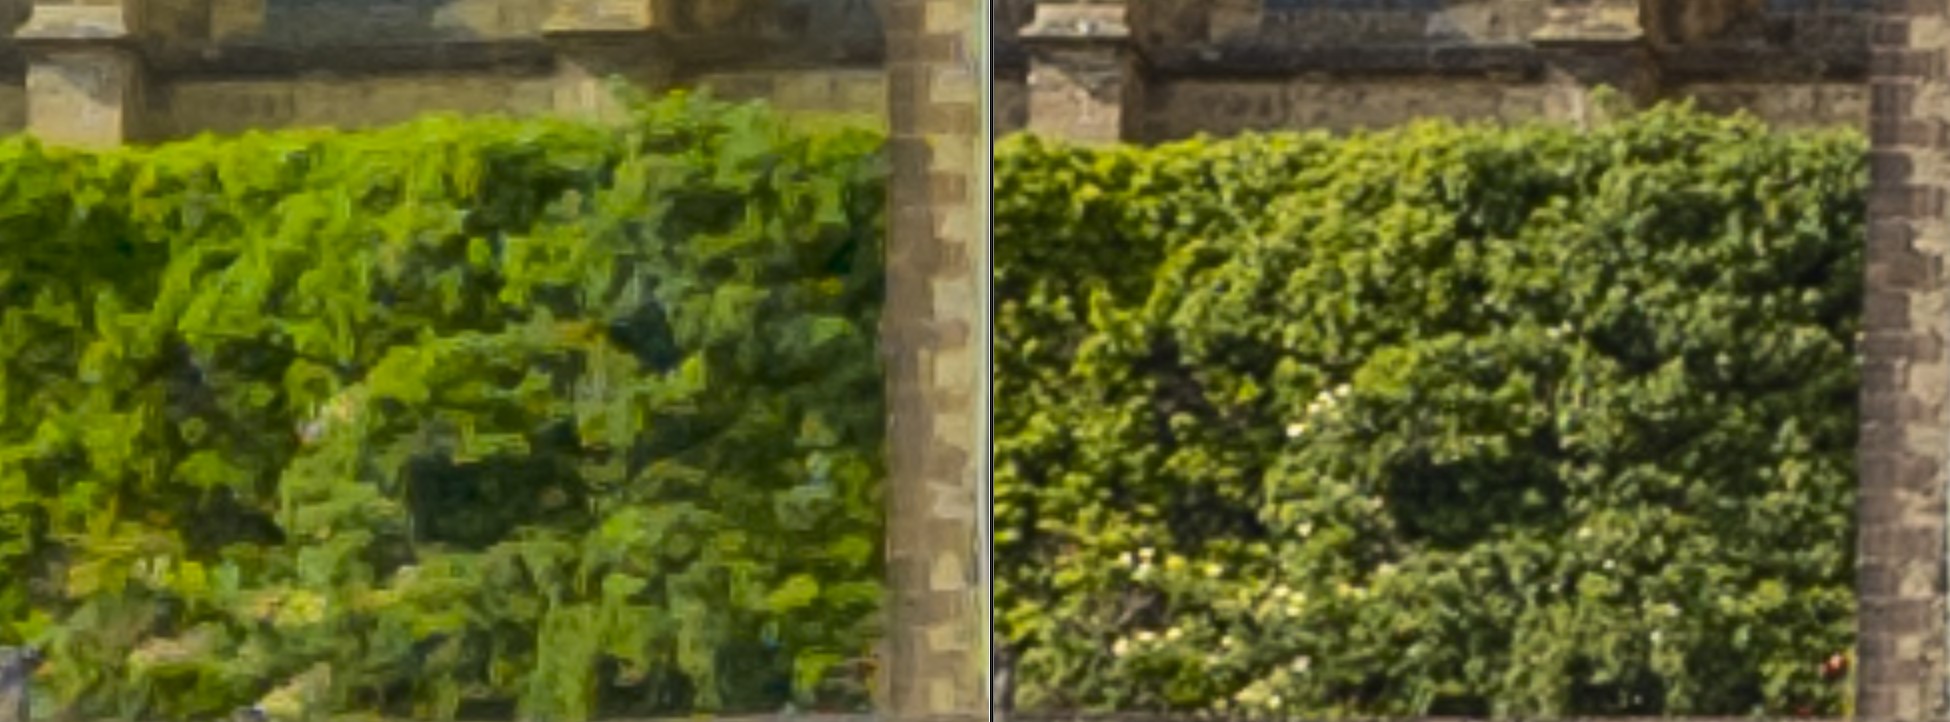
As you can see in the picture, the individual color filters have been significantly enlarged in the Quad Bayer grid. They now cover 4 sensor fields each. This reduces the color resolution by a factor of 4 compared to the classic Bayer matrix. And this is clearly visible in the example images, for example in the bushes. To illustrate this effect, I am showing below a further enlarged section from the center of the image above with the bushes. The left image of the DJI Mini 3 Pro has been enlarged in Lightroom to 400%, the right one of the DJI Air 2s with the same detail to about 650%:
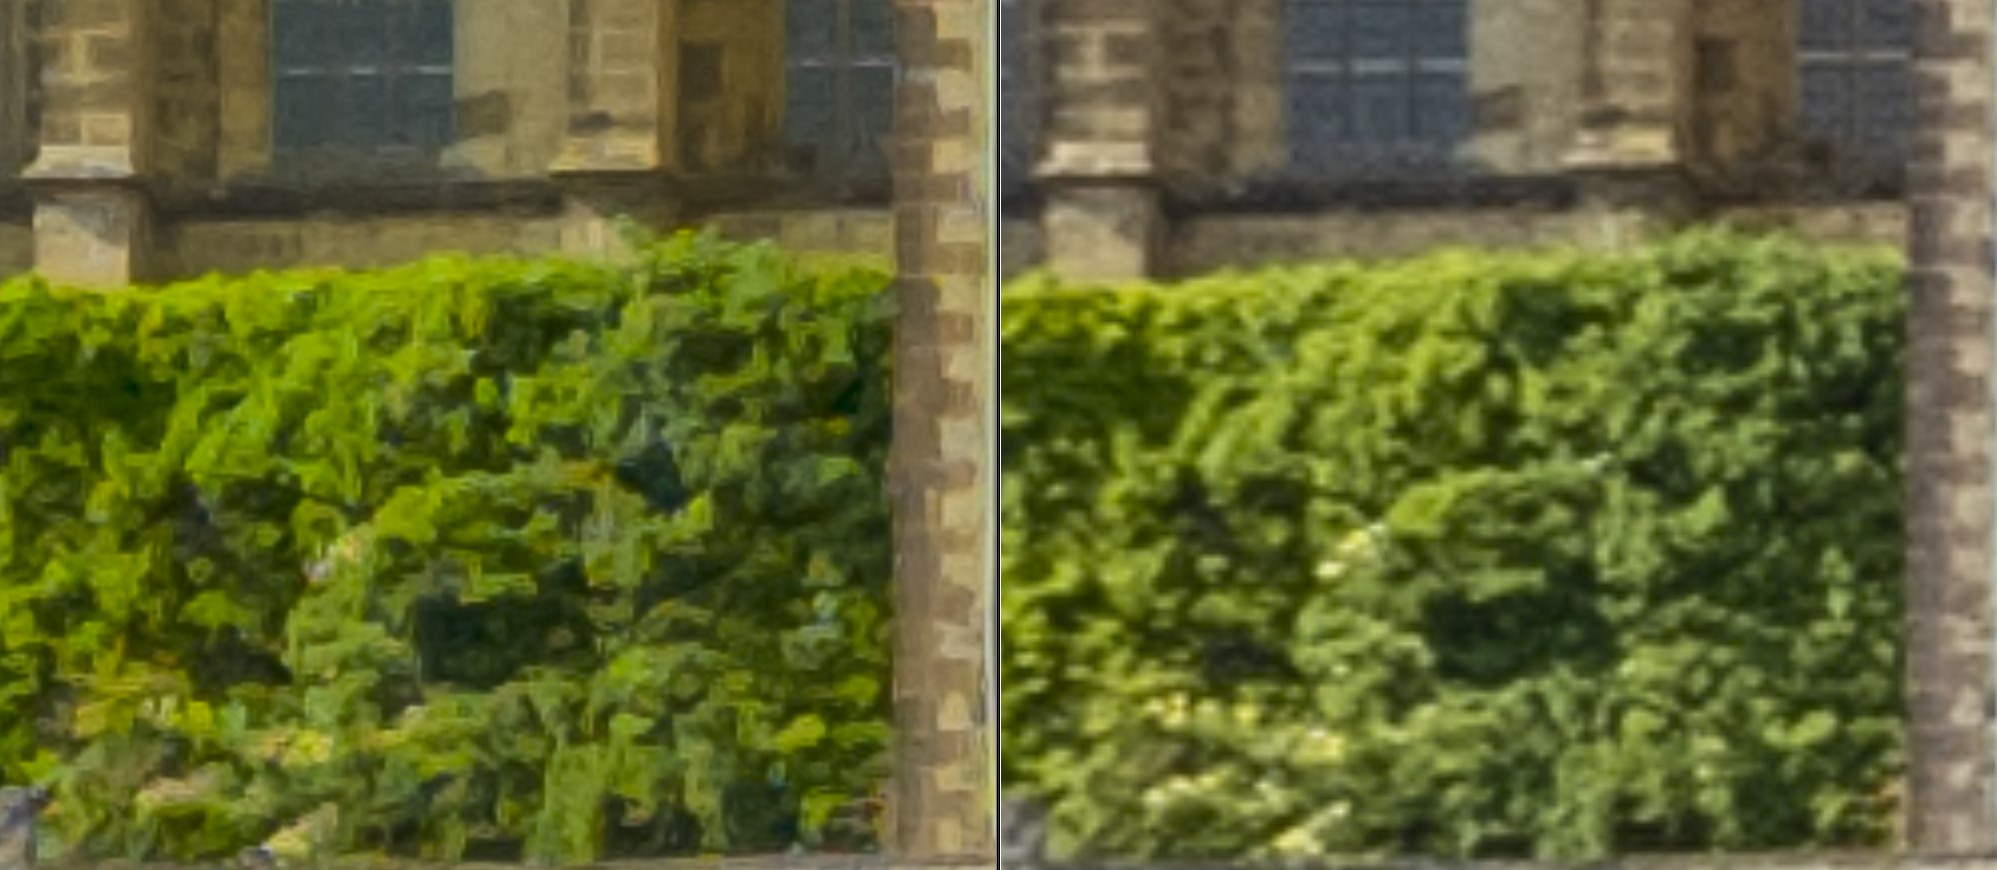
On the right image of the Air 2S, you can still see individual white dots in the bushes that correspond to blossoms. Despite the nominally higher resolution, these are only visible as slightly brighter areas in the image of the Mini 3 Pro. The Mini 3 Pro’s tendency to produce artifacts is also intensified in this high magnification. Overall, in this case, the DJI Air 2s is a better choice despite its lower resolution.
The difference is even more striking when compared with the EOS R5 (both views magnified 400%):
The EOS R5 is orders of magnitude better here, no question. Once again, the DJI Mini 3 Pro has obviously already pre-processed and de-noised the RAW files, which unfortunately led to a significant loss of detail. However, this should not be overestimated. After all, we are talking about 400% enlargements here. The resulting total images would be a good 8 meters wide in a print corresponding to a usual 100 DPI screen resolution!
Why Quad Bayer?
The reason for this design modification, which seems unreasonable at first glance, is that the sensor can alternatively read 4 individual pixels at once without any problems. Although the sensor resolution then drops to only 1/4 of the original number of pixels, each individual pixel will be four times larger. This improves the sensor’s light sensitivity, noise performance and dynamic range at the expense of resolution. Thus, the DJI Mini 3 Pro then operates at 12 megapixels also in its photo mode. However, since I will usually use the drone in photography in good weather and at its base ISO of 100, I would have preferred a classic Bayer Matrix.
To the DJI Mini 3 Pro’s salvation, however, it should be remembered that it is not yet directly supported by Lightroom either. It is quite possible that the Quad Bayer data is not yet interpreted correctly. Unfortunately, the Mini 3 Pro is not yet supported by DxO PhotoLab or PureRAW either. I hope that the AI-based DeepPRIME algorithm available there will improve the quality.
Résumé
I have mixed feelings about the DJI Mini 3 Pro’s photo results so far. Overall, the detail resolution of the DJI Mini 3 Pro is better than that of the DJI Air 2s for suitable subjects without large color variations (as seen in the church tower example above).
The photos are quite decent when viewed as a whole. However, small colored details like the blossoms in the bushes in the example are sometimes lost, and here the Air 2s is even partly superior. In addition, the RAW files of the Mini 3 Pro show clear artifacts, which indicates intensive preprocessing and noise reduction of the DNG files even at ISO 100. In any case, I would much prefer honest, unprocessed, noisy RAWs for photography.
These could then be processed with complex algorithms, such as the AI-based DeepPRIME process in DxO PureRAW or DxO Photolab, at the user’s choice and with presumably much better results - provided that DxO also supports the DJI Mini 3 Pro in the near future. However, I strongly assume that this will be the case due to the wide acceptance of the new drone. DxO added support for the predecessor, the DJI Mini 2, a few months after the drone was released.
By no means does the drone even come close to the quality of a full-frame system camera like the Canon EOS R5. However, this was not to be expected.
I don’t know yet if it will replace my DJI Air 2s. In the video area, which I only use very rarely so far, the Air 2s is still clearly superior to the Mini 3 Pro. But it also offers some advantages in photography, such as long exposures with up to 10 seconds exposure time and provides an exposure mode with aperture priority at a fixed ISO value, which I still miss a lot in the Mini 3 Pro.
The DJI Mini 3 Pro only uses the lower 12 megapixel resolution in the automatic panorama modes I used frequently before. The DJI Air 2s, on the other hand, does this much better with its full resolution of 20 megapixels. However, with the Mini 3 Pro, this can at least be achieved manually controlled at 48 megapixels. This is very cumbersome and I really hope that the panorama versions with 48 megapixels will be added in a future firmware version. In addition, the DJI Mini 3 Pro is basically the first model to allow a full 360° spherical panorama, as it can tilt the camera up to 60°. The DJI Mini 2 and the Air 2s spherical panoramas do not include a part of the image in the zenith because the gimbal can only be tilted upwards to a limited extent.
*=Affiliat Link
Guten Tag Herr Neukamp! Vielen Dank, daß Sie Ihre Erfahrungen teilen. Besonders gefällt mir Ihre systematische und standardisierte Vorgehensweise, die überhaupt erst Vergleiche und Rückschlüsse zuläßt! Das ist selten zu finden!! Gerne möchten ich mir einen Eindruck davon verschaffen, was ich mit meiner Erfahrung aus den dng-Dateien herausholen kann, Möglichkeiten und Grenzen ausloten. Es würde mich sehr freuen, wenn Sie mir hierfür von der Aufnahme mit dem Blick aus Ihrem Fenster (sie hat fast alle für mich relevanten kritischen Bildmerkmale) eine dng-Datei von der Mini 4 und der Air 3 bereitstellen könnten. Das wäre großartig. Mein Schwerpunkt ist Fotografie (Architektur und Landschaft). Schönen Gruß, Thomas Ott
Hallo Herr Ott,
ich habe die DNG Dateien am Ende meines Artikels zum Test der Mini 4 Pro verlinkt.
Viele Grüße,
Gerd-Uwe Neukamp