As already mentioned in my first short report on the Mini 4 Pro, I have now purchased the new Mini 4 Pro, which will replace my previous Mini 3 Pro. After a first test flight, I was particularly interested in the photo quality, since I use my drones mainly for photography. As a passionate photographer, I exclusively use the RAW / DNG format in the highest sensor resolution of 48 megapixels.
According to the technical specifications, the camera of the Mini 4 Pro has not changed compared to its predecessor Mini 3 Pro. Although it looks the same on the outside, it is not: my ND filters from the Mini 3 Pro do not fit to it.
However, DJI points out that the image quality of the Mini 4 Pro is still improved due to the more powerful digital image processing. I already had a similar impression with my larger drone, the DJI Air 3, which also uses a 1/ 1.3-inch sensor and optics with the same specifications in its wide-angle camera. The comparison between Air 3 and Mini 3 Pro can be found here.
While many people think that RAW files contain only the actual, unprocessed sensor data, this is not the case. In fact, the data is always pre-processed in your camera - more so with some cameras, less so with others. Artifacts that occur during this process are very difficult to remove later, even with the best RAW development software.
A particular problem arises from the quad-bayer sensor chosen by DJI. Compared to sensors with a classic Bayer design, the color resolution of these is reduced to a quarter and thus only corresponds to that of a 12-megapixel sensor.
I have already written more about the Bayer / Quad Bayer topic in my article about the Mini 3 Pro, so I don’t want to repeat everything here.
However, since all RAW processing tools I know are designed for the standard Bayer design, the DJI drones already convert the raw data into a so-called linear DNG format. In this process, the color mapping of the individual pixels (the “de-Bayer” process) is already done internally in the drone. For this purpose, the assumed color of each individual sensor pixel is derived from the surrounding RGB pixels according to a proprietary algorithm. Another disadvantage of linear DNG files is that they contain the data of all three color channels for each sensor pixel, which results in three times larger file size than, for example, the RAW file of the Canon EOS R5 prior to the de-Bayer process.
A closer look at the DNG files reveals that post-processing (denoising / sharpening) has obviously taken place here as well. The Mini 3 Pro in particular shows quite noticeable sharpening artifacts. These are not as pronounced in the Air 3, which was released later.
Computational photography
The image quality of digital cameras therefore depends not only on the optics and the sensor, but also on the digital post-processing in the camera/drone. This technology is nowadays called “computational photography” and has been driven in particular by the smartphone industry.
It’s quite impressive what modern smartphones currently offer in this area. For a more in-depth introduction to the subject, I recommend the series of articles on computational photography on dpReview.
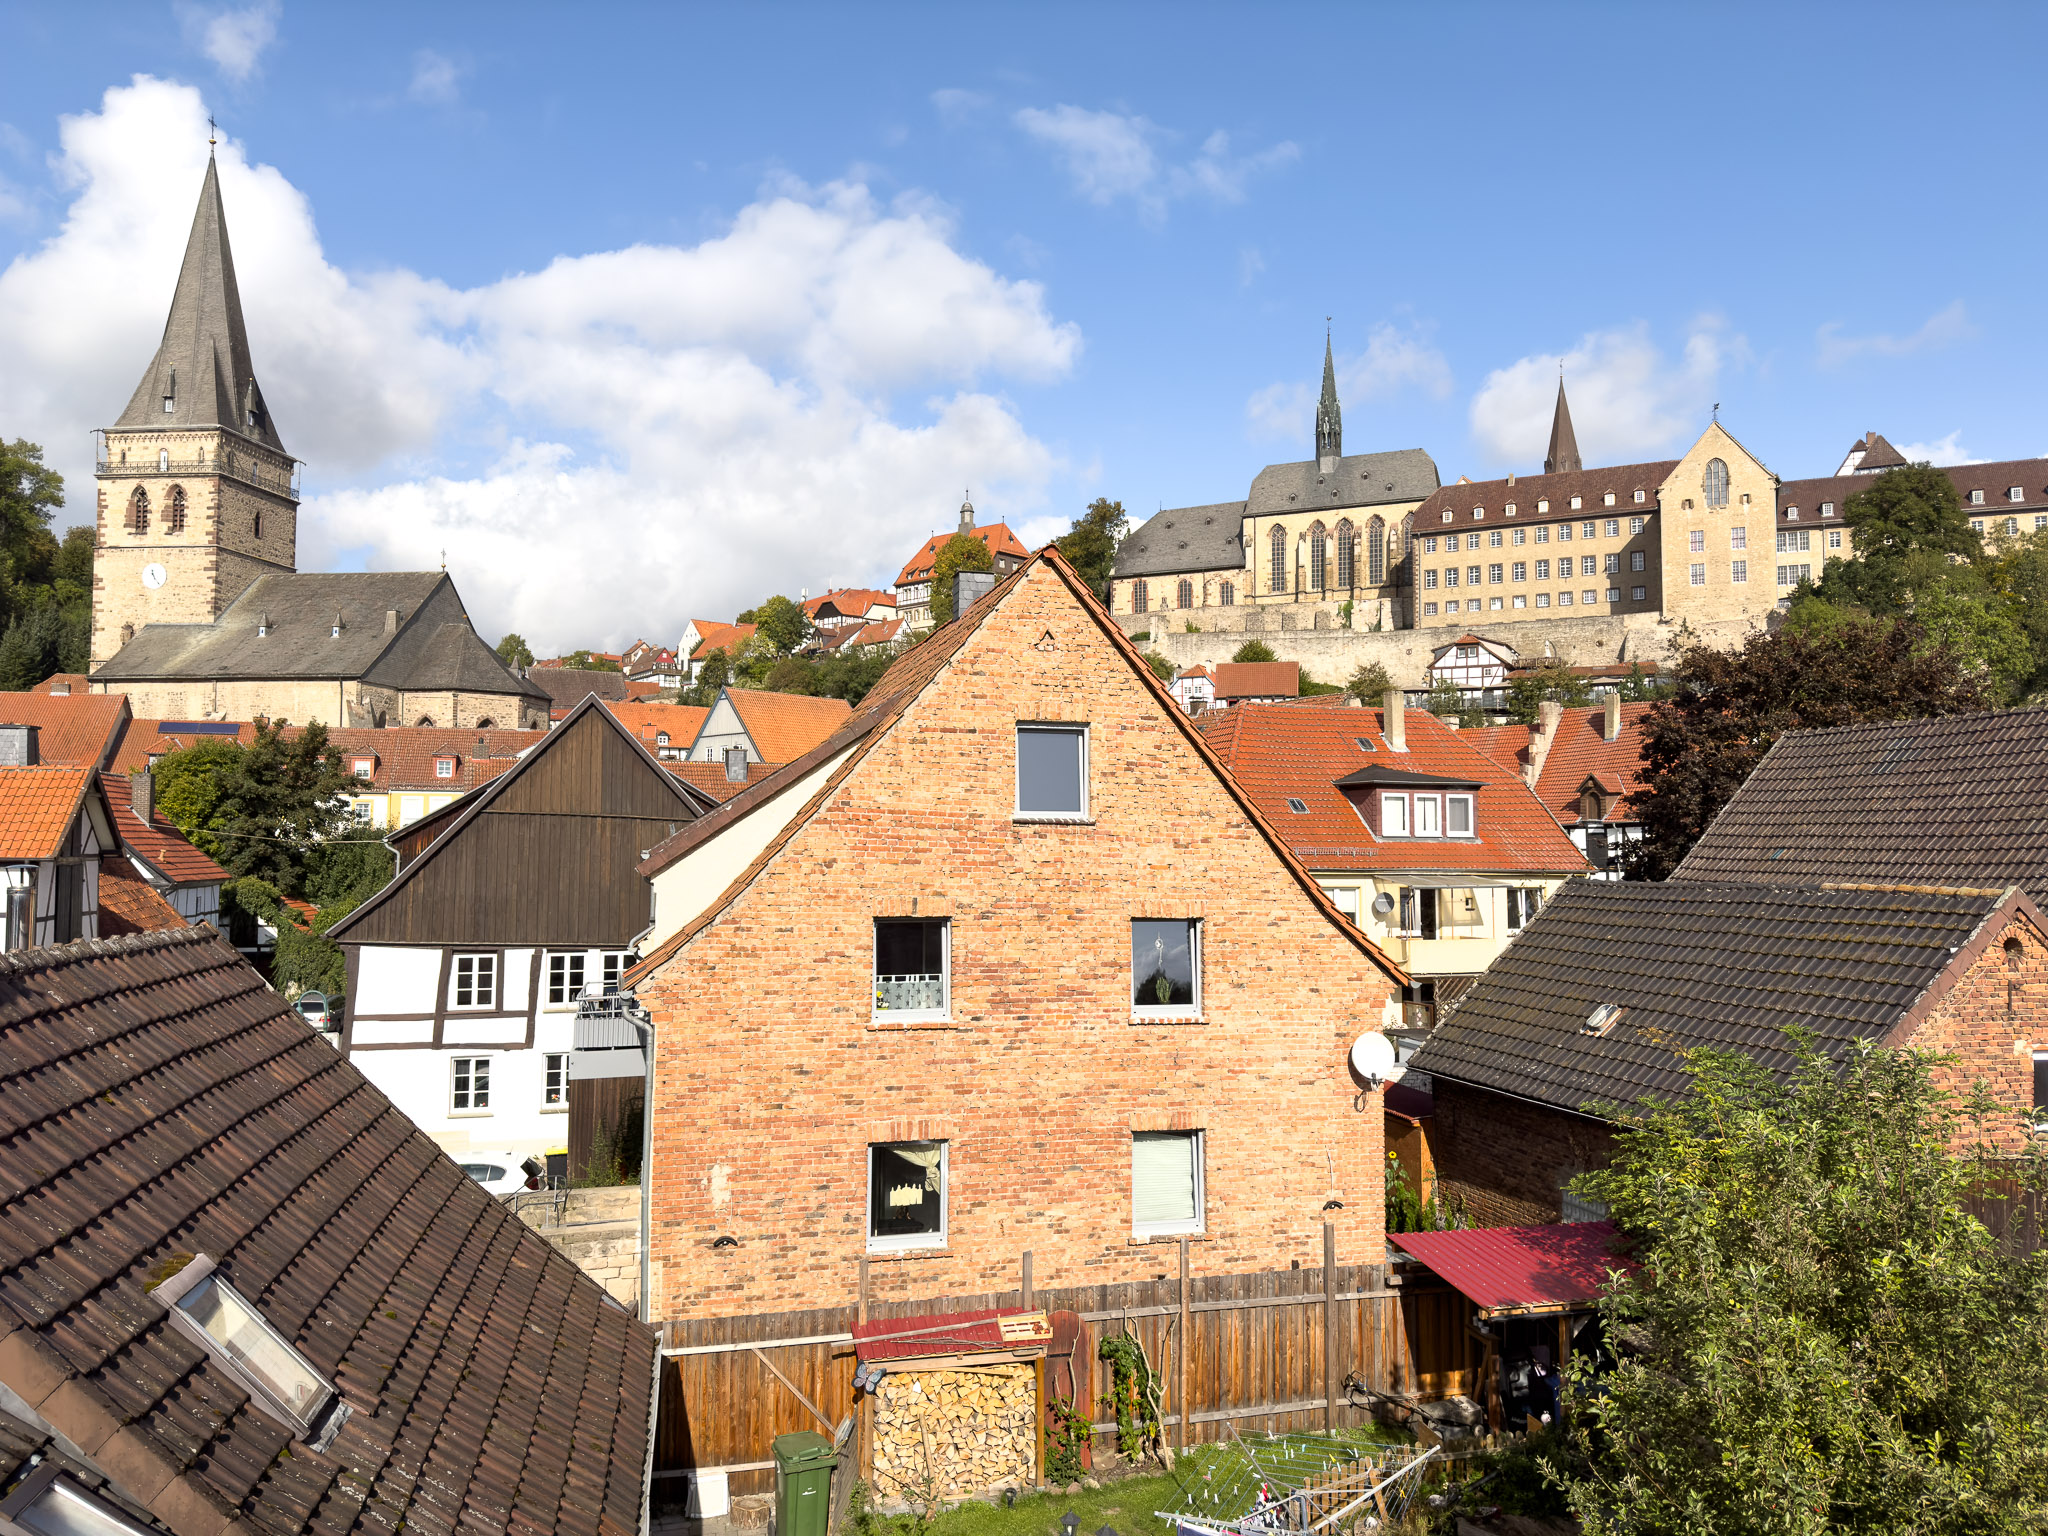
Therefore, I was of course very curious to see what the DJI Mini 4 Pro has to offer. As with my previous tests, I again took comparison shots out of my window. This time I even tested 5 cameras:
- DJI Mini 4 Pro
- DJI Mini 3 Pro
- DJI Air 3
- Canon EOS R5 with 24-105mm f/4L IS
- IPhone 15 Pro
Again, I took the images in quick succession. I imported them into Adobe Lightroom Classic 12.5 and edited them according to my usual workflow. All of the DJI drone shots were taken with the same exposure settings and processed identically in Lightroom. Here are my development settings in Lightroom Classic 12.5:
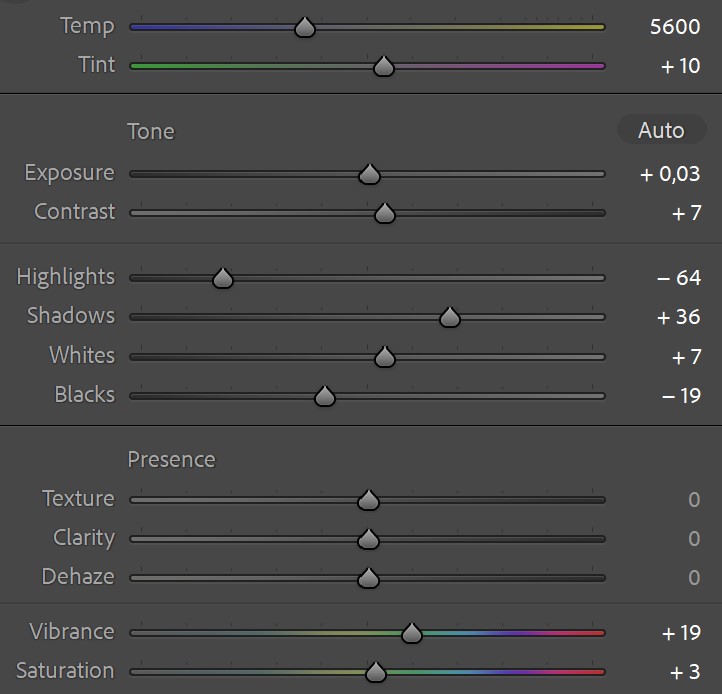
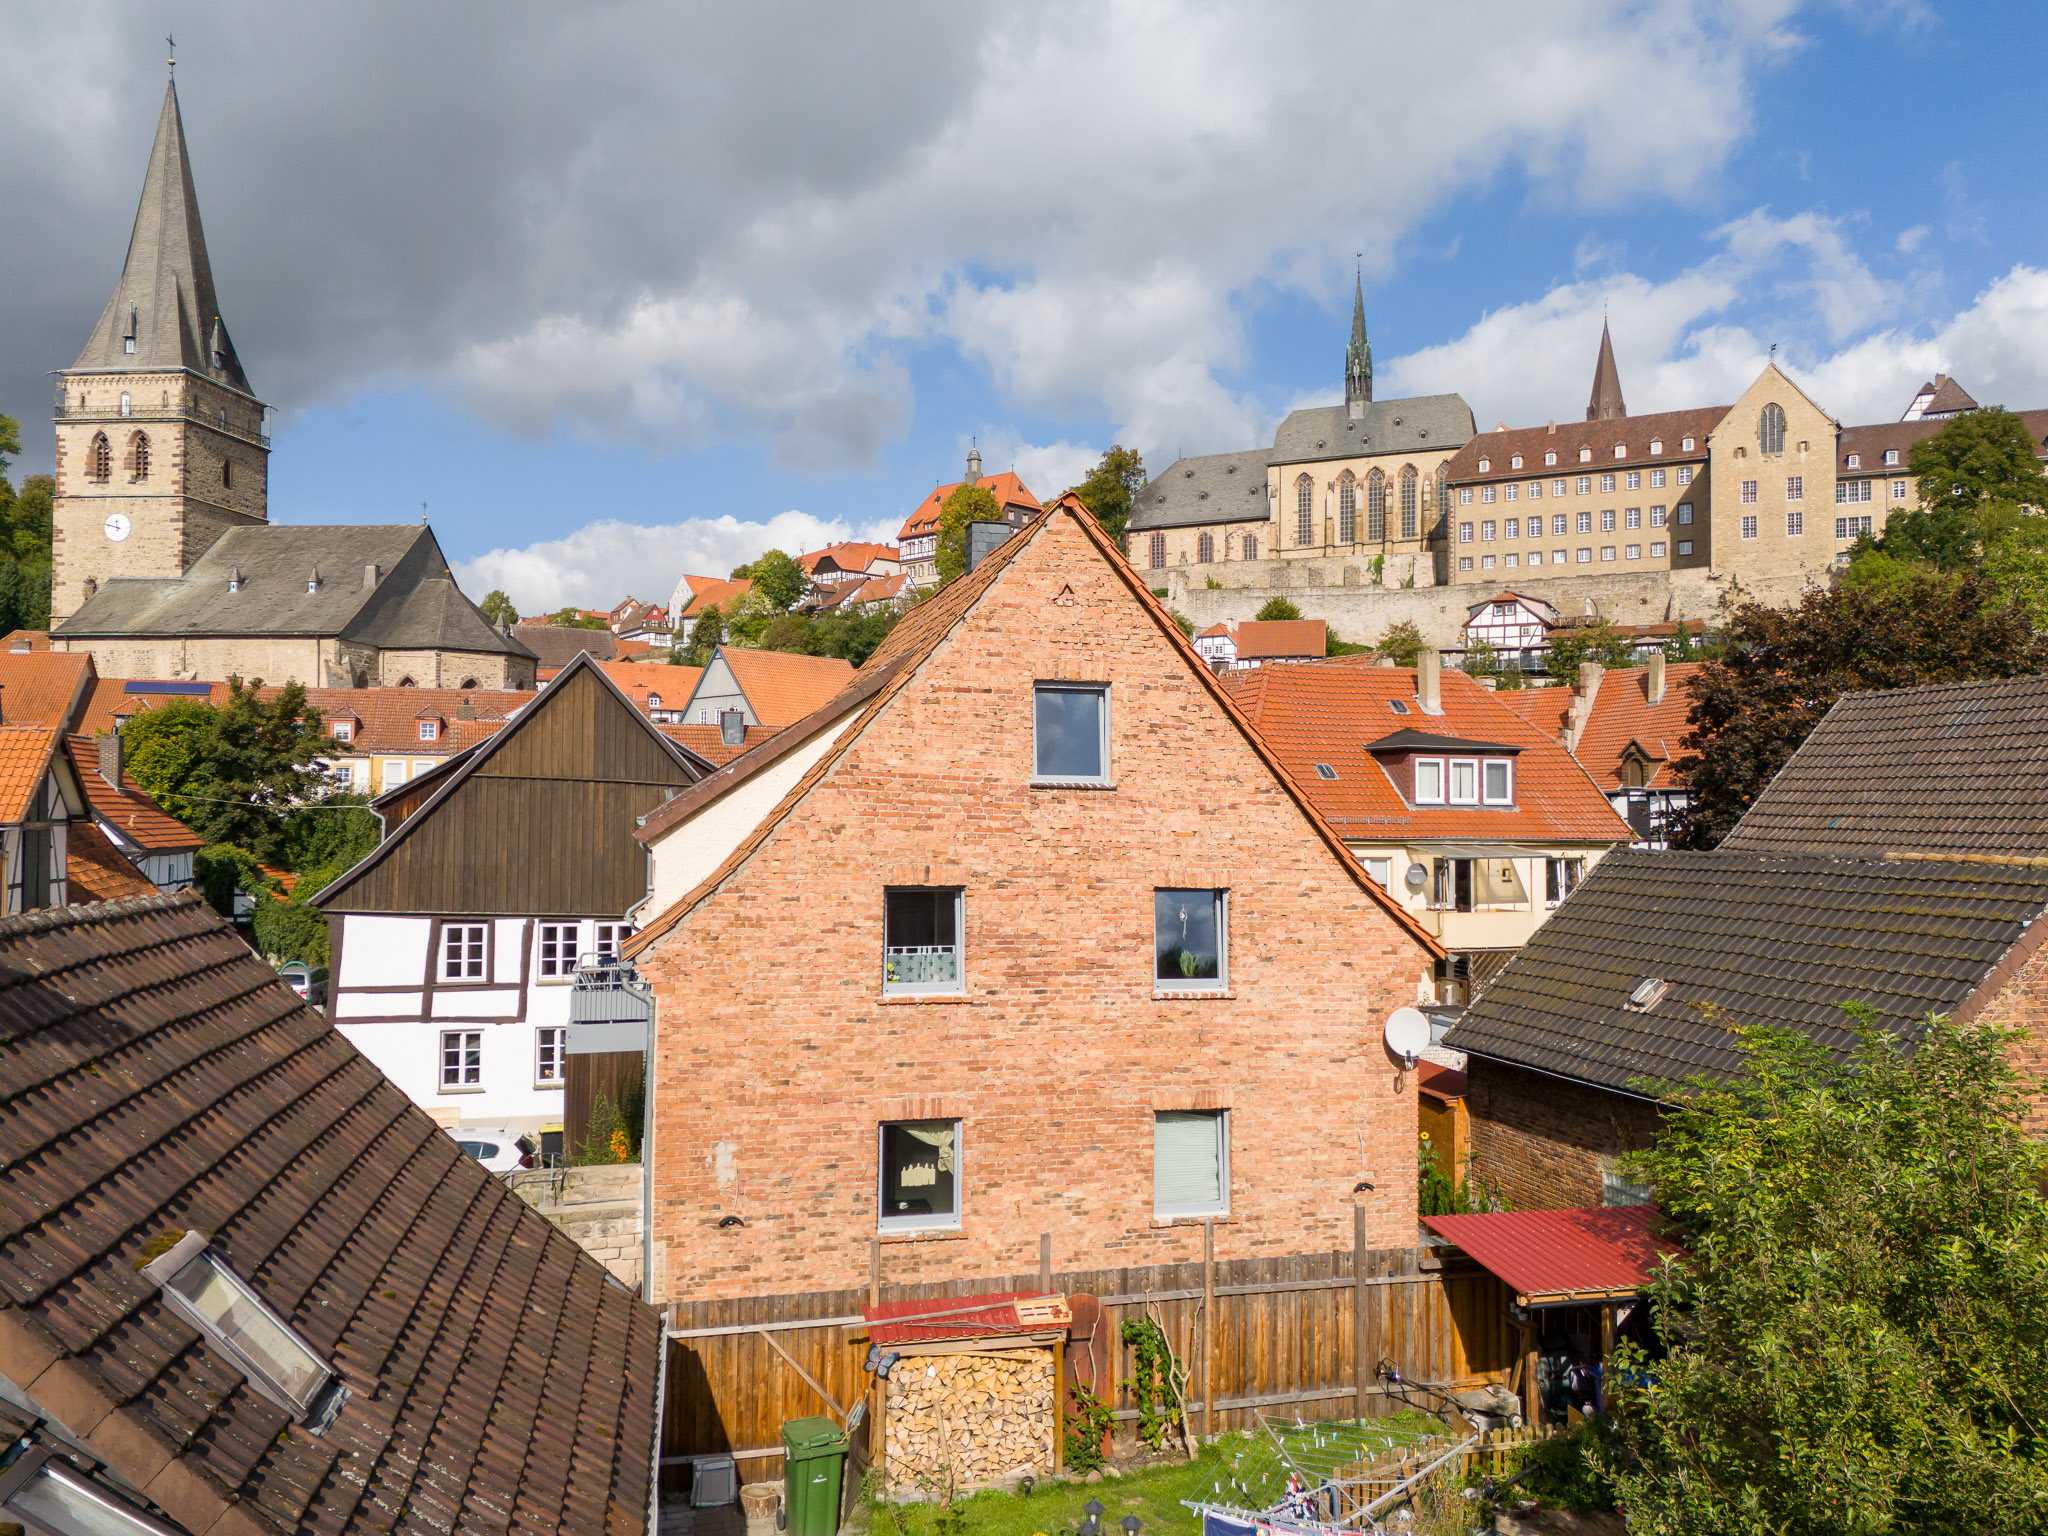
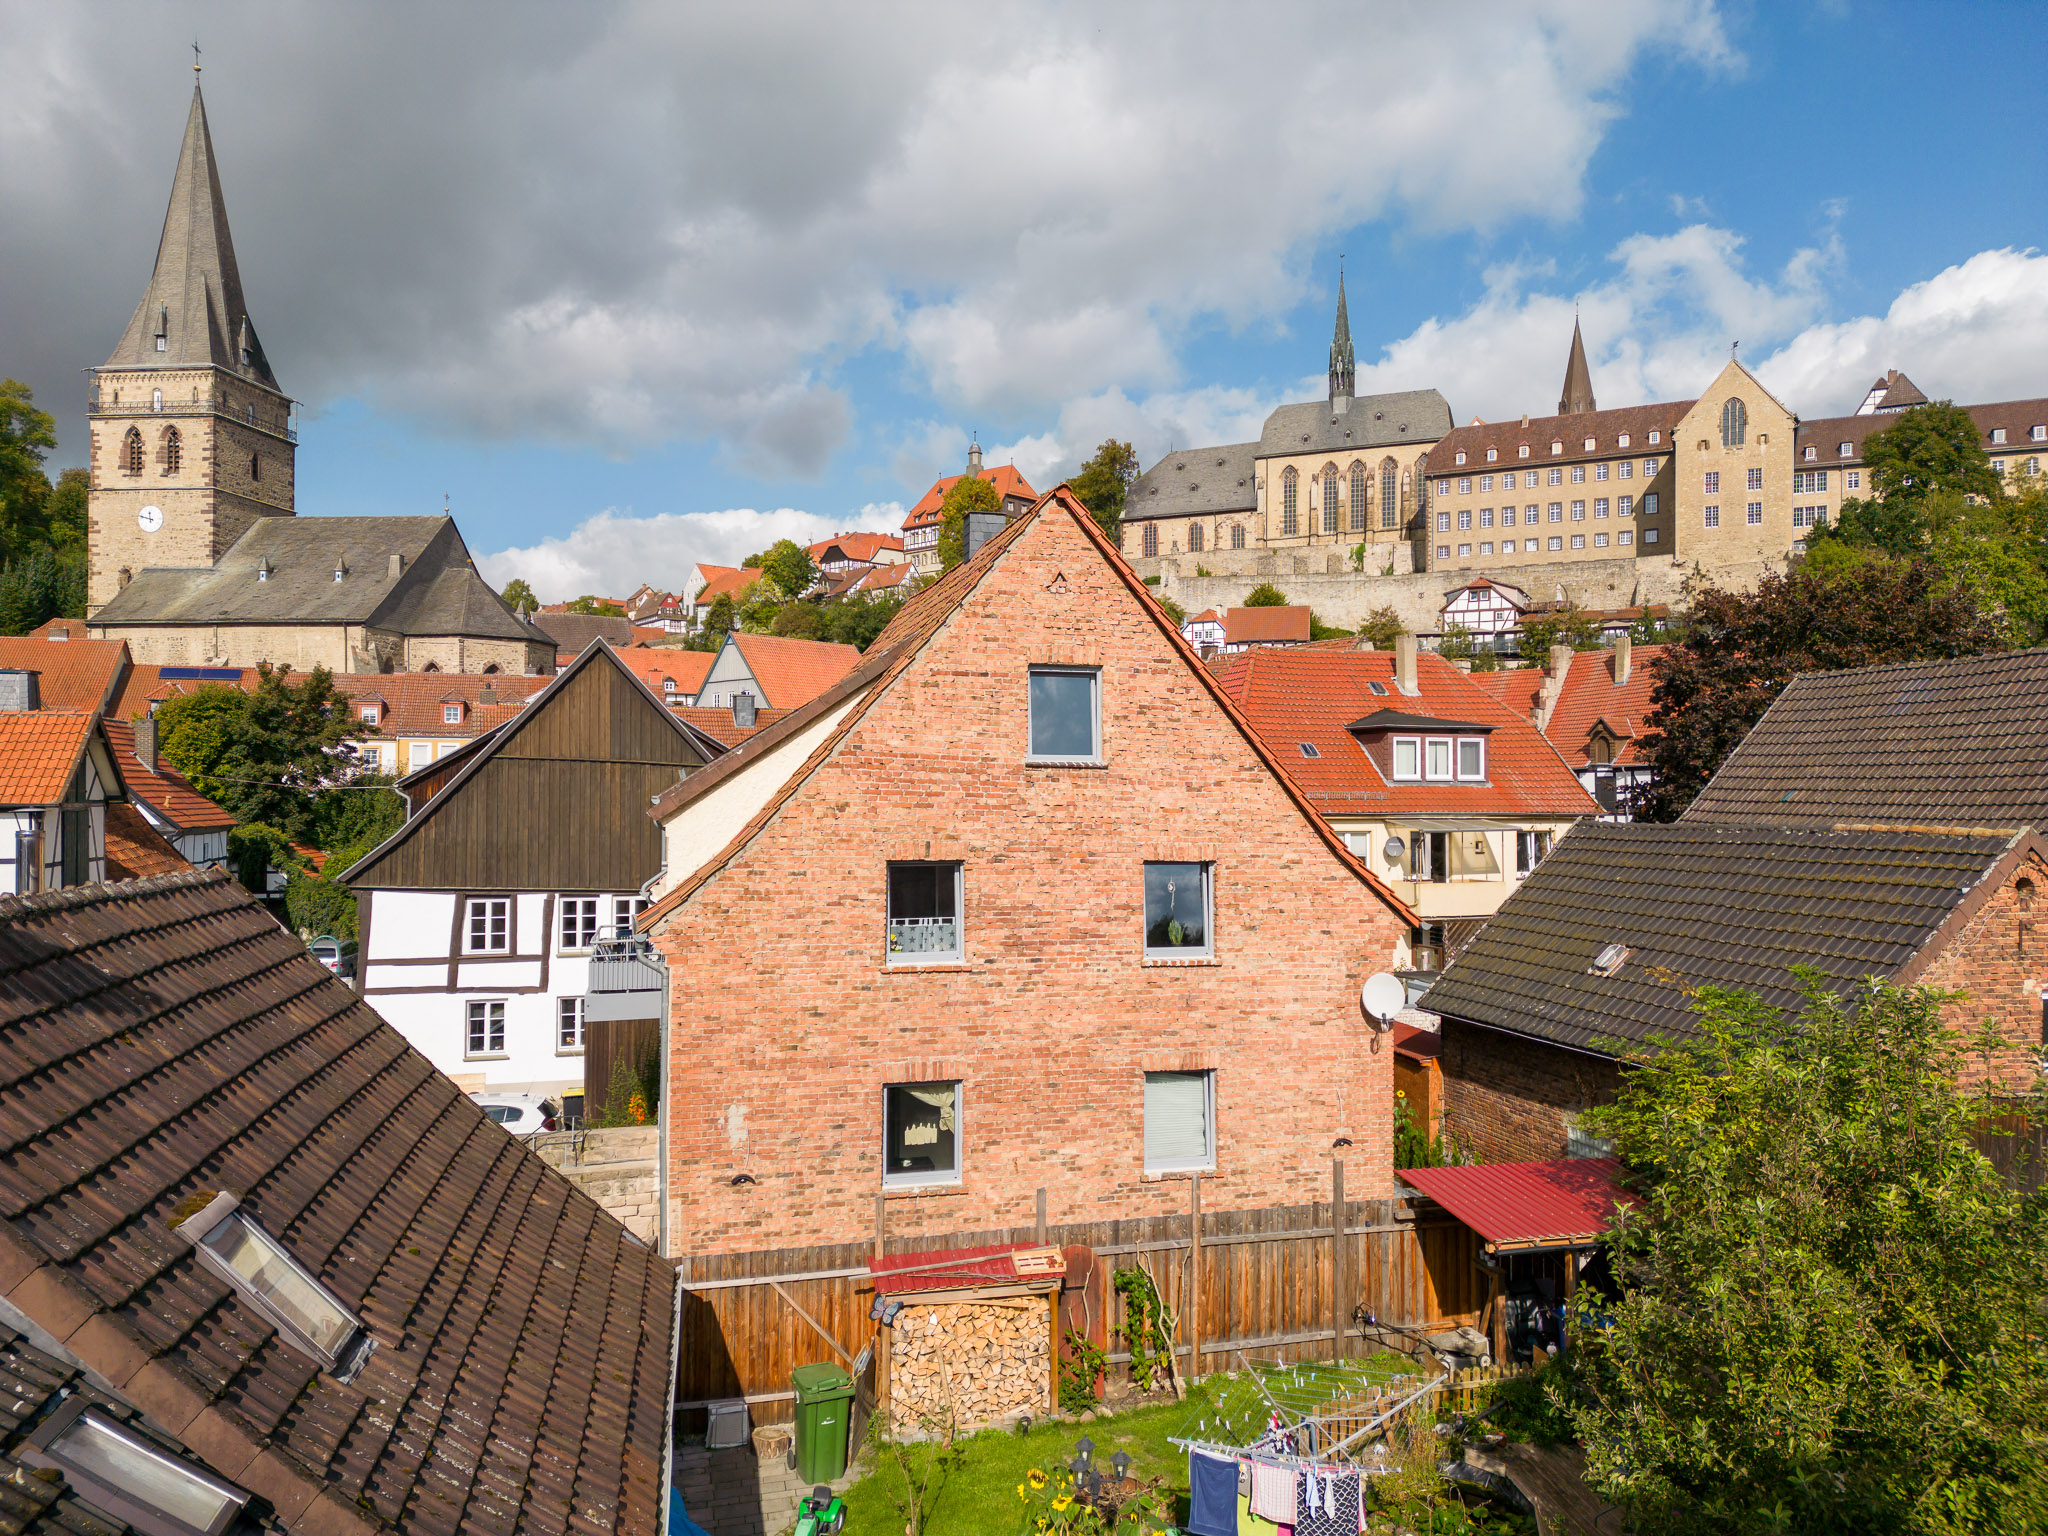
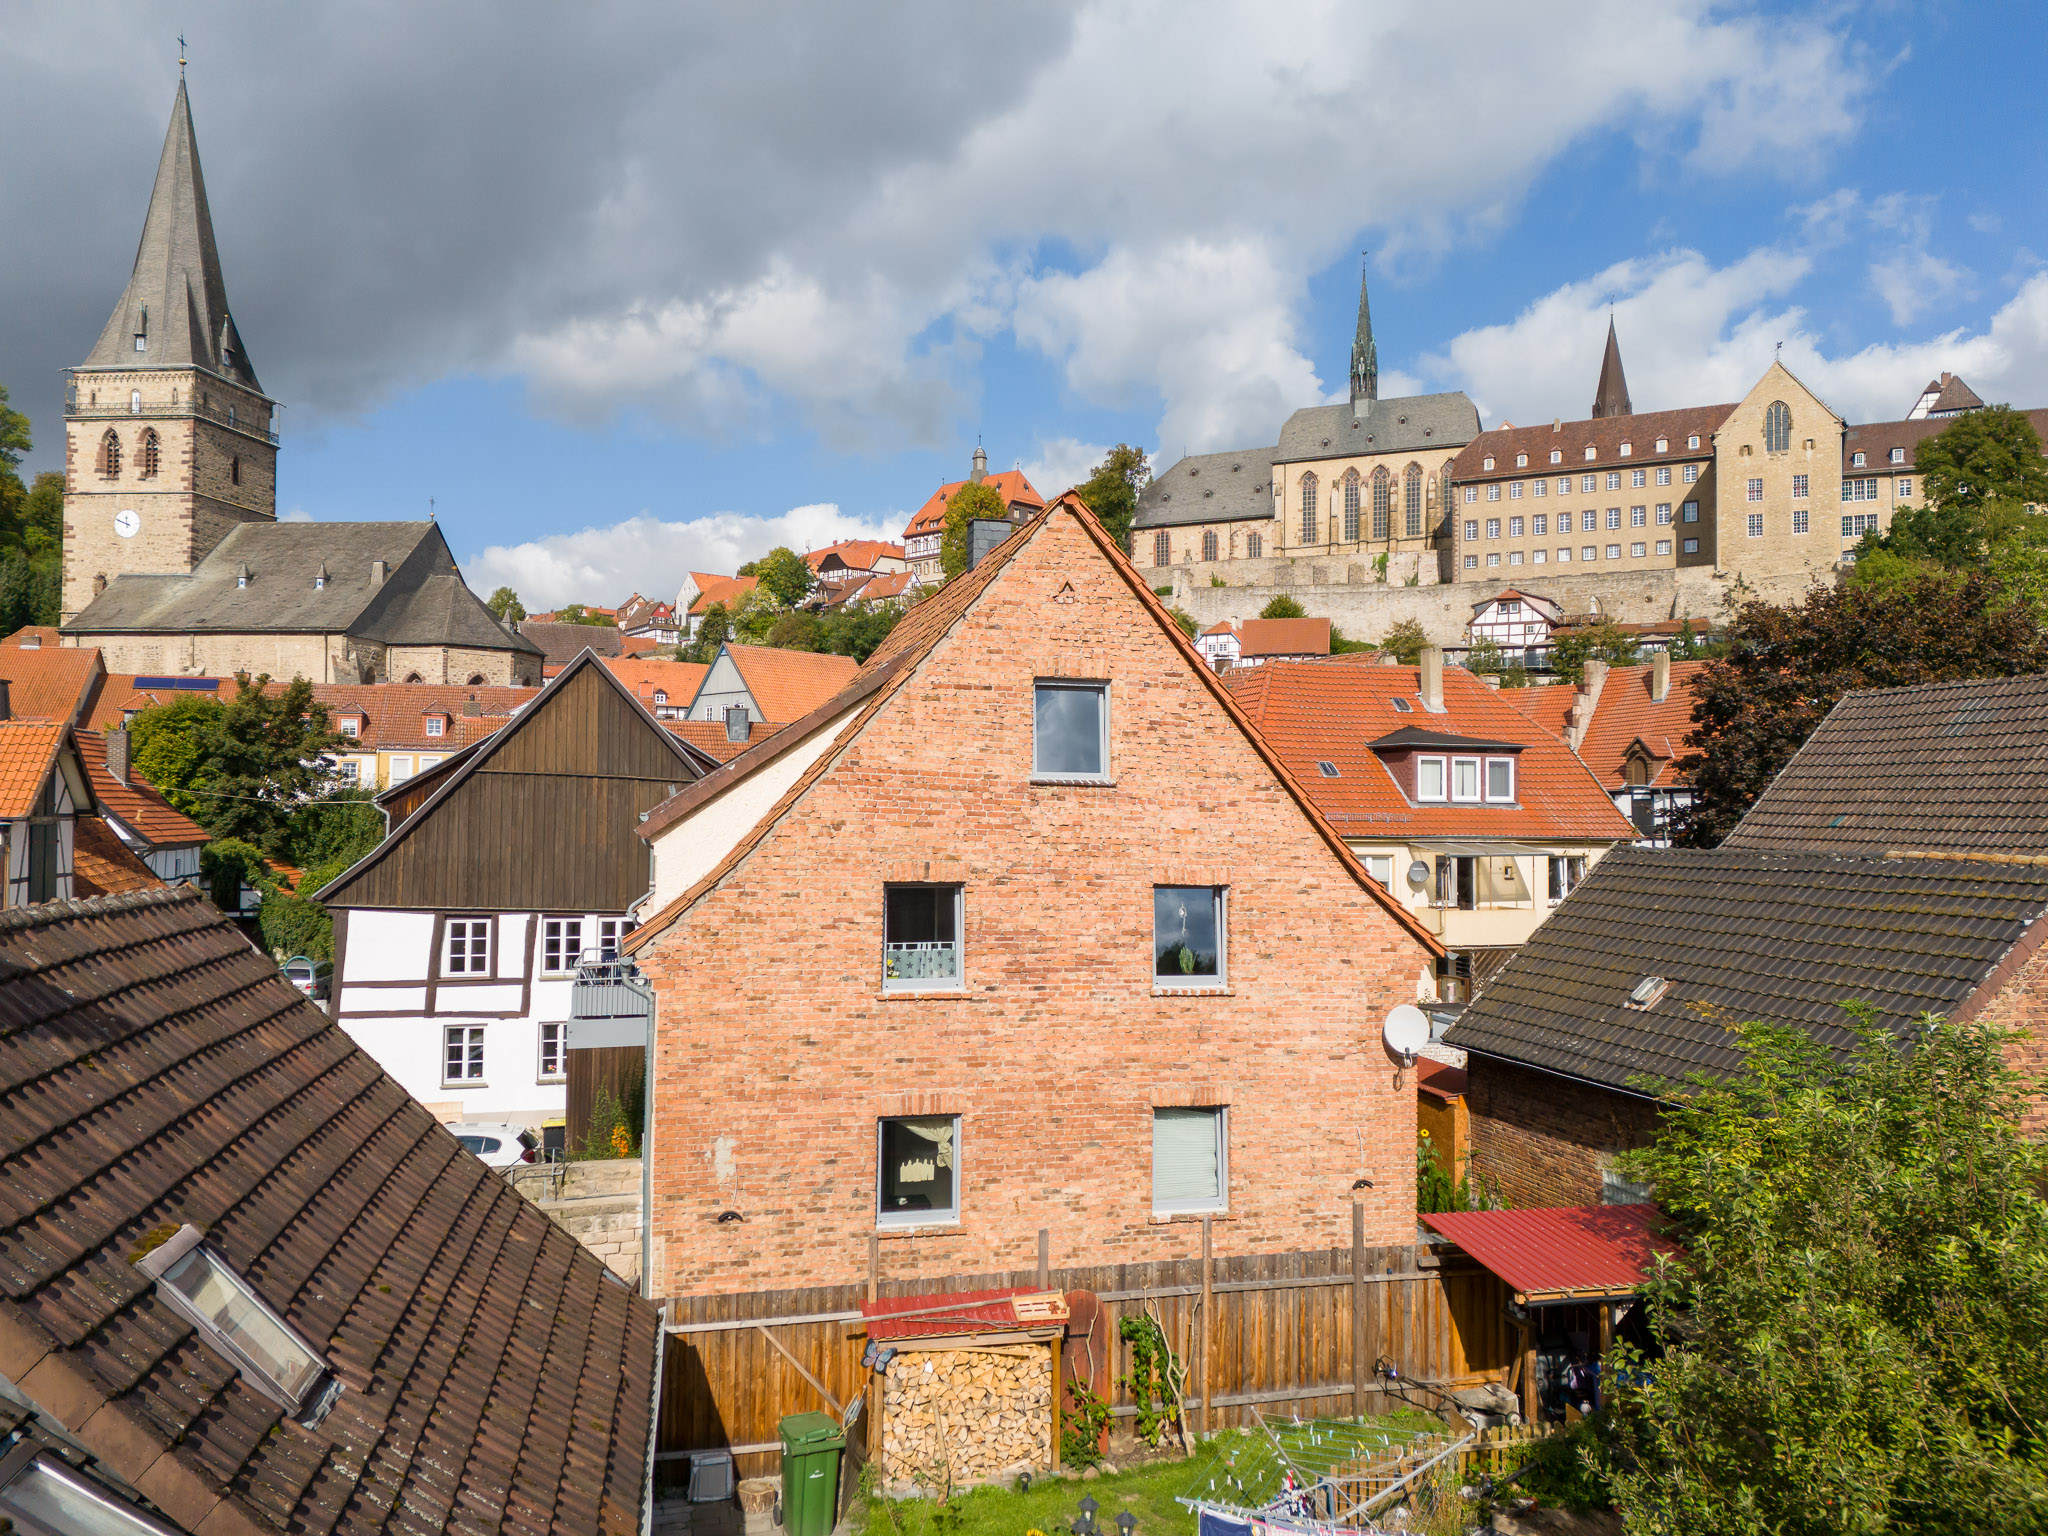
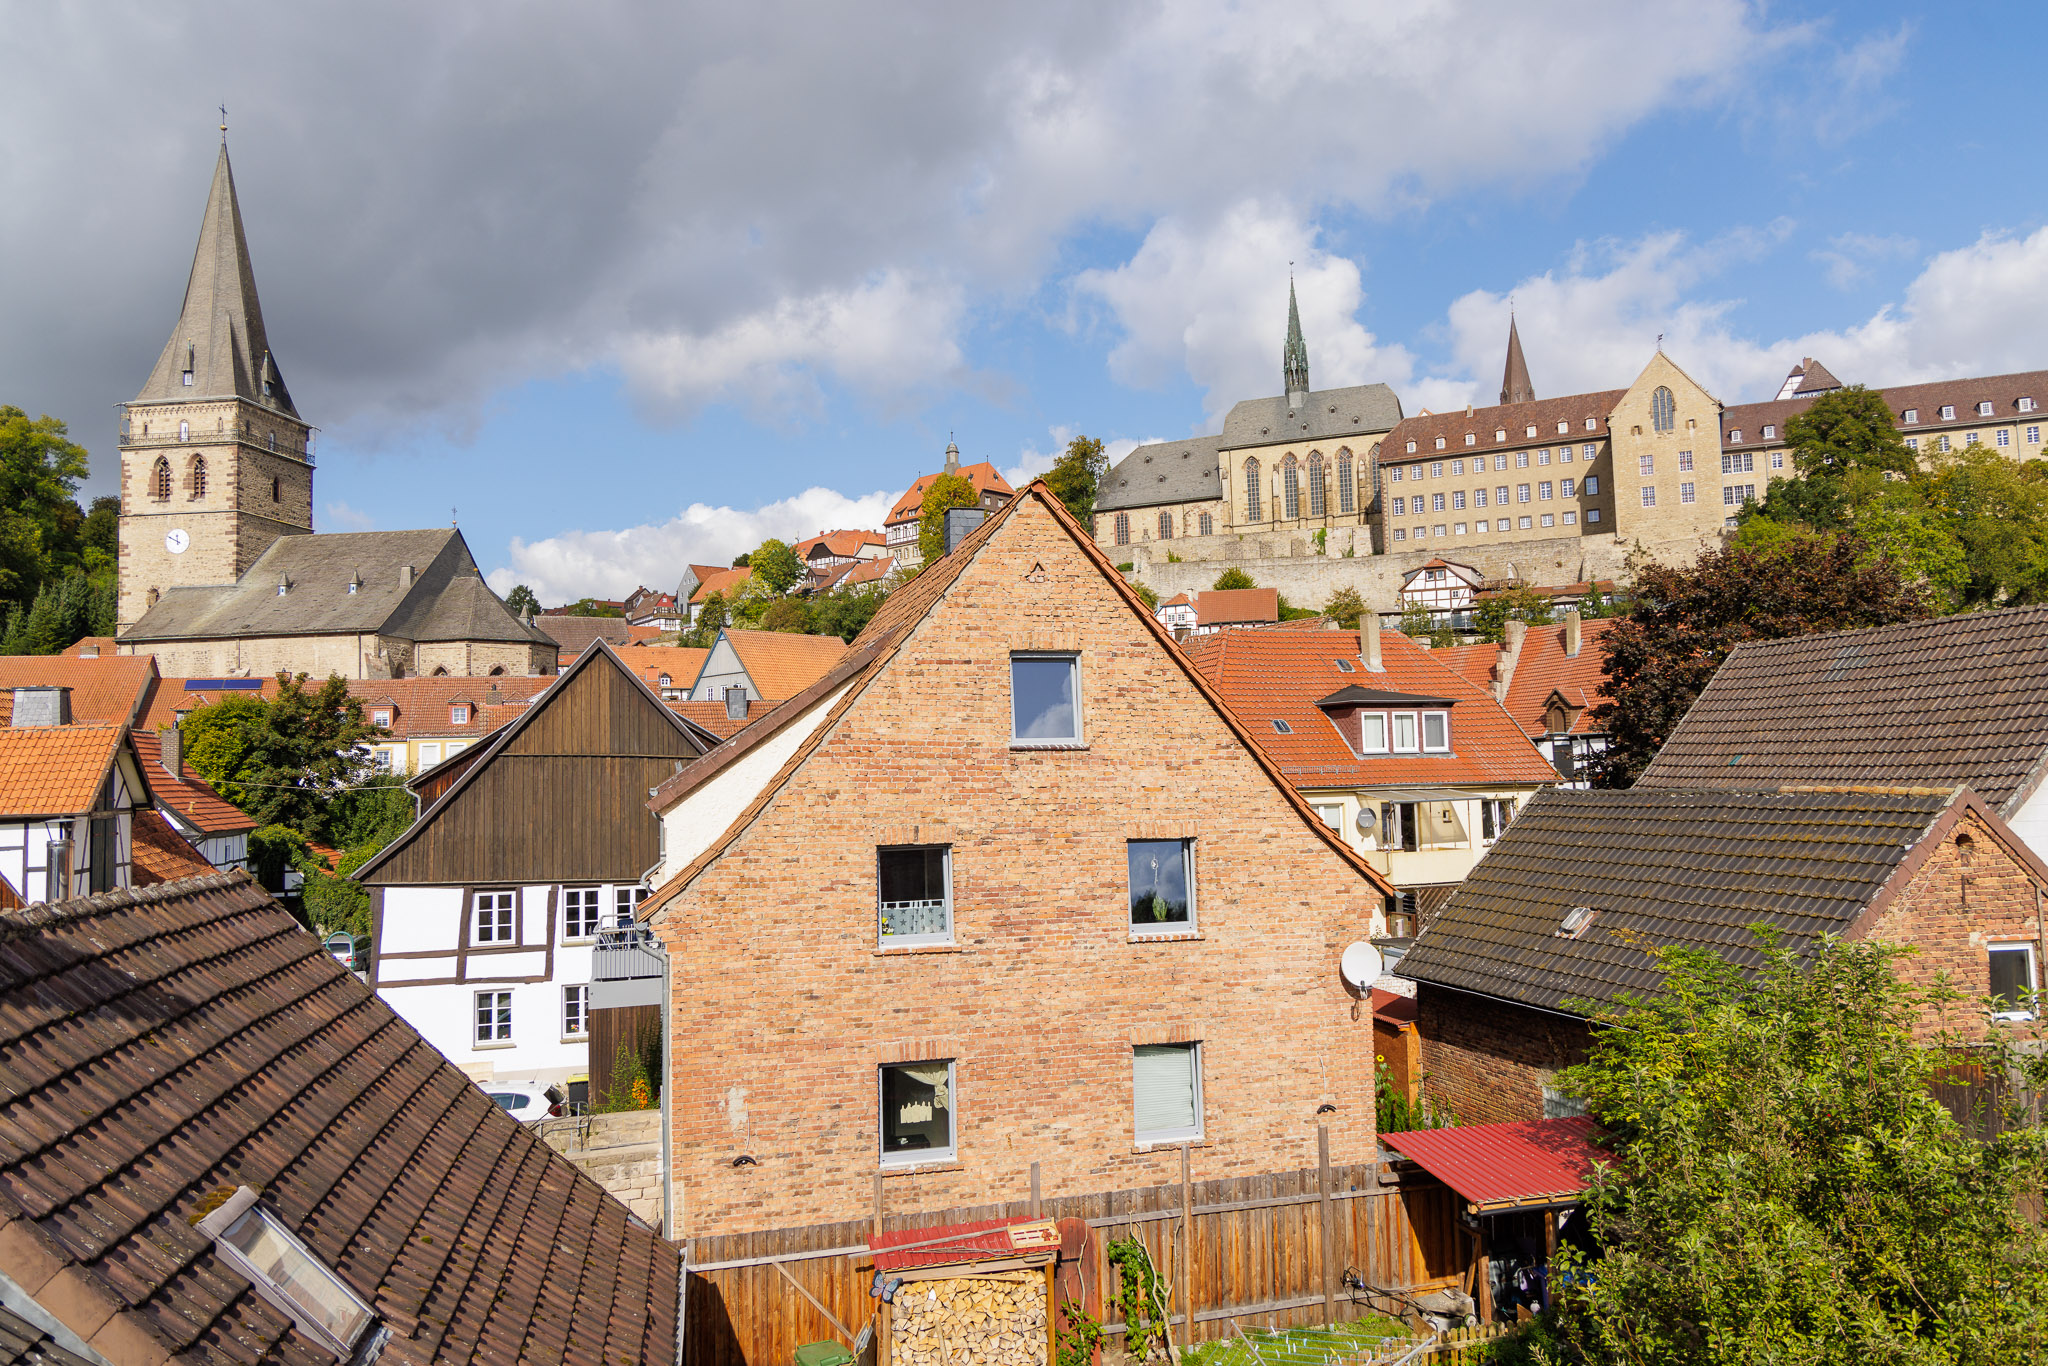
I then processed the two shots taken with the iPhone 15 Pro and my full-frame Canon EOS R5 in Lightroom to make the color tone and exposure appear roughly comparable to the drone shots. Here you can see the complete version of the single images cropped to 2048 pixel horizontally:
In the total view, scaled down to about 3 megapixels, the shots are not much different. What some of you may notice is that the framing of the DJI Mini 4 Pro and DJI Air 3 is a bit narrower than that of the Mini 3 Pro, despite the lenses sharing the same focal length. This is because both include a lens profile in the DNG files that Lightroom already applies automatically:
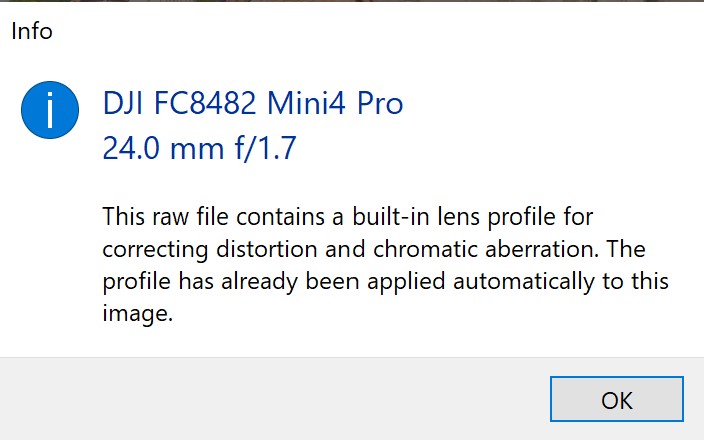
The DNG file of the Mini 3 Pro does not contain such a profile.
Mini 4 Pro vs Mini 3 Pro
Most of you will be interested in the comparison between Mini 4 Pro and Mini 3 Pro. For this purpose, here are again some crops taken from the Lightroom Classic comparison view in 400%.
First, a comparison from the center of the image. Here and in the other comparisons, the Mini 4 Pro is shown on the left side:
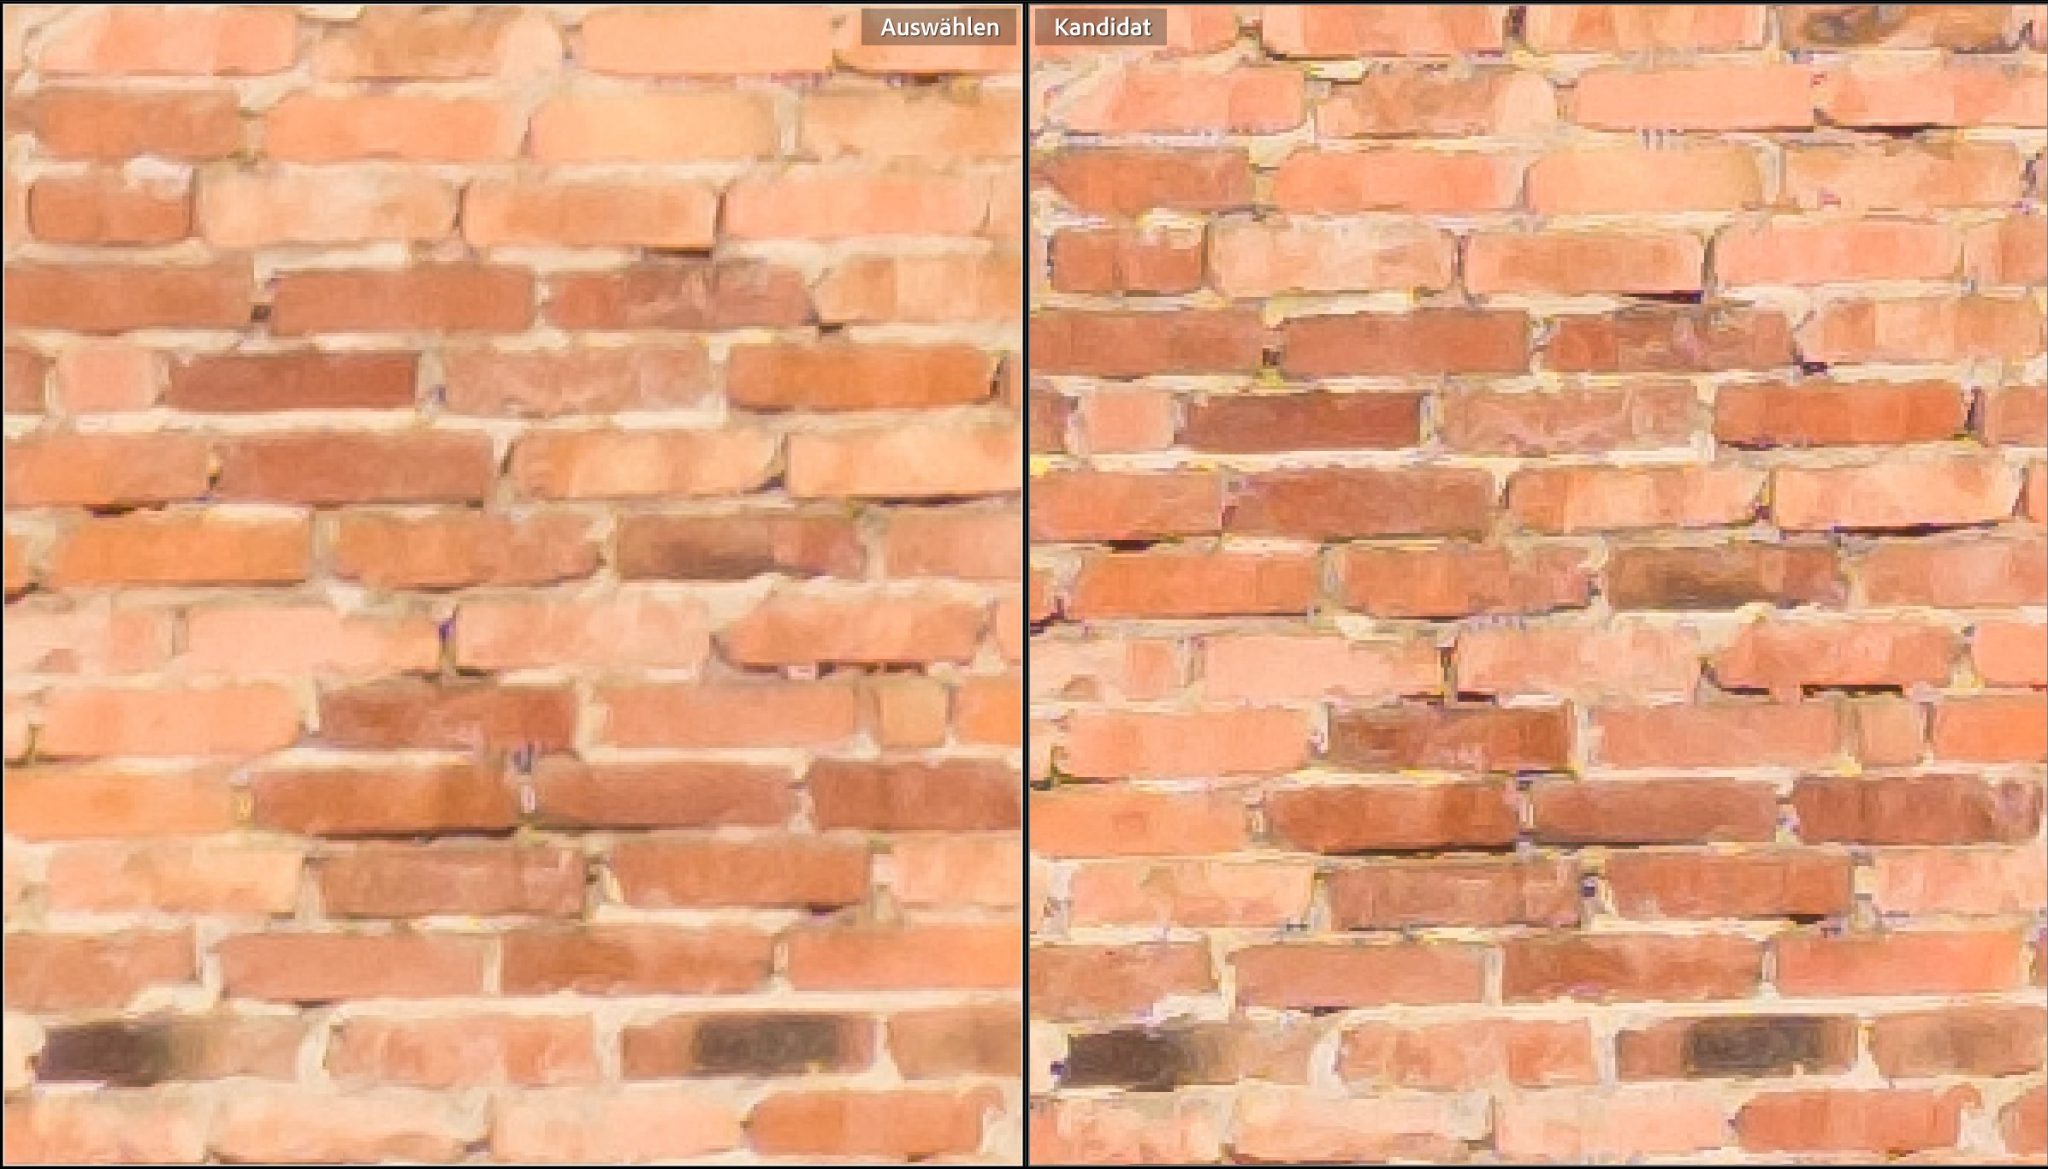
As in my comparison of the Mini 3 Pro with the DJI Air 3, the image of the DJI Mini 3 Pro seems sharper at the first glance. However, a closer look reveals that the Mini 3 Pro has been significantly sharpened internally, which results in noticeable sharpening artifacts in the form of double contours, especially in the gaps between the bricks.
To demonstrate that the seemingly increased sharpness of the DJI Mini 3 Pro compared to the Mini 4 Pro is actually just due to more re-sharpening and not better optics, I did a comparable amount of re-sharpening on the Mini 4 Pro shot in Lightroom Classic once:
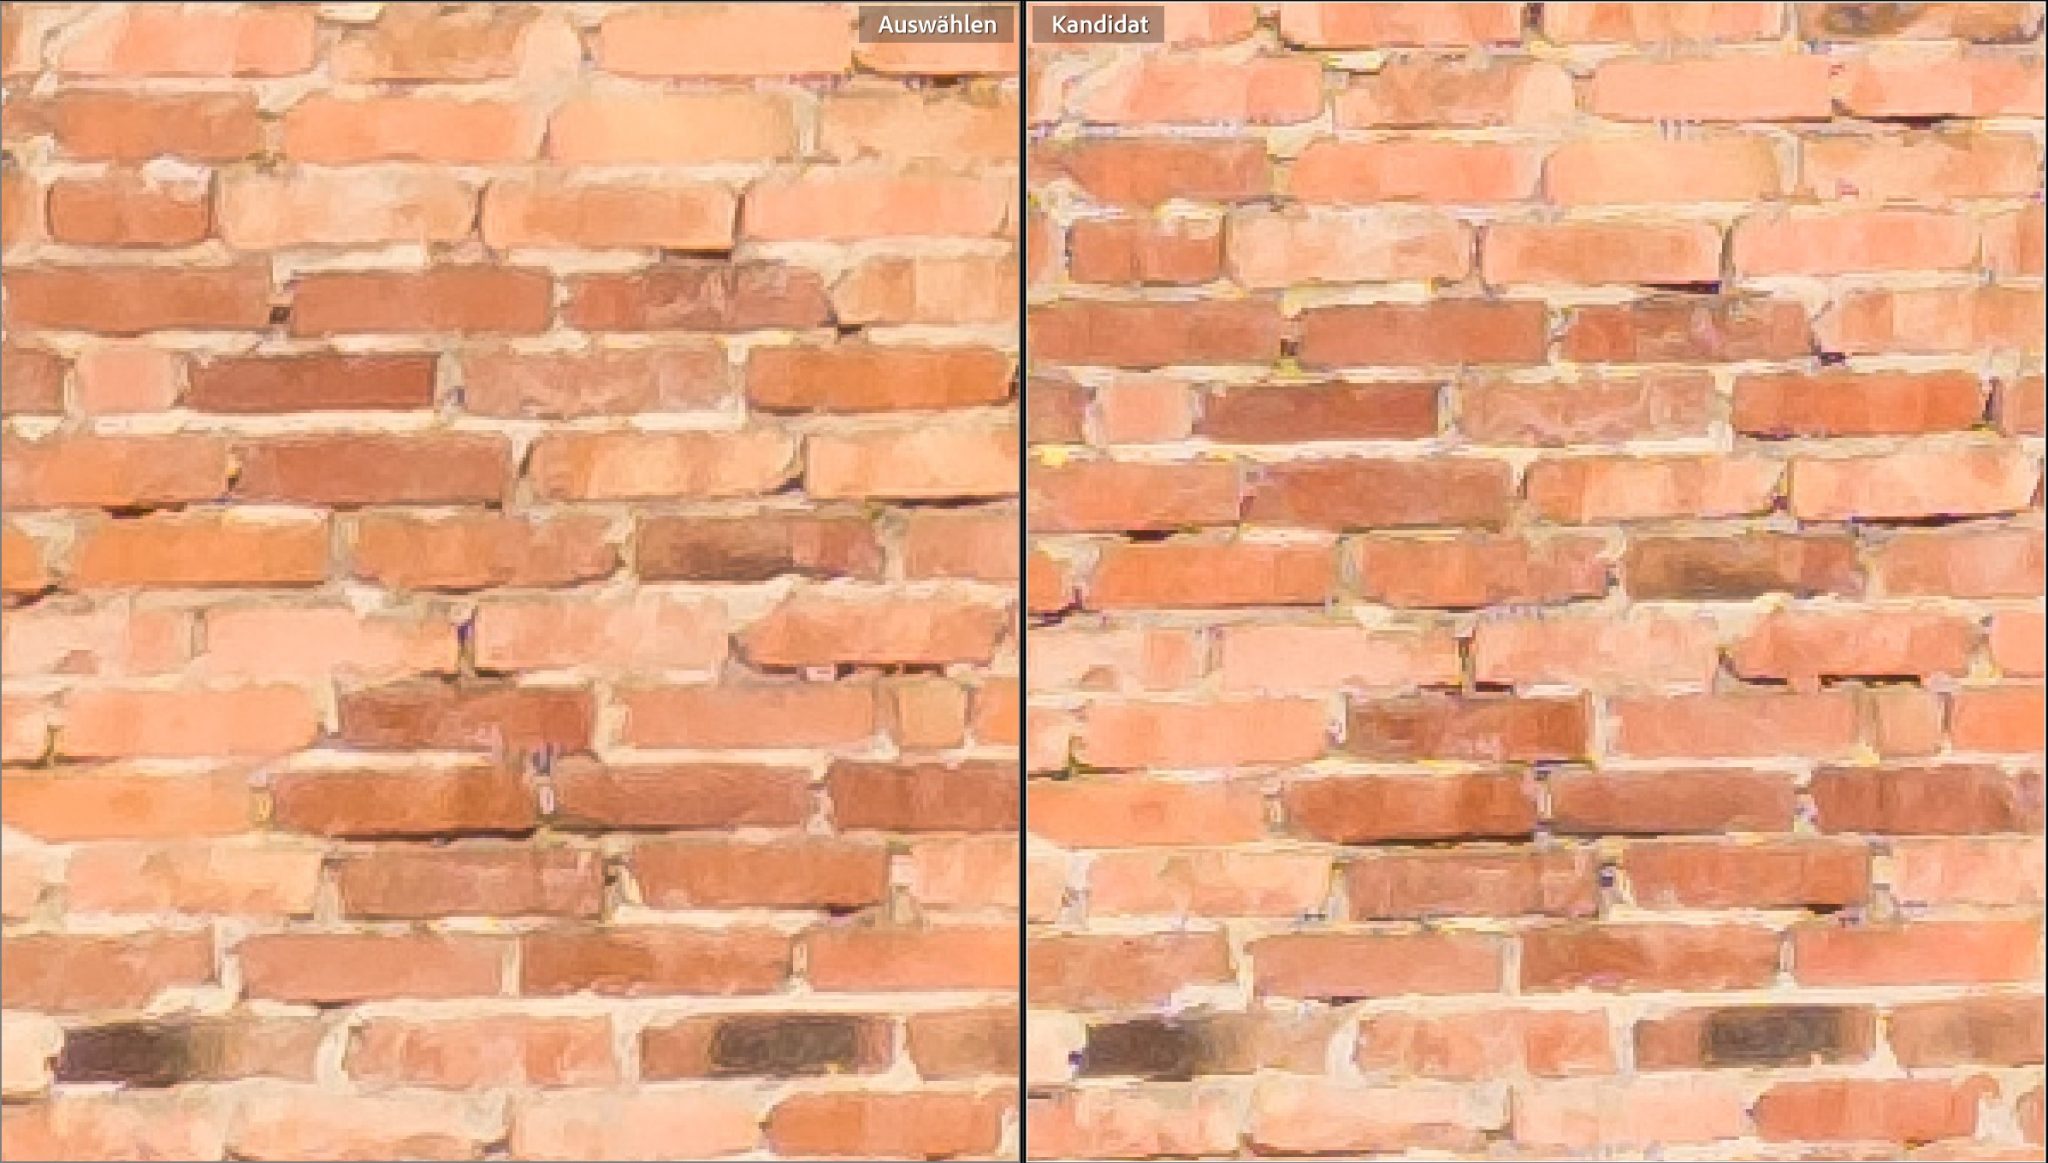
Post-processed in this way, the subjective impression of sharpness of the image details of both DJI Mini drones becomes comparable again.
Here is another comparison of the Mini 4 Pro with the Mini 3 Pro:
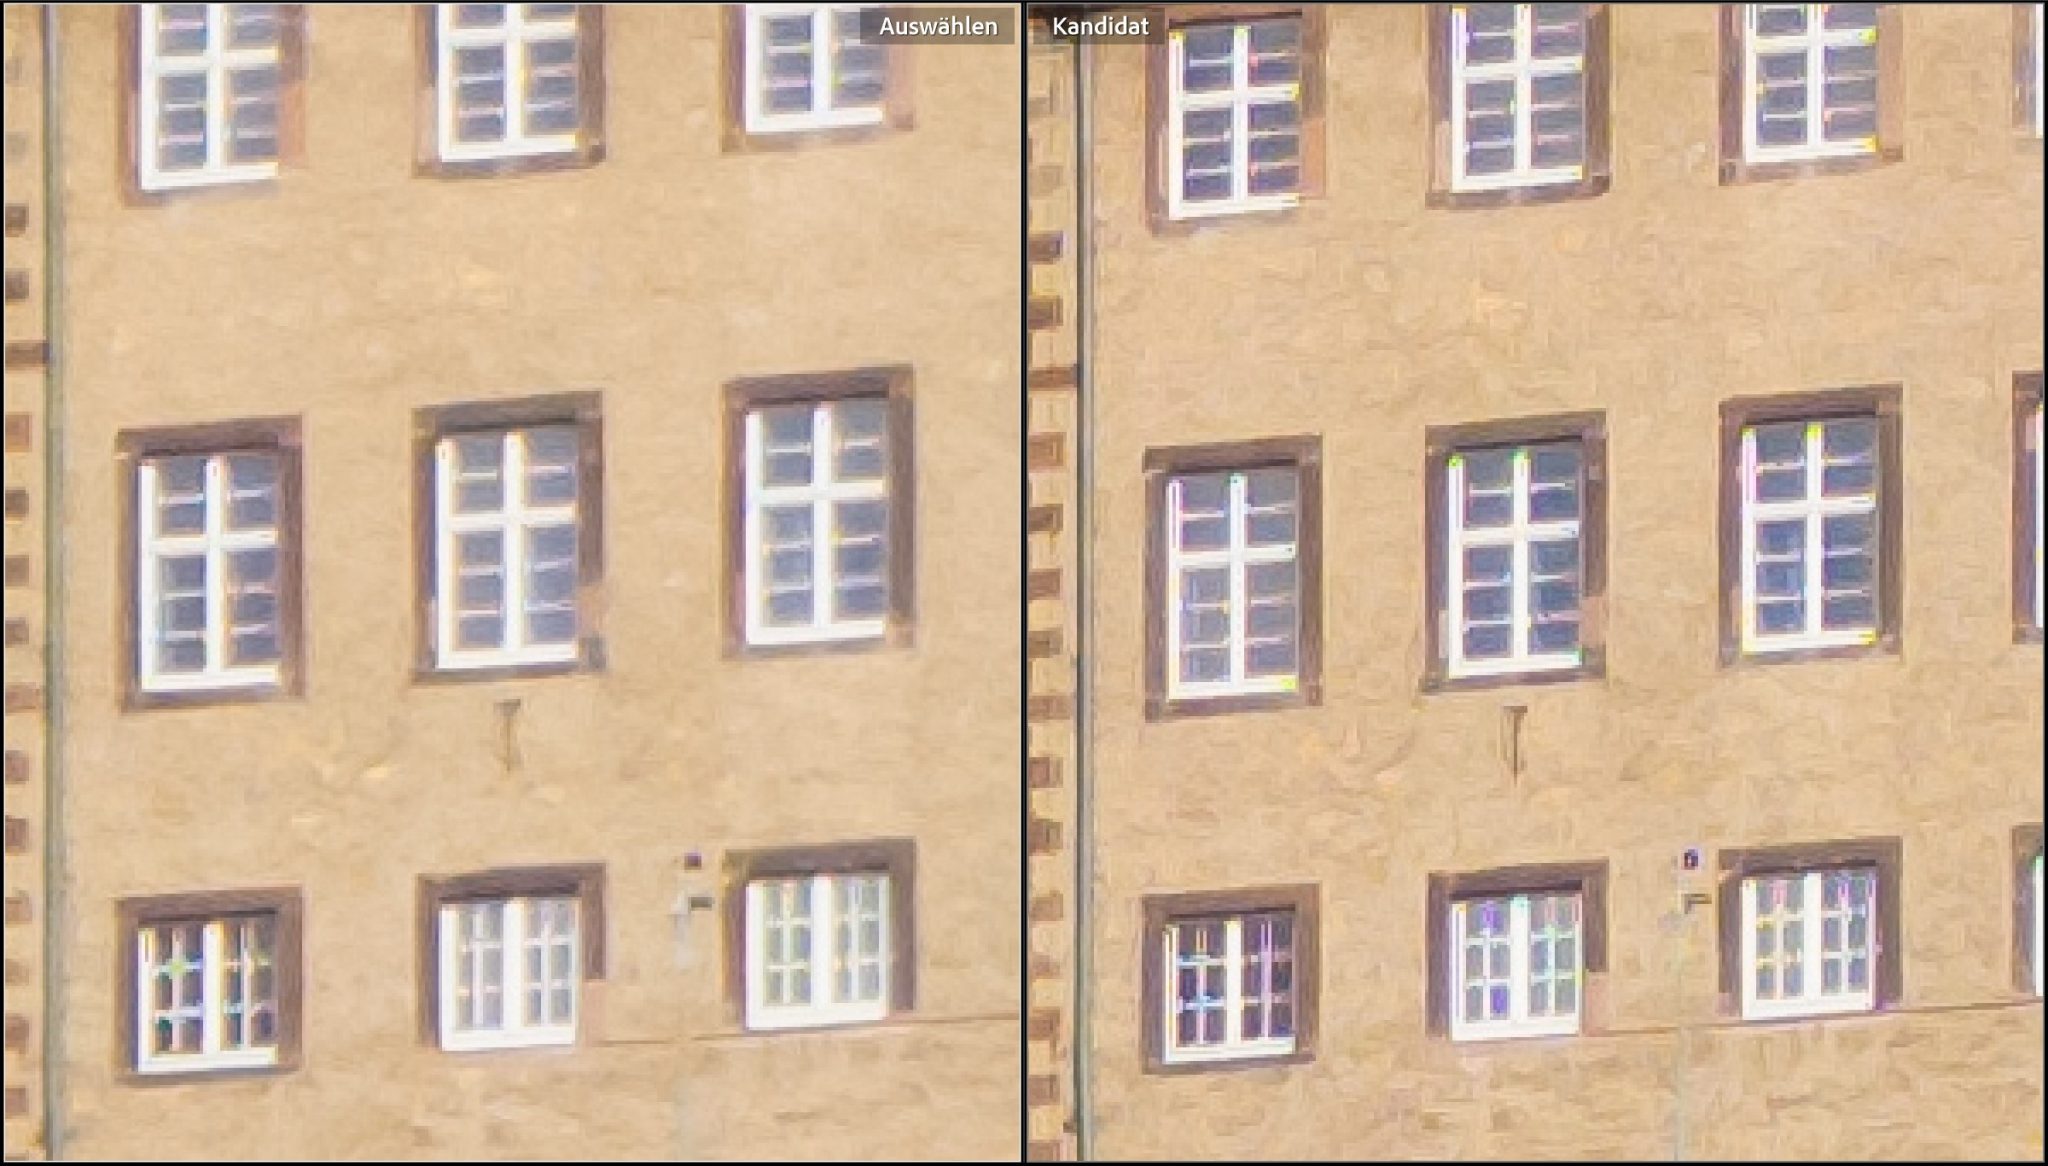
Again, the right shots of the Mini 3 Pro seem sharper at first glance. But they show again some sharpening artifacts in the form of double contours (especially in the window frames) and also some colorfringes.
DJI Mini 4 Pro vs DJI Air 3
Now the comparison of the above crop region with the DJI Air 3:
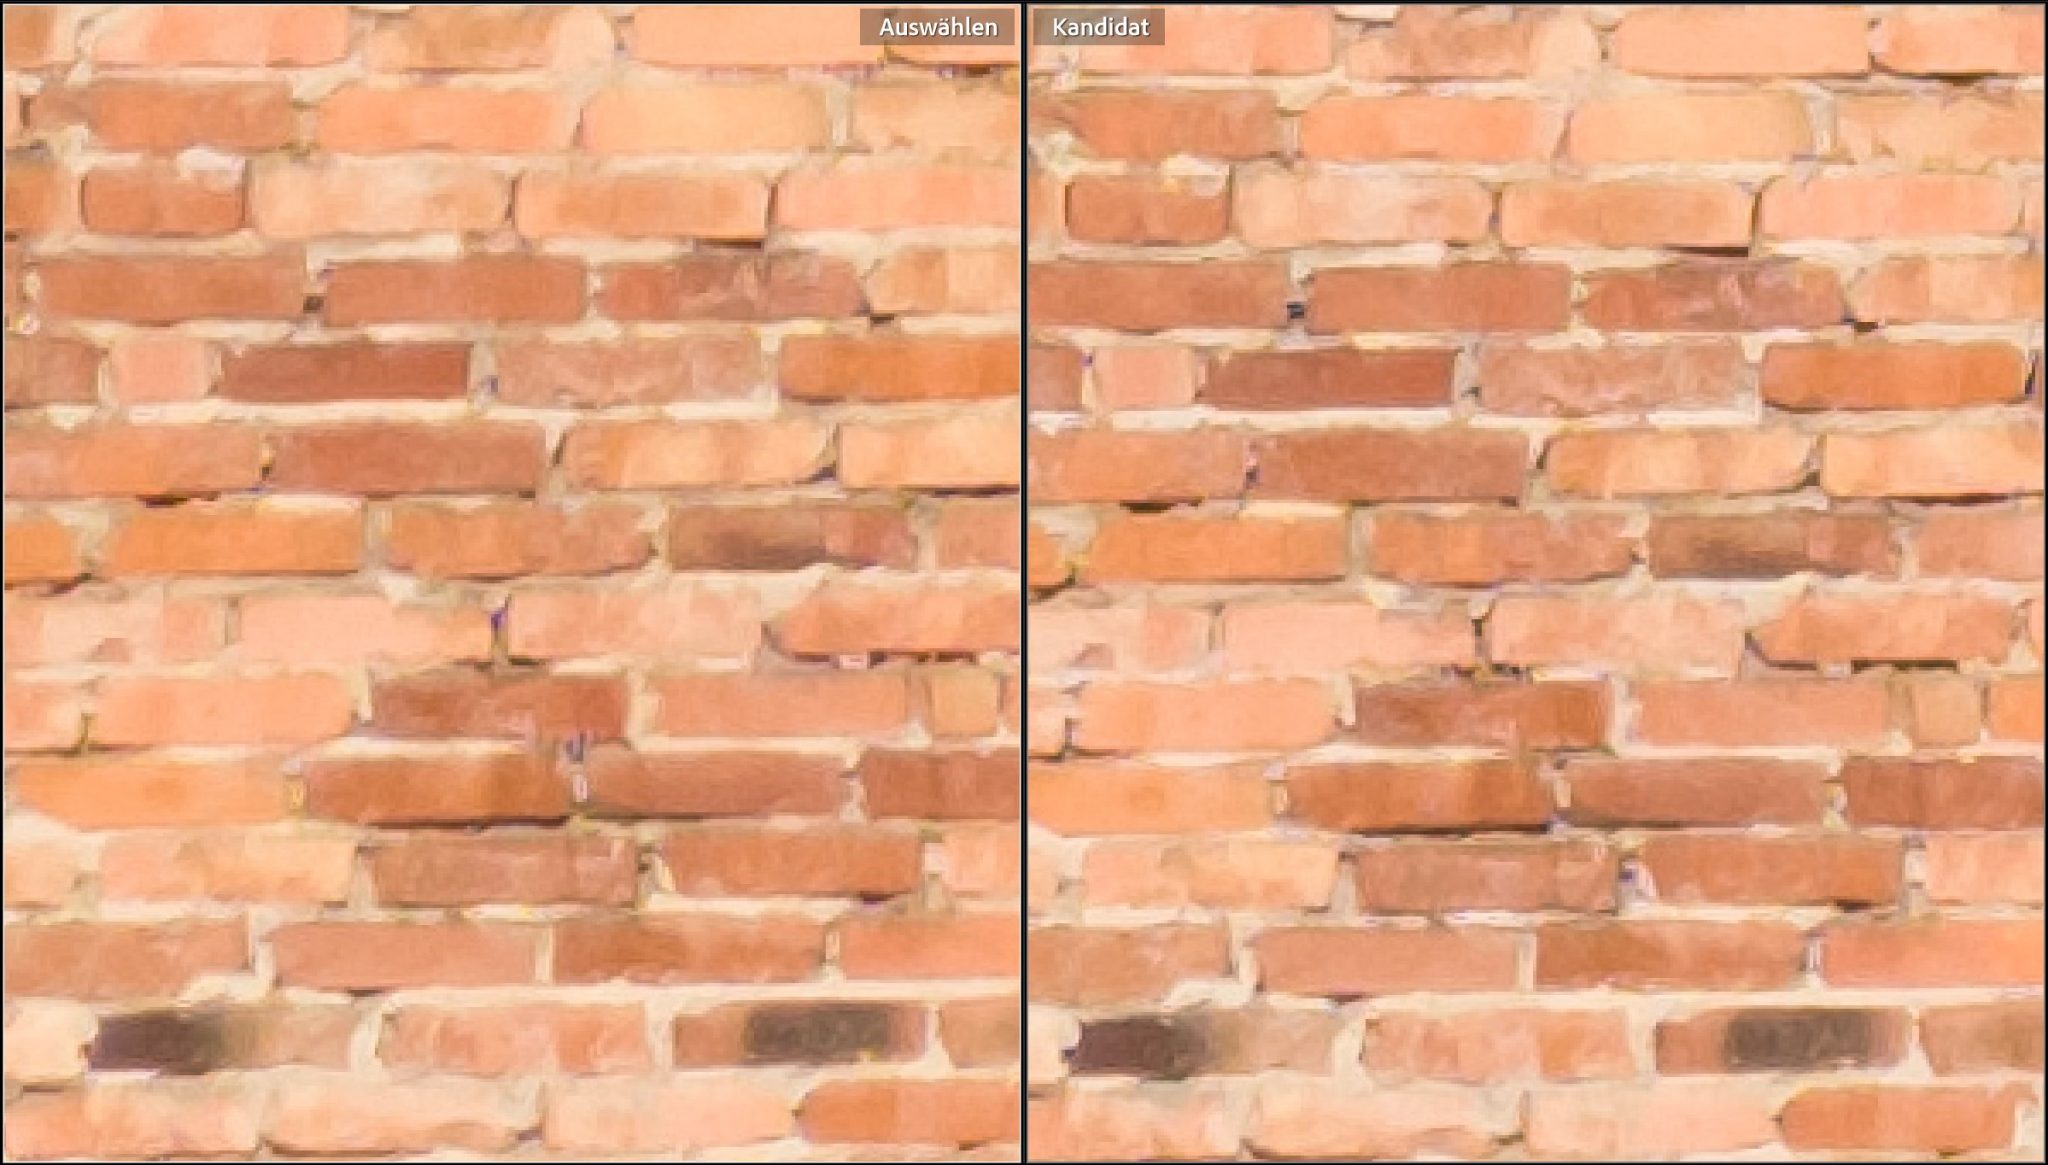
Here the difference is smaller, personally I like the moderate sharpening of the Air 3 quite well, but a comparable effect can be achieved with a minimal addition of sharpening in Lightroom on the Mini 4 Pro (left) too:
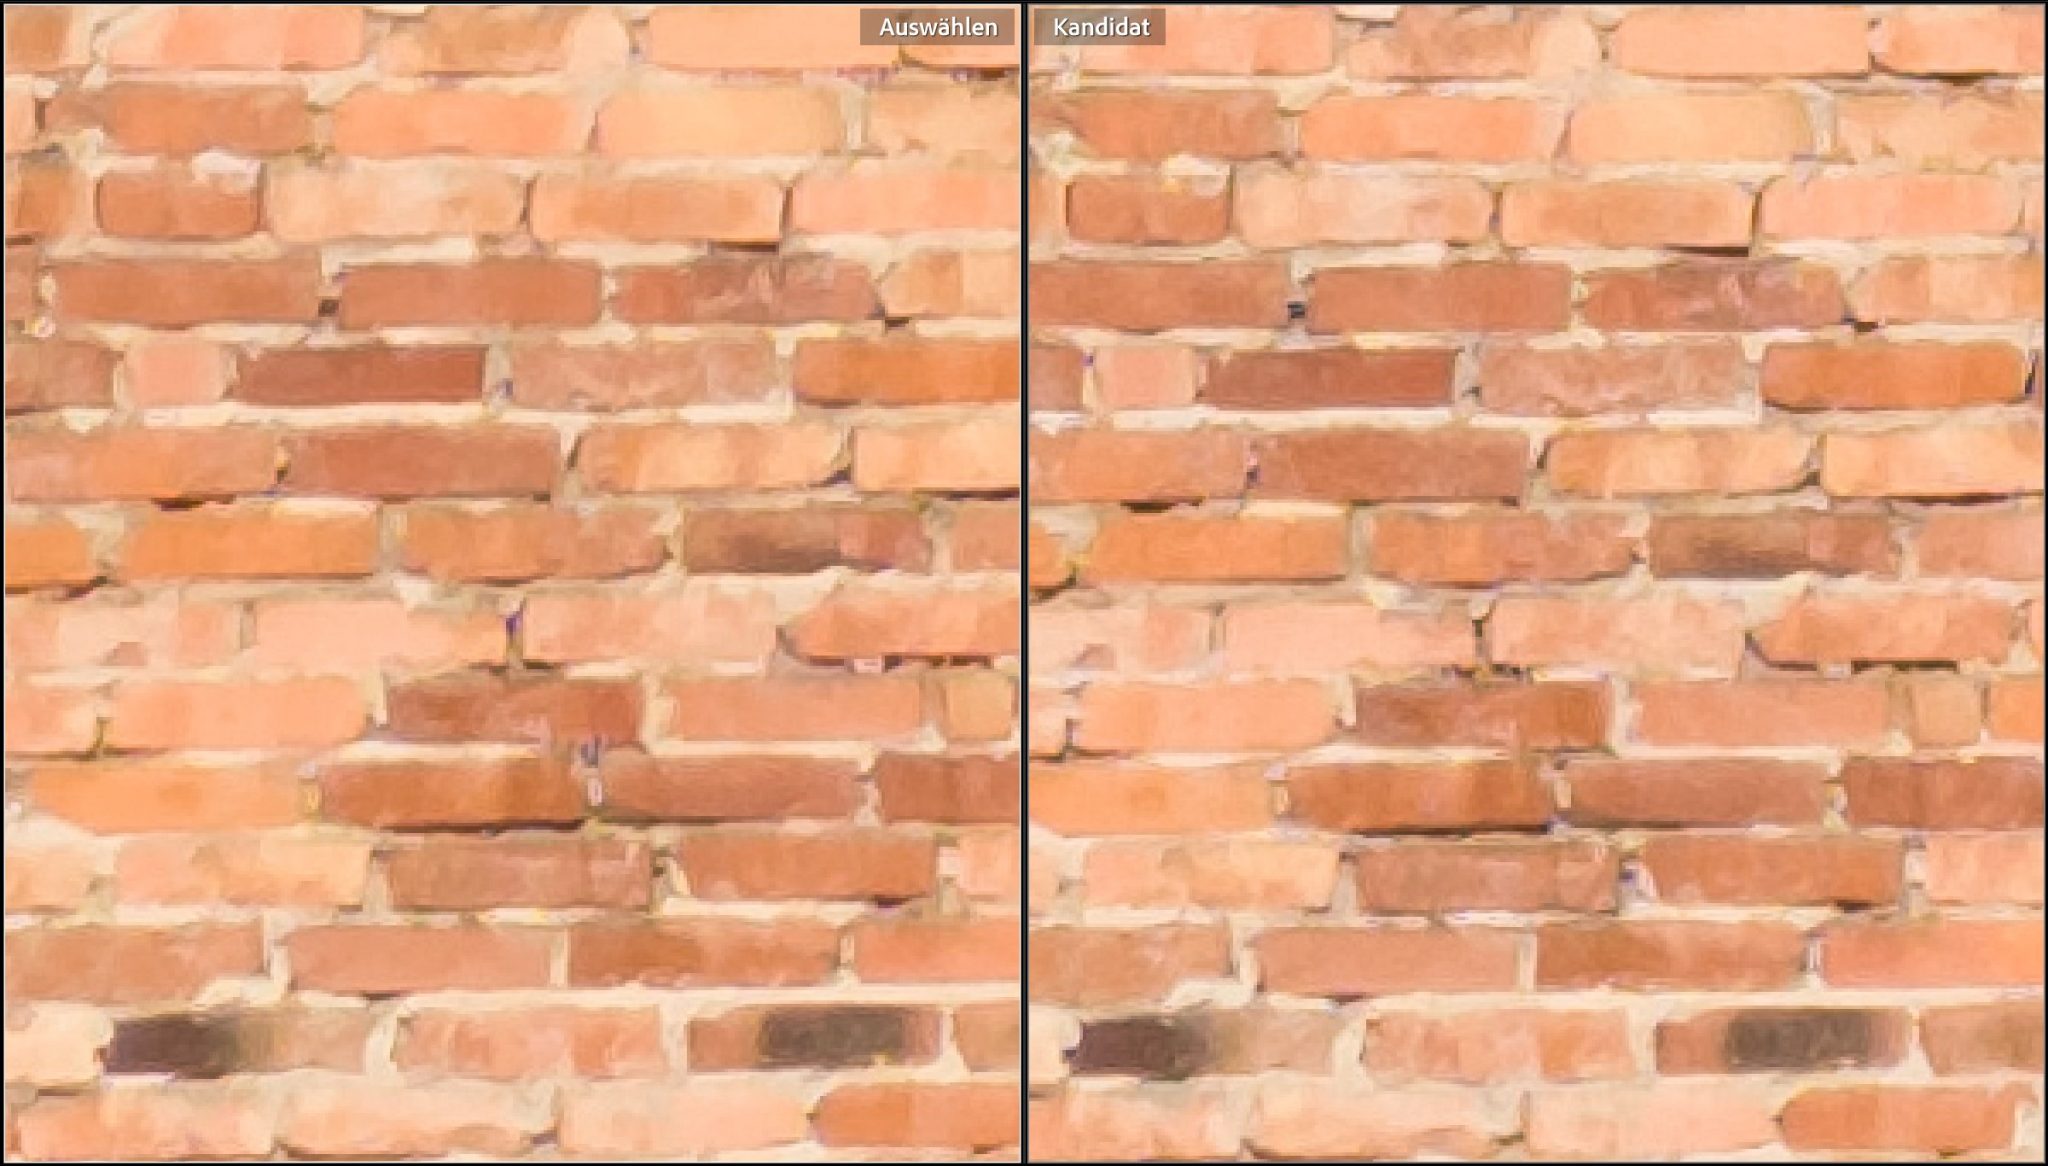
Overall, I am quite satisfied with both results.
Mini 4 Pro or Mini 3 Pro?
In summary, the images of the Mini 3 Pro appear sharper than those of the Mini 4 Pro at first glance, but this is in my opinion due to a too intensive post-sharpening of the Mini 3, which creates several artifacts. Personally, I prefer the image of the Mini 4 Pro, where I can better control the degree of re-sharpening by myself. Unfortunately, the Mini 4 Pro is not (yet) supported by my reference RAW developer, DxO DeepPrime. With the Mini 3 Pro, I was still able to achieve a quality improvement with it.
However, the differences between the two mini models are not very big. They are only noticeable in strong magnification. And I particularly point out once again that the image details shown here were really massively enlarged in order to make the relative small differences visible at all. So that you can understand it better: If you would enlarge the whole image in the same scale as the details shown here, it would be printed out at a usual screen resolution of 100 dpi with a width of about 8 meters!
However, the difference should hardly be noticeable when viewed normally and in usual print formats.
So, to put it bluntly, when it comes to photo quality alone, you can still be very satisfied with the Mini 3 Pro.
Looking beyond
Another very exciting aspect is the comparison with the other two test candidates. Like the DJI drones tested here, the actual iPhone 15 Pro is equipped with a 48-megapixel Quad Bayer sensor of a similar size (1/1.28″). So what can the certainly much more powerful post-processing of the iPhone make of it?
The result really amazed me. Here are the two above crops for comparison, again the DJI Mini 4 Pro on the left, the iPhone 15 Pro on the right:
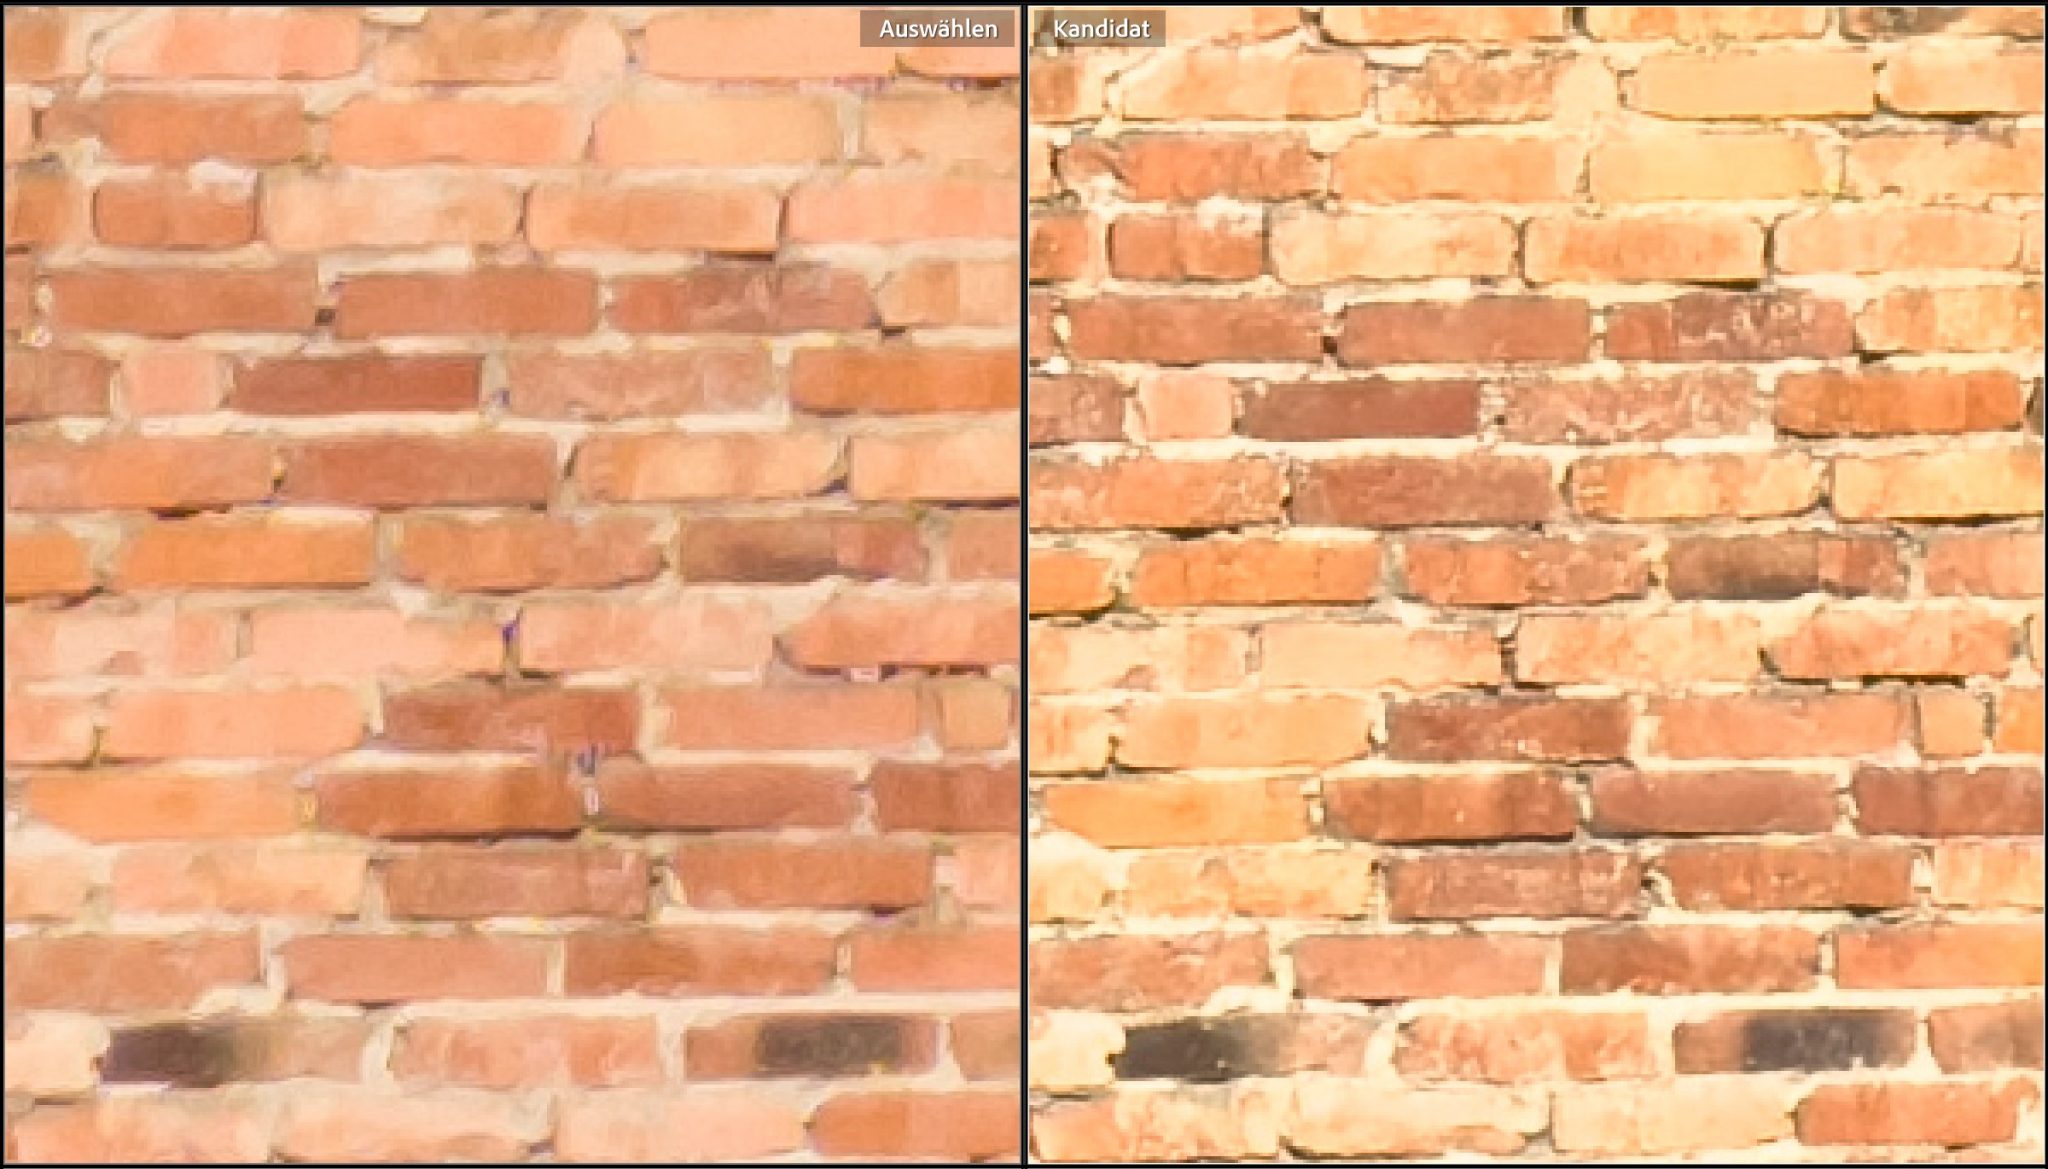
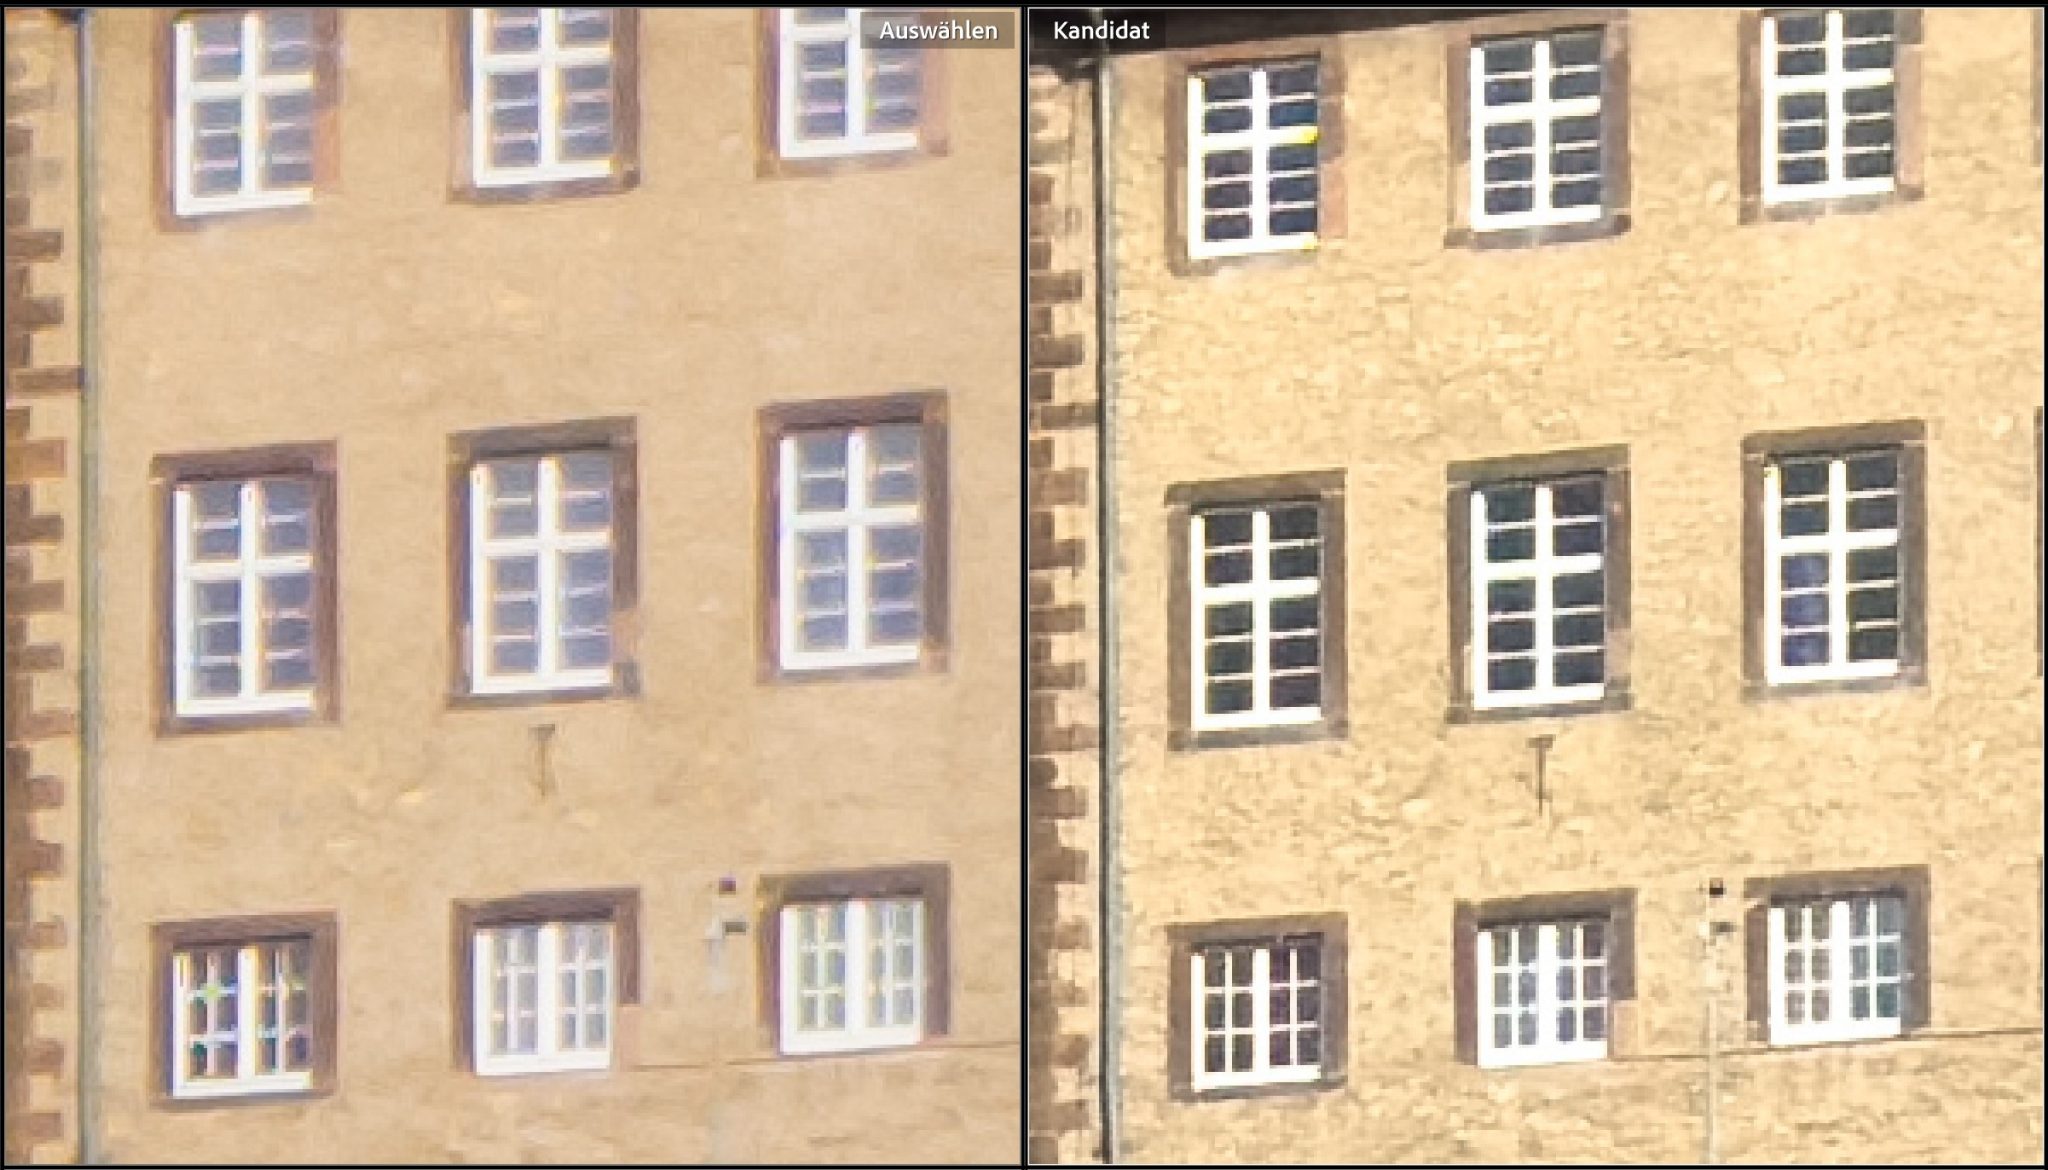
The iPhone demonstrates where “computational photography” is going. Despite the same sensor size and resolution, the iPhone’s image is much more detailed and clear. The iPhone achieves this by taking many photos with different parameters in quick succession with each shutter release and intelligently combining the individual images. The result is truly amazing.
This comes very close to my personal reference camera, a Canon EOS R5 (full-frame system camera with 45 megapixel resolution) - at least in decent lighting. Here is a comparison between Apple iPhone 15 pro (left) and Canon EOS R5 with the standard zoom 24-105 f/4L at 24mm (right):
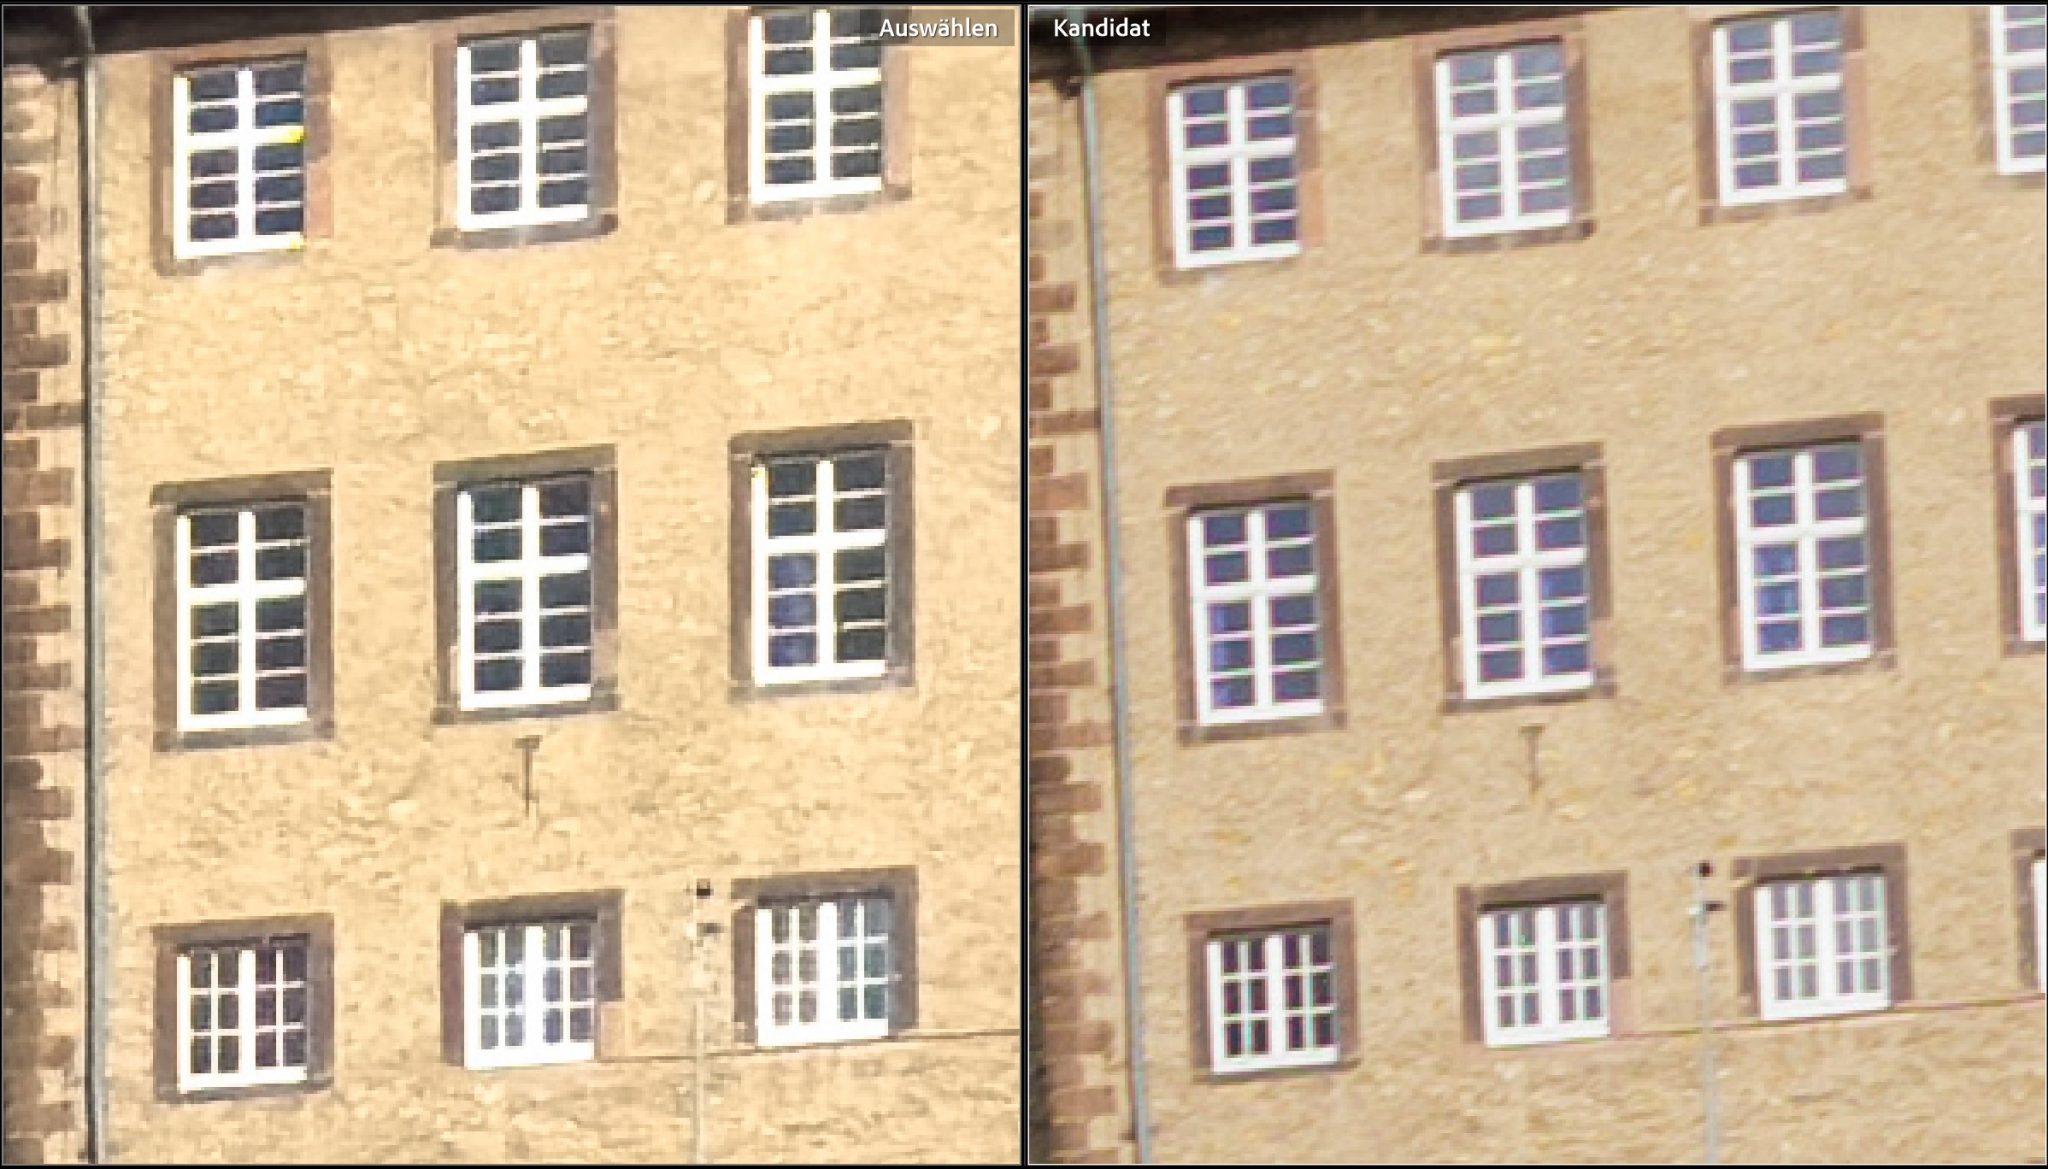
Résumé
The Mini 4 Pro is a significant evolution of the Mini 3 Pro in terms of its feature set, omnidirectional obstacle detection, flight dynamics, range of control, and also in its video capabilities thanks to 4k 60P in all modes and D-LOG-M.
I personally consider the photo quality in the 48-megapixel mode (which I use exclusively) to be slightly better thanks to the lower sharpness artifacts. Overall, however, the difference to the predecessor is not very dramatic. However, in my opinion, the improvement is not sufficient as the sole reason to switch.
I also appreciate the much better integration of the 48-megapixel mode, which now allows exposure bracketing and continuous shooting. Hopefully, DJI will increase the number of continuous and HDR shots from the current three to five in a future firmware update, as it did with the Air 3.
The comparison with the current iPhone 15 Pro proves that there is still room for improvement even with the same sensor size due to sheer processing power. The image quality - at least in good lighting conditions - is surprisingly close to that of a system camera.
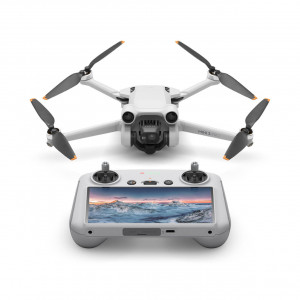
Hi, I’m interested in purchasing a drone, most probably the dji mini 4 pro since it’s overall qualification is best with 360° obstacle avoidance and it can fly above water and take good height from tower building🗼🏢 (🤔) correct me if I’m wrong.
If you know a good drone around €500 which is similar to the dji4 pro please let me know.
The only disadvantage is, the mini 4 pro can’t be connected to the better RC screen, from what I heard on YouTube.
Q: how do I record the movie and sound (voice) on the RC controller❓
Or do I need to edit it on a computer❓
Is there a SD card slot on the RC or Drone ❓
And which SD card is best for this ❓
THX, Grant
Hi Grant,
I also think that the DJI Mini 4 Pro offers a good overall package for the price. However, it has one limitation due to the C0 certification: it can only ascend a maximum of 120m from the starting point. An alternative would be the previous version, the Mini 3 Pro, which does not have this limitation. Sound cannot be recorded with the drone, as this would not make sense with the propeller noise. I don’t know whether it works directly on the controller. The RC2 controller supplied with the drone has the new O4 transmission protocol and therefore has a better range than the old RC-Pro controller. I therefore don’t miss it. The videos recorded with the drone can be played back directly, but it certainly makes sense to edit them on a computer beforehand. Both the drone and the RC2 controller have micro SD card slots, I myself use SanDisk MicroSDXC cards with 256Gb capacity in these.
Best regards,
Gerd-Uwe
Thank you for this article but it’s a pity that you didn’t share DNG files for download. DJI Mini 4 is available in the market for more than month but it’s not possible to find any DNG files from this drone because the authors of the reviews do not attach such files to the articles, they only provide JPG photos with a width of 1500-1800 px… I wonder why? (Is one 40MB file that much …?).
Best regards.