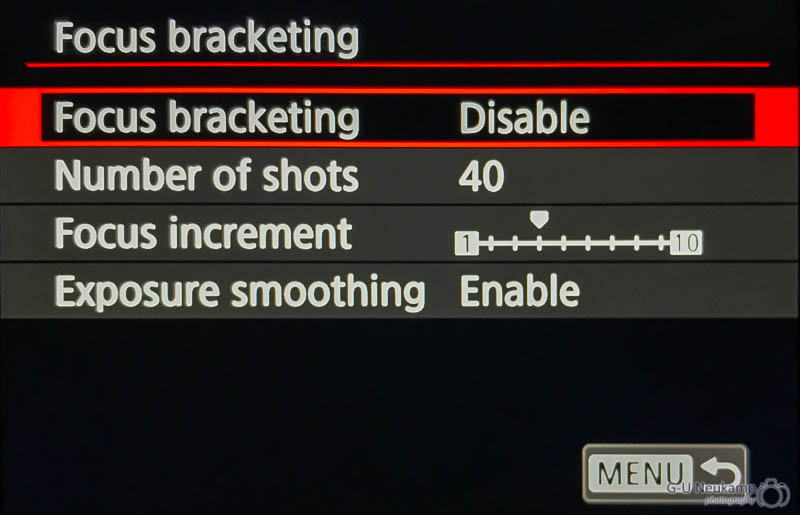
In my previous report, I introduced the Focus Stacking of the Canon EOS R5. Since there were questions about the optimal settings in the menu “Focus Backeting”, I took up the topic again. Unfortunately, Canon does not give any further assistance. There are three options in the menu “Focus Bracketing!
- Number of shots
- Focus increment
- Exposure smoothing
With the EOS R5, there is unfortunately no way around simply trying out the “number of shots” option. At the beginning of the series you should first focus on the closest point of the object that you want to get in focus, using the focus magnifier if necessary. Then, I do a test run with a rather generous estimate of the number of images needed. Superfluous images can easily be deleted afterwards. If the focus of the last image of the series is not already behind the desired focus range, you just have to repeat the series and increase the number of images.
Exposure smoothing should always be activated.
Exposure smoothing should always be activated. This , according to the manual of the Canon EOS R5, does not apply to the following lenses:
- EF100mm f/2.8L Macro IS USM
- EF180mm f/3.5L Macro USM
- EF-S60mm f/2.8 Macro USM
With these three, activated exposure smoothing might cause changes in the image brightness.
Finally, there remains the “focus increment”. Here, Canon provided a simple gradation from 1-10, with a gray marker above level 4, which probably marks the default position.
Which focus increment to choose?
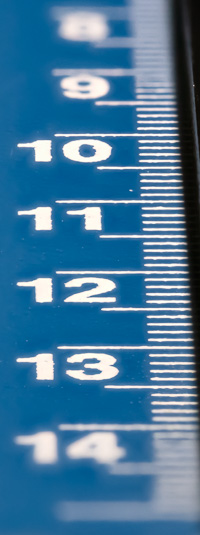
To examine the whole thing a bit closer, I shot a series of pictures with the “Focus bracketing” option of a centimeter scale at an oblique angle with the EF 100mm f/2.8 Macro USM* with 20 steps each (once with open aperture f/2.8 and another time with aperture f/8).
With the step size “4” and subsequent stacking in Helicon Focus, the result is as follows:

f/2.8, increment 4

f/8, increment 4
As is clearly visible, the EOS R5 selects the step size depending on the aperture. At aperture 2.8 (left), approx. 2mm are sharply displayed, so the step size is obviously approx. 0.1mm in this case. At aperture 8 (right), the steps are larger, they are probably about 0.3mm, so that a larger area of about 7mm (right image) is displayed sharp.
I then tried this again by setting the “Focus increment” to the maximum step size of 10:

f/2.8, increment 10

f/8, increment 10
With the selected step size of 10, the steps of the focus planes are already much wider. At f-stop 2.8 in this example, approx. 8mm (step size approx. 0.4mm), at f-stop 8 even approx. 38mm (step size approx. 1.9mm) of the centimeter scale are in focus. Surprisingly in this case, even with step size 10, the transitions between the planes are obviously sufficiently sharp.
Is the step size of 10 now sufficient?
To answer this question, I photographed a somewhat more complex object, again a pocket watch. First I took the pictures with step size “4”. I selected 40 as the number of shots and then stacked the single images in Helicon Focus:

And then, for comparison, the same clock, but this time with a step size of 10. Here I only needed 12 single images:

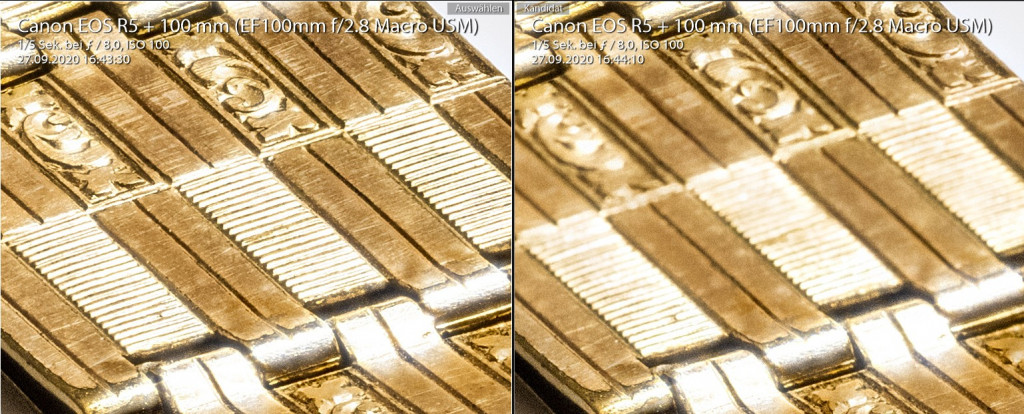
At first glance, both images look very good. And if you take a closer look at the resulting picture with step size 4, everything is fine, too. The clock is sharp from front to back, there are no visible blurry transitions between the individual images.
However, the step size of 10 is no longer sufficient in this case on closer examination. Particularly at the linked band shown in the figure, there are clearly visible blurred areas on pixel level:

Thus, the focus increment of 4, which is marked in grey by Canon, seems to be the optimal setting. I will continue to use it by default for now.
*= Affiliate Link


Thank you for this nice discussion. I haven’t used this feature much in the field because I was intimidated by all the possible variables (focal length of lens, closest focal distance etc). In addition to the ones you mention. I suppose it’s a matter of trial and error and experience. I will practice in the backyard.