Modern camera sensors are becoming more and more light-sensitive and produce continuously less noise. Image processing software is also evolving. Particularly since the appearance of AI (artificial intelligence) algorithms, there are continuously improving possibilities for noise reduction with high-ISO images. Nowadays, useful results can even be achieved with images taken at ISO 12,800, something that was merely incredible just a few years ago.
I’ve recently started using the DeepPRIME algorithm developed by DxO, which is included in DxO PhotoLab 4 Elite and, more recently, in DxO PureRAW. I use both programs exclusively for noise reduction; all further processing is done in Adobe Lightroom Classic, as I have been accustomed to for years.
More information about the DxO programs can be found here on my website, where I have already tested both:
DxO PhotoLab 4 Elite
DxO PureRAW
Since I was told by several people that excellent noise reduction is also achievable with Topaz Denoise AI, I wanted to test Topaz Denoise AI myself and compare the results with those of the DeepPRIME algorithm.
Spoiler: unlike DxO PhotoLab 4, I won’t buy the full version of Topaz Denoise AI - the reason follows…
To compare, I downloaded the trial version of Topaz Denoise AI from the link above and used it with an ISO 12,800 image from my photo library to evaluate its results against those of DxO PhotoLab 4 and DxO PureRAW.
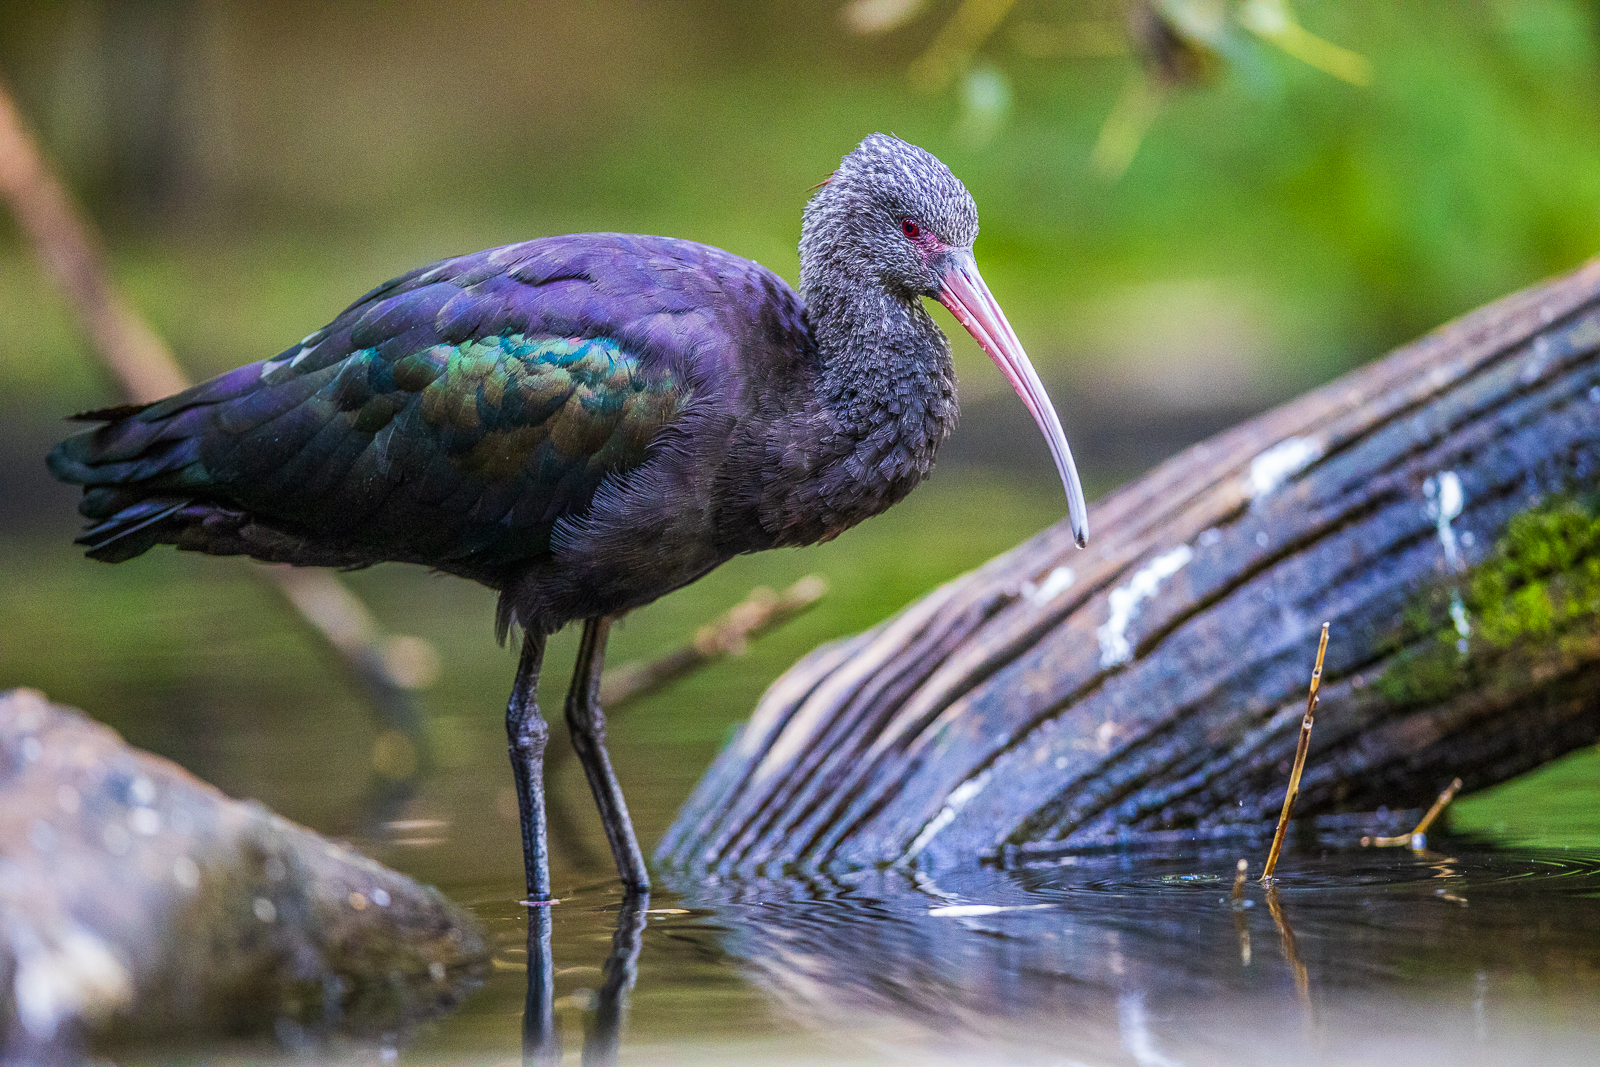
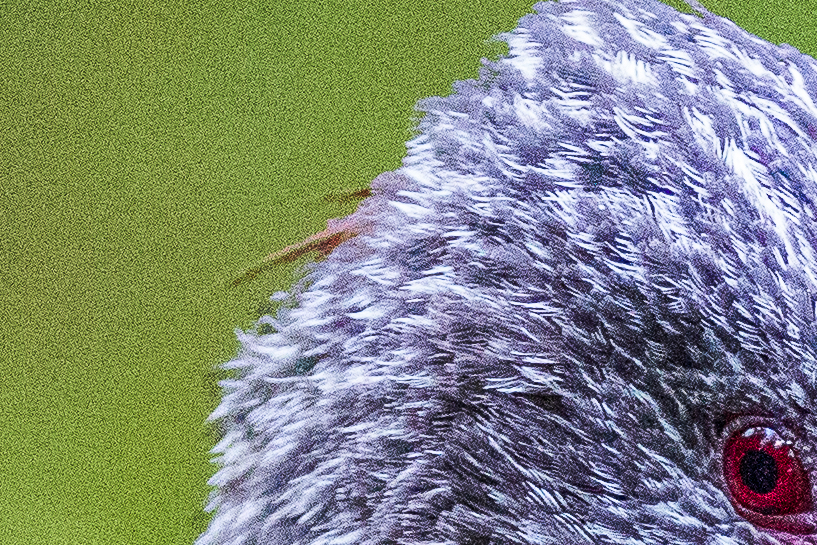
I tried to finally edit all images in Lightroom Classic so that colors, contrast and brightness are as similar as possible. Here, first of all, you can see the original version of the image, intensively processed in Lightroom to my taste (Exposure -0.66, Contrast +58, Highlights -100, Depths +100, Clarity +28, Dynamics +21, Denoising and Sharpening to Standard), downsized to 1600px long edge. The result is still clearly noisy even in the reduced version:
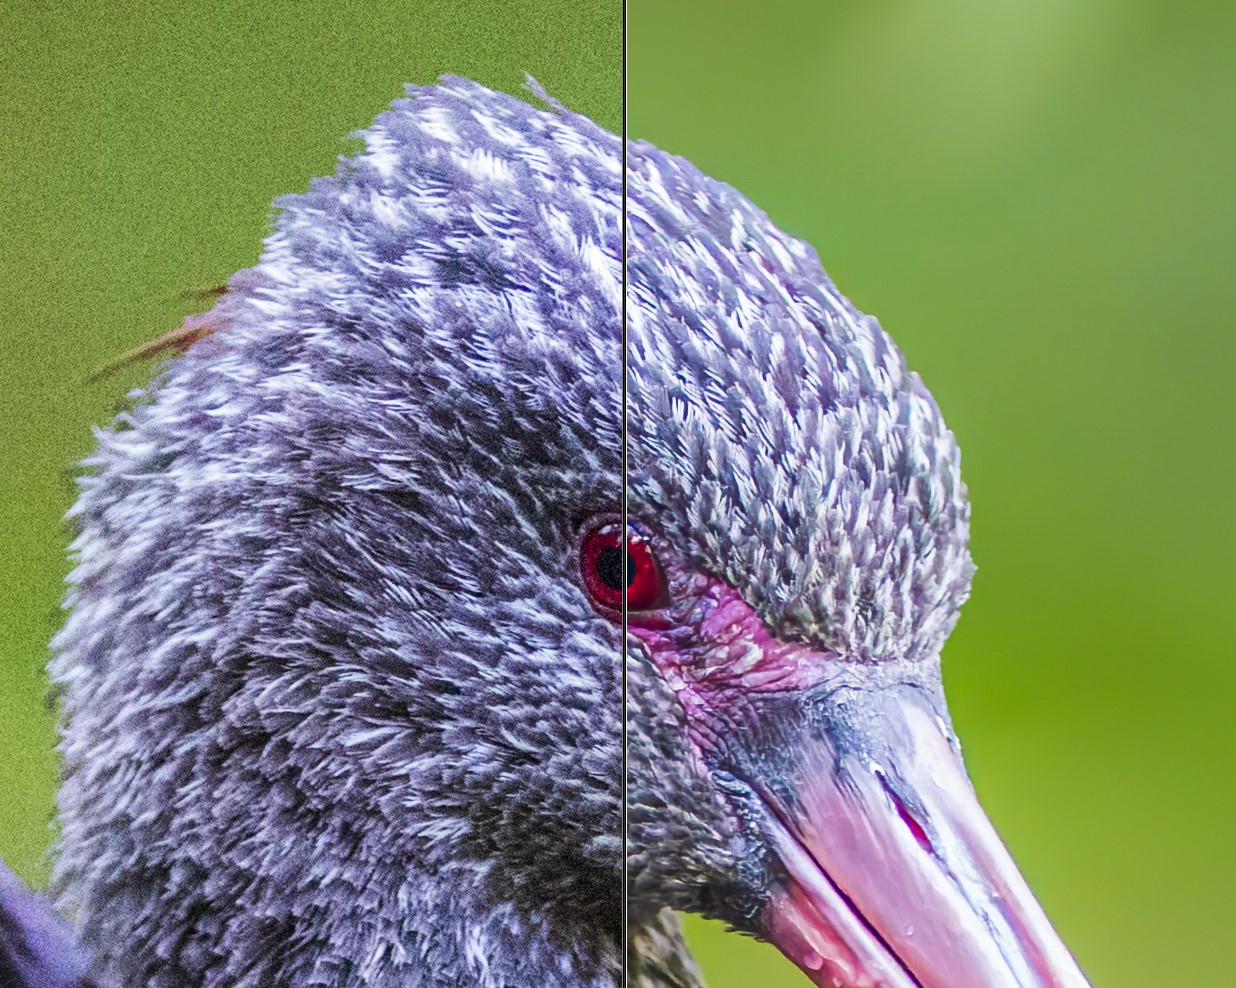
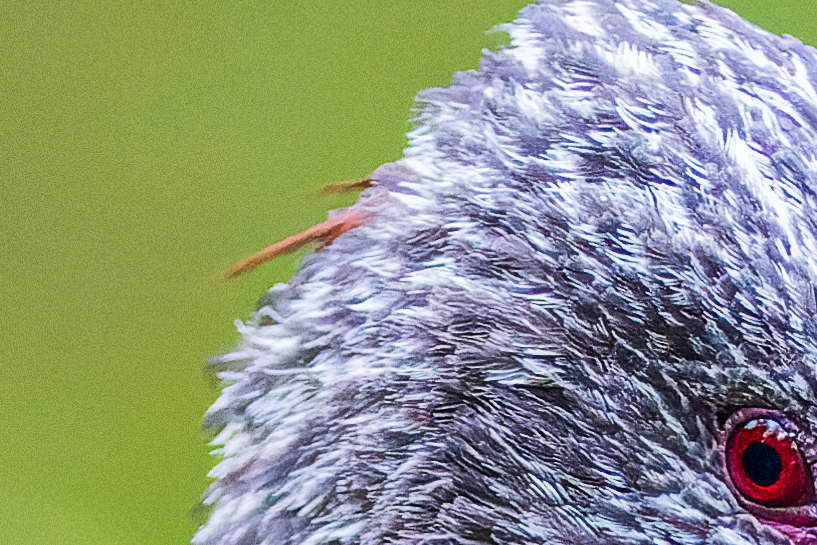
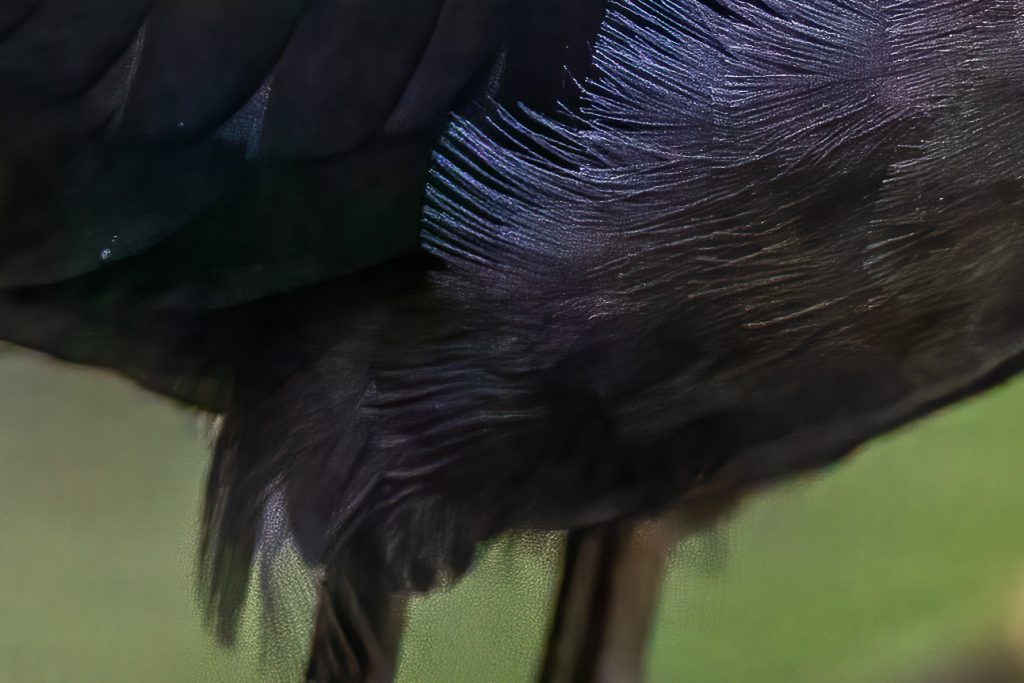
Here are two more crops in 100% scale:
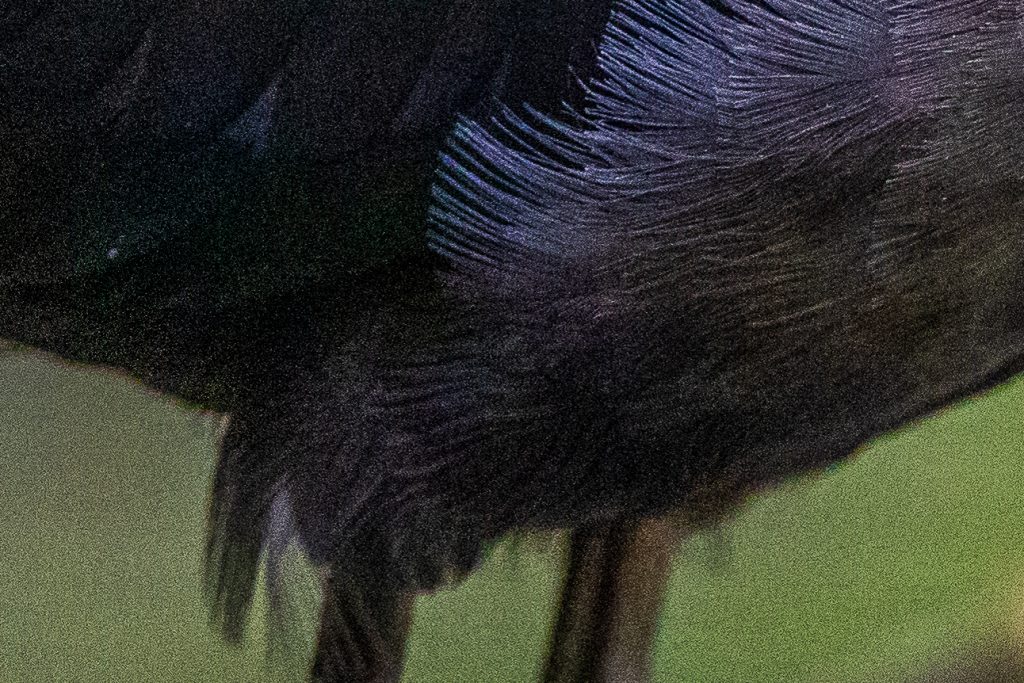
I then passed the image as a CR3 file from Lightroom Classic to DxO PhotoLab4, where it was denoised using the DeepPRIME algorithm (Luminance setting 100). this is in accordance with my usual workflow. Afterwards, it was converted again with the option
„Export as DNG (Noise reduction & optical corrections only)“
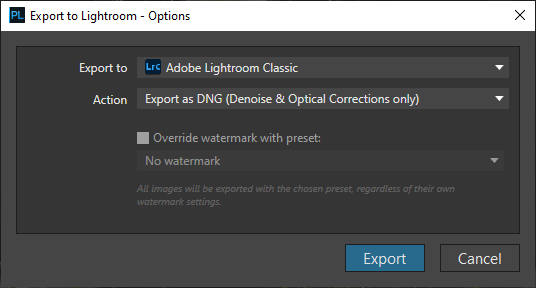
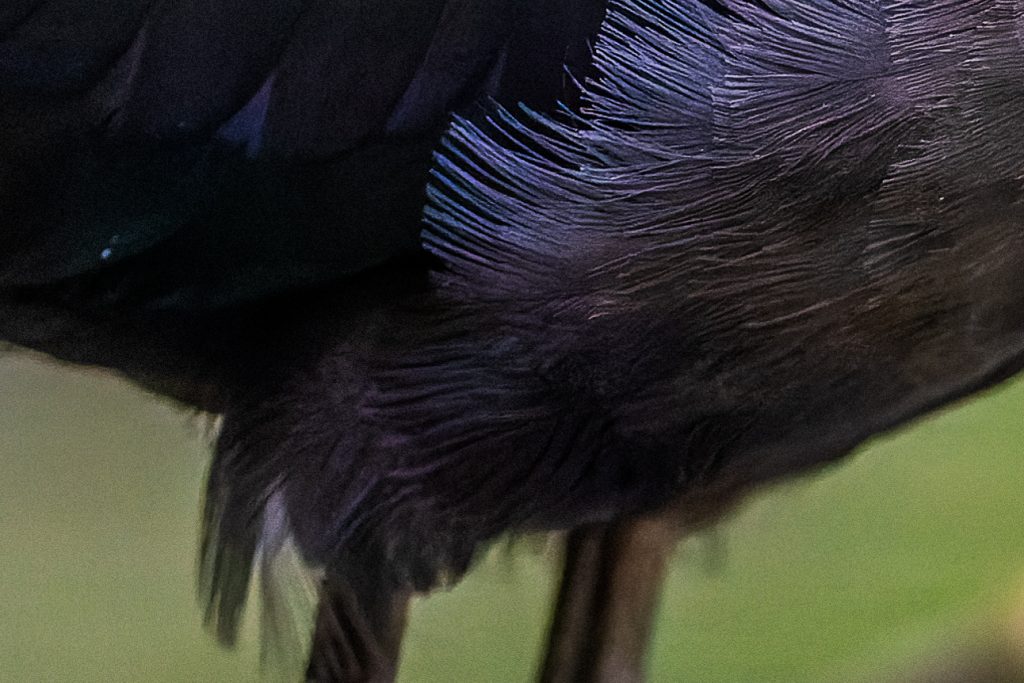
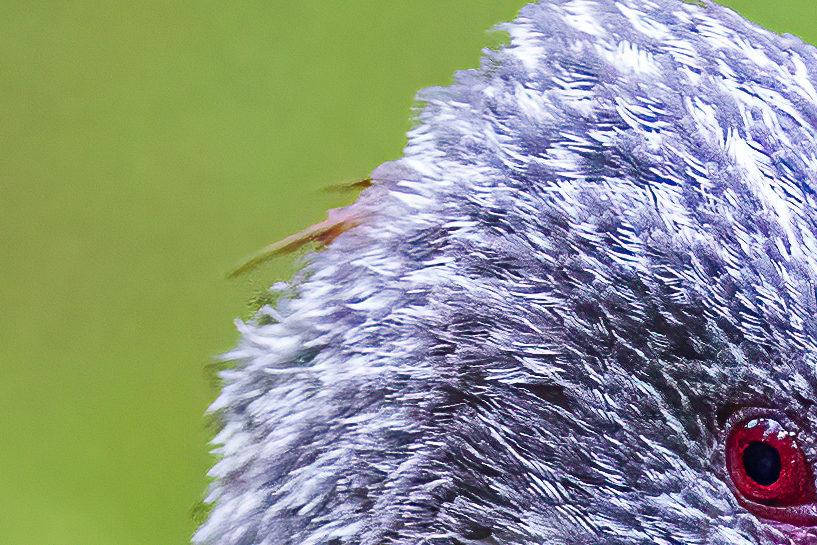
as a DNG file back to Lightroom and post-processed so that brightness, color saturation and contrast were comparable. The following crops show the result of this treatment in 100% view again - it looks very much better now:
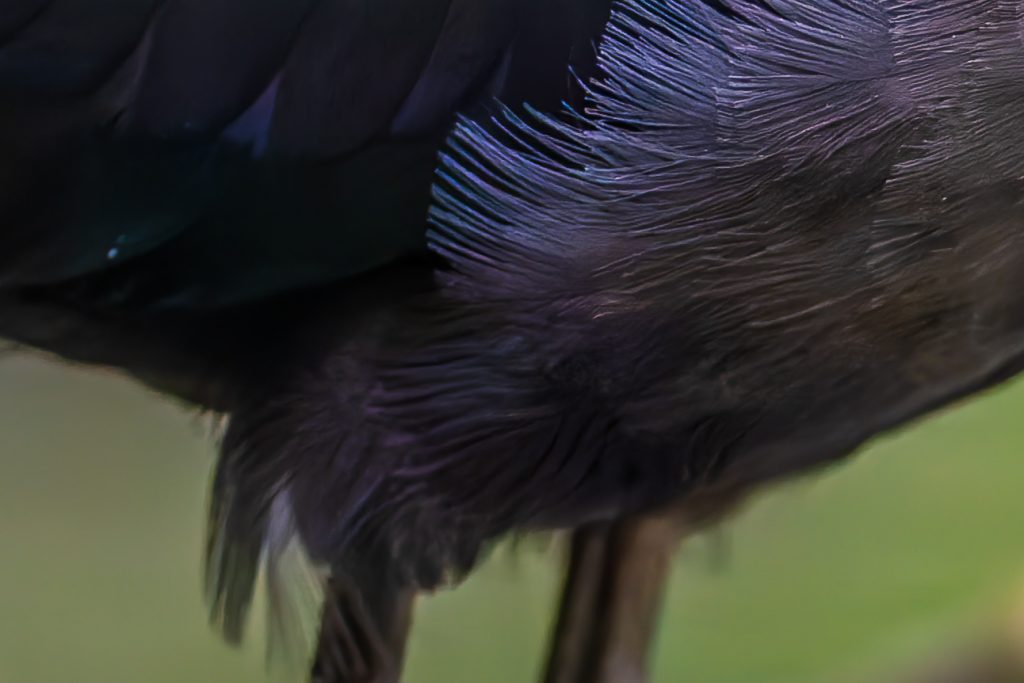
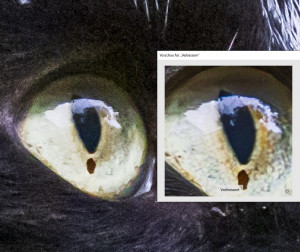
And now the same with DxO PureRAW with default settings (you even cannot adjust anything there 😉 ). Although PureRAW also uses the DeepPRIME algorithm, the result is different. There is a slight amount of remaining noise in the background, and the plumage is already marginally over-sharpened:
All in all, while PureRAW is still very usable, I really prefer the results with the DeepPRIME options in DxO PhotoLab 4.
And what about Topaz Denoise AI?
Now follows the interesting comparison with Topaz Denoise AI: In version 3.0.3, Topaz Denoise AI can directly edit the CR3 RAW files from my EOS 5R. I therefore started by loading the original CR3 file of my Canon EOS R5 into Topaz Denoise AI. Then I used the automatic setting to remove the noise and saved the result as a DNG file. I then re-imported this into Lightroom. Basically, this is the same approach that I took above with DxO PhotoLab 4 and DeepPRIME.
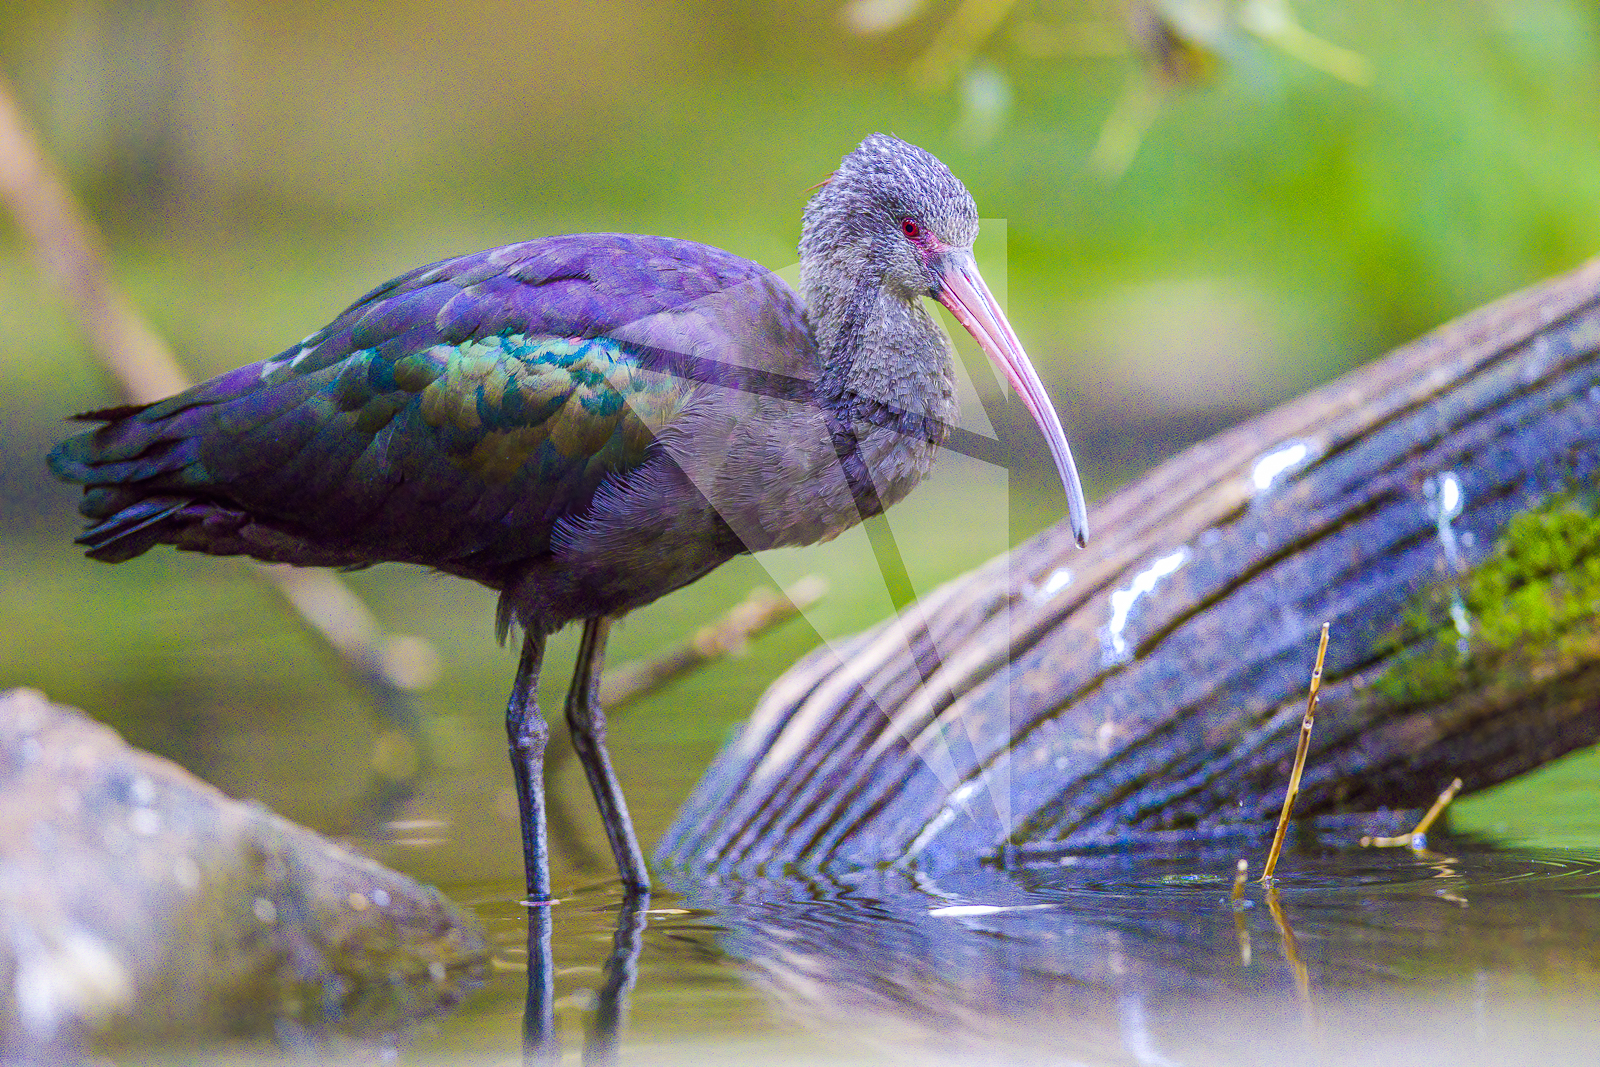
However, the resulting image looks very dull and dark at first, so that I had to make extensive corrections to achieve a comparable result to the one I had previously got in Lightroom. Here is my result in a scaled-down full image to demonstrate, that the result is somewhat comparable in terms of brightness and color.
The image contains a watermark because I used the test version of Topaz for the review. This is another plus for the DxO software: it can be used without restriction and put through its paces, at least for a generous test period of 31 days.
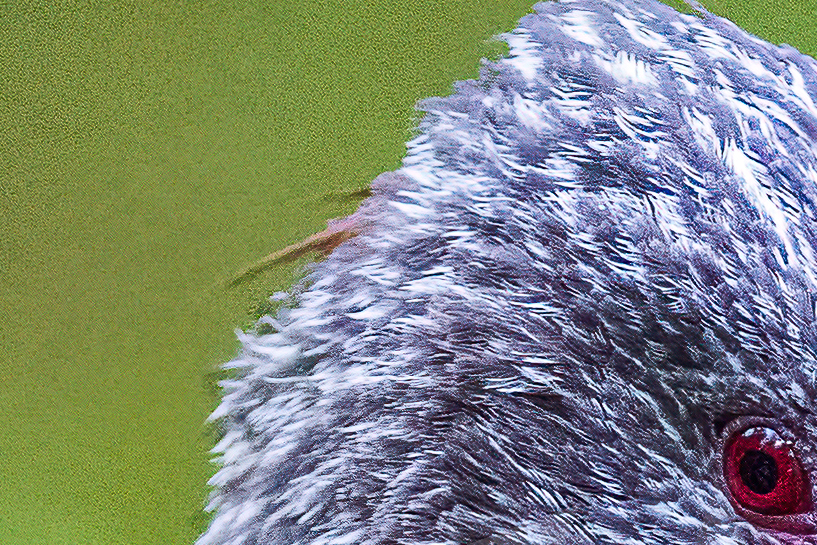
Even the scaled-down version is not very impressive, which is unfortunately confirmed in the 100% crops. The result is even significantly worse than what I achieved with Lightroom Classic alone:

Thus, in my opinion, direct processing of CR3 raw files with Topaz Denoise AI is currently not of any use.
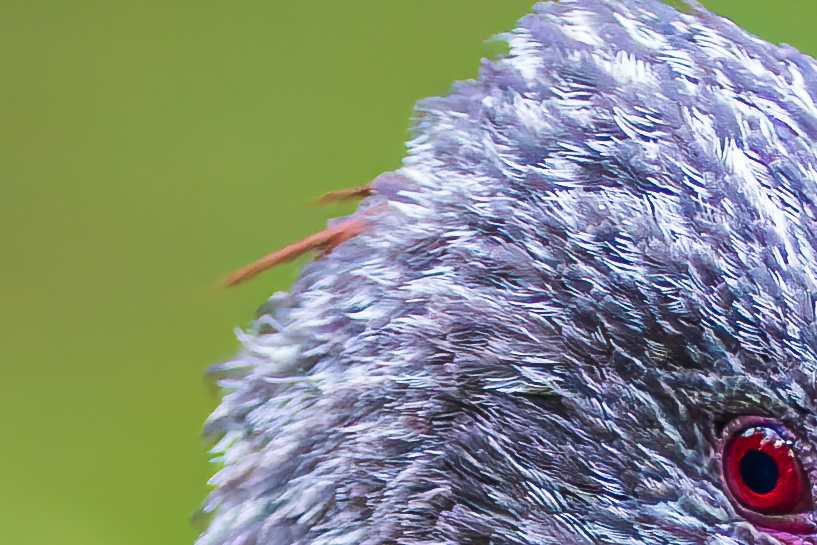
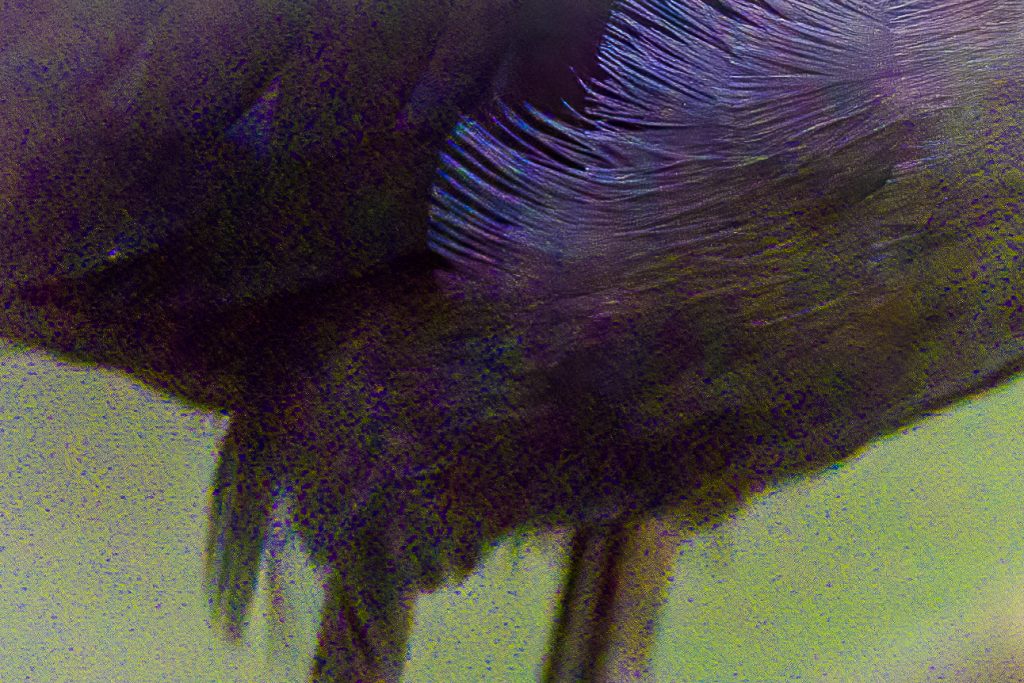
I have therefore used Topaz Denoise AI directly with Lightroom. From there, the image can be transferred to Topaz Denoise AI as a 16bit TIFF file using the menu item “Edit in…”. At first, I used the automatic settings in Topaz Denoise AI (Noise 40 Sharpening 28, Rest 0):

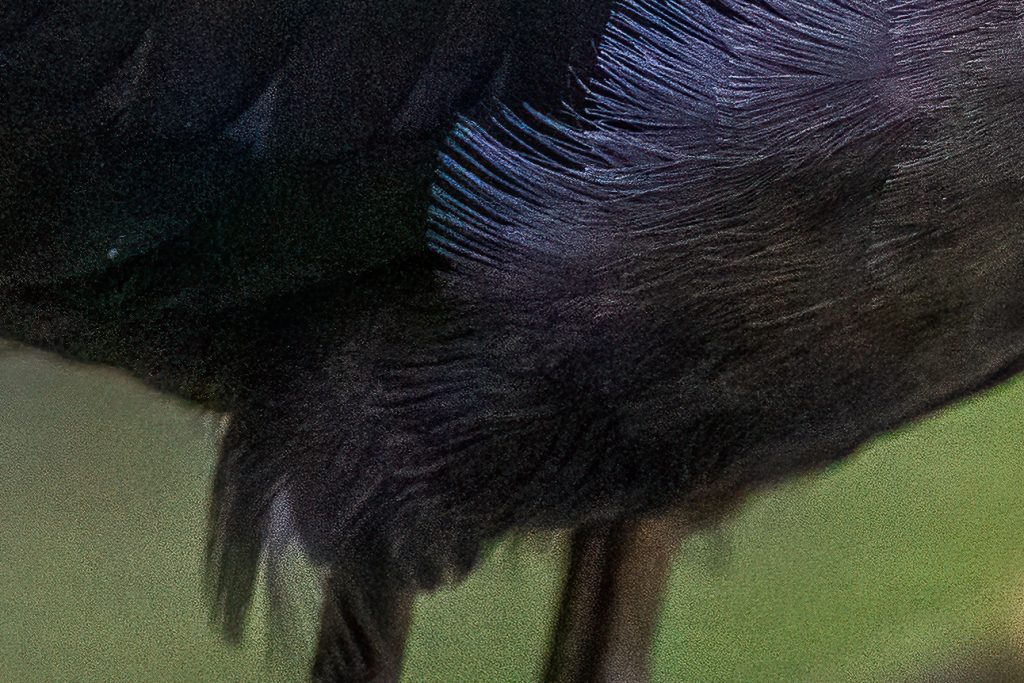
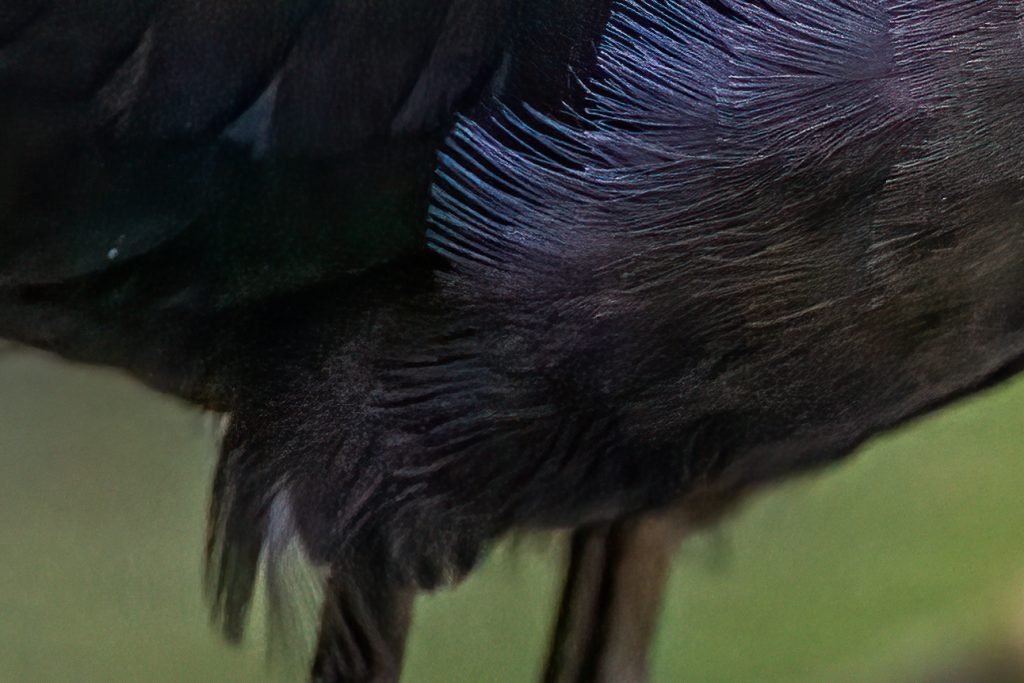
This is already better, but still doesn’t come close to the DxO DeepPRIME results. The image also seems over-sharpened to me and there is still clearly visible residual noise. Note in particular the artifacts at the back of the head and the noise between the legs. I therefore tried to improve the result manually (setting Noise 60, Sharpening 18):

I like this version better, but it still contains artifacts between the legs and at the back of the head.
I then denoised the image once more with Topaz Denoise AI using the “AI Clear” setting, which is supposed to gain better results with high-ISO shots, and left the rest of the processing as before.
First the automatic setting, here Topaz Denoise AI Clear sets the denoising level to Medium:
Since that was still very noisy, I changed the denoising setting to High, then it looks like this:

Well, the artifacts are partially gone, but I’m still not really thrilled with the result with the AI Clear setting.
All in all, Topaz Denoise AI is already very good, at least better than what I can manage in Lightroom alone. However, the DxO DeepPRIME algorithm seems much better to me. In addition, Topaz Denoise AI is, in my opinion, currently not reasonably usable with RAW files (at least with those of my Canon EOS R5).
DxO DeepPRIME, on the other hand, clearly benefits from processing the RAW files, which is not surprising since DxO can perform noise reduction even before demosaicing the Bayer matrix and can therefore use much more image information.
Maybe Topaz Denoise AI or other programs can achieve even better results, I am very curious. However, for now, I will continue to use DxO DeepPRIME to process my noisy high-ISO images.
But if you want, you can use the software of your choice to work on the RAW file I used here. You can find and download it here.
I look forward to your comments and edits.