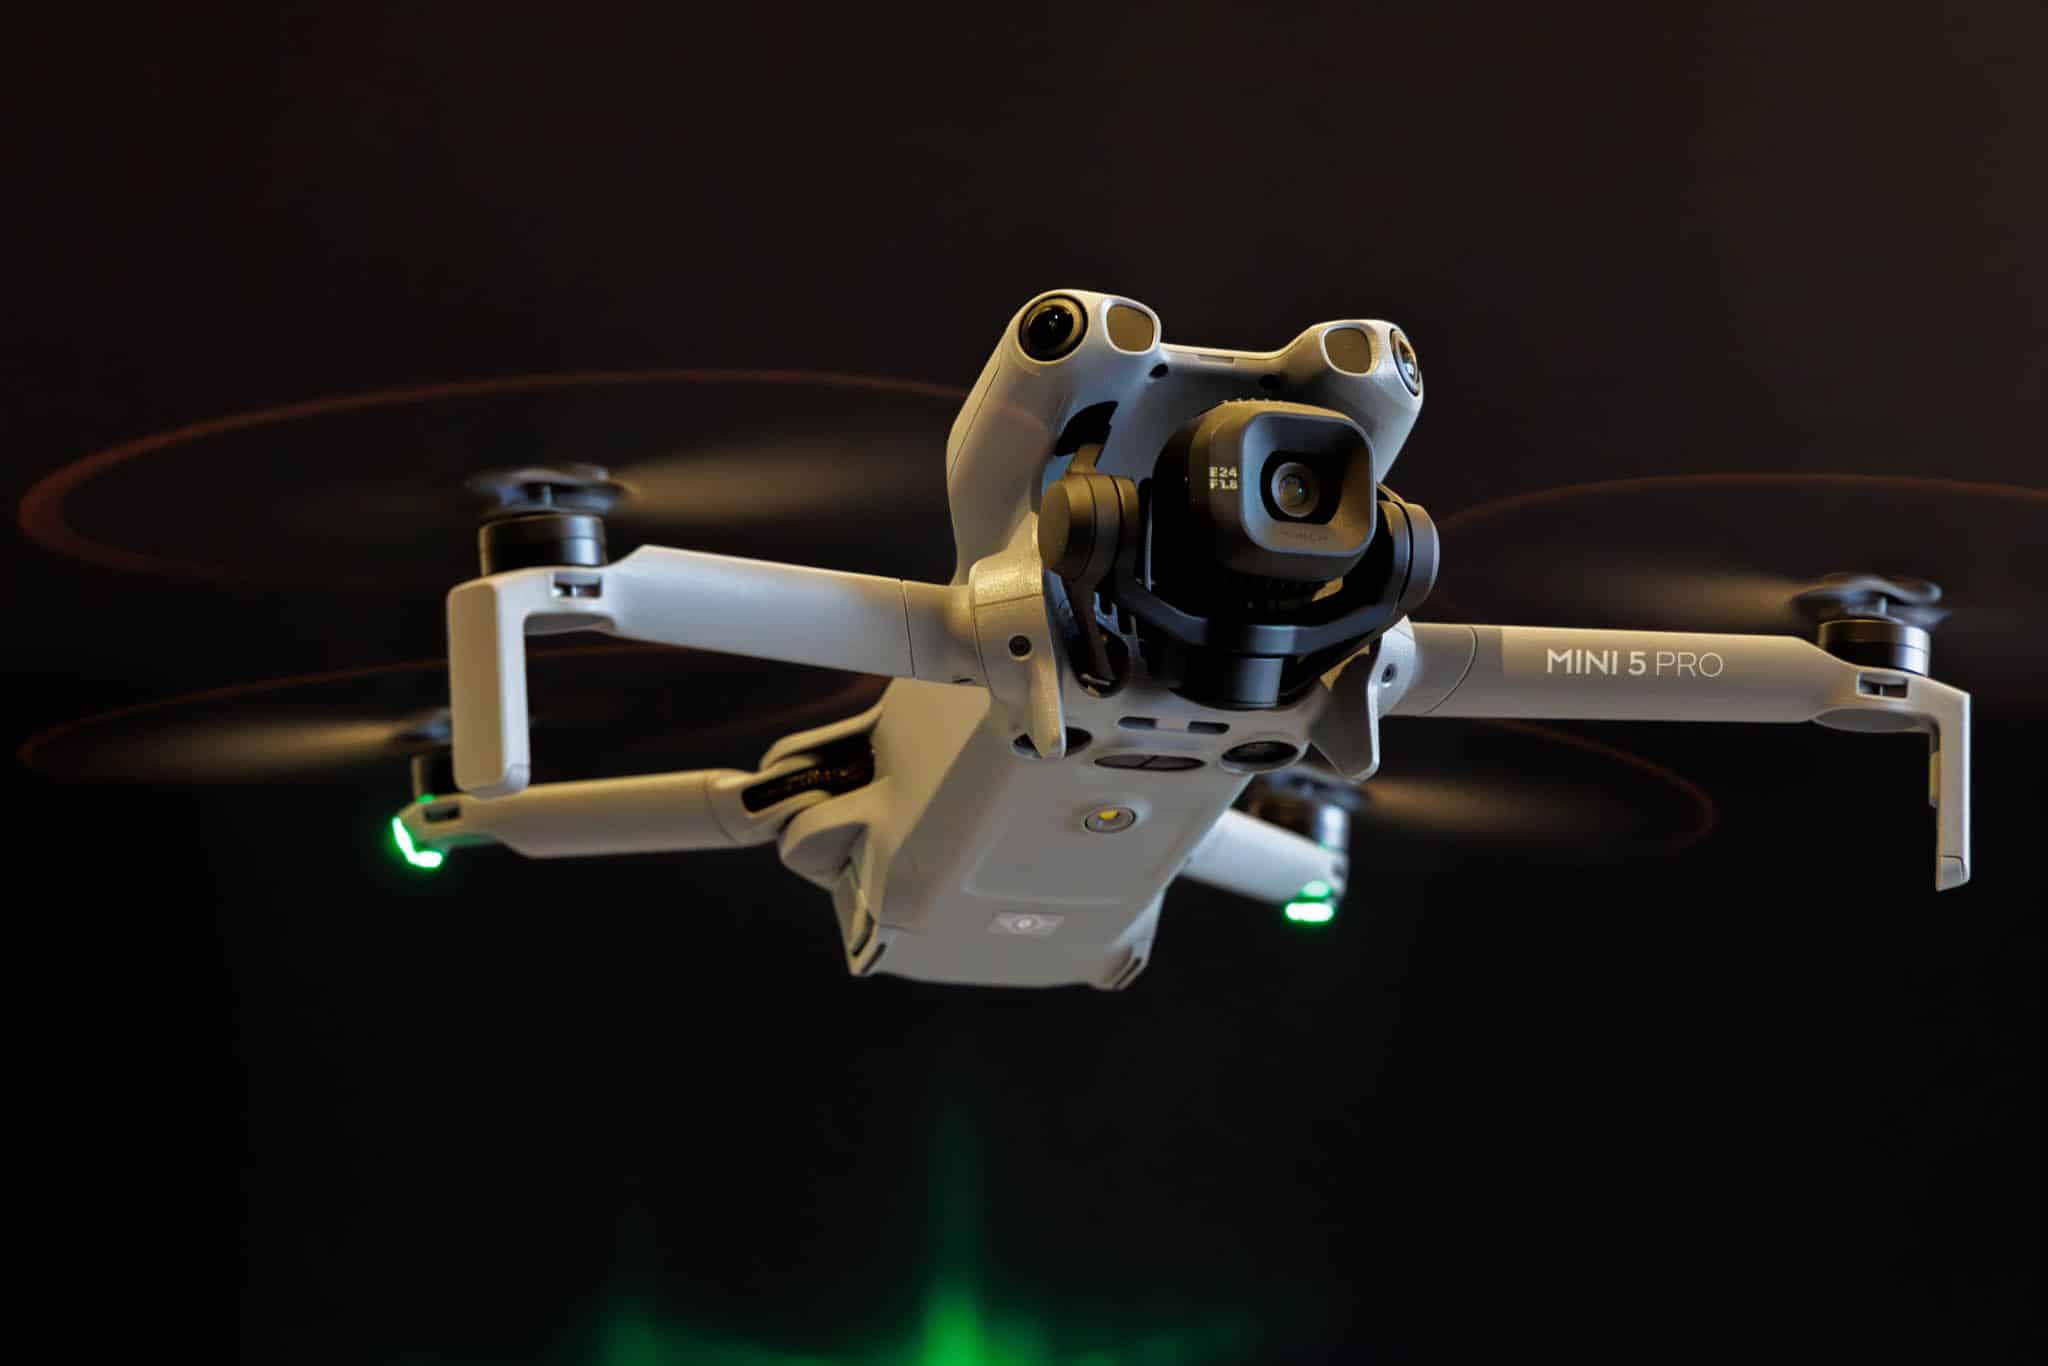
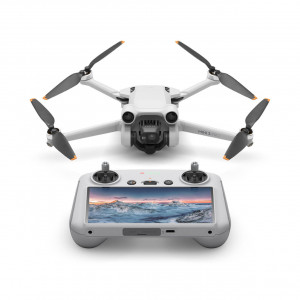
The new DJI Mini 5 Pro is here, and just a few days after its launch (as usual in the Fly More Combo*), it flew into my hands 😉. I’ve been happily using its predecessor, the Mini 4 Pro, alongside my DJI Air 3s for a good two years now, as it’s much less conspicuous and much easier to transport.
Weighing less than 250 grams, the new Mini 5 Pro remains in the lightest drone class, C0. This places it in EU category A1, the least restricted flight class.
As I have mentioned several times before, my main focus continues to be on photography, and in this review I would like to examine the Mini 5 Pro more closely from this perspective.
But first, the question arises: What has changed compared to the popular Mini 4 Pro, which was introduced almost exactly two years ago (my detailed review of the Mini 4 Pro can be found here)?
Changes compared to the Mini 4 Pro
Better camera, larger sensor
The most striking innovation is the 1-inch camera sensor with a resolution of 50 megapixels, used for the first time in a drone weighing less than 250g. By comparison, the Mini 4 Pro has a smaller 1/1.3-inch sensor with 48 megapixels. According to DJI, the larger sensor in the Mini 5 Pro is designed to deliver visibly better image quality and a wider dynamic range, especially in low light and high contrast conditions.
It also excels at video recording: 4K videos are now possible at up to 120 frames per second, and Full HD even at 240 fps—perfect for smooth slow motion.
Another new feature is the camera’s 2x telephoto function, which DJI calls “Med-Tele Mode.” Similar to the current Apple iPhones (where it is called “Fusion Camera”), this uses only the central quarter of the image sensor.
It is therefore merely a sensor crop to the middle 12 megapixels. In video, which uses only 8 megapixels even in 4K resolution, this results in perfectly usable image quality that is also significantly better than the previous 2x zoom of the Mini 4 Pro. However, this is of no benefit in photography, which is my primary interest and the focus of this article. The 2x crop can just as easily be done in post-processing.
New panorama mode
The new Mini 5 Pro finally offers the fantastic new free panorama mode that was introduced with the Air 3s. This allows you to select an area of any size for a panoramic image. The area is simply defined by marking two corners of the desired panorama area. The Mini 5 Pro then automatically calculates the number of individual shots required and takes them automatically.
This feature also offers several other important improvements: individual images (either JPG or DNG) can now finally be captured at the camera’s full sensor resolution (50 megapixels). Previous panorama features only supported individual images with a resolution of 12 megapixels.
In addition, the Mini 5 Pro can now also take 3 HDR single shots in free panorama mode (and even 5 single shots in 12 MP resolution). This allows you to merge an HDR panorama in Lightroom Classic, for example, which significantly improves the image quality.
However, the amount of data created in this way is enormous. Even my powerful 16-core Threadripper workstation with an RTX 2080TI takes a very long time to stitch these panoramas together—but the result is breathtaking. The resolution is sufficient for prints large enough to cover entire house walls 😉.
More stable, safer, longer in the air
The flight time increases slightly to up to 36 minutes – two minutes more than the Mini 4 Pro. That may not sound like much, but it is noticeable in practice, especially in windy conditions. Speaking of wind: according to the technical data, the Mini 5 Pro is now wind-stable up to 12 m/s, making it around 10% more robust than its predecessor.
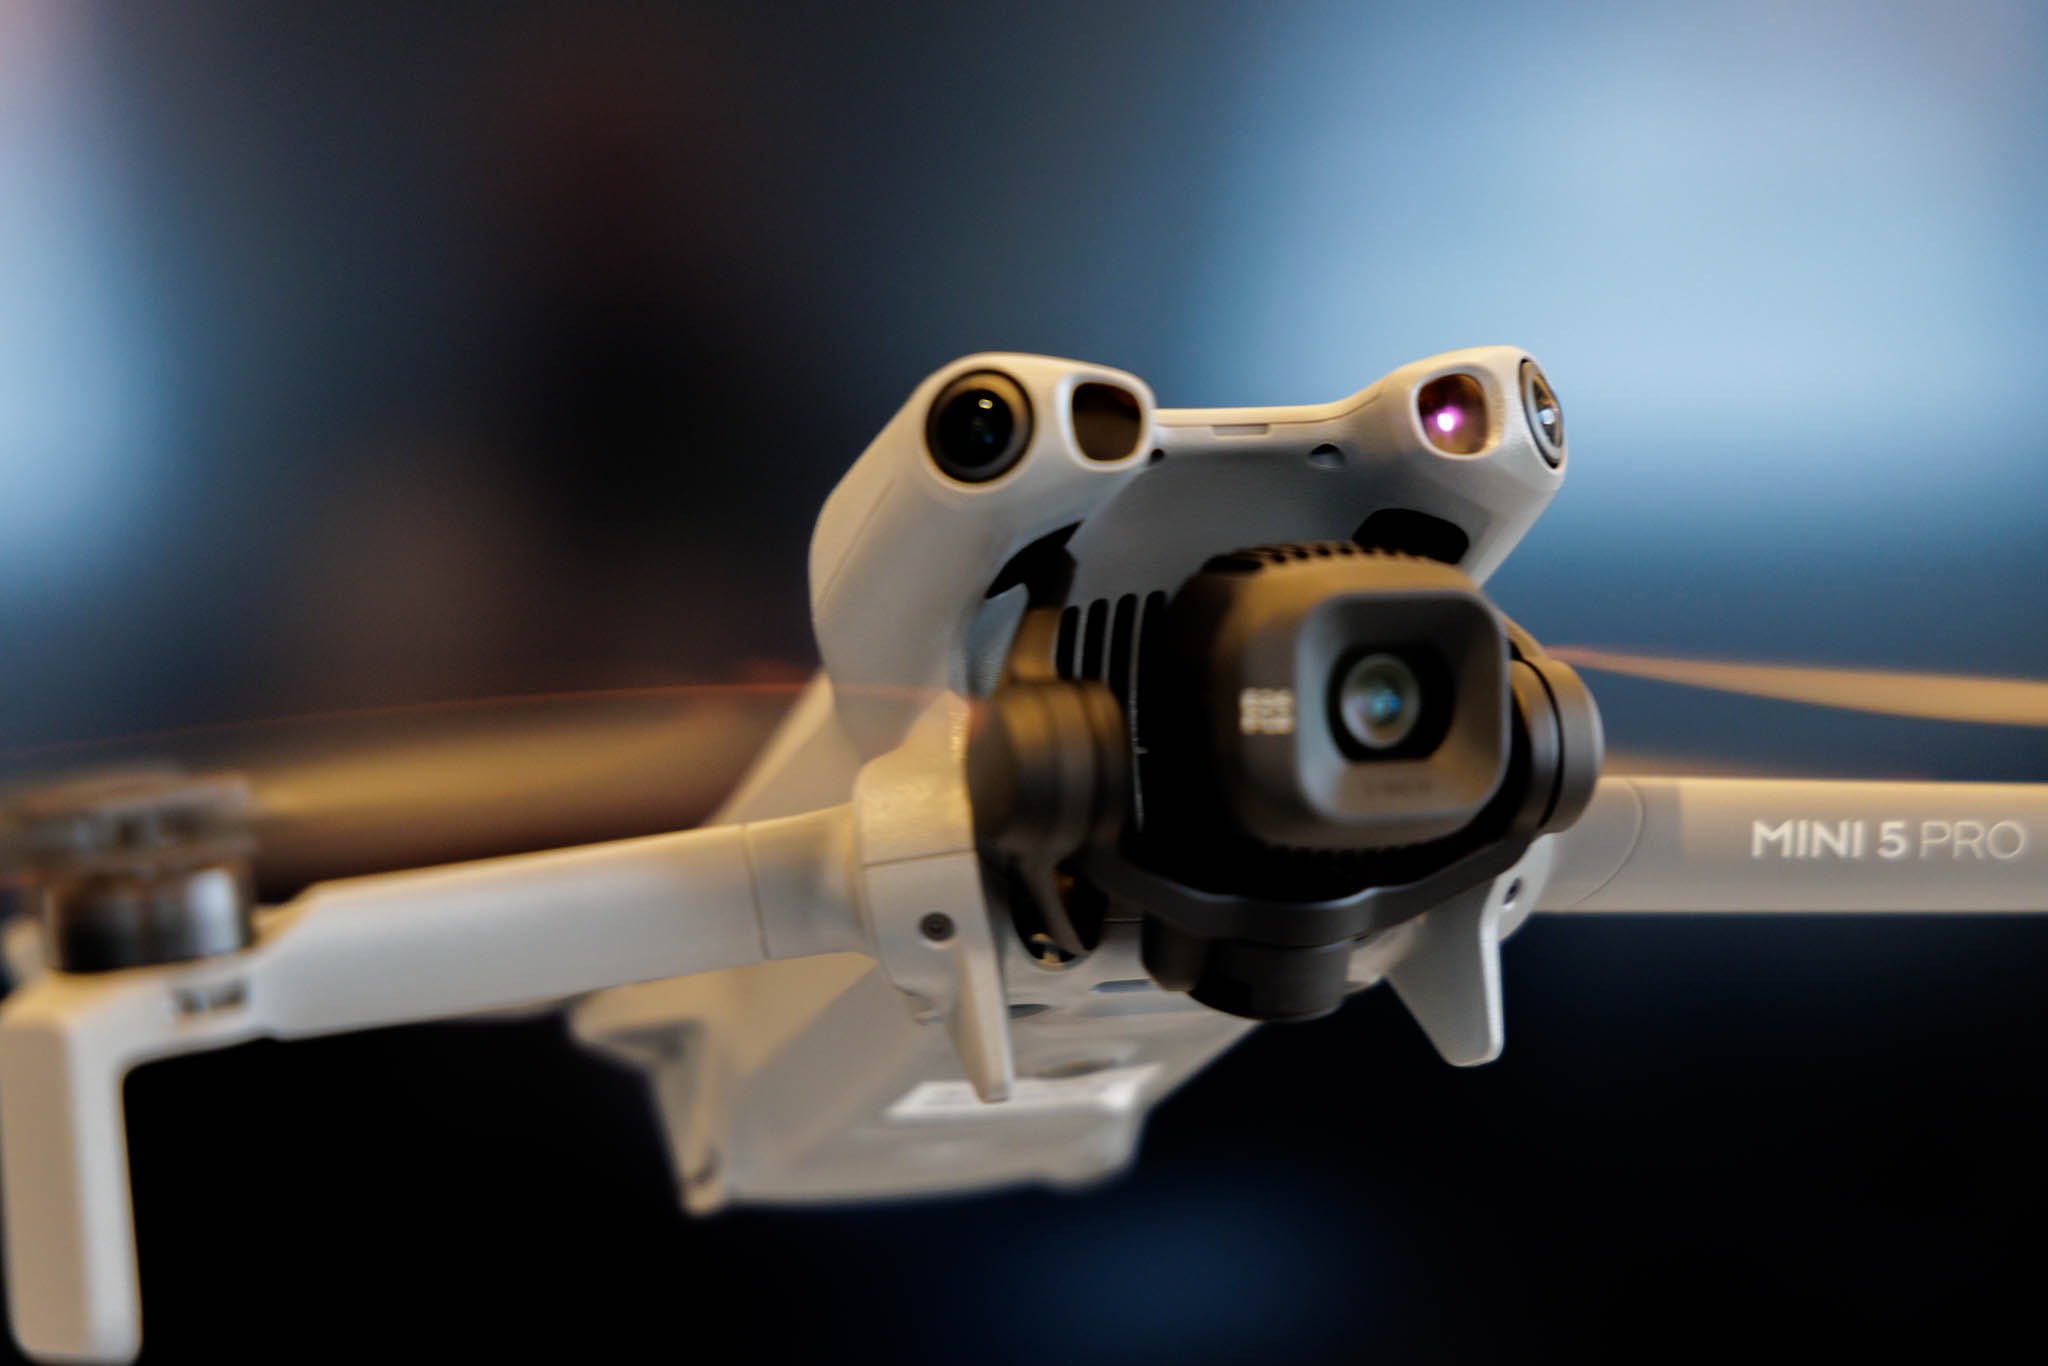
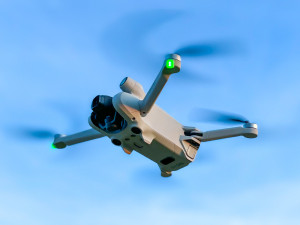
An improved obstacle protection system is also new. In addition to the 360° sensors all around, the Mini 5 Pro now also uses Lidar (Light Detecting and Ranging) technology to detect objects even more precisely—even at dusk or in low light. The IR light from the active Lidar sensor, which is invisible to our eyes, can be clearly seen above the lens in this image:
More memory and new improved system
Another plus point is the internal memory: it now comes with 42 GB built in, so even if you forget your memory card in your card reader at home, you can still take a lot of pictures. The wireless connection runs via the new O4+ system, which is designed to offer even more stable image transmission with less interference.
Gimbal rotation
The gimbal (camera mount) now has a larger rotation range. This allows for even more flexible filming. The Mini 4 Pro was already able to rotate the camera 90° for portrait shots. The Mini 5 Pro can now rotate the camera continuously by up to 225°, allowing you to shoot videos with a rotating horizon, similar to the much larger Mavic 4 Pro.
Improved two-way charging station
A very welcome improvement that I recently discovered myself: the DJI Mini 5 Pro two-way charging station included in the Fly More Combo has not only been given a new color. Unlike its predecessor, it now charges at up to 45 watts with compatible PD power adapters - allowing two batteries to be charged SIMULTANEOUSLY.PD-Netzteilen mit bis zu 45 Watt - dann werden zwei Akkus GLEICHZEITIG geladen.
I frequently use this feature when traveling and recharge drained batteries with a PD-compatible power bank while using freshly charged ones. This allows you to fly the Mini5 Pro almost continuously for as long as the power bank allows.
Improved return to home function
As with the DJI Air 3s, the Mini 5 Pro’s “return to home” behavior has been significantly improved. All previous DJI drones automatically returned to the position where they had received their first GPS fix when the RTH (return to home) function was initiated, either intentionally or due to signal loss. This fix was accompanied by an acoustic signal from the remote control with the message “Homepoint updated.”
However, this was not necessarily the actual starting point, especially when taking off from locations with poor GPS coverage. Now, the Mini 5 Pro also remembers the flight path from takeoff to the first GPS fix and then flies this route exactly in reverse when returning. This even works indoors through open windows or gates.
Additional features
Another change, at least in the Fly More Combo: it now comes in a new, significantly larger bag. Whether this is seen as an advantage or a disadvantage is a matter of opinion. The bag that came with the previous model was conveniently small for transport. However, it only just fit the essential components, with no room for additional accessories.
That’s different with the new larger bag. For example, I can also use it to carry my Rokid Air video glasses*, which I really like to use as an additional display with the DJI RC 2 remote controller. The glasses can be easily connected to the RC 2 using the USB-C cable supplied and then display a huge virtual image of the RC 2 screen.
The propellers have undergone another very welcome change. Thanks to a quick-release system, like on all larger DJI drones, they can now finally be changed without tools. Fiddling around with a mini screwdriver and tiny screws, as was the case with the mini predecessors, is finally a thing of the past. Six spare propellers are included with the combo again.
A box containing three ND filters (ND 8, ND 32, and ND 128) is also included in the scope of delivery.
Legal information for drones weighing less than 250g
Drones weighing less than 250g have the great advantage of being subject to the fewest flight restrictions. The extensive drone regulations sound confusing: Like its predecessor, the Mini 5 Pro is in Europe classified in CE class C0 and can therefore be flown in category “A1.”
In practical terms, this means that they can be flown without an EU remote pilot certificate, i.e., without a corresponding examination (category A1/A3) and without the otherwise prescribed minimum distances to residential areas or people (except for overflights). Nevertheless, registration of the operator (in Germany with the Federal Aviation Authority (LBA)) and a drone liability insurance policy are of course still required.
But there are also restrictions: In general, Class C0 drones may not exceed a maximum speed of 19 m/s (which is still equivalent to 68 km/h!). And there is a flight altitude limit of 120 m measured above the altitude of the take-off point. As a rule, all drones of all classes must always be flown within visual line of sight from the remote pilot.
Dji Mini 5 Pro in photography
As a passionate photographer, I exclusively use the RAW/DNG format in the highest available sensor resolution of 50 megapixels when taking photos with the Mini 5 Pro. I also edit my images almost exclusively with Adobe Lightroom Classic, so my comments below refer explicitly to this workflow.
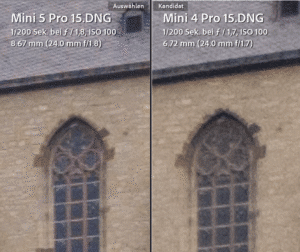
Besides the other improvements compared to its predecessor mentioned above, I was therefore particularly interested in the quality of the new 1-inch sensor (12.80 x 9.60 mm) in the Mini 5 Pro. The Mini 4 Pro still had a 1/1.3-inch sensor (9.98 x 7.50 mm). The new sensor is therefore 64% larger with almost the same resolution (50 vs. 48 megapixels), which promises better image quality with less noise and a higher dynamic range.
Camera design
The sensor and optics are likely to be largely identical to those of the DJI Air 3s, which I also use with pleasure. Many of the drone shots in my Tromsø gallery were taken with this model. I have already written a detailed test report on this as well: DJI Air 3s – Photo Quality. Much of what is written there should therefore also apply to the DJI Mini 5 Pro.
Contrary to popular belief, RAW files from digital cameras do not only contain the actual, unprocessed sensor data. In fact, the data is always pre-processed in any camera – to a greater or lesser extent depending on the model. Artifacts that arise during this processing are very difficult to remove later, even with the best RAW development software.
Unfortunately, however, the sensor in the Mini 5 Pro, once again, as has been the case since the Mini 3 Pro, is a Quad Bayer design, which significantly reduces color resolution and thus makes post-processing of high-resolution photos more difficult.
DNG format
If you take a closer look at the DNG files from the newer DJI drones (e.g., with EXIFTOOL), you will see , that they are supplied in the standard Bayer format. Obviously, a Quad-Bayer -> Bayer conversion has already been performed insider the drone, which inevitably makes original sensor information inaccessible for later, better demosaicing algorithms. Despite the many advantages of Quad-Bayer for video, a standard Bayer design, which is used by almost all professional camera sensors, is significantly better for photography.
But enough theory, here are some practical results from my first test flight.
First flight
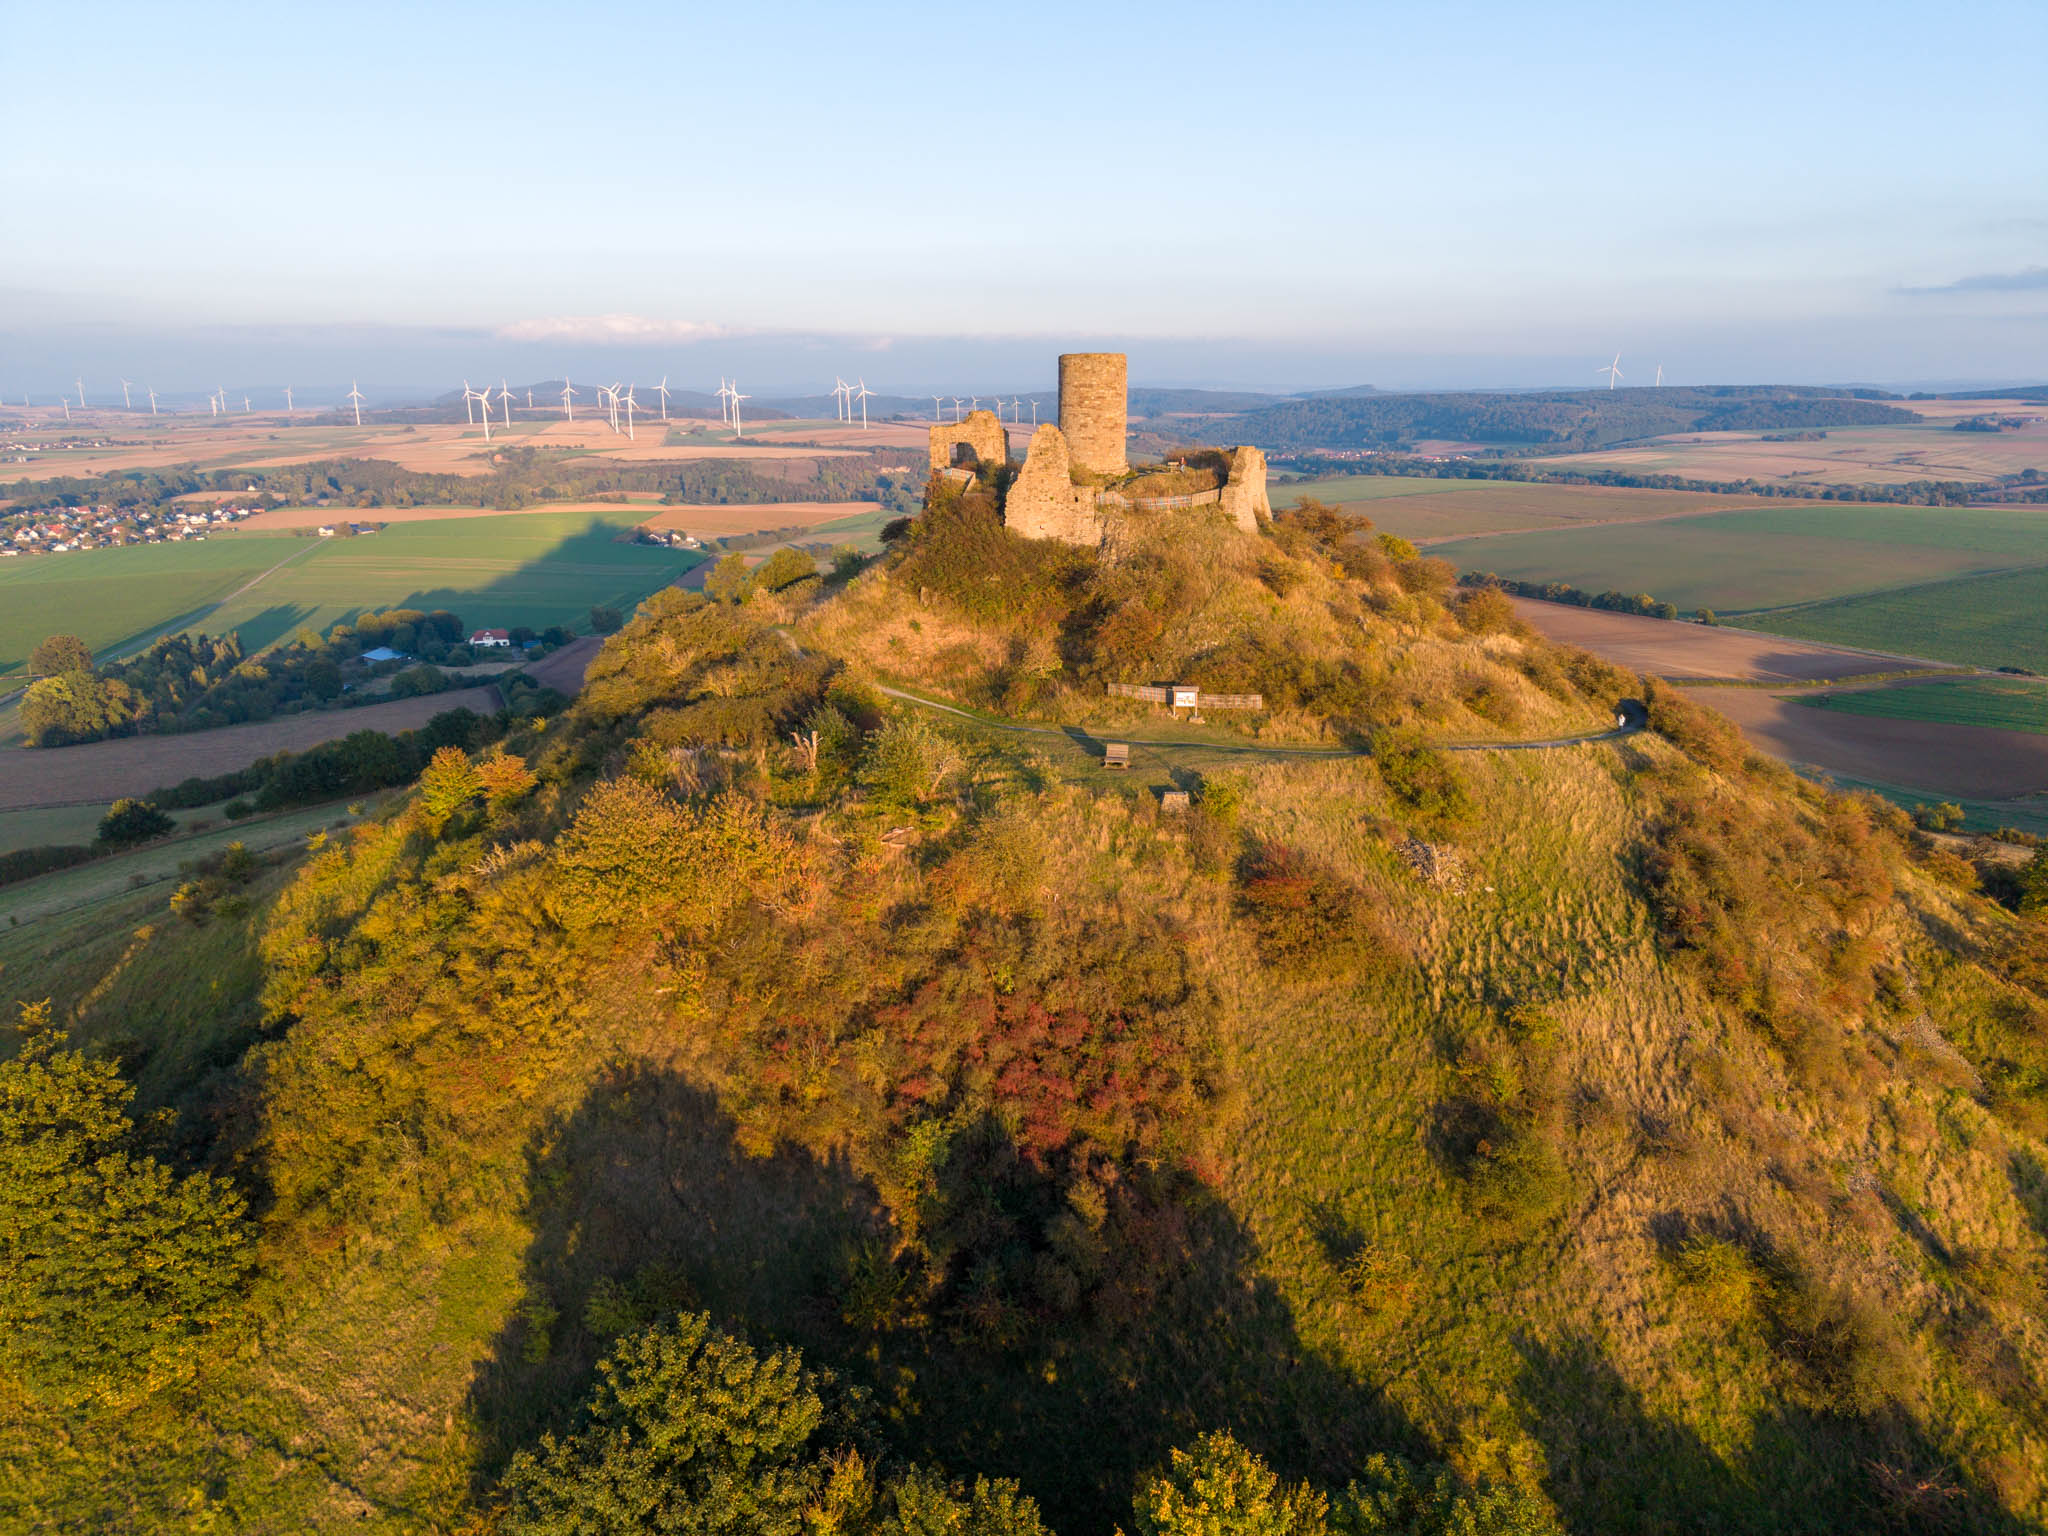
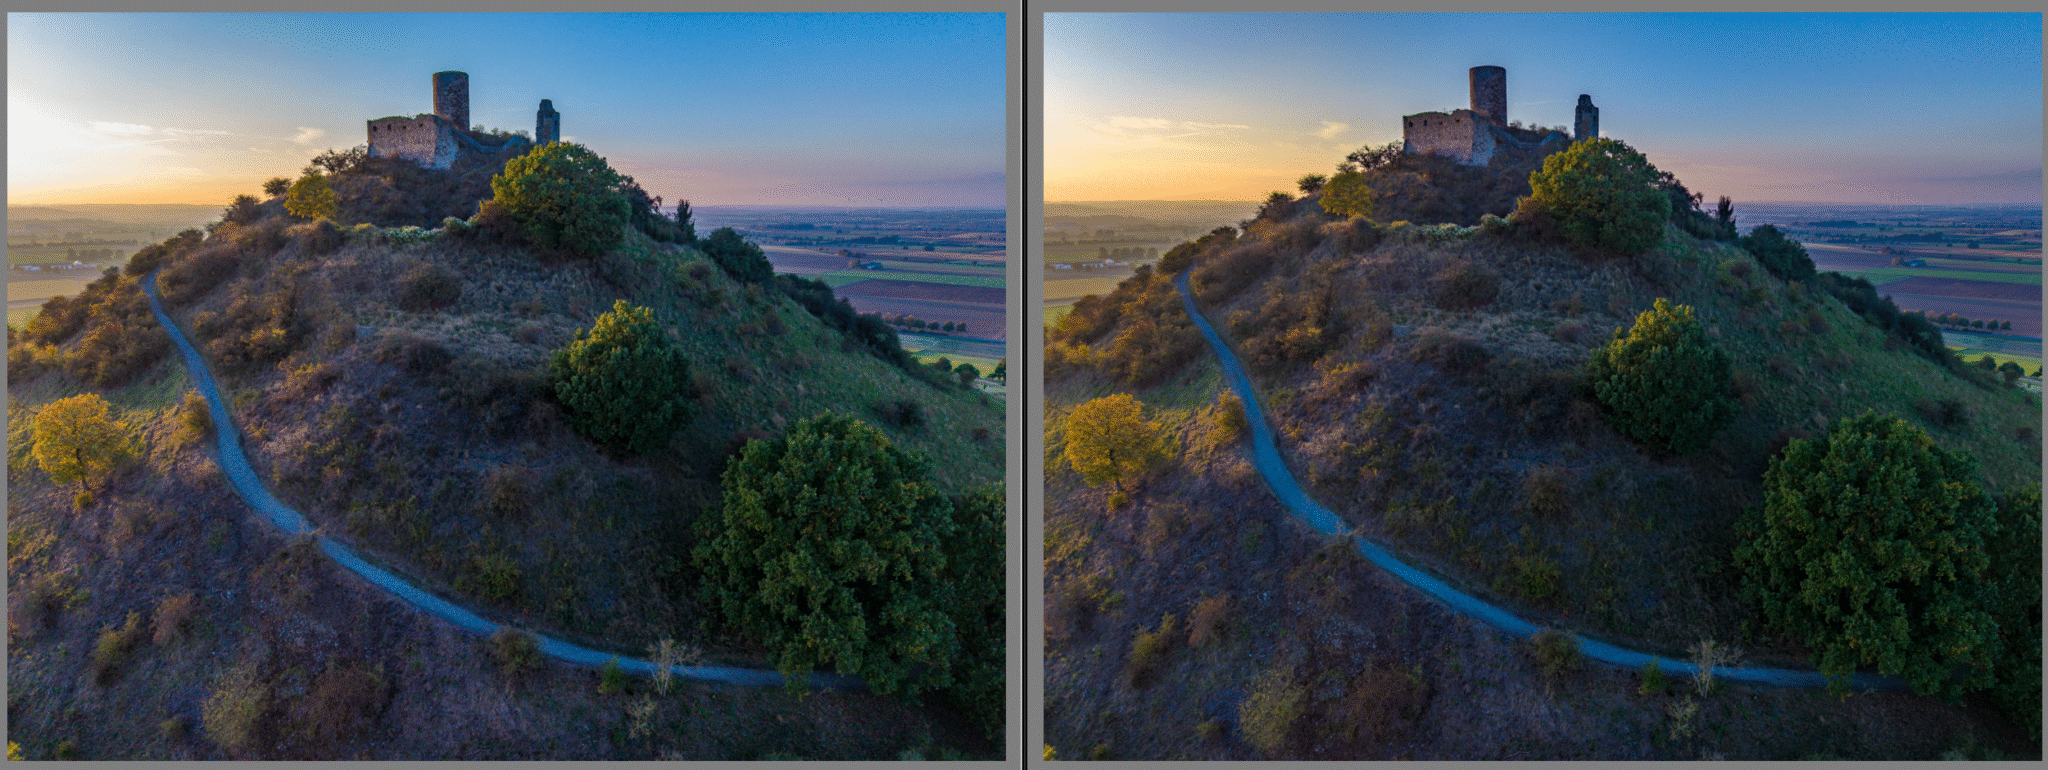
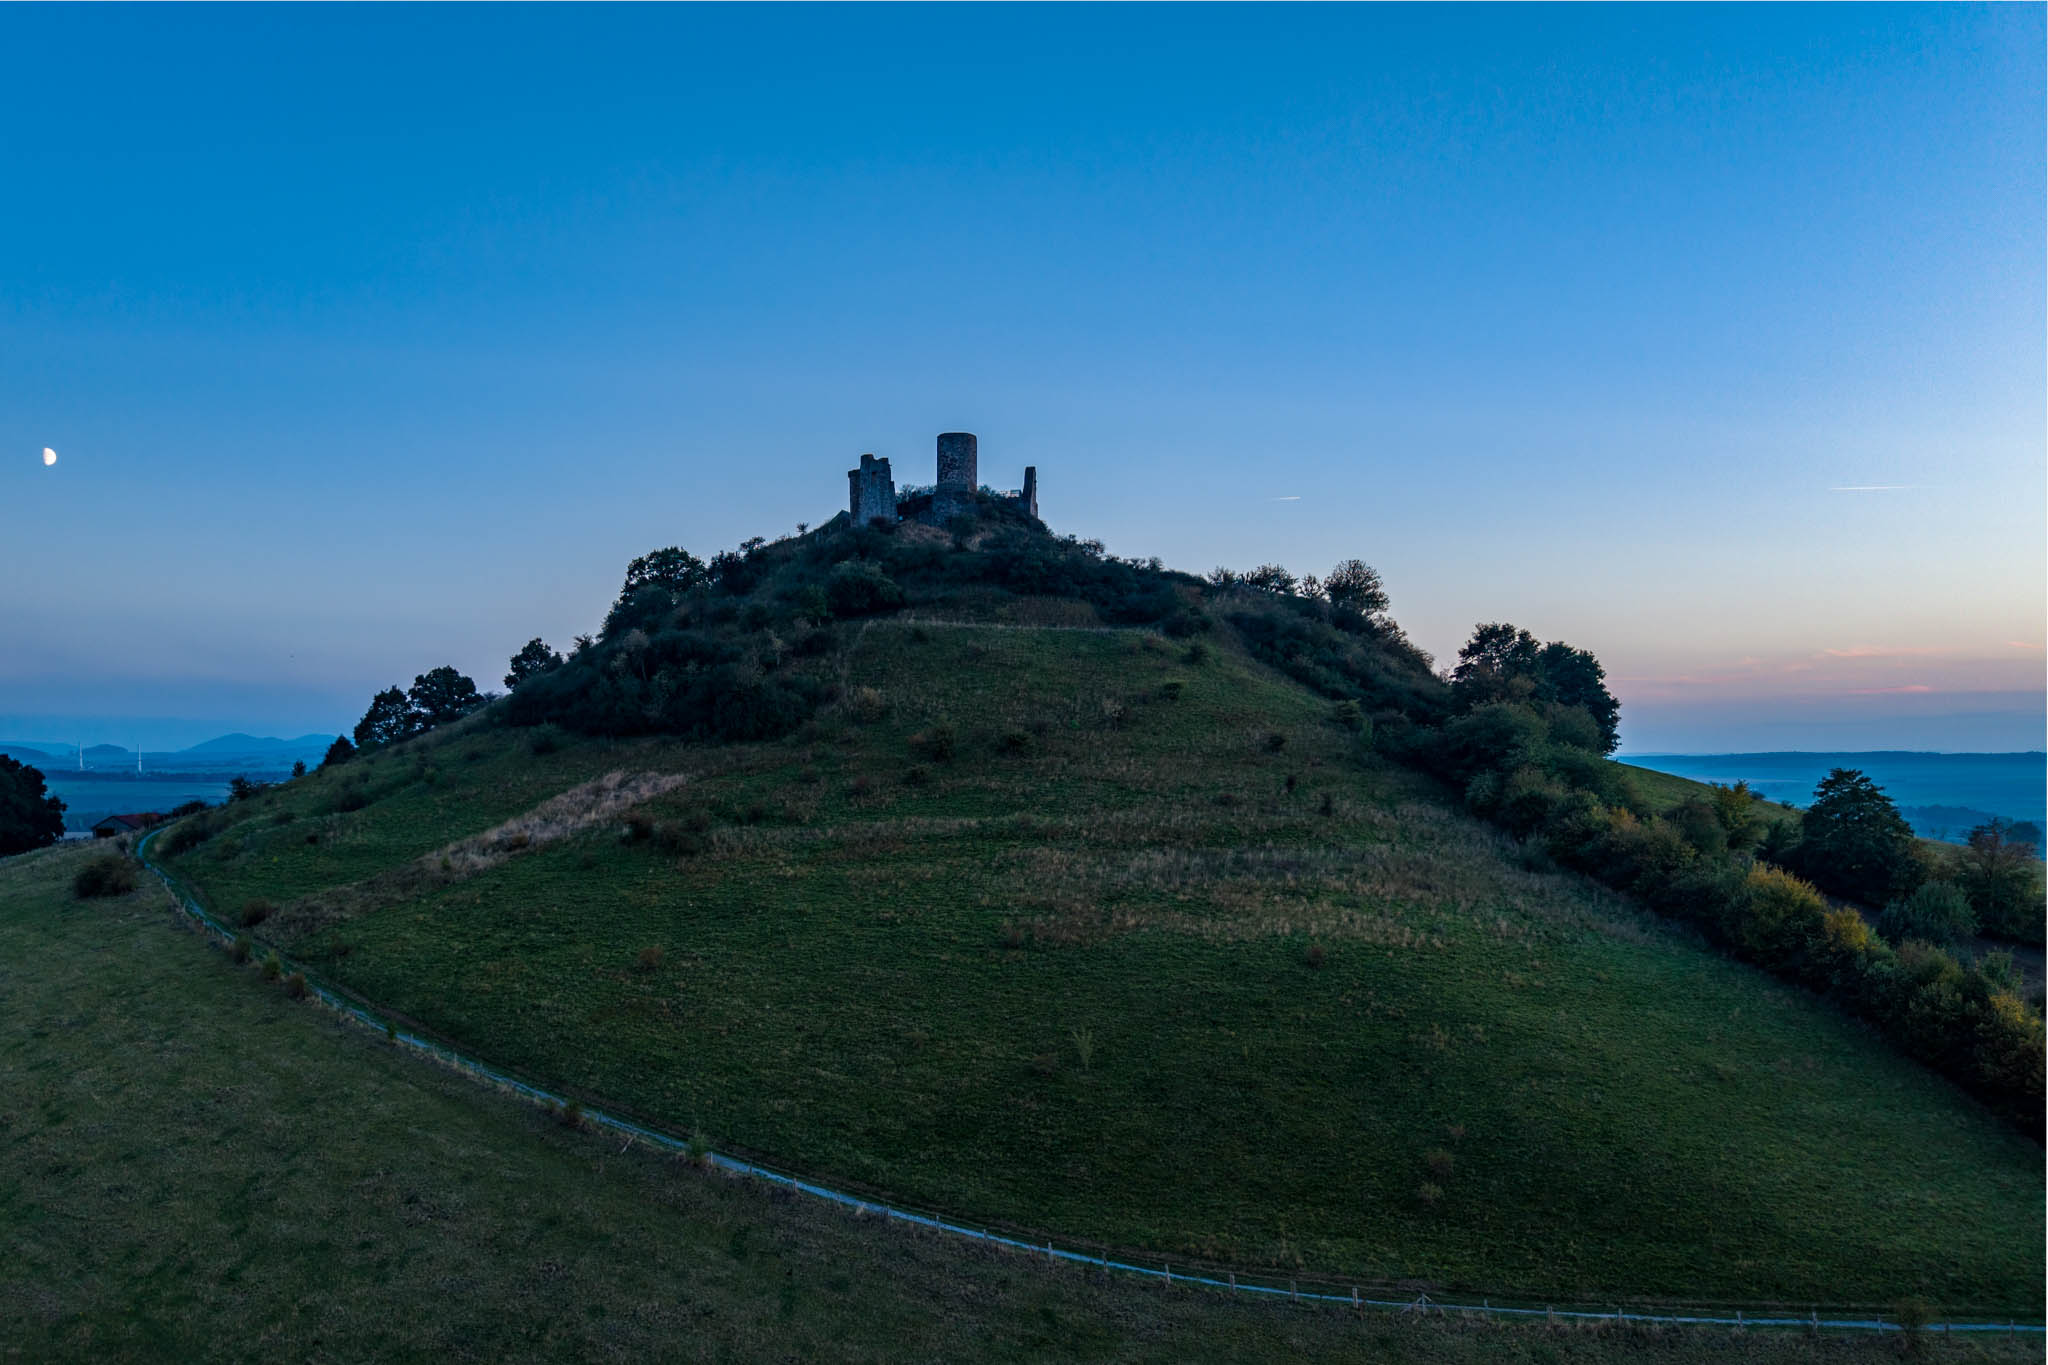
As with many of my previous drone tests, the destination for my first test flight with the Mini 5 Pro was once again our local mountain, the nearby Desenberg. As always, I took all the pictures as 50-megapixel RAW DNG files and then edited them in my usual workflow in Adobe Lightroom Classic (version 14.5.1).
Exposure bracketing
For years, I have been using my drones almost exclusively to take AEB exposure series. This allows me to increase the dynamic range of the small drone sensors, which is significantly reduced compared to larger system cameras, by post-processing the individually exposed images using HDR. This time, I again took 5 individual shots at ISO 100 between -1 1/3 and + 1 1/3 EV. To ensure that I have enough storage capacity in all situations, I currently only use SanDisk Extreme microSDXC UHS-I memory cards* with a capacity of 512 GB in my DJI drones. I haven’t had any problems with them so far.
Suggestions for improvement
Unfortunately, like its predecessors, the DJI Mini 5 Pro only supports AEB exposure bracketing with a maximum of 5 (at 50 megapixels) fixed steps, each with 2/3 f-stops. I would prefer to be able to adjust the step size or at least increased individual steps of one f-stop.
Sample images
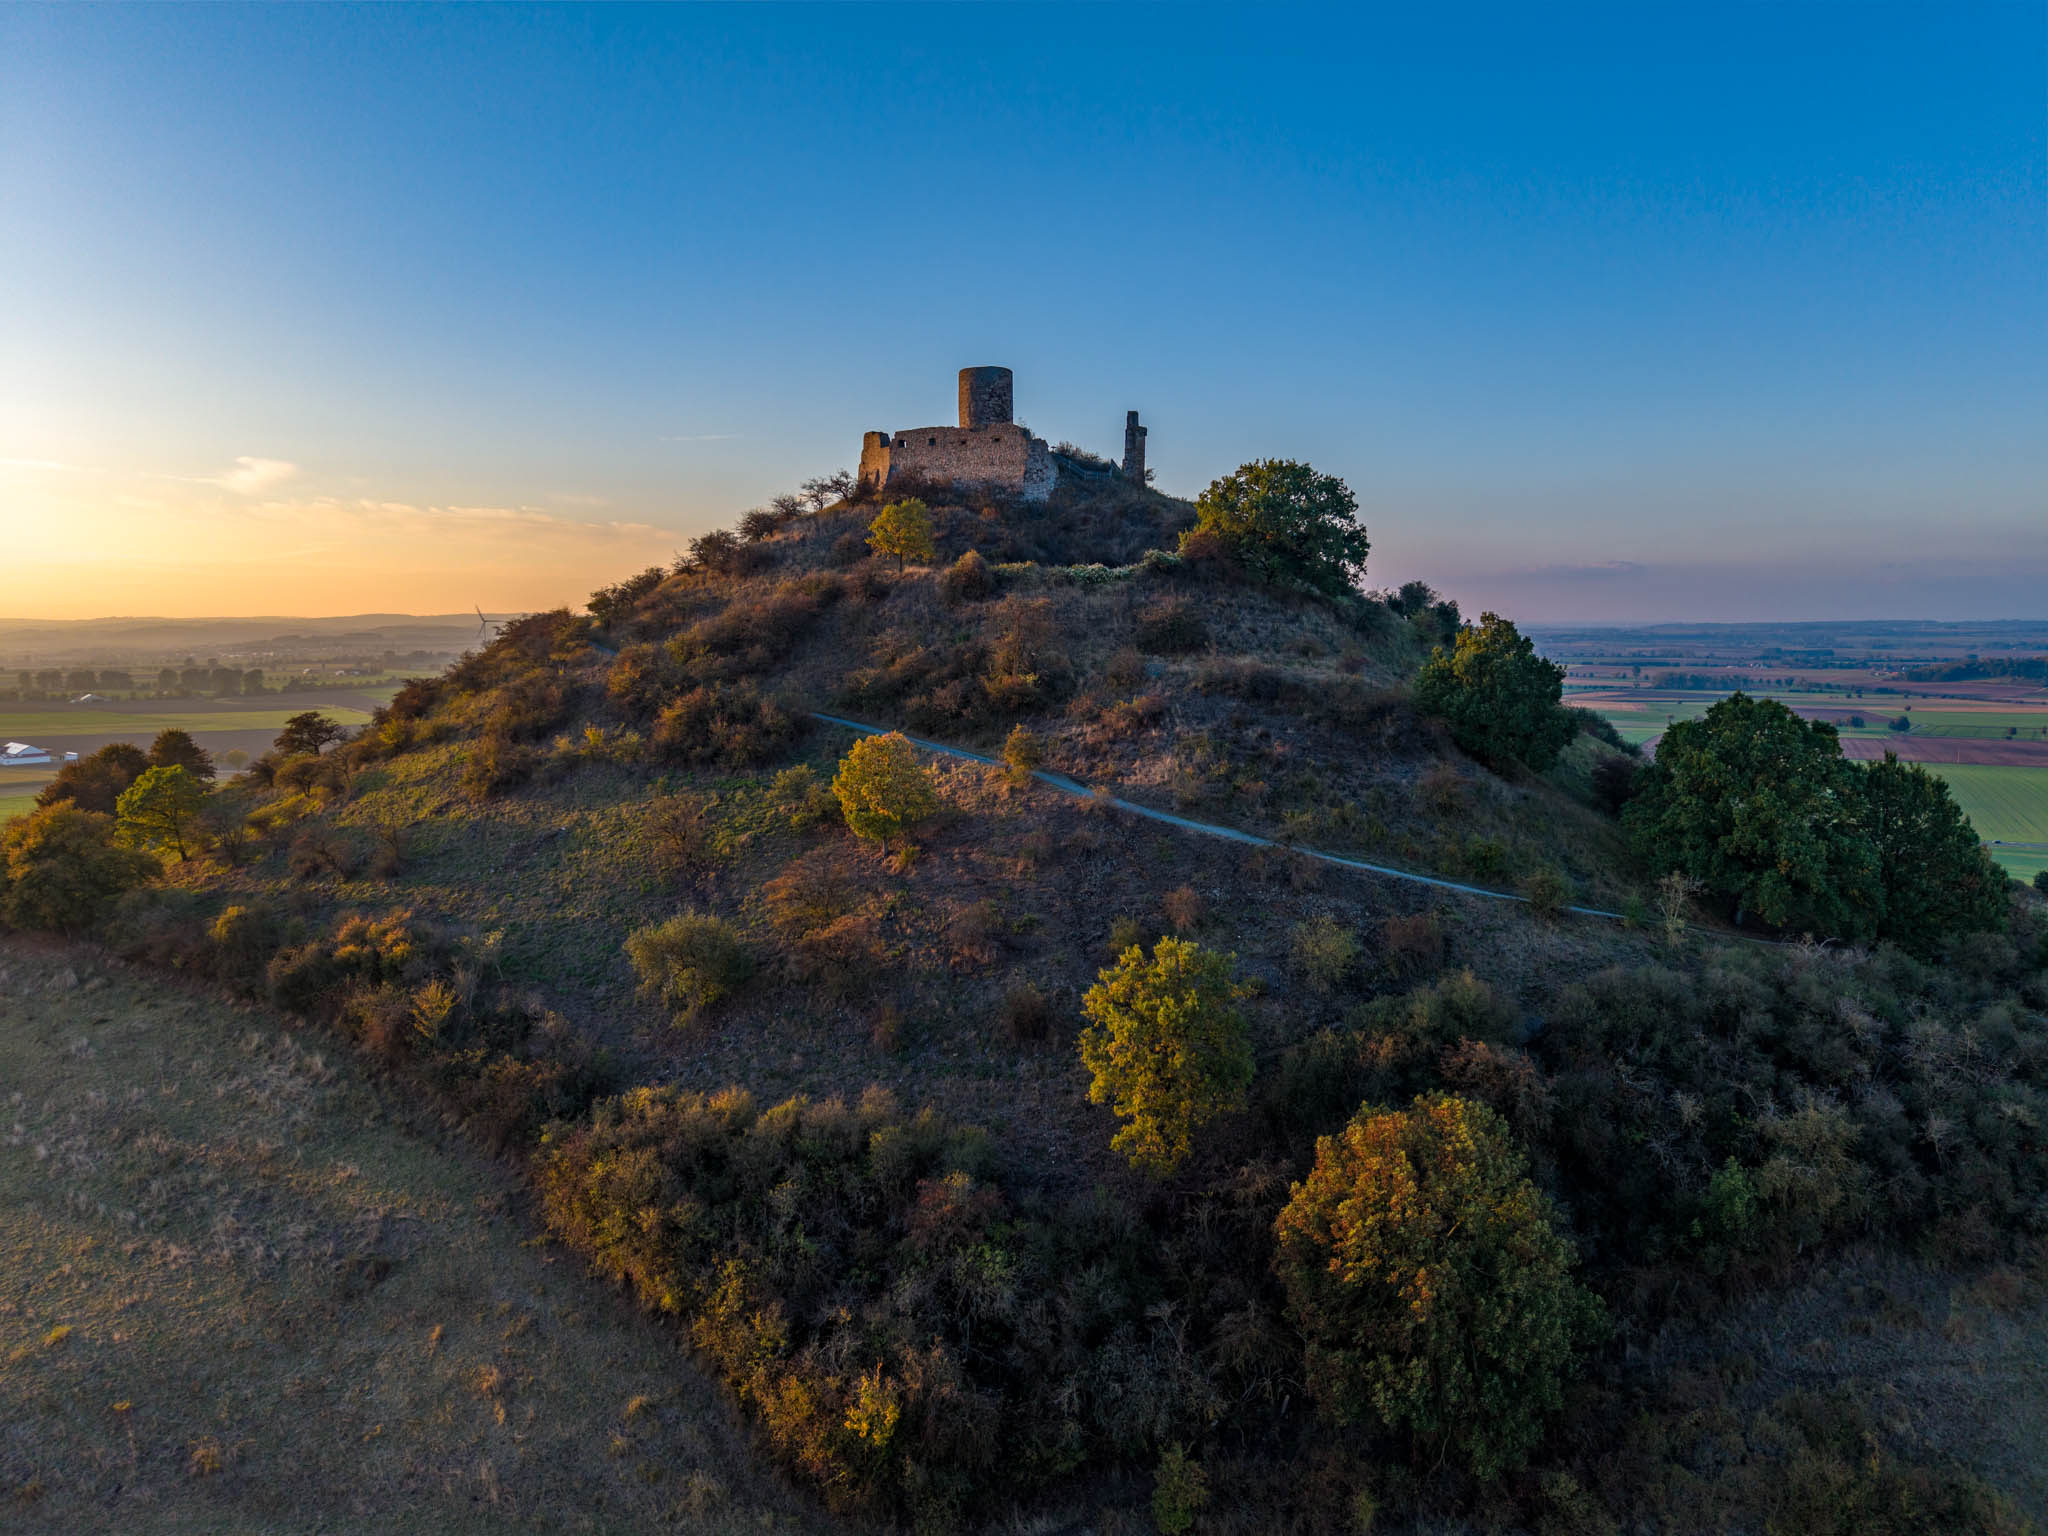
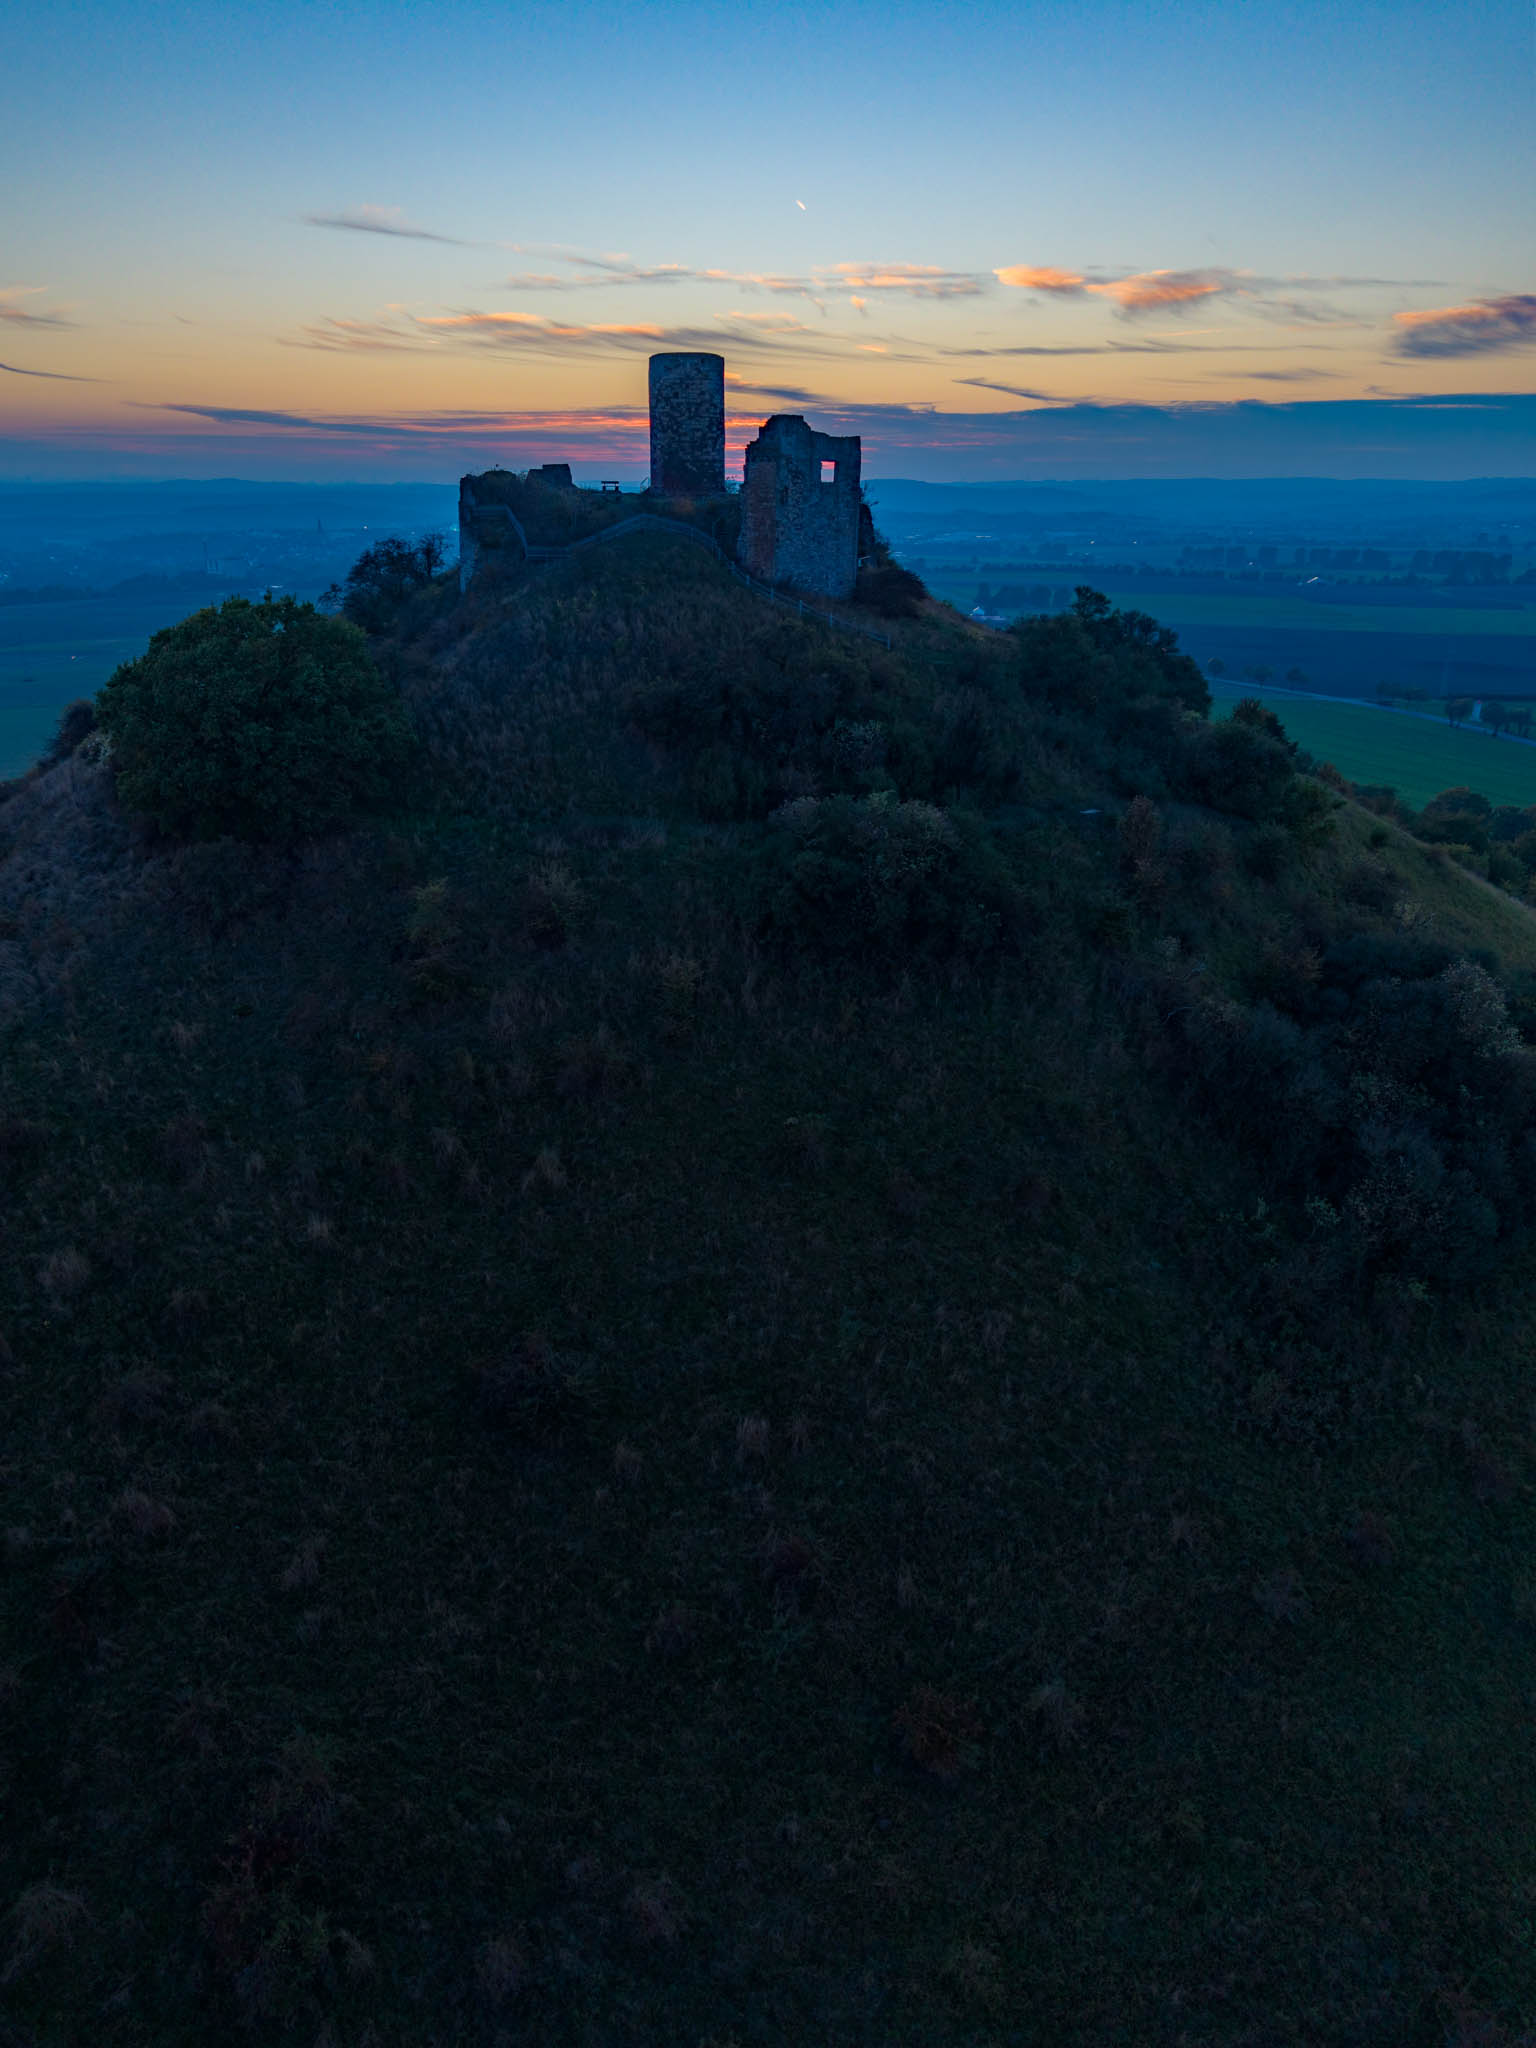
The flight took place on a late October afternoon at an outside temperature of around 5°C during sunset. Here is a first shot of the sunlit south-west side of the Desenberg:
The image above is a single shot taken with automatic exposure at ISO 100 without exposure compensation. I edited it in Lightroom using the following settings:
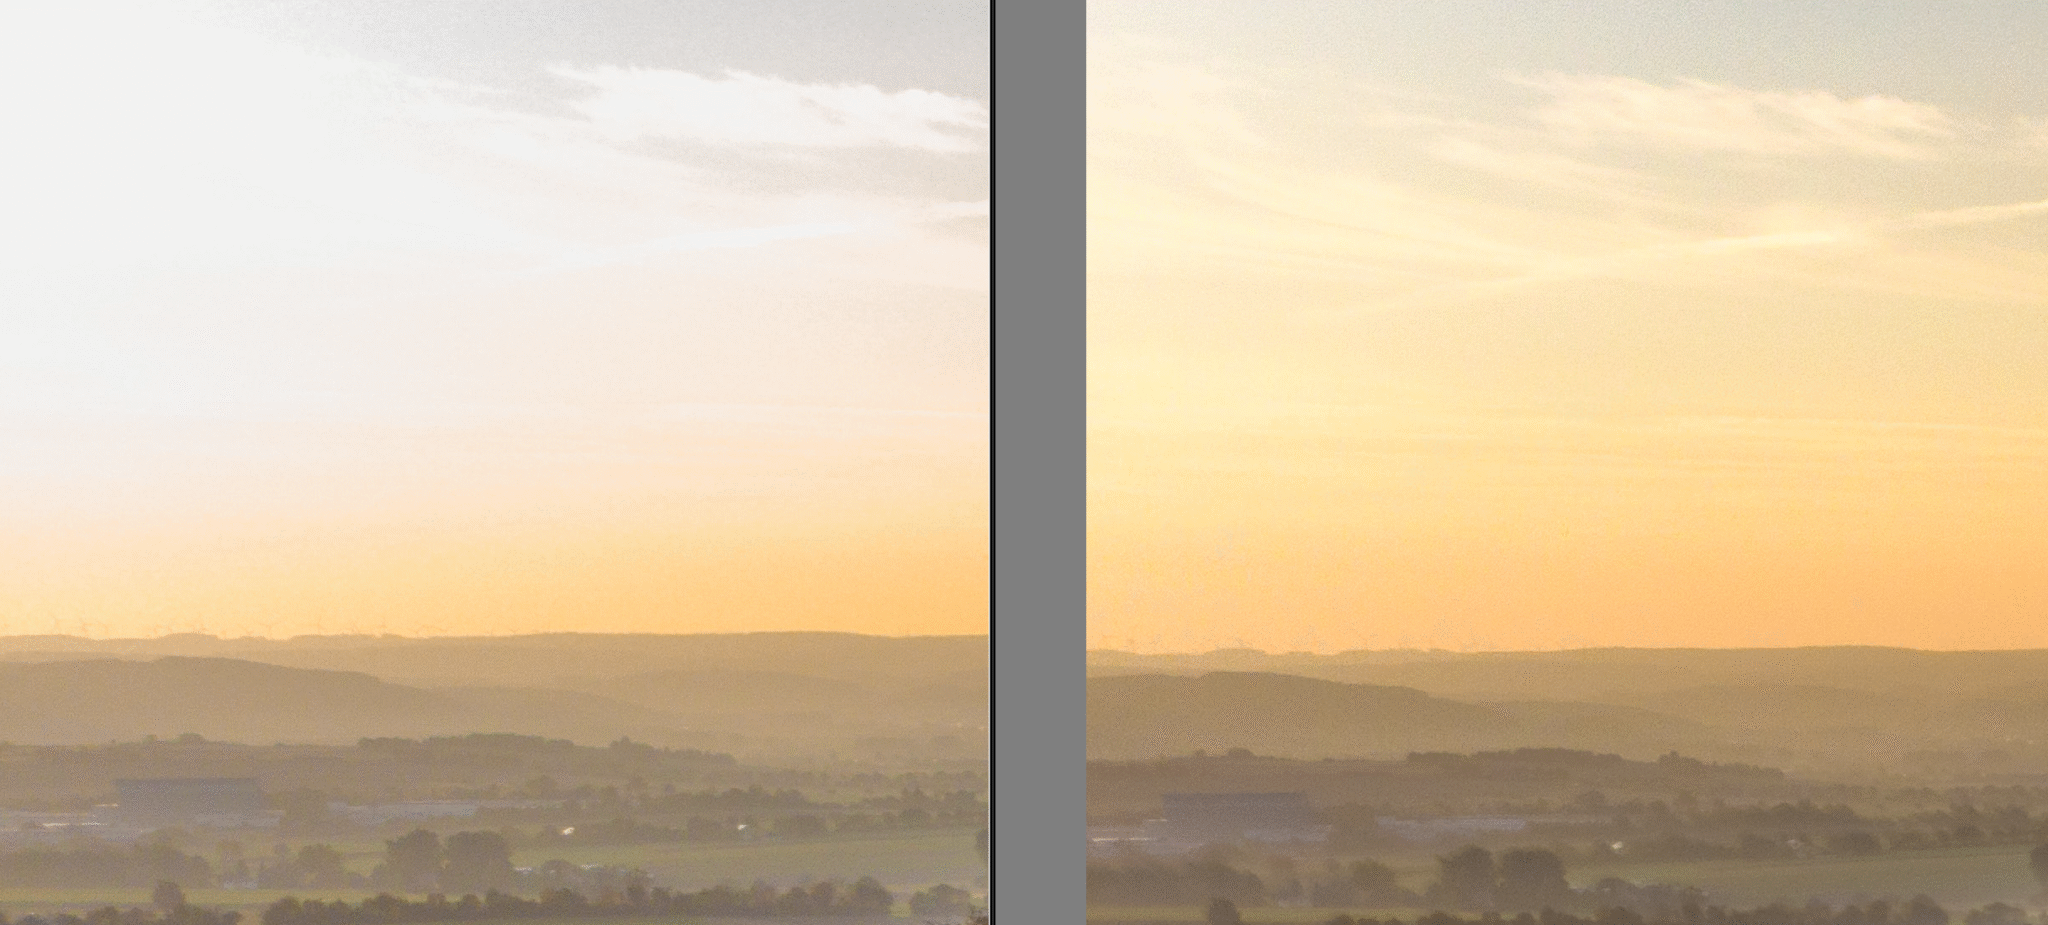
As expected, there are some noise artifacts in the shadows, but these are only noticeable when greatly enlarged. The extreme corners are slightly blurred, but this is not unusual for a wide-angle shot of 24mm in full format. All in all, I think the image quality is already quite good. However, the lighting conditions here were also uncomplicated.
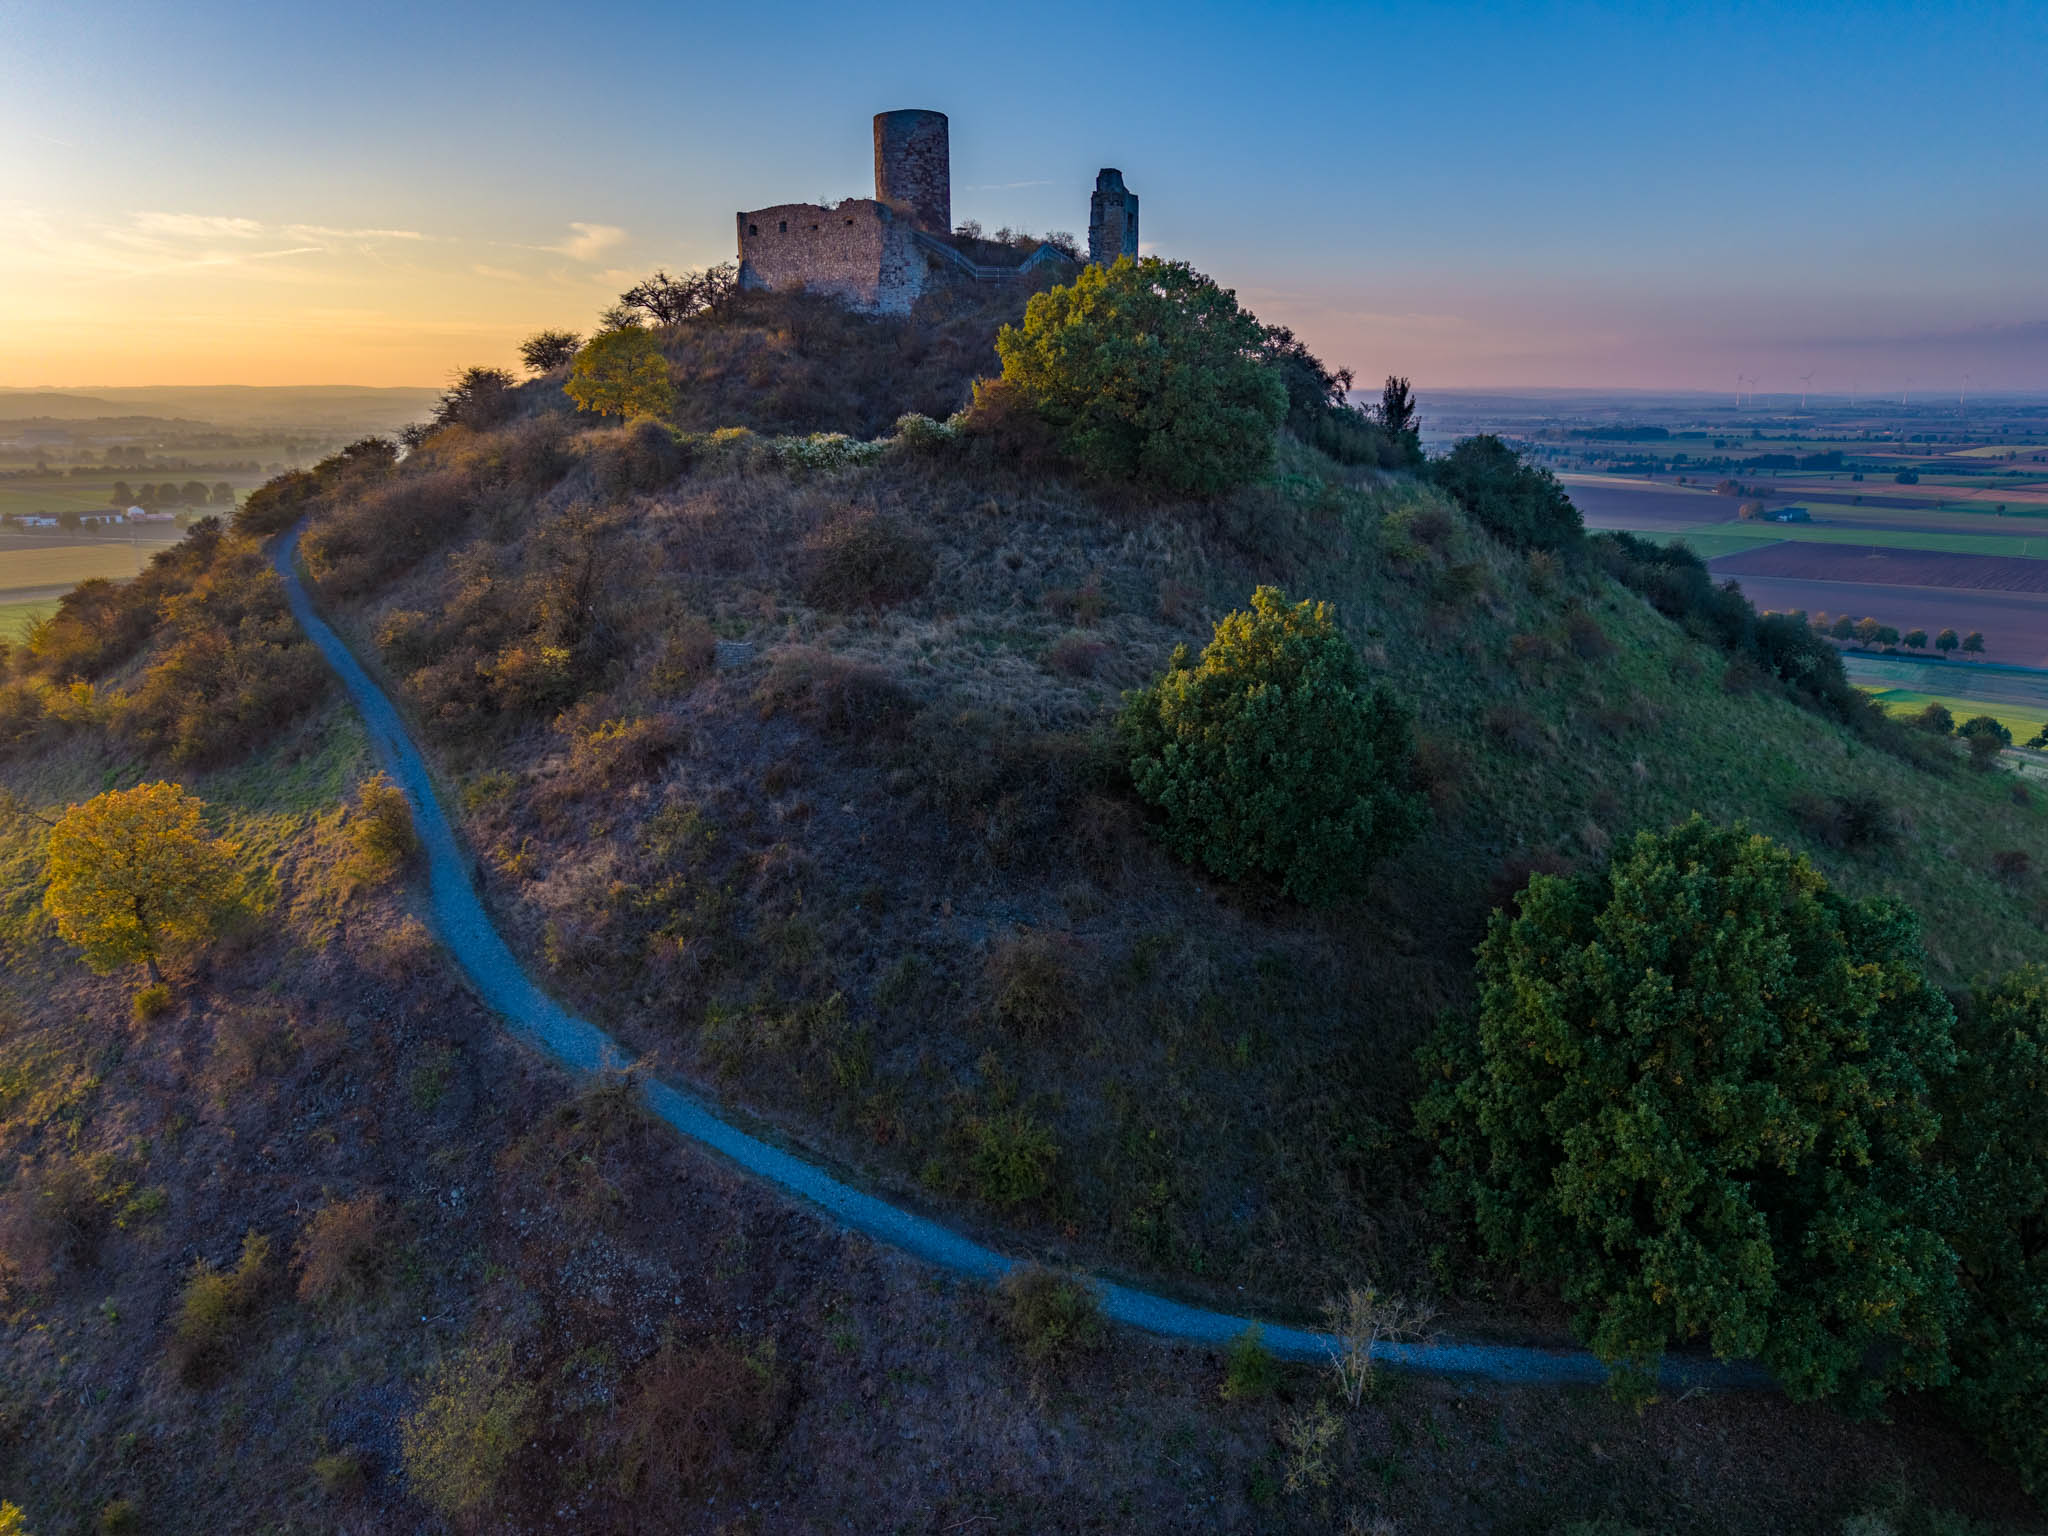
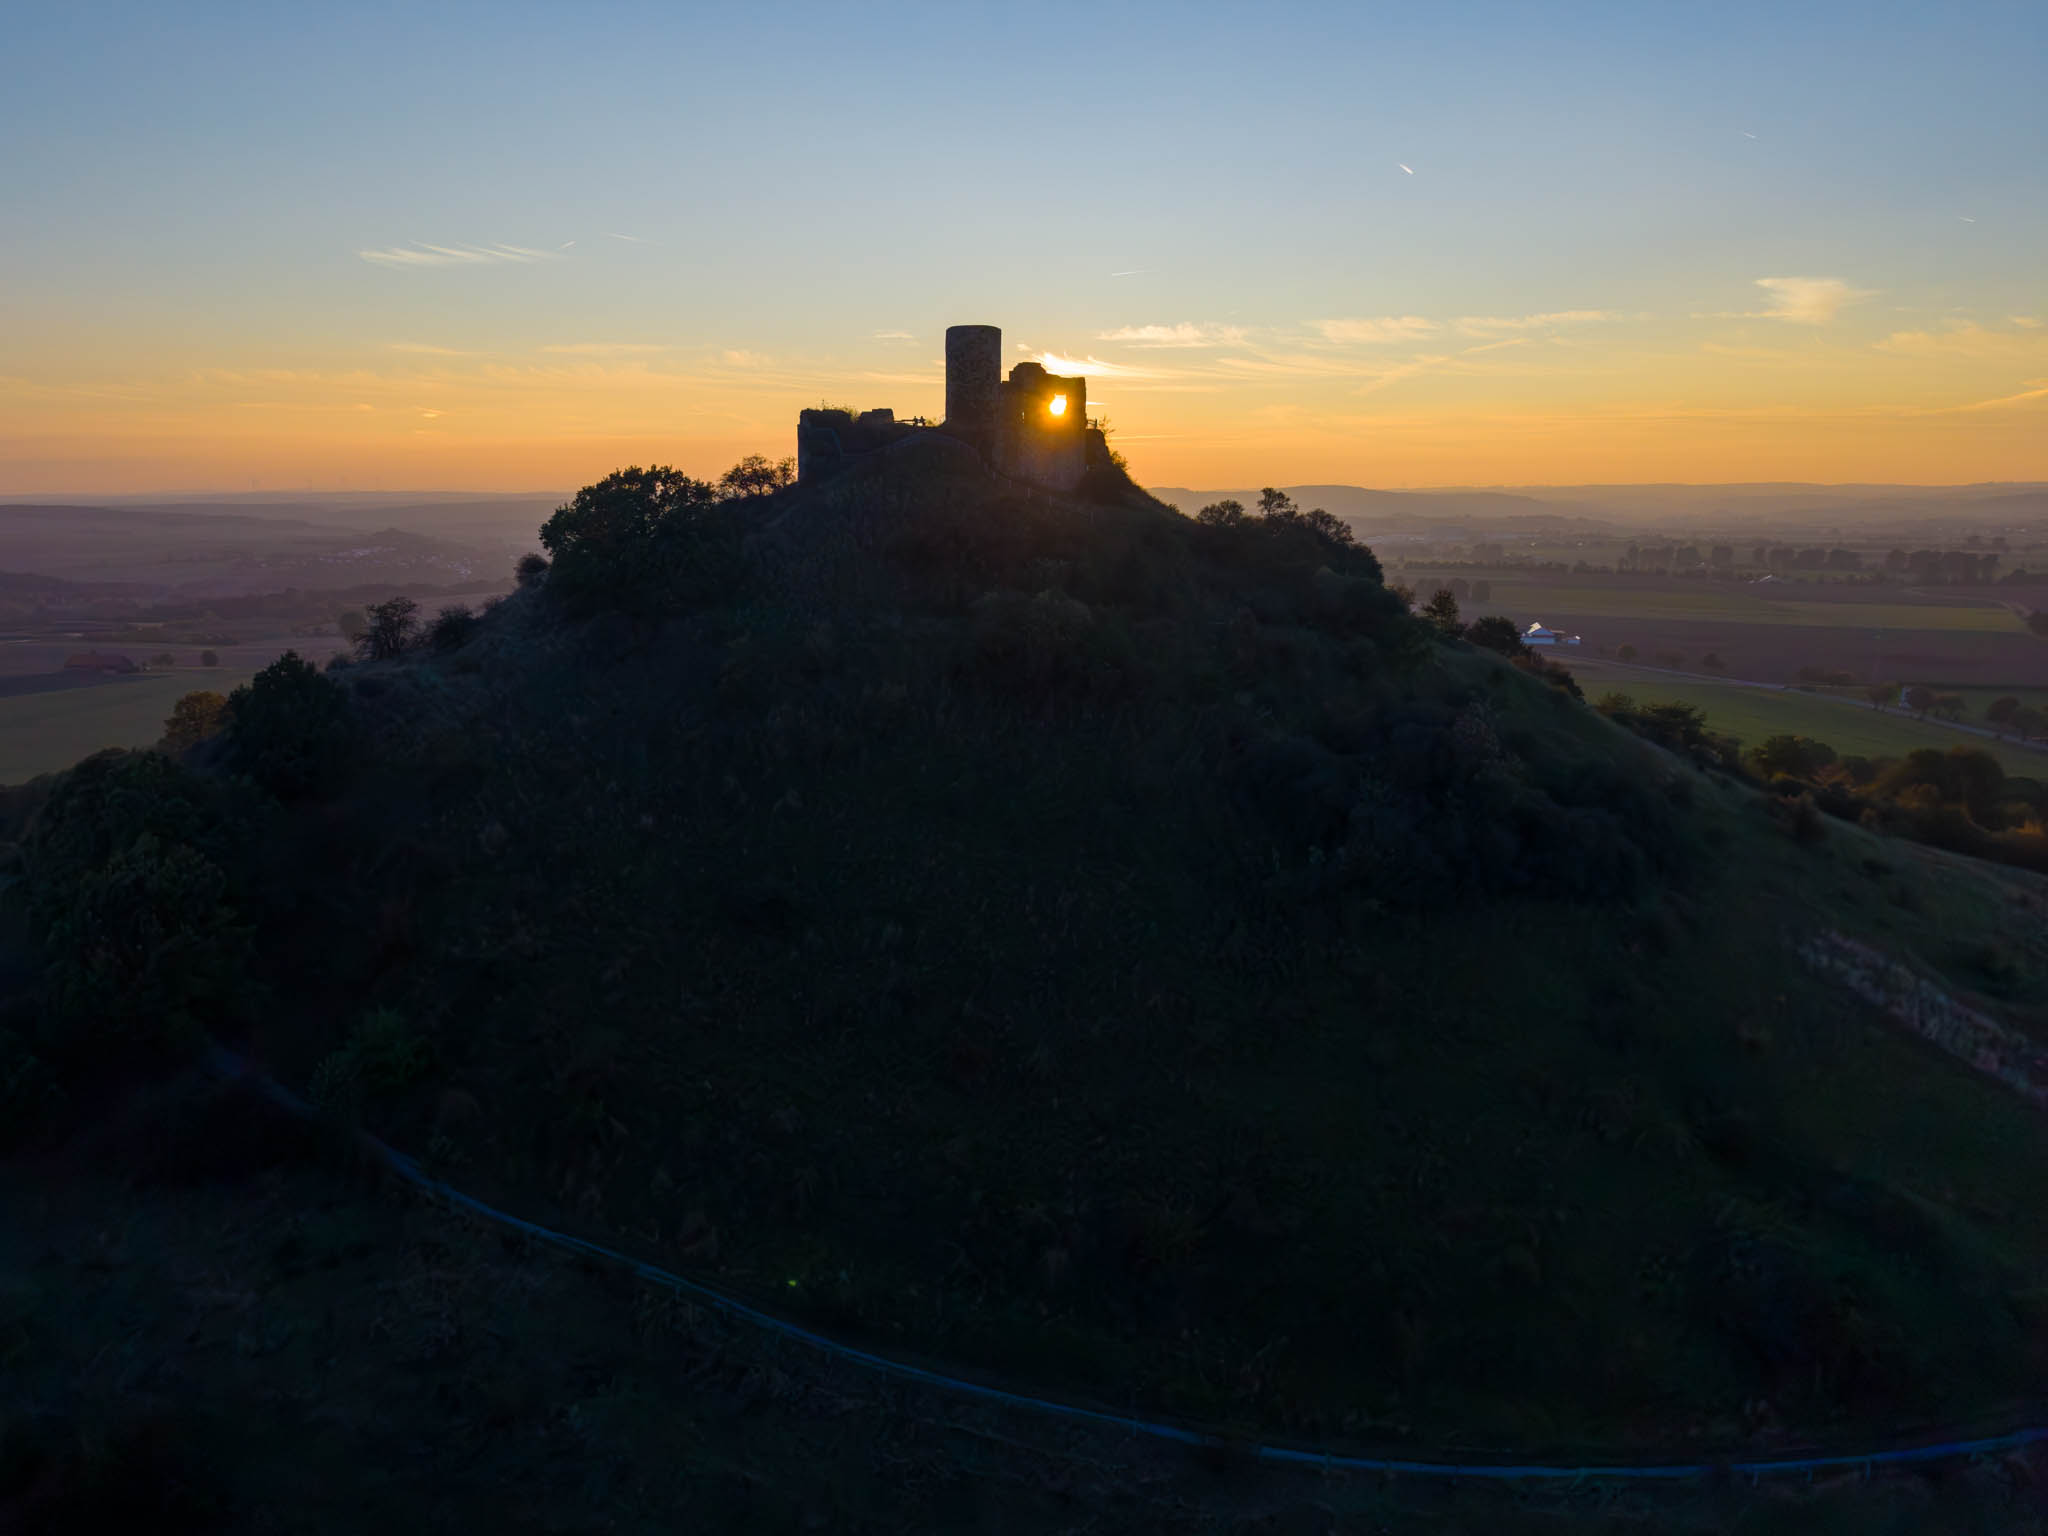
Example #2
Here is another example of a slightly more complex lighting situation: a backlit shot. In order to capture the high dynamic range of the scene, I used the function
- Photo | Photo merge | HDR
in Lightroom Classic to merge the five individual shots from the +/- 1.33 bracketing series into an HDR image:
I then processed the new HDR DNG file in Lightroom Classic using the following settings:
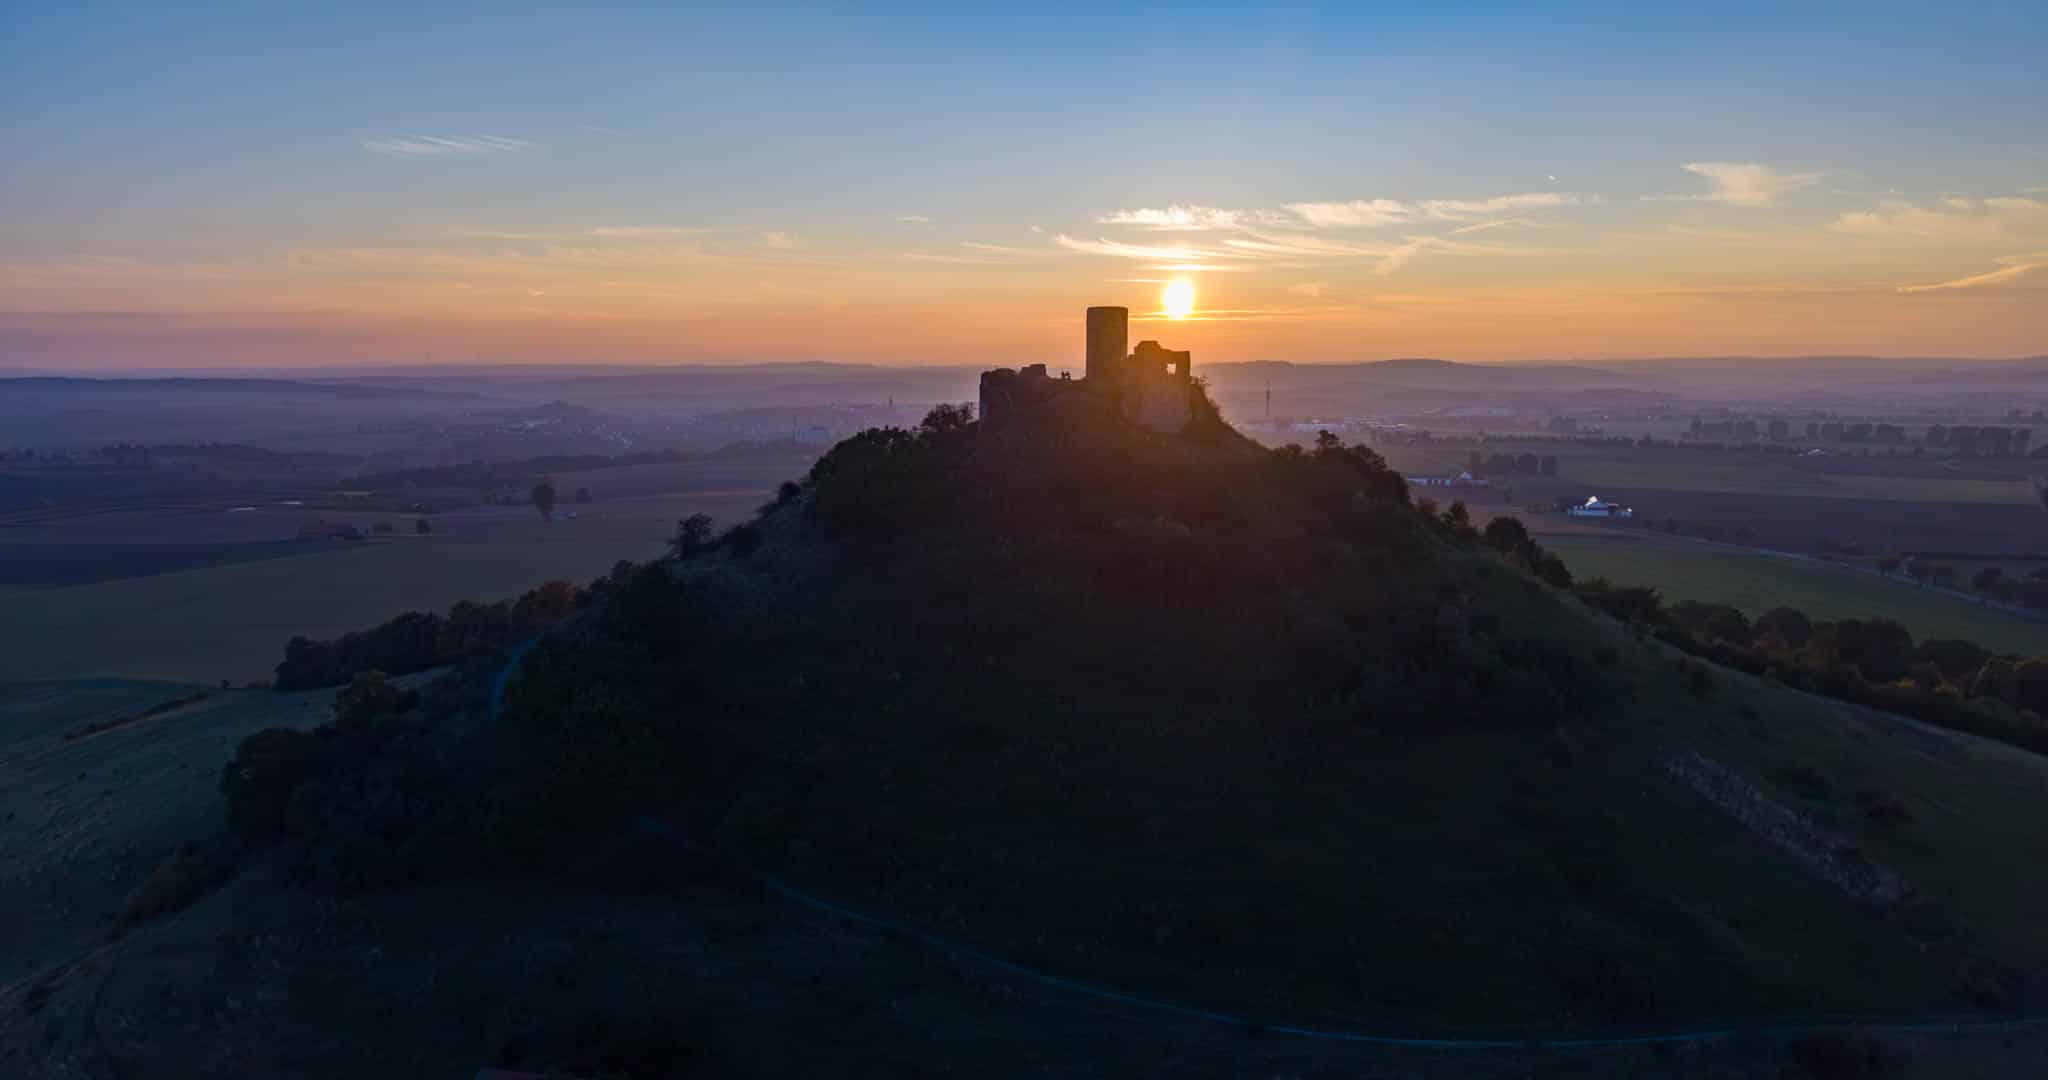
Example #3
Here is another example, this time the shots were taken with even 10 individual exposures with exposure times ranging from 1/90 to 1/5000:
I am also very satisfied with this result. HDR processing is very helpful in situations like this, as the comparison below shows:
On the left is an edited single shot (ISO 100, 1/500), on the right is the HDR image created from the bracketed shots in Lightroom. The differences in the highlights on the left are particularly noticeable; here is a 100% crop:
In the single shot on the left, the bright areas in the sky are completely blown out, while the DNG file still reveals cloud details. But the shadow areas also benefit from HDR processing, with significantly reduced noise:

The strong color noise is particularly noticeable on the right edge of the frame. In my opinion, the results from the new small drone are quite usable. However, compared to shots taken with a full-frame camera, it takes significantly more effort to achieve good results. At first glance, the quality is, as expected, quite comparable to that of the larger DJI Air 3s and feels slightly better than that of its predecessor. This was to be expected, as the previously new 1-inch sensor of the Air 3s had already shown slightly better results compared to the Mini 4 Pro. For more on this, please refer to my test of the Air 3s photo quality.
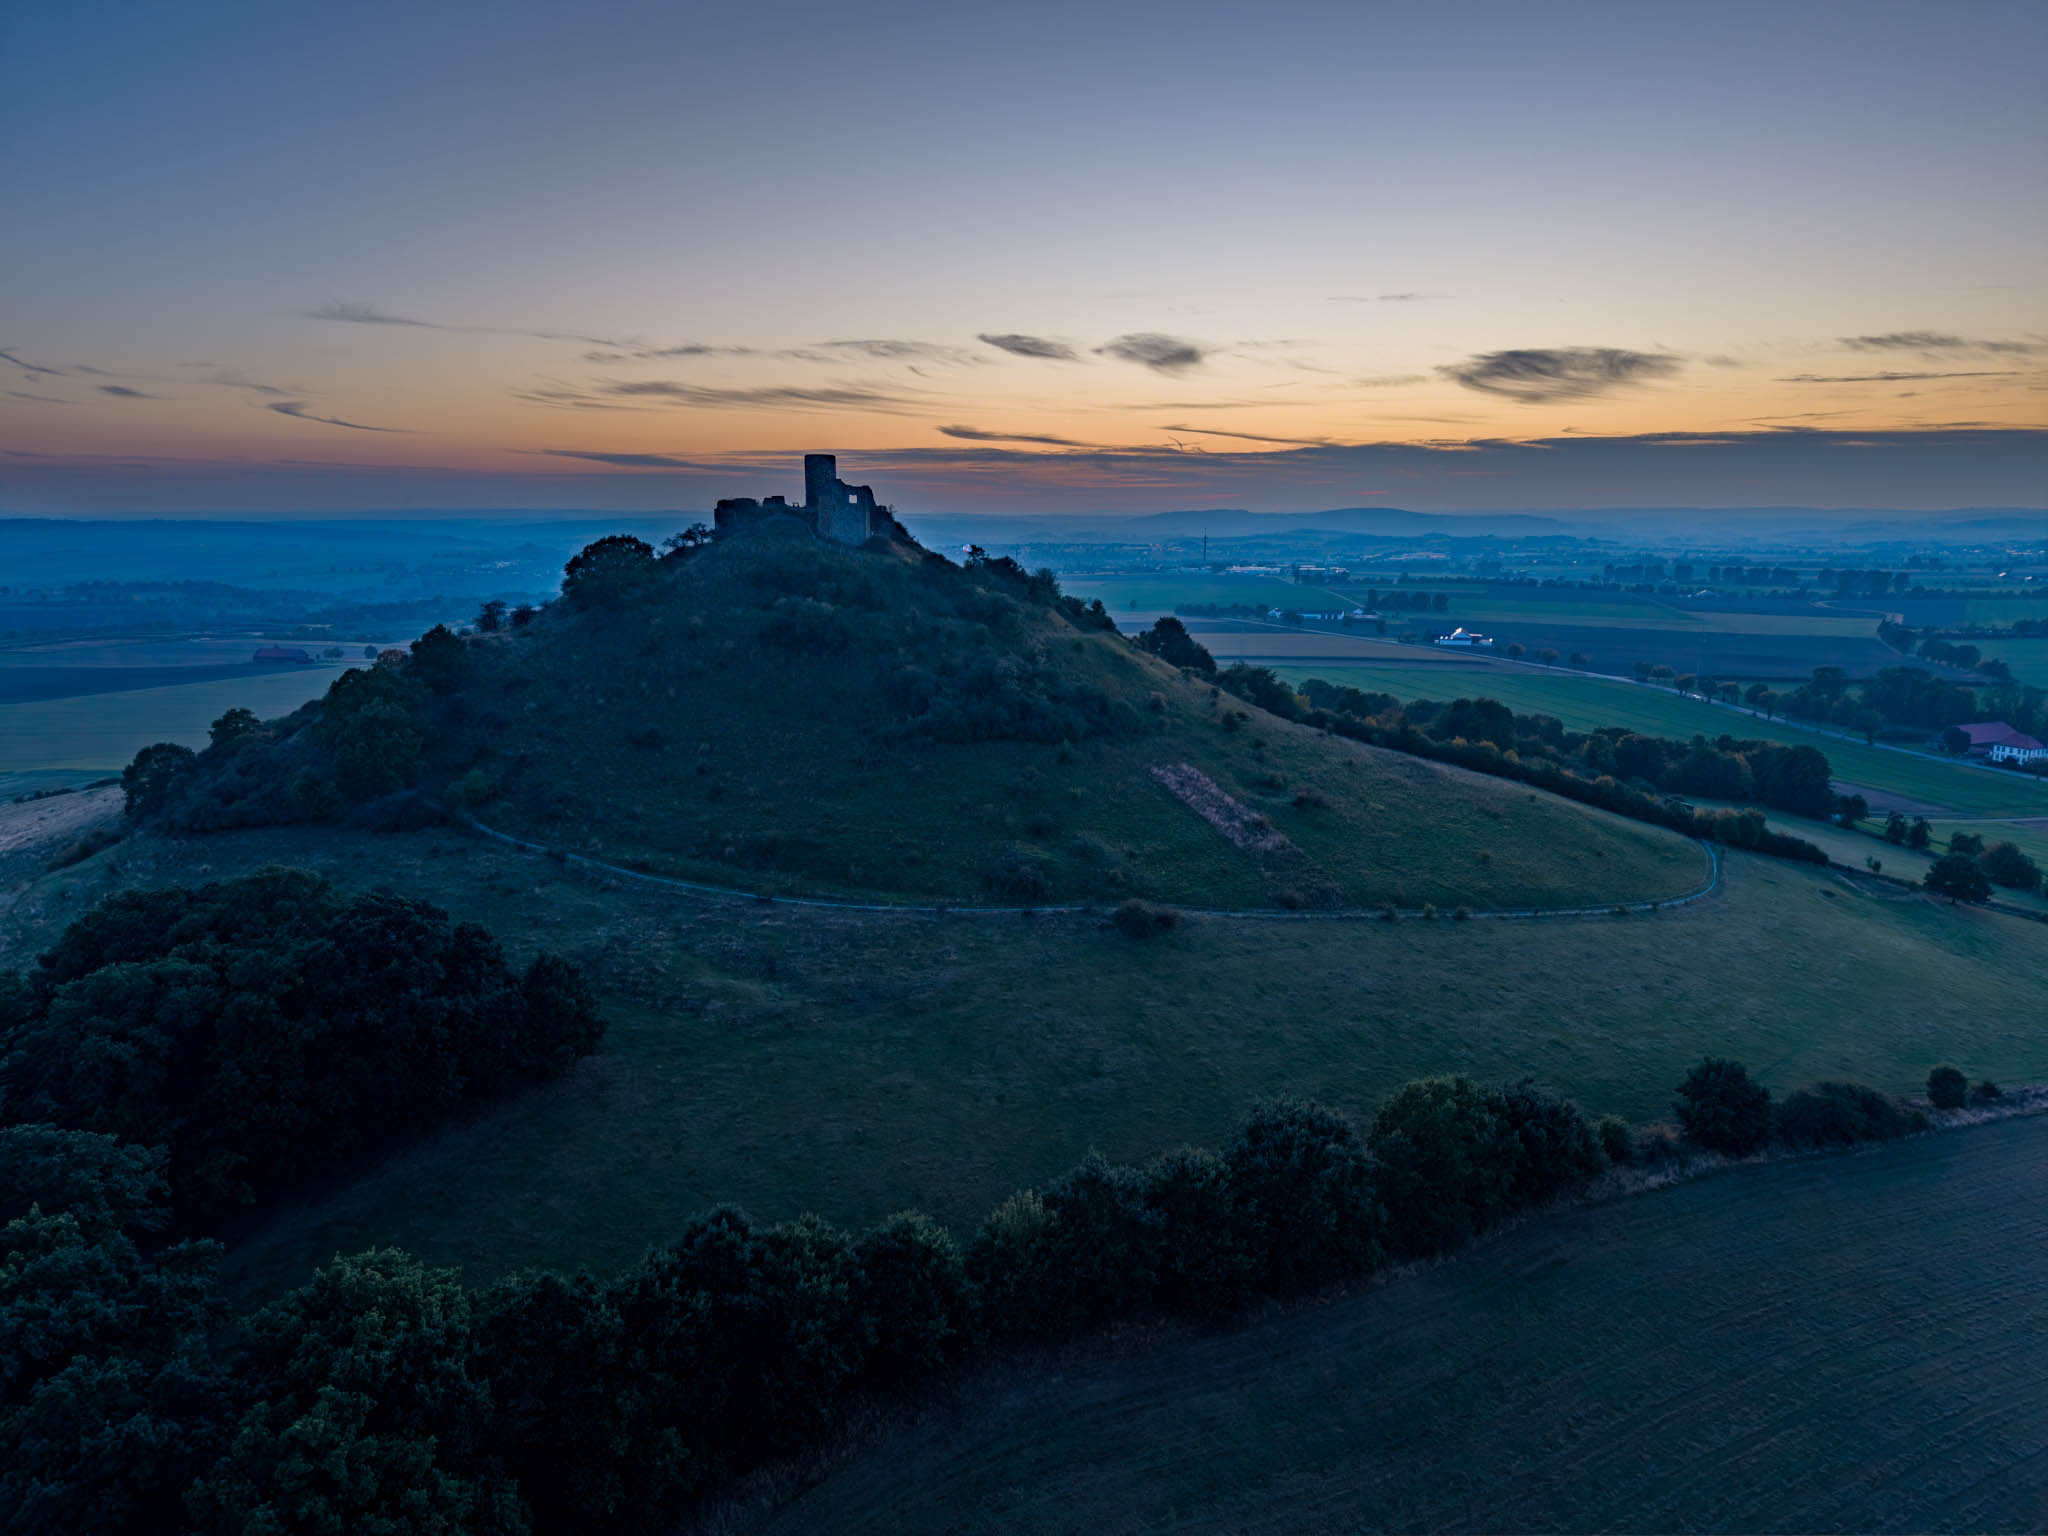
Finally, here are a few more photos from the maiden flight:
Resumée
In my opinion, the new DJI Mini 5 Pro offers welcome improvements for us photographers compared to its predecessor. The image quality has been further improved. I have already used the new free panorama mode very often with the Air 3s. I am very happy to now have it with me all the time on its little sister, too.
Other improvements are also welcome, such as better obstacle detection thanks to Lidar, improved RTH handling, and slightly longer flight times.
All in all, I am pleased with the further improvement in image quality, even though it still does not match that of my Canon EOS R5 Mark II. However, with good post-processing, it is still possible to achieve appealing results.
Is it worth switching from the Mini 3 or 4 Pro?
This is a difficult individual decision. Overall, the improvements are once again more “evolution” than “revolution.” The Mini 3 and 4 Pro were already very good. Everyone must therefore decide for himself whether the additional value provided by the improvements described justifies the extra expense. This initial test report documents how I decided.
By the way, if anyone is interested, I have a Mini 4 Pro in the Fly More Combo in very good condition with an included ND filter set for sale 😉.
PS: By the way, in the meantime, I have also completed a direct comparison test between the DJI Mini 4 Pro and DJI Mini 5 Pro. The results can be found here on my website in the article: DJI Mini 5 Pro vs Mini 4 Pro - comparison of photo quality.
*= Affiliate Link
I switched from the DJI Mavic 3 Classic to the Mini 5 Pro for many reasons and naturally expected the image quality to be noticeably inferior to the Mavic 3. The Mini 5 Pro’s flight characteristics are fantastic and meet my expectations. Since I primarily use drones for photography, like you, I always capture my subjects with three or five exposures to combine them into an HDR image in Lightroom Classic, just like you do. However, during my first flight yesterday with the Mini 5 Pro, my Syndisk Extreme V30 quickly became overloaded when I tried to take my three exposure brackets for a panorama. Writing to the card felt incredibly slow, which is certainly due to the 50 megapixels per image. This is extremely problematic in rapidly changing lighting conditions, and I definitely had a time advantage with the Mavic 3 Classic in those situations. Which card do you use? Best regards, Markus
Hello Markus,
I also use the Sandisk Extreme V30 with 512GB*. It’s true that creating a 50-megapixel bracketing panorama takes a very long time. However, I don’t think it would be any faster with other memory cards; I believe this is simply a limitation of the Mini 5 Pro, which only supports the slower UHS-I standard. I’ve gone back to taking panoramas with 12 megapixels because the 50-megapixel panoramas are huge (often over 200 megapixels) and difficult to edit afterwards, and I don’t really need such a high resolution.
Best regards,
Gerd-Uwe
An interesting comparison, thanks. I have upgraded from a mini 2 to the mini 5. So far I’m quite disappointed with the photo quality at 50 MP. Specifically when shots include bright reflections of sun on water, or trees. I’m seeing large red artefacts along with other colors which are impossible to remove in post. It’s not color noise, it’s bigger. No such artefacts show up at 12 MP. I always shoot in RAW. Has anyone else seen this?
Hello Fred,
in my opinion, the visible color artifacts in the 50-megapixel images are caused by the suboptimal internal processing of the Quad Bayer sensor in the drone. Unfortunately, there is no direct access to the Quad Bayer data, as it is already been converted to the standard Bayer format intern in the drone for the DNG files — this can be seen with suitable tools such as EXIFTOOL. Post-processing the already converted DNG files with DeepPRIME, for example, can therefore only help to a limited extent. My way of improving the output quality is to take almost exclusively 5-exposure bracketing images and merge them into an HDR using Lightroom Classic. This is time-consuming, but the images show significantly less noise and artifacts. The artifacts can further be reduced in Lightroom with color noise reduction, which I then use at almost 100%.
But there is something else that is fundamental. Many people make the mistake of viewing 12-megapixel and 50-megapixel images at 100% and comparing them with each other. The 50-megapixel image ALWAYS loses out in this comparision. If you do so, the 50-megapixel image is enlarged four times, allowing you to see more than four times the detail, which of course greatly aggravates any shortcomings caused by the lens and due to the significantly smaller Pixel size (= more noise). However, it is interesting to compare both using the same output size, e.g., as a print. And there, the 50-megapixel sensor wins again by a clear margin.
Best regards,
Gerd-Uwe